

Canvas at Your Fingertips: A Deep Dive into Abstract Line Art
Hello, my loves. Grab a cozy cup of tea and find a soft spot to settle in, because today we are talking about something so much more than just beauty. We’re talking about the art of the ‘slow down’—that precious hour where it’s just you, your favorite playlist, and the tiny canvases at your fingertips. I’ve always found that painting my nails is like a cloud-soft embrace for my soul; it’s a meditative practice that lets us wear our creativity on our sleeves, or rather, our hands.
Lately, I’ve been dreaming of delicate lines, playful textures, and colors that make my heart flutter every time I reach for my morning latte. Whether you’re a seasoned pro or picking up a striping brush for the very first time, I want this masterclass to feel like a warm hug from a friend. We’re going to explore ten beautiful looks that turn your manicure into a masterpiece, all from the comfort of your sun-drenched living room. Let’s create something beautiful together, shall we?
5 Easy Steps to Paint Pink Gingham Nails
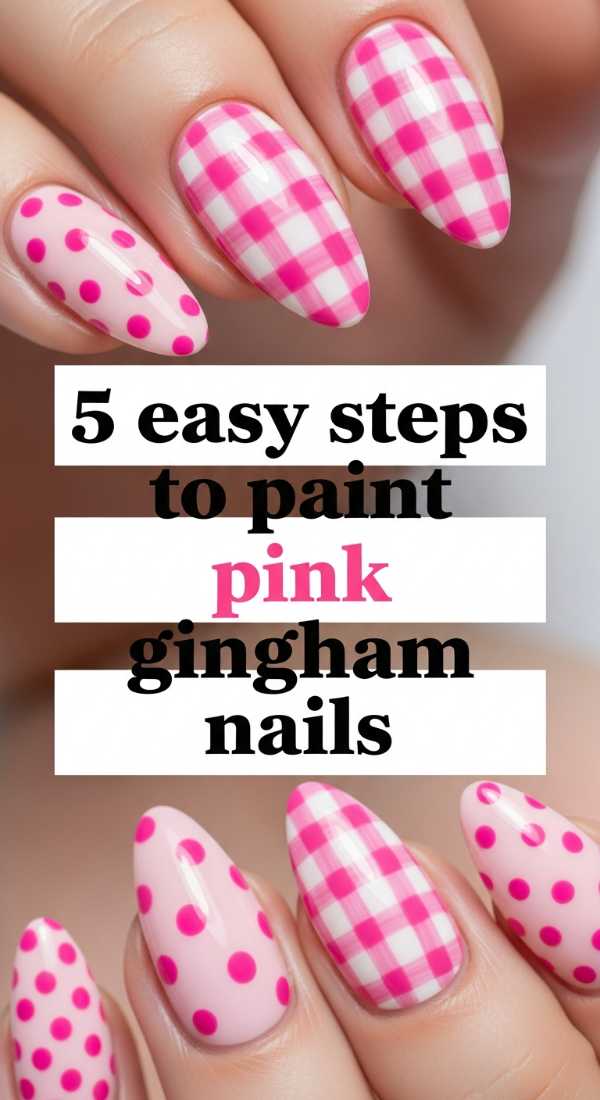
Why to love these Nails:
There is something so nostalgic and sweet about a soft pink gingham print. It feels like a summer picnic in a bottle, bringing a touch of cottagecore charm to your everyday look without being too overwhelming. It’s the perfect blend of structured lines and soft, feminine hues.
Essential Items:
- Pale pink base polish
- Medium pink detail polish
- Thin striping brush
- Matte or glossy top coat
How to Prepare:
- Apply two thin coats of your pale pink base and let dry completely.
- Dip your striping brush into the medium pink and draw vertical lines.
- Cross those with horizontal lines to create the grid.
- At the intersections, add a slightly thicker square of color for that woven effect.
- Seal with a top coat to smooth out the texture.
Budget Range
- Essie ‘Slippers’ ($9.00)
- Beetles Nail Art Brushes ($6.99)
- OPI Top Coat ($11.00)
Prepare Your Cherry Nail Art in 4 Steps
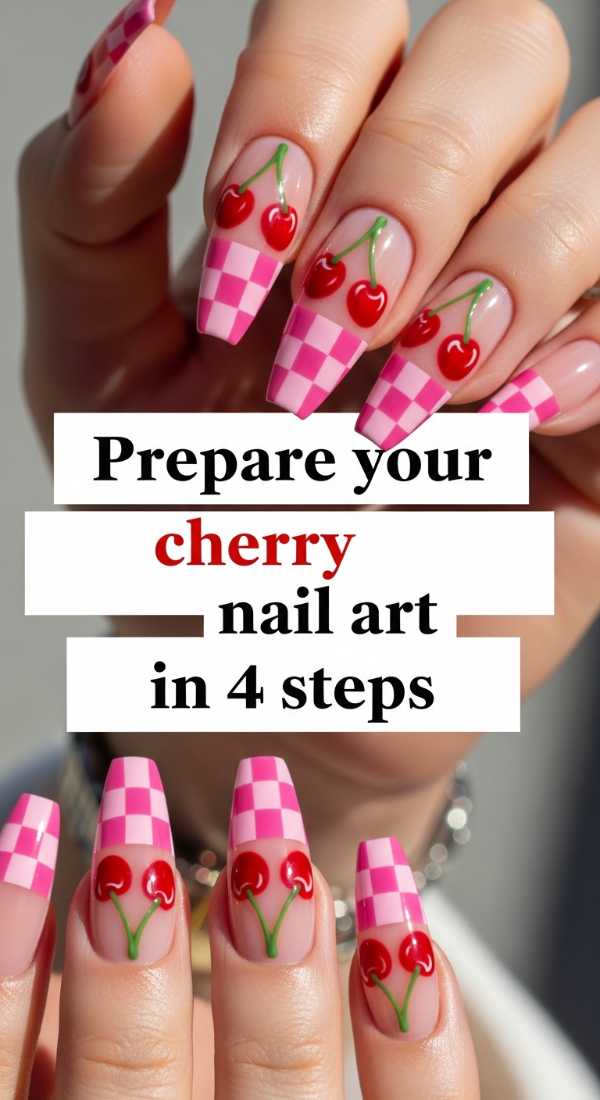
Why to love these Nails:
Sweet, juicy, and a little bit retro—cherry nails are the ultimate mood booster. They add a pop of vibrant red that looks incredible against a clean, nude base. It’s a playful nod to fruit-inspired aesthetics that never goes out of style.
Essential Items:
- Nude or clear base polish
- Bright red polish
- Deep green polish
- Large and small dotting tools
How to Prepare:
- Prep your nails with a clear base to make the red pop.
- Use a large dotting tool to place two red dots side-by-side for the cherries.
- Use a tiny brush or toothpick to draw thin green stems connecting the pairs.
- Add a tiny white ‘highlight’ dot on each cherry for a 3D juice effect.
Budget Range
- Sally Hansen ‘Red-y’ ($5.00)
- Zoya ‘Hunter’ Green ($12.00)
- Nail Dotting Tool Set ($4.50)
Master the Perfect French Tip in 3 Minutes
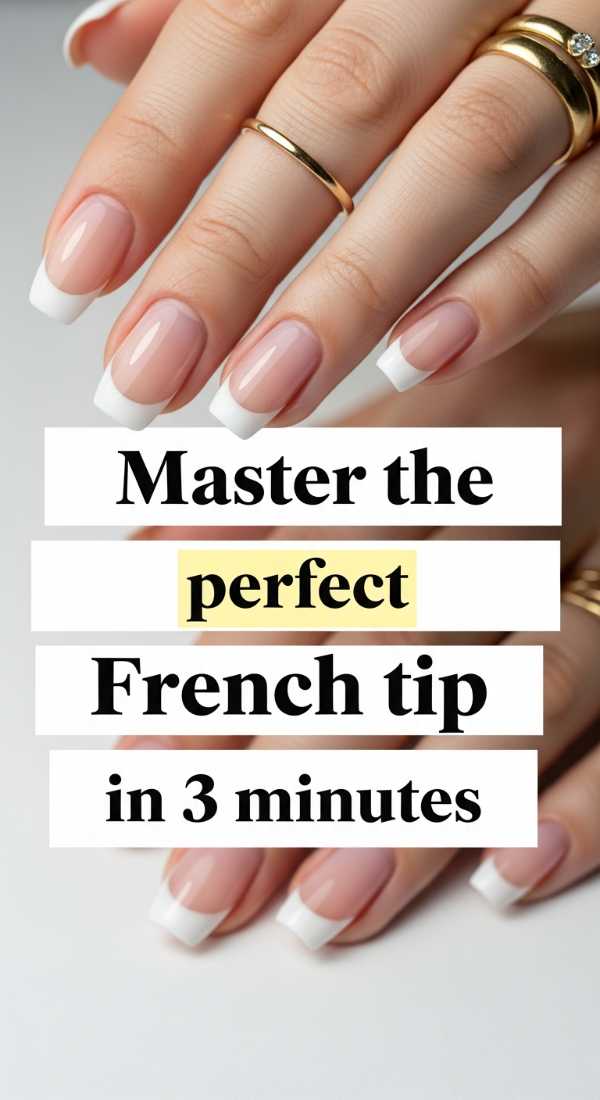
Why to love these Nails:
The French tip is the undisputed queen of elegance. It’s clean, sophisticated, and makes your fingers look miles long. While the classic white is forever, I love how this technique gives you the confidence to try neon or pastel tips whenever the mood strikes.
Essential Items:
- Sheer pink base
- Crisp white polish
- Silicone nail stamper
How to Prepare:
- Apply your sheer base and wait for it to be tacky but not wet.
- Paint a thick line of white polish onto the center of your silicone stamper.
- Gently press your nail tip into the stamper at a 45-degree angle to create the perfect curve.
Budget Range
- Maniology Silicone Stamper ($8.00)
- Essie ‘Mademoiselle’ ($9.00)
- Wet n Wild ‘White’ ($2.00)
Create 3 Trendy Abstract Red Swirls Easily
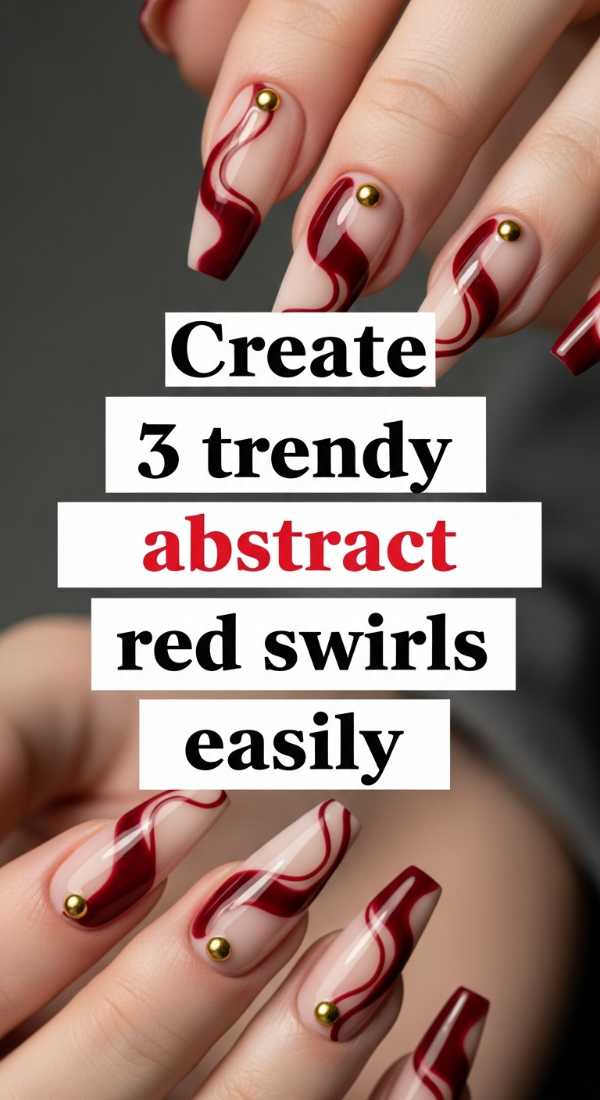
Why to love these Nails:
Abstract swirls are for the artistic souls who love a bit of movement. This look is all about negative space and bold, flowy lines. No two nails need to look the same, which takes the pressure off of being ‘perfect’ and lets you just play with the shapes.
Essential Items:
- Classic red cream polish
- Long liner brush
- Clear high-shine top coat
How to Prepare:
- Start with a clean, bare, or nude-primed nail.
- Load your liner brush and start from the side, swooping into an ‘S’ shape.
- Add a second, thinner line following the curve of the first for depth.
Budget Range
- Revlon ‘Big Apple Red’ ($6.00)
- Winstonia Detail Brushes ($8.00)
Get 10/10 Glazed Chrome Nails at Home
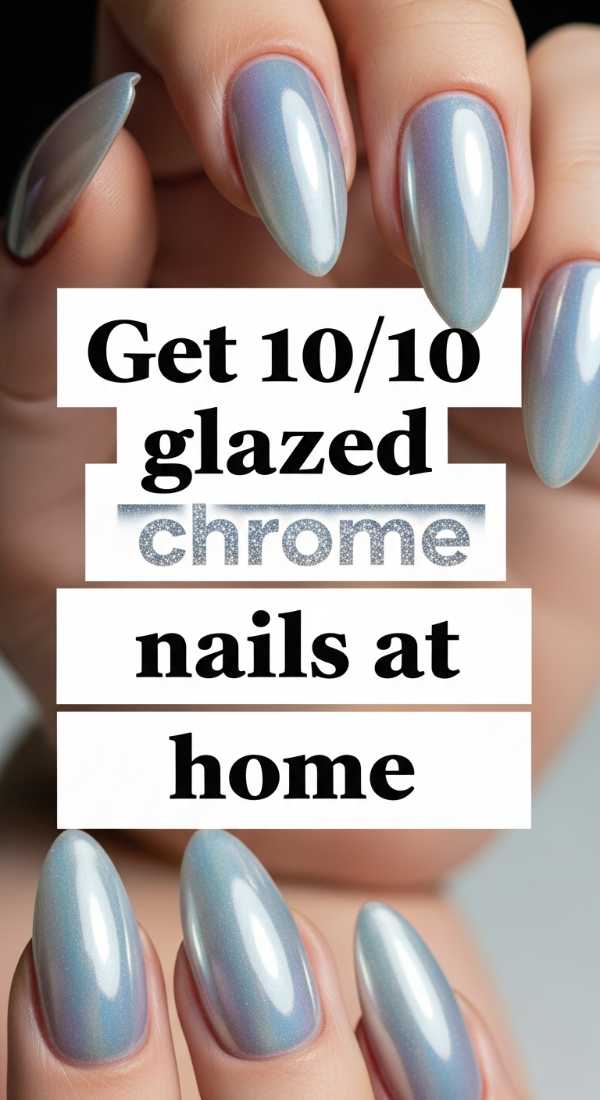
Why to love these Nails:
We are all chasing that ethereal, ‘glazed donut’ glow. These nails catch the light in the most magical way, looking like liquid silk. It’s a high-end look that is surprisingly simple to achieve once you have the right powder.
Essential Items:
- Sheer white polish
- White pearl chrome powder
- No-wipe gel top coat (UV lamp required)
- Eyeshadow sponge
How to Prepare:
- Apply and cure your sheer white base and no-wipe top coat.
- Rub the chrome powder onto the nail using the sponge until it’s mirror-like.
- Dust off excess powder very gently.
- Apply a final layer of top coat and cure again to lock in the shine.
Budget Range
- Artdone Chrome Powder ($7.99)
- SUNUV LED Lamp ($25.00)
- Beetles No-Wipe Gel ($8.00)
Paint Dainty Summer Daisies in 5 Simple Stages
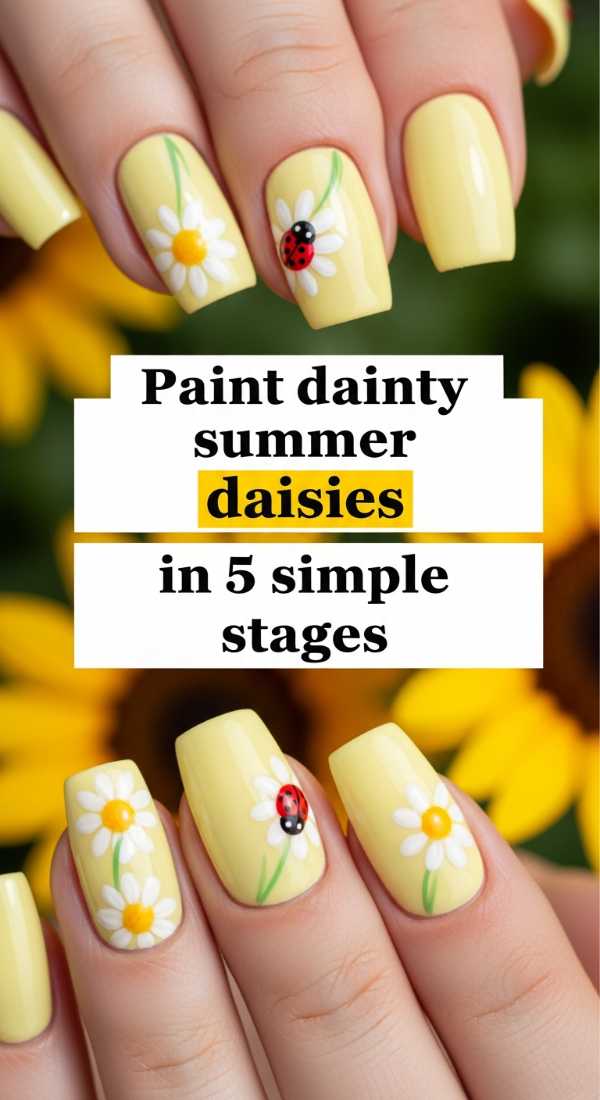
Why to love these Nails:
Daisies are pure joy. This look is so delicate and whimsical, perfect for garden parties or just feeling like a breath of fresh air. It’s my go-to when I need a little reminder of sunshine during the week.
Essential Items:
- Pastel blue or yellow base
- Opaque white polish
- Bright yellow polish
- Dotting tool
How to Prepare:
- Paint your base color and let it dry.
- Place a single yellow dot where you want the center of the flower.
- Use a dotting tool with white polish to place 5-6 dots around the yellow center.
- Pull the white dots slightly inward with a toothpick to create petal shapes.
- Finish with a glossy top coat.
Budget Range
- Holo Taco ‘Butterscotch’ ($13.00)
- Orly ‘White Tips’ ($15.00)
- Amazon Dotting Tools ($5.00)
Achieve a Classy Bridal Look in 6 Steps
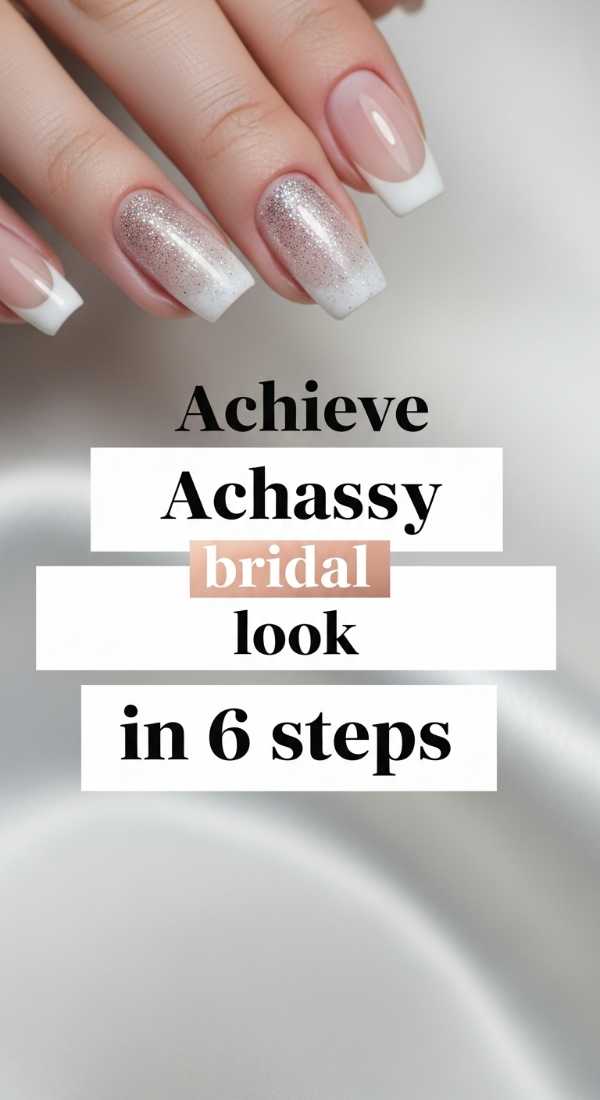
Why to love these Nails:
Even if you aren’t walking down the aisle, this look is the pinnacle of ‘quiet luxury.’ It’s soft, shimmering, and incredibly polished. It’s the kind of manicure that makes you feel like you have your life together, even on a Monday morning.
Essential Items:
- Soft milky white or nude polish
- Fine silver glitter or shimmer
- Buffing block
- Nourishing cuticle oil
How to Prepare:
- Buff the nail surface until smooth and apply a base coat.
- Apply two coats of milky white polish.
- Apply a very thin gradient of shimmer starting from the cuticle.
- Refine the edges with a clean-up brush dipped in acetone.
- Seal with a thick, plush top coat.
- Massage cuticle oil in for that healthy, hydrated glow.
Budget Range
- DND ‘Milky White’ ($10.00)
- Cuccio Cuticle Oil ($7.00)
- Seche Vite Dry Fast Top Coat ($9.00)
Design 5 Cute Pastel Polka Dot Patterns
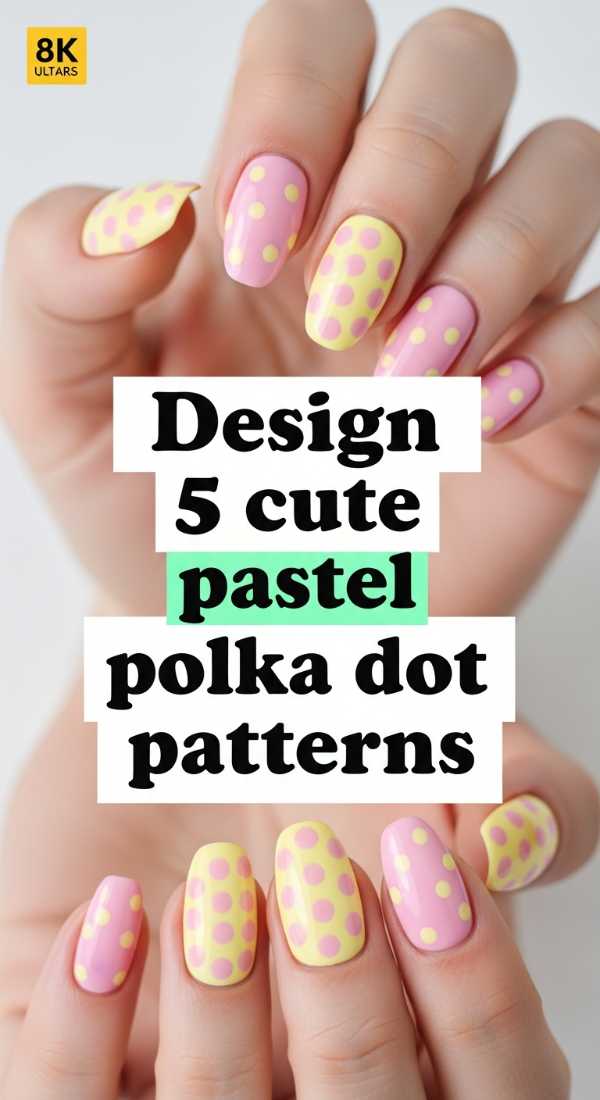
Why to love these Nails:
Polka dots are the ultimate beginner-friendly art. They are youthful, fun, and so versatile. You can go for a structured grid or a scattered ‘confetti’ look—there are no rules here, only vibes!
Essential Items:
- Various pastel polishes (mint, lavender, peach)
- Dotting tools in various sizes
How to Prepare:
- Pick a base color or leave the nail natural.
- Choose 3 coordinating pastel colors.
- Start with the largest dots first, spacing them out.
- Fill in the gaps with smaller dots in different colors.
- Ensure dots are dry before top-coating to prevent smearing.
Budget Range
- Pastel Nail Polish Set ($15.00)
- Dotting Tool Kit ($6.00)
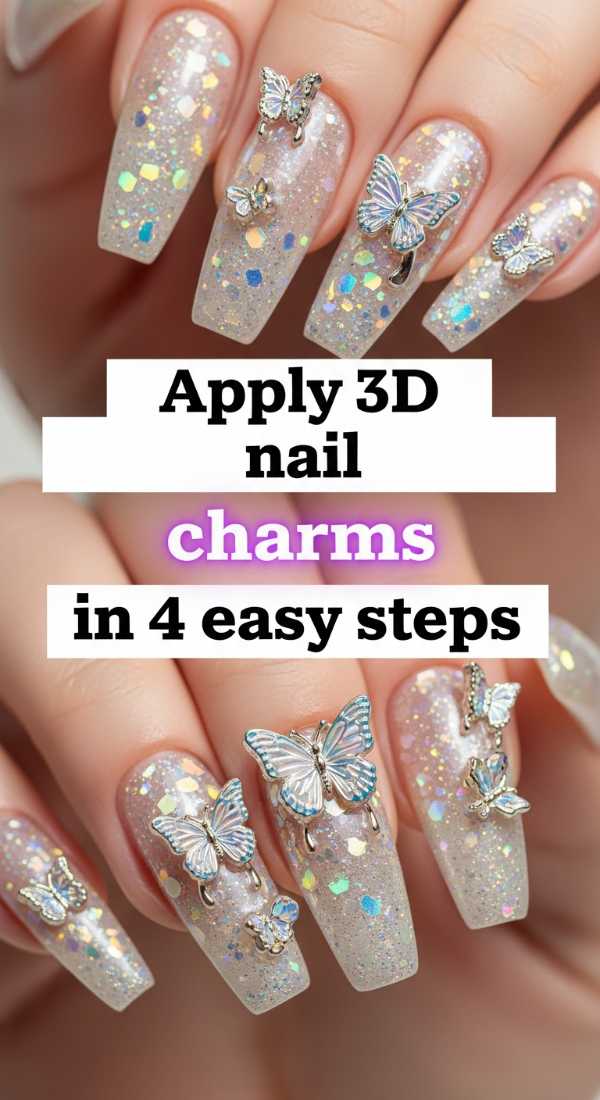
Apply 3D Nail Charms in 4 Easy Steps
Why to love these Nails:
Sometimes, we just need a little extra sparkle. 3D charms, like tiny gold hearts or pearls, turn your nails into jewelry. It’s a tactile, bold way to express your personality and add a little ‘oomph’ to your style.
Essential Items:
- Nail charms (bows, pearls, gems)
- Strong nail glue or thick builder gel
- Tweezers
How to Prepare:
- Complete your base color and top coat first.
- Apply a small bead of glue or gel where you want the charm.
- Place the charm with tweezers and hold for 10 seconds.
- Seal the edges of the charm with a bit more top coat to prevent snagging.
Budget Range
- Nail Art Charm Variety Pack ($9.00)
- Makartt Nail Glue ($8.00)
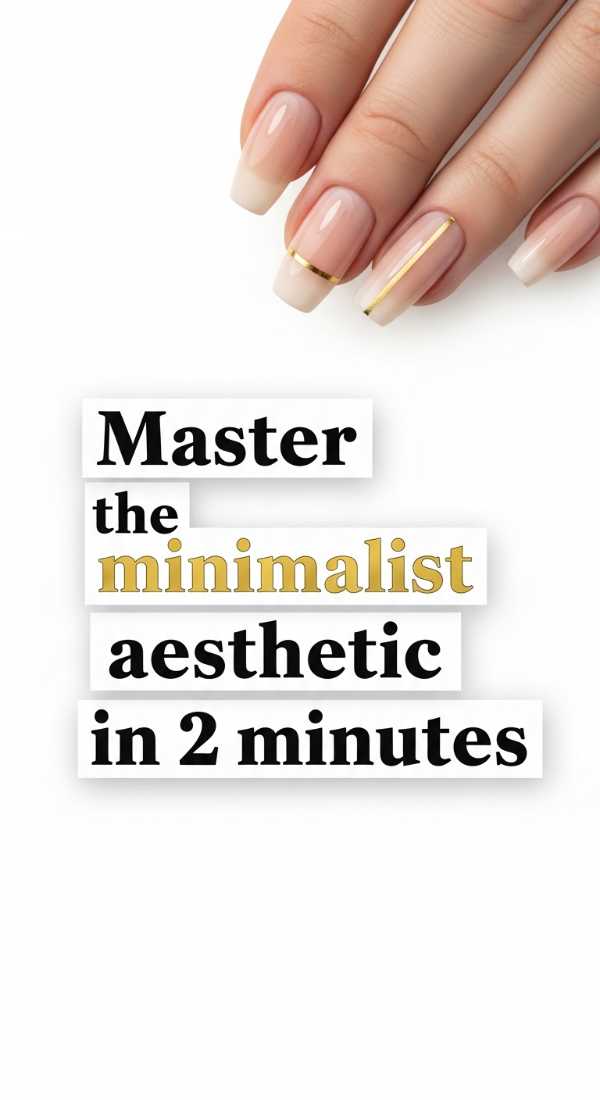
Master the Minimalist Aesthetic in 2 Minutes
Why to love these Nails:
Less is often so much more. The minimalist aesthetic is for the girl who loves clean lines and subtle details. A single dot or a lone vertical line can be incredibly striking and high-fashion without requiring hours of work.
Essential Items:
- Matte base or nude polish
- Black or gold detail polish
- Toothpick
How to Prepare:
- Apply a matte nude base for a sophisticated finish.
- Place one tiny black dot at the center of the cuticle base of each nail.
- Allow to dry completely—minimalism is all about precision!
Budget Range
- OPI Matte Top Coat ($11.00)
- Sinful Colors ‘Black on Black’ ($3.00)
Embrace Your Inner Artist
My loves, I hope this journey through abstract lines and dainty details has inspired you to take a little time for yourself. Remember, nail art isn’t about being perfect; it’s about the joy of creating something that makes you smile. Your hands do so much for you every day—they write, they hold, they create—so why not treat them like the galleries they are? I can’t wait to see the beautiful masterpieces you create at your own fingertips. Stay inspired, stay creative, and most importantly, stay uniquely you.