

We’ve all been there—scrolling through Pinterest at 2:00 AM, clutching a lukewarm coffee, and looking at our beige apartment walls with a heavy sigh of longing. There is something about those perfectly curated spaces that feels like a warm hug for the soul, a blend of effortless chic and intentional living that seems just out of reach for those of us on a real-world budget. But here’s a little secret I’ve learned after years of DIY trials: you don’t need a six-figure renovation budget to create a home that feels like a sanctuary.
Creating a ‘Pinterest-worthy’ home is less about the price tag and more about the narrative you weave through your decor. It’s about the soft glow of a well-placed lamp, the texture of a vintage throw, and the way you organize your workspace to invite creativity rather than stress. In this guide, we are diving deep into the art of the aesthetic, from the curb appeal of your front yard to the whimsical corners of your living room, proving that with a little elbow grease and some creative vision, your apartment can be the inspiration for someone else’s late-night scroll.
How to Design a Stunning Front Yard for Instant Curb Appeal
Why we love this
There is a profound sense of pride that washes over you when you turn the corner and see a home that looks loved from the outside in. We adore this project because it transforms the first impression of your space into an inviting, sensory experience; imagine the crisp, earthy scent of fresh mulch mingling with the sweet fragrance of blooming lavender as you walk to your door. The visual rhythm of neatly edged borders and vibrant foliage creates a high-end, manicured look that feels both professional and deeply personal, offering a daily reminder that your home is a place of beauty and care.
Essential Elements:
- Black or dark brown hardwood mulch for contrast
- Steel or heavy-duty plastic landscape edging
- Perennial plants (Lavender, Hostas, or Boxwoods)
- Solar-powered warm LED path lights
- Decorative river stones or gravel
- A high-quality garden spade and leveling rake
How to make it
- Begin by defining your perimeter; use a garden hose to map out organic, flowing curves for your flower beds, avoiding harsh straight lines for a more modern, professional look.
- Remove all existing grass and weeds within the marked area, digging down approximately 3 to 4 inches to ensure you have a clean slate for your soil and mulch.
- Install your edging material along the perimeter, ensuring it sits about an inch above the soil line to prevent grass from creeping in; use a rubber mallet to secure stakes firmly into the ground.
- Place your largest plants first as ‘anchors’ toward the back, then layer smaller textures in the front; ensure you tease the roots of each plant before placing them in a hole twice the width of the root ball to encourage rapid growth.
- Spread a 3-inch layer of premium mulch across the entire bed, smoothing it with a rake but keeping it away from the direct stems of your plants to prevent rot; the ‘doneness’ cue here is a uniform, rich color that completely hides the underlying dirt.
- Finalize the look by spacing your solar lights evenly—about 3 to 5 feet apart—angling them slightly toward the path to create a soft, high-end glow as the sun sets.
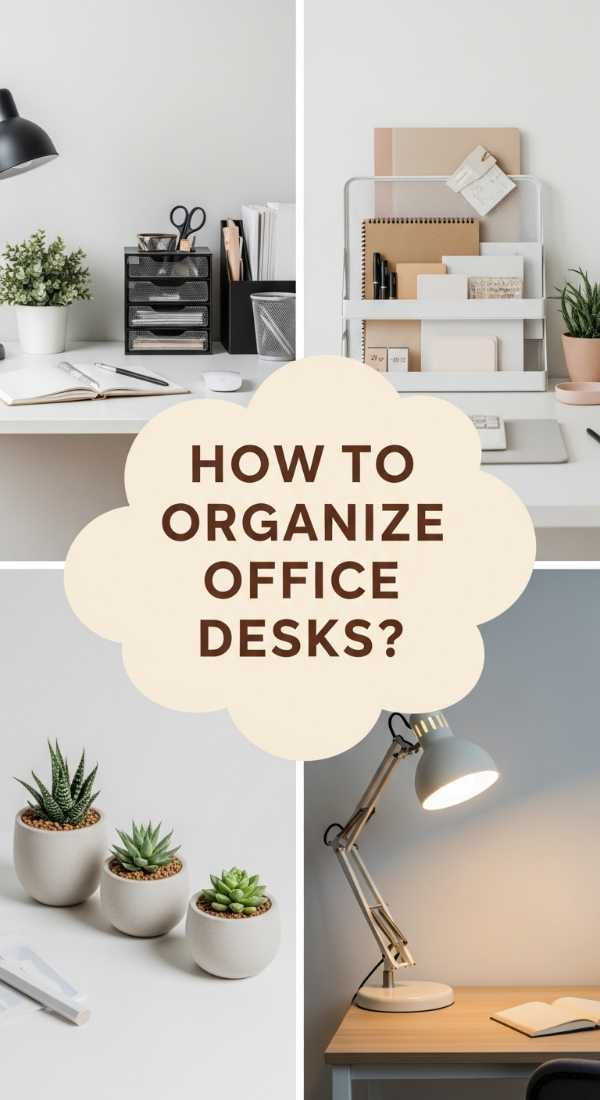
How to Style a Productive Work Cubicle for Maximum Focus

Why we love this
In a world of digital noise, having a workspace that feels like a serene island of productivity is a total game-changer for your mental health. We love this cubicle transformation because it replaces the sterile, fluorescent atmosphere of a standard office with textures and tones that soothe the nervous system. Imagine the tactile softness of a felt desk mat under your wrists, the gentle hum of a small diffuser emitting notes of eucalyptus, and a visual palette of sage and cream that keeps your eyes rested even during an eight-hour shift, making every deadline feel a little more manageable.
Essential Elements:
- Peel-and-stick fabric wallpaper or acoustic felt panels
- Adjustable warm-toned desk lamp with a linen shade
- Large felt or vegan leather desk mat
- Acrylic or gold-toned organizing trays
- Small potted snake plant or pothos
- Noise-canceling headphones with a dedicated wooden stand
How to make it
- Start by stripping your desk of everything but the computer; clean all surfaces with a microfiber cloth to ensure a dust-free environment for the next layers.
- Measure the interior walls of your cubicle and apply the peel-and-stick fabric; use a squeegee to smooth out air bubbles, working from the center outward to ensure a taut, professional finish that dampens surrounding office noise.
- Set up your lighting ‘temperature’ by choosing a 2700K LED bulb for your desk lamp; position it so the light bounces off the side wall rather than directly onto your screen to eliminate glare and create a soft, ambient glow.
- Layer your desk mat centered under your keyboard and mouse; this provides a ‘zone’ of comfort and visual focus that anchors the entire workstation.
- Organize your tech and stationery into the acrylic trays, grouping items by ‘heat level’ or frequency of use—daily essentials like pens and sticky notes go in the ‘hot’ zone closest to your dominant hand.
- Introduce the plant on the corner of the desk furthest from your computer to create a ‘visual break’ for your eyes; the ‘doneness’ cue is a space that feels curated and intentional, where every item has a specific home and the air feels noticeably calmer.
How to Curate Epic Music Wallpapers for a Modern Aesthetic
Why we love this
There is something incredibly nostalgic yet cutting-edge about turning your digital space into a gallery of your musical taste. We love this DIY because it’s a digital ‘mood board’ that reflects your identity; it’s the visual equivalent of a perfectly mixed vinyl record spinning in the background. Seeing your favorite album covers rendered in high-definition, color-coordinated grids on your desktop or TV screen creates a sophisticated, gallery-like atmosphere in your apartment, turning a cold piece of tech into a warm piece of art that pulses with the energy of your favorite tracks.
Essential Elements:
- High-resolution album art (3000px minimum)
- Graphic design software (Canva or Photoshop)
- A consistent color palette (e.g., monochrome, pastels, or neon)
- Minimalist font pack (Helvetica or Montserrat)
- Digital frame or Smart TV for display
How to make it
- Select 9 to 12 of your favorite albums that share a common color thread; for example, if you want a ‘moody’ vibe, choose covers with deep blues, blacks, and charcoal greys.
- Open your design software and set a canvas to 3840 x 2160 pixels for a 4K display; create a grid layout with equal margins to ensure a balanced, professional look.
- Import your images and use a ‘smart crop’ technique to ensure the main focus of the album art is centered within each grid square; avoid stretching the images, as pixelation is a sign of a ‘raw’ or unfinished project.
- Apply a subtle grain filter (around 3-5%) over the entire composition to give the digital art a tactile, ‘analog’ feel that mimics the texture of real paper or vinyl.
- Export the file as a high-quality PNG; set it as your wallpaper and adjust the display settings to ‘fit to screen’ to avoid any cropping of the edges.
- The visual cue for perfection is when the colors of the wallpaper harmonize with the physical decor in your room, making the screen feel like an integrated piece of furniture.
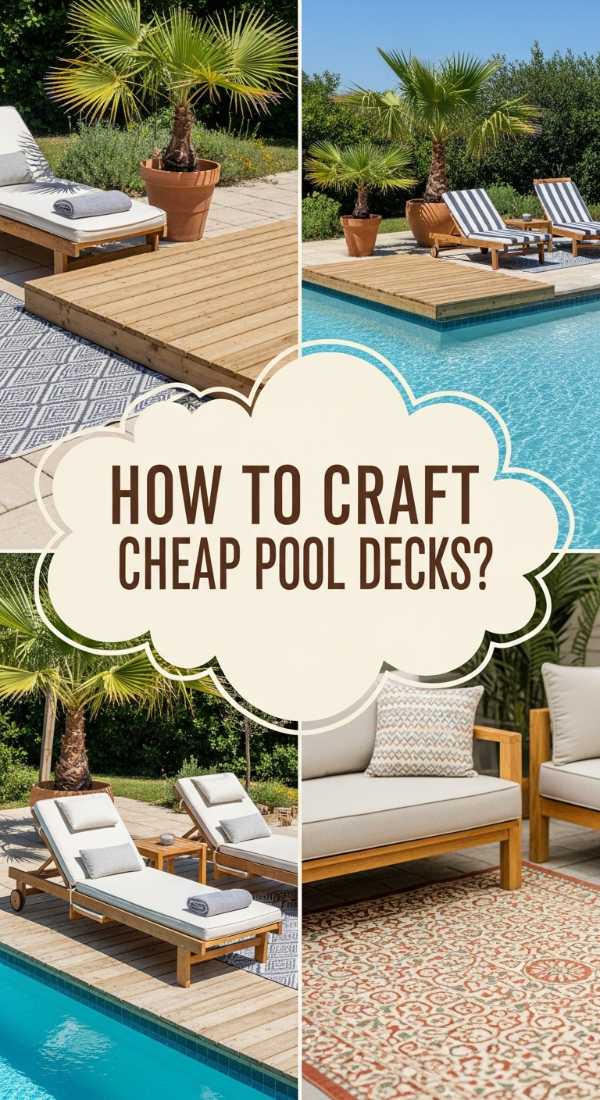
How to Build a Budget Pool Deck for Endless Summer Fun

Why we love this
Nothing says ‘summer sanctuary’ quite like the feeling of sun-warmed wood beneath your feet as you prepare for a refreshing dip. We love this budget-friendly deck build because it elevates an ordinary above-ground pool into a luxurious resort experience without the five-figure contractor bill. Imagine the sound of water splashing against a stable, beautiful platform where you can set up a lounge chair, a cold drink, and a towel, creating a seamless transition from your yard to the water that makes every weekend feel like a high-end vacation.
Essential Elements:
- Pressure-treated 2×4 and 2×6 lumber
- Concrete deck blocks for foundations
- Galvanized deck screws (3-inch)
- Power drill and circular saw
- Exterior wood stain or sealant
- Leveling tool and sand for base
How to make it
- Clear a 10×10 foot area next to your pool, digging out 2 inches of topsoil and replacing it with a layer of leveled sand to provide a stable ‘bed’ for your foundation.
- Place your concrete deck blocks in a grid pattern, spaced 4 feet apart; use a 4-foot level to ensure every block is perfectly even, as a sloping deck is a major safety hazard and won’t look ‘done.’
- Construct the outer frame using 2×6 boards, securing them into the slots of the deck blocks; add joists every 16 inches on center to ensure the deck can handle the ‘heat’ of heavy foot traffic and furniture.
- Lay your top decking boards (2x4s) perpendicular to the joists, using a 1/4-inch spacer between each board to allow for wood expansion and water drainage.
- Trim any overlapping edges with your circular saw for a crisp, flush finish; then, sand the surface thoroughly to remove any splinters or rough patches.
- Apply two coats of high-quality exterior stain with a wide brush, working with the grain; the ‘doneness’ cue is a rich, uniform sheen that beads water and highlights the natural beauty of the wood.
How to Create Summer Table Centerpieces for an Elegant Garden Party

Why we love this
An elegant centerpiece is the heartbeat of a garden party, setting a tone of effortless sophistication and warmth. We love this DIY because it uses the fleeting beauty of summer—ripe citrus, wild greenery, and delicate blooms—to create a sensory masterpiece that smells as good as it looks. Picture the bright, zesty aroma of sliced lemons floating in crystal-clear water, paired with the soft, romantic ruffles of peonies; it’s a visual feast that encourages guests to linger over their plates, talk a little longer, and soak in the magic of a golden hour evening.
Essential Elements:
- Wide-mouth glass vases or hurricane jars
- Fresh lemons, limes, or oranges
- Seasonal flowers (Peonies, Hydrangeas, or Zinnias)
- Eucalyptus or Ruscus stems for greenery
- Floral shears and floral tape
- Floating tea light candles
How to make it
- Slice your citrus fruits into uniform 1/4-inch rounds; the key to a professional look is ensuring the slices are thick enough to hold their shape but thin enough to press against the glass.
- Place a smaller glass vase inside the larger vase; slide the citrus slices into the gap between the two glass walls, stacking them in a staggered pattern for maximum visual impact.
- Fill the inner vase with fresh, cool water and use floral tape to create a ‘grid’ across the top; this grid will act as a structural support for your heavy blooms, keeping them upright and perfectly spaced.
- Trim your flower stems at a 45-degree angle under running water to maximize hydration; place the largest ‘hero’ flowers in the center of the grid, then work outward with smaller fillers and trailing greenery.
- Add a few sprigs of eucalyptus to the base of the arrangement to provide a ‘curtain’ of green that hides the rim of the vase; ensure no leaves are submerged in the water to prevent bacterial growth.
- Place a floating candle on top of the inner vase water; the ‘doneness’ cue is when the citrus looks vibrant and the floral arrangement appears lush and overflowing, creating an immediate focal point for the table.
How to Achieve a Whimsical Apartment Aesthetic for a Dreamy Living Space

Why we love this
Whimsical decor is all about embracing the magic in the mundane, turning a standard apartment into a place where the imagination can run wild. We adore this aesthetic because it prioritizes comfort and ‘wonder’—think layers of sheer, iridescent fabrics that catch the morning light, clusters of glowing mushrooms or fairy lights that twinkle at dusk, and a palette of soft lavenders and mints. It’s a style that feels like living inside a modern-day fairytale, where every corner holds a tiny, delightful surprise that makes coming home the best part of your day.
Essential Elements:
- Sheer voile curtains or canopy fabric
- Copper-wire fairy lights with remote control
- Velvet floor cushions in pastel tones
- Gold-framed vintage mirrors
- Dried flower bouquets or ‘cloud’ installations
- Iridescent window film
How to make it
- Apply iridescent window film to any direct-light windows; this creates a ‘rainbow’ effect across your floors and walls when the sun hits, establishing the base ‘heat’ or energy of the whimsical vibe.
- Hang sheer voile fabric from the ceiling or over your bed frame using clear command hooks, allowing the fabric to drape and ‘puddle’ on the floor for a soft, ethereal look.
- Weave copper-wire fairy lights through the fabric or around your indoor plants; ensure you hide the battery packs or plugs behind furniture so the glow appears to come from nowhere.
- Create a ‘gallery of mirrors’ on one wall to bounce the light and create an illusion of infinite, dreamy space; use varying sizes of ornate, thrifted frames for a ‘collected over time’ feel.
- Style your seating area with oversized velvet cushions, layering different textures like faux fur and chunky knits to create a ‘nest-like’ environment.
- The visual cue for doneness is a room that feels ‘soft’ at every edge; there should be no harsh shadows, and the lighting should feel like a warm, diffused embrace.
How to Plan a Lush Aquarium Setup for a Serene Home Vibe

Why we love this
An aquarium is more than just a pet habitat; it is a living, breathing piece of art that brings the calming rhythm of the underwater world into your living room. We love this setup because of the profound ‘biophilic’ effect it has on a space—the sight of vibrant green aquatic moss swaying in a gentle current and the soft, rhythmic bubbling of the filter can lower your heart rate instantly. It adds a layer of sophisticated, natural texture to your apartment, creating a glowing centerpiece that feels like a private, underwater forest of serenity.
Essential Elements:
- Rimless glass aquarium (10-20 gallons)
- Active nutrient-rich substrate (Aqua-soil)
- Hardscape materials (Dragon stone or driftwood)
- Live plants (Anubias, Java Fern, and Carpet Moss)
- Full-spectrum LED plant light
- Water conditioner and liquid fertilizer
How to make it
- Pour your aqua-soil into the tank, sloping it from 4 inches deep at the back to 1 inch at the front; this ‘forced perspective’ makes the aquarium look much deeper and more professional than it actually is.
- Arrange your hardscape (stones and wood) following the ‘Rule of Thirds’; place your largest piece slightly off-center to create a natural, asymmetrical focal point that draws the eye through the tank.
- Mist your plants with water to keep them wet, then use aquascaping tweezers to plant them into the soil; place taller ‘background’ plants behind your hardscape and ‘carpeting’ mosses in the foreground.
- Place a clean plate over the substrate and pour water slowly over it; this prevents the ‘heat’ of the incoming water from disturbing your careful planting and clouding the tank.
- Install your LED light and set it to a timer for 6-8 hours a day; this mimics natural sun cycles and prevents algae growth while highlighting the neon colors of the plants.
- The ‘doneness’ cue for an aquarium is a crystal-clear water column where the plants look turgid and bright, and the hardscape looks integrated as if it has been there for years.
How to Master the Vintage Grandma House Aesthetic for a Cozy Feel

Why we love this
The ‘Grandmacore’ or ‘Vintage Grandma’ aesthetic is a soulful rebellion against the cold, sterile minimalism of the past decade. We love this look because it celebrates history, comfort, and the beauty of imperfection; it’s about the smell of aged book pages, the intricate patterns of a lace doily, and the warmth of a floral porcelain teacup. It makes an apartment feel like it has ‘bones’ and a story, wrapping you in a blanket of nostalgia that feels incredibly grounded and safe in an ever-changing world.
Essential Elements:
- Embroidered or crocheted throw blankets
- Floral pattern wallpaper or textiles
- Vintage brass candlesticks and tapered candles
- Dark wood side tables or ‘curio’ cabinets
- Pressed flower art in gold frames
- A collection of mismatched vintage china
How to make it
- Start with your ‘textile layer’; drape a heavy, floral-patterned quilt over the back of a neutral sofa to instantly inject color and ‘age’ into the room.
- Incorporate ‘clutter’ intentionally by grouping your vintage china or brass candlesticks in odd numbers (3 or 5) on a wooden tray; this makes the items look like a curated collection rather than a mess.
- Hang pressed flower art in a tight ‘grid’ formation above a bed or sideboard; the ‘visual cue’ here is that the frames should look slightly aged—use a bit of gold rub-n-buff on new frames to achieve this.
- Replace modern lighting with ‘warm’ antique-style lamps that feature pleated fabric shades; the light should be soft and golden, never white or blue.
- Introduce a scent element like a ‘linen and rose’ candle or an old-fashioned potpourri bowl to anchor the sensory experience of a vintage home.
- The project is ‘done’ when the room feels lived-in and layered, where every object invites you to touch it or ask about its history.
How to Theme a Fall Baby Shower for a Warm Celebration

Why we love this
A fall baby shower is the ultimate celebration of ‘new beginnings’ set against the cozy, golden backdrop of autumn. We love this theme because it uses a rich, earthy palette—burnt orange, creamy ivory, and muted sage—to create an atmosphere that is both sophisticated and incredibly snug. Imagine guests sipping hot apple cider surrounded by velvet pumpkins and dried wheat stalks; it’s a sensory experience that feels abundant and celebratory, honoring both the coming season and the new life about to join the family.
Essential Elements:
- Velvet pumpkins in various sizes and earth tones
- Dried wheat bundles or pampas grass
- Kraft paper table runners
- Custom ‘Little Pumpkin’ wooden signage
- Cinnamon sticks and twine for napkin rings
- Warm-toned balloons (Chocolate, Terracotta, and Sand)
How to make it
- Lay a Kraft paper runner down the center of your table; use a white paint pen to hand-letter the menu or ‘welcome’ messages directly onto the paper for a rustic, bespoke touch.
- Create ‘clusters’ of velvet pumpkins along the runner, varying the heights and colors to create a ‘river’ of texture that leads the eye down the table.
- Tuck small sprigs of dried wheat or eucalyptus between the pumpkins to add height and a ‘wild’ organic feel; the ‘visual cue’ is a look of effortless abundance.
- Construct a balloon arch using a mix of matte terracotta and cream balloons; inflate them to different sizes and use glue dots to fill in gaps with ‘mini’ balloons for a high-end, professional finish.
- Tie cinnamon sticks to linen napkins using rough-hewn twine; the ‘heat’ of the room will release a subtle, spicy aroma that perfectly complements the fall theme.
- The ‘doneness’ cue is a space that feels warm and inviting, where the decor reflects the cozy anticipation of a new arrival.
How to Curate Patriotic Decor for a Festive Front Porch
[IMAGE_10]
Why we love this
There is a classic, timeless beauty to a patriotic front porch that evokes a sense of community and celebration. We love this DIY because it’s a bold, high-contrast look that uses the power of red, white, and blue to create instant energy and cheer. Imagine the sight of crisp cotton flags fluttering in a summer breeze and the pop of bright red geraniums against a white porch railing; it’s a look that feels both traditional and fresh, welcoming neighbors and friends with a festive spirit that is undeniably uplifting.
Essential Elements:
- Tea-stained or vintage-style American flags
- Red flowering plants (Geraniums or Petunias)
- Navy blue outdoor throw pillows
- White wicker or wooden rocking chairs
- Woven seagrass rugs for texture
- Bunting or ‘banner’ flags for railings
How to make it
- Clean your porch thoroughly, removing any cobwebs or dirt; a ‘Pinterest’ look always starts with a pristine, high-shine surface.
- Place your large planters of red geraniums on either side of the front door to create ‘symmetry,’ which is a hallmark of high-end curb appeal.
- Hang your tea-stained flags at a 45-degree angle from the porch pillars; the ‘vintage’ wash on the flags prevents the colors from looking too garish and adds a layer of sophisticated ‘history.’
- Layer a navy blue outdoor rug over a larger seagrass mat; this ‘double rug’ technique is a pro-designer secret that adds instant depth and luxury to a small space.
- Arrange your white rocking chairs with the navy pillows, ensuring the pillows are ‘plumped’ and centered; the ‘visual cue’ for completion is a balanced, inviting seating area.
- Secure your bunting to the railing using clear zip ties hidden behind the fabric; ensure the ‘swags’ are of equal depth for a professional, tailored finish.
Conclusion: Your Home, Your Masterpiece
Transforming your apartment from a generic rental into a Pinterest-worthy sanctuary doesn’t require a magic wand—it just requires your unique perspective and a bit of creativity. Whether you are layering vintage quilts for that cozy ‘grandmacore’ feel or building a custom deck for summer pool days, the goal is always the same: to create a space that reflects who you are and how you want to feel. Remember, the best homes aren’t ‘finished’ in a day; they are curated over time, one DIY project at a time. So, grab your toolkit, find your inspiration, and start turning those ‘saves’ into your reality.