

Bright, Bold, and Beautiful: Your 2024 Summer Nail Inspo
Hello, my beautiful loves! Can you feel it? That soft, golden warmth stretching across the floor, the scent of blooming jasmine drifting through the window, and the sudden, irresistible urge to sip something iced while wearing your favorite linen dress. Summer isn’t just a season; it’s a whole mood, a soft embrace from the universe telling us to slow down and shine. And you know me—I believe that shine starts right at your fingertips.
There is something so magical about looking down at your hands and seeing a burst of color that matches the joy in your heart. Whether you’re planning a barefoot beach escape or just want to bring a little sunshine to your morning coffee run, your nails are the ultimate accessory for the 2024 heatwave. This year, we’re leaning into the bold, the 3D, and the blissfully tropical.
I’ve curated the ultimate list of June and summer nail trends that are taking over my feed (and my heart) right now. From hibiscus blooms to refreshing water drops, we’re going to make sure your manicure is as vibrant as your summer spirit. Let’s dive into these dreamy designs together, shall we?
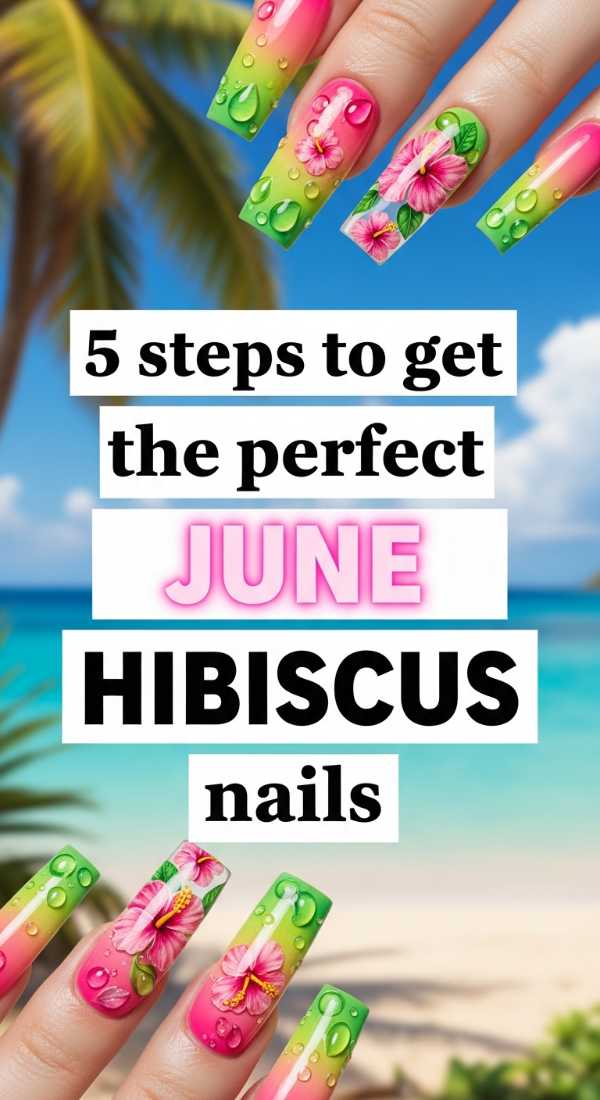
5 steps to get the perfect June Hibiscus nails
Why to love this Design:
Oh, sweethearts, this design is like a tropical vacation captured in a tiny canvas. The hibiscus flower is the universal symbol of summer bliss, and wearing it on your nails feels like carrying a piece of paradise with you wherever you go. It’s feminine, playful, and has that effortless ‘island girl’ aesthetic we all crave.
Essential Elements:
- Hot pink or coral base polish
- Fine-tipped nail art brush
- Bright white gel paint
- Tiny gold studs for the flower centers
- A glossy high-shine top coat
How to Prepare:
- Apply two thin coats of your chosen coral or pink base and cure.
- Using your fine brush, paint five teardrop shapes in a circle to form the petals.
- Add a tiny line of white or yellow in the center for the stamen.
- Place a tiny gold stud at the very center for a bit of 3D sparkle.
- Seal the entire look with a thick layer of top coat for that salon finish.
Budget Range
- OPI ‘Cajun Shrimp’ Polish – $11.50
- Winstonia Fine Liner Brush Set – $8.00
- Saviland White Gel Paint – $6.00
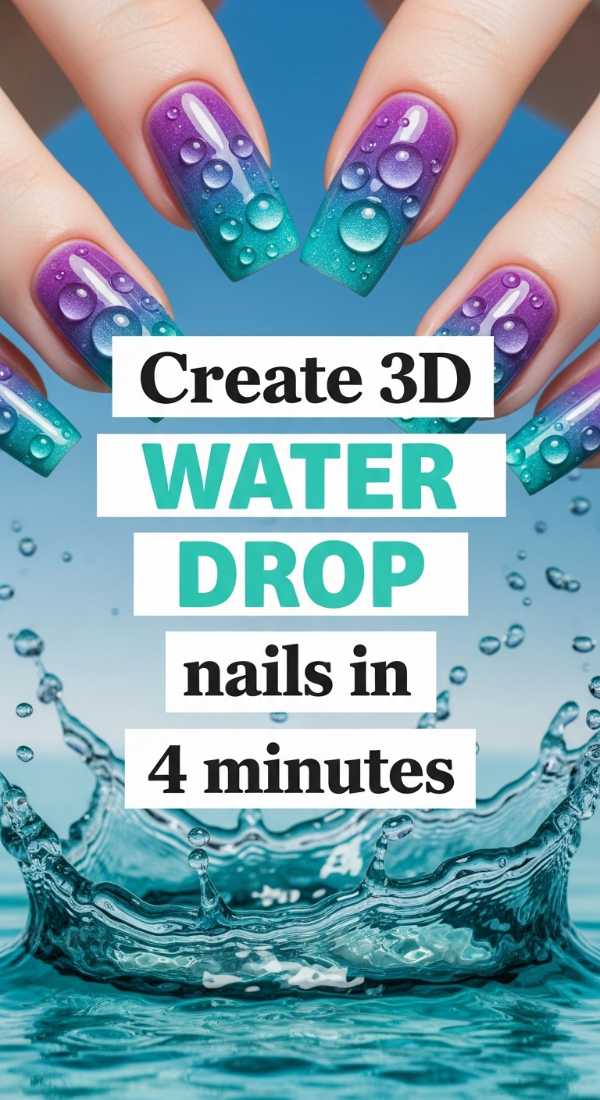
Create 3D water drop nails in 4 minutes
Why to love this Design:
This is for my loves who want something truly unique and tactile. It looks like you’ve just stepped out of a refreshing pool or caught a morning dewdrop. It’s subtle yet incredibly sophisticated, catching the light in a way that feels modern and fresh.
Essential Elements:
- Non-wipe clear builder gel (thick consistency)
- A large dotting tool
- A soft blue or seafoam green base color
- UV/LED Lamp
How to Prepare:
- Apply your base color and a matte top coat (the drops pop better on matte!).
- Dip your dotting tool into the clear builder gel.
- Gently place irregular ‘beads’ of gel onto the nail surface.
- Flash cure immediately for 10 seconds to prevent the drops from leveling out.
- Full cure for 60 seconds to ensure the drops are rock hard.
Budget Range
- Modelones Clear Builder Gel – $9.00
- Dotting Tool Set (various sizes) – $5.00
- Essie ‘Soothe Move’ Matte Polish – $10.00
Design your Summer Trip nails with 3 simple tools

Why to love this Design:
When you’re packing for a getaway, you want nails that match every outfit and every sunset. This design focuses on ‘vacation chic’—minimalist lines and sun-kissed hues that look just as good at a fancy dinner as they do on a hiking trail. It’s the ultimate ‘cool girl’ travel vibe.
Essential Elements:
- Striping tape
- A makeup sponge (for soft gradients)
- A wooden cuticle stick
How to Prepare:
- Paint your nails a neutral sandy beige or nude.
- Use the sponge to dab a sunset orange at the tips.
- Apply striping tape horizontally to create clean, crisp white lines.
Budget Range
- Holo Taco ‘Sandstone’ Polish – $13.00
- Nail Striping Tape Multi-pack – $4.00
- Wedge Makeup Sponges – $3.00
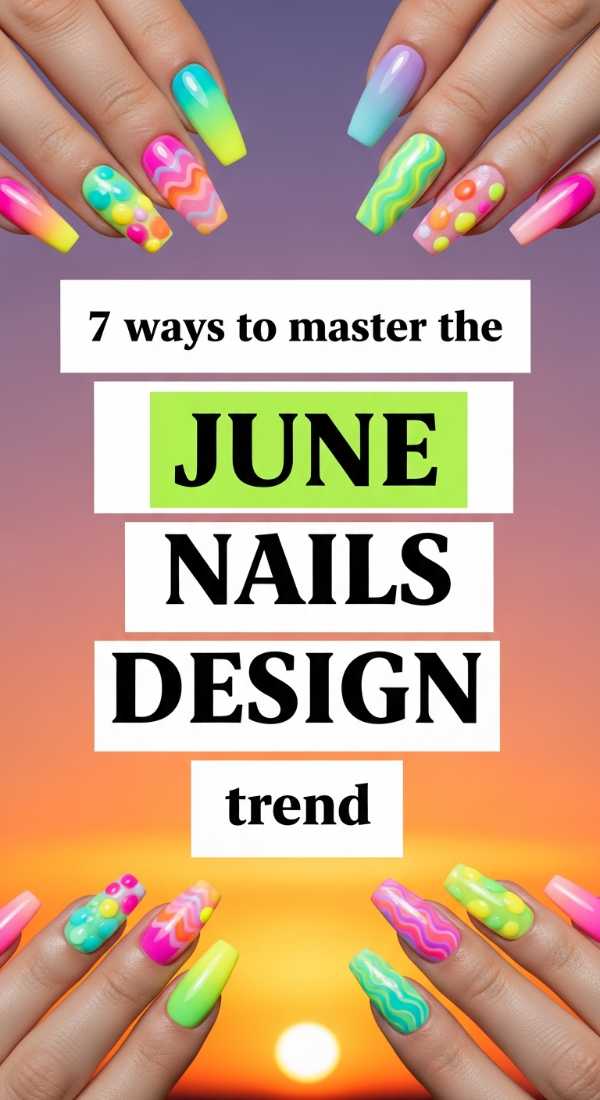
7 ways to master the June Nails Design trend
Why to love this Design:
June is all about the transition from spring softness to summer intensity. This trend embraces ‘mismatched’ aesthetics—think different patterns on every finger. It’s for the creative souls who can’t pick just one color because, let’s be real, life is too short for boring nails!
Essential Elements:
- A palette of 5 coordinating pastel and neon shades
- Nail decals (fruits or stars)
- French tip guides
How to Prepare:
- Pick a ‘theme’ like ‘Citrus Garden’ or ‘Ocean Breeze’.
- Paint each nail a different base color from your palette.
- Add a French tip to one, a decal to another, and dots to the third.
- Keep the thumb and pinky simple to balance the look.
- Use a fast-dry top coat to merge all the textures together.
- Massage cuticle oil daily to keep the ‘June glow’ alive.
- Take a photo against a bright background for the ‘gram!
Budget Range
- Olive & June ‘Summer Set’ – $40.00
- Artistic Nail Decals – $7.00
- Sally Hansen Insta-Dri Top Coat – $6.00
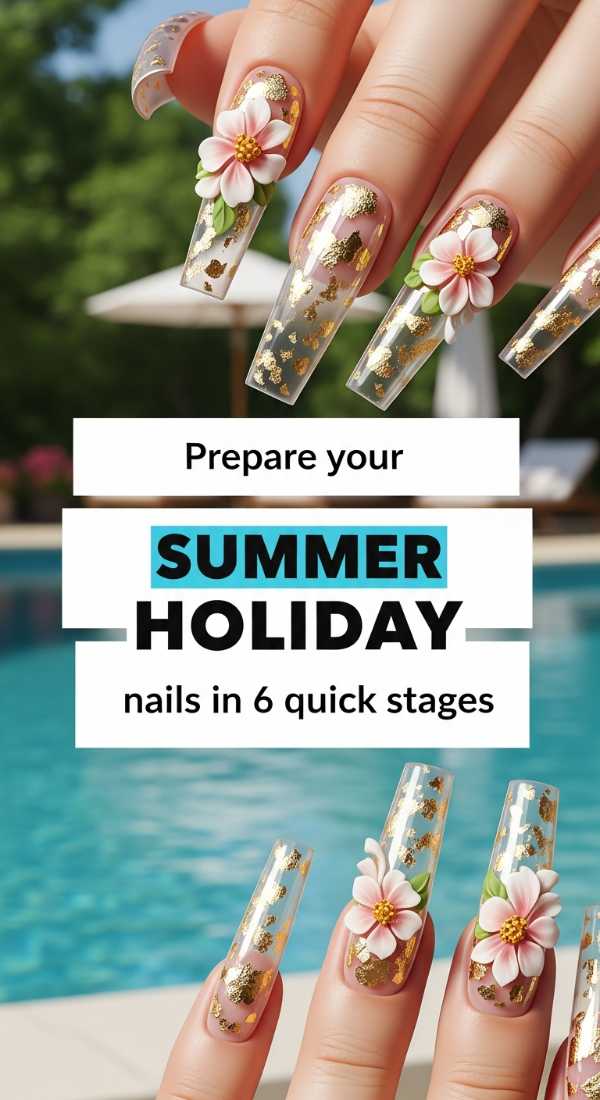
Prepare your Summer Holiday nails in 6 quick stages
Why to love this Design:
There is nothing worse than a chipped nail on day two of your holiday. This method focuses on durability and high-impact color. It’s the ‘set it and forget it’ of nail art, giving you that ‘just left the spa’ feeling for your entire trip.
Essential Elements:
- PH Bonder/Dehydrator
- Gel Base Coat
- Neon Cobalt Blue Polish
- Strength-building gel
How to Prepare:
- Dehydrate the nail plate to remove oils.
- Apply a thin layer of bonder.
- Apply the strength-building gel for extra ‘holiday armor’.
- Apply two coats of neon blue.
- Cure each layer thoroughly.
- Finish with a long-wear top coat.
Budget Range
- Gelish PH Bond – $12.00
- Beatles Gel Polish ‘Neon Blue’ – $7.00
- Orly Builder in a Bottle – $20.00
Apply 3D flower charms in 3 easy steps
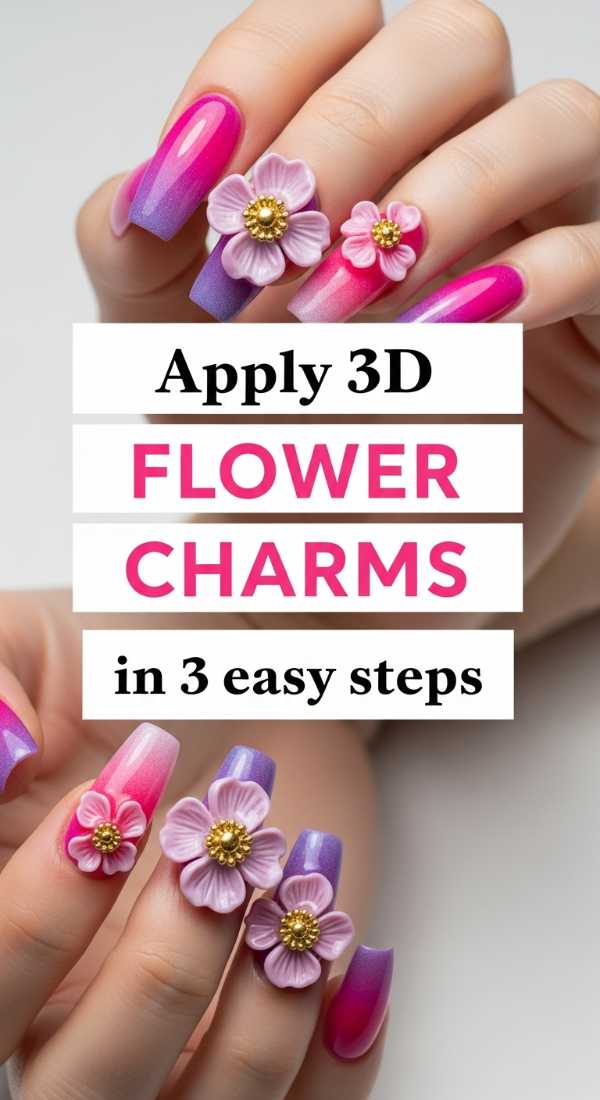
Why to love this Design:
Charms are the ‘it’ factor of 2024. They add a whimsical, Y2K-inspired touch that feels so high-fashion. It’s like wearing jewelry on your nails! These little acrylic flowers make even a simple manicure look like a piece of art.
Essential Elements:
- Acrylic flower charms
- Rhinestone glue or thick gel
- Tweezers
How to Prepare:
- Apply a small bead of rhinestone glue where you want the charm.
- Use tweezers to press the flower charm firmly into the glue.
- Cure for 60 seconds and tuck a little top coat around the edges of the charm to ‘lock’ it in.
Budget Range
- Mixed Resin Flower Charms (100pcs) – $8.00
- Makartt Rhinestone Glue – $10.00
- Precision Tweezers – $5.00
Mix neon gradients for June Nails in 5 minutes

Why to love this Design:
Neon is the heartbeat of summer. This gradient look (often called ‘Ombré’) mimics a summer sunset or a glass of fruit punch. It’s high energy, loud, and looks incredible against a tan.
Essential Elements:
- Neon Yellow and Neon Orange polish
- Latex liquid tape (for easy cleanup)
- Disposable makeup sponge
How to Prepare:
- Apply liquid tape around your cuticles.
- Paint the two colors side-by-side on the sponge.
- Dab the sponge onto the nail repeatedly until blended.
- Peel off the tape.
- Apply top coat to smooth the gradient transition.
Budget Range
- Cirque Colors Vice Collection Neons – $14.00 each
- Pueen Liquid Latex – $9.00
- Bulk Sponges – $4.00
Craft tropical tiger print nails in 4 simple moves
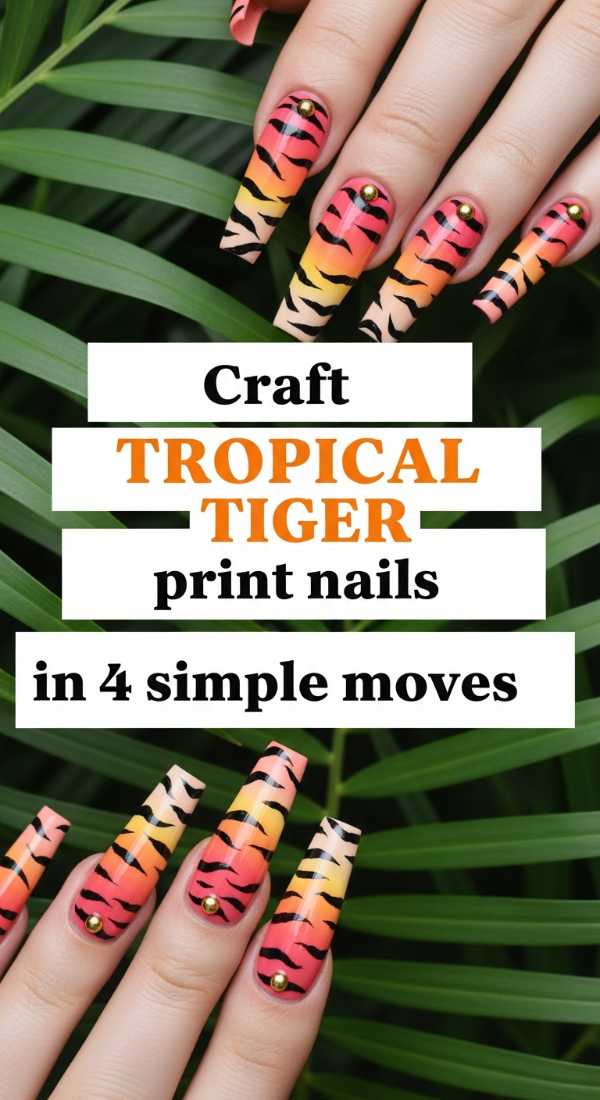
Why to love this Design:
Who says animal print is just for autumn? By swapping browns for bright oranges and teals, tiger print becomes the ultimate tropical statement. It’s fierce, bold, and shows the world you’re ready for an adventure.
Essential Elements:
- Electric orange base polish
- Black striper pen or fine brush
- Teal accent polish
How to Prepare:
- Paint a bright orange base.
- Add small teal ‘blobs’ sporadically.
- Draw thin, wavy black lines over and around the teal.
- Top coat to seal the wildness!
Budget Range
- Zoya ‘Abby’ Orange – $12.00
- Nail Art Black Striper – $6.00
- Barry M Teal Polish – $5.00
Get salon-quality Summer Nails with 8 pro tips
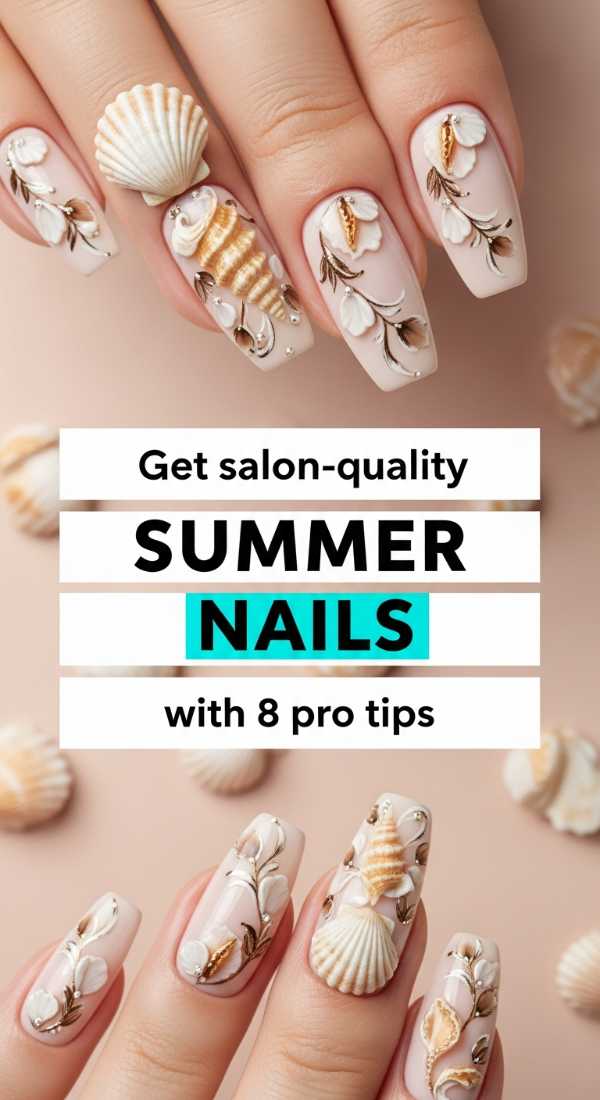
Why to love this Design:
We all want that expensive-looking finish without the $80 salon price tag. Mastering the professional ‘clean girl’ summer look is about the prep and the finish. This is for the perfectionist who wants their DIY to look like a pro did it.
Essential Elements:
- Glass nail file
- Cuticle remover cream
- High-quality buffing block
How to Prepare:
- Always file in one direction with glass.
- Soak cuticles and gently push back.
- Buff the nail surface lightly for better grip.
- Clean with alcohol before polishing.
- Use thin coats (never one thick one!).
- Cap the free edge (paint the very tip).
- Wait 10 minutes before the final top coat.
- Finish with almond oil for that ‘just stepped out’ shine.
Budget Range
- Mont Bleu Glass Nail File – $10.00
- Blue Cross Cuticle Remover – $7.00
- Cuccio Milk & Honey Oil – $13.00
Finish your Holiday Nails with 2 glossy coats
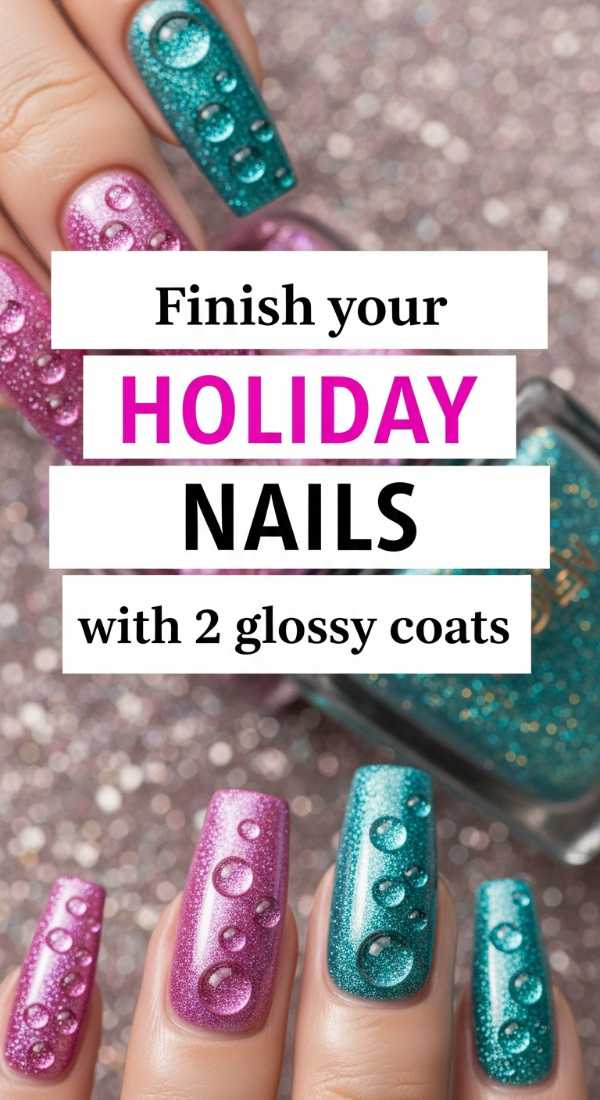
Why to love this Design:
The finish is everything. A ‘wet look’ glossy finish makes colors look deeper and more expensive. It’s the final step that turns ‘nails’ into a ‘manicure’. It’s that satisfying, glass-like shine that we all love to stare at under the sun.
Essential Elements:
- Plumping top coat
- UV Lamp (if using gel) or fast-dry serum
How to Prepare:
- Apply the first layer of top coat and let it set for 2 minutes.
- Apply a second, slightly thicker layer to ‘plump’ the look and add depth.
Budget Range
- Seche Vite Dry Fast Top Coat – $9.50
- Essie Gel Couture Top Coat – $13.00
Wrapping Up Your Summer Glow
And there you have it, my loves! Ten ways to make your hands the star of the season. Whether you go for the bold neons or the delicate 3D flowers, remember that the best part of any manicure is the confidence it gives you. Summer is a time for joy, for bare feet in the sand, and for feeling absolutely beautiful in your own skin. I can’t wait to see which of these looks you choose to rock! Tag me in your nail selfies, and let’s fill the world with color together. Stay bright, stay bold, and stay beautiful!