
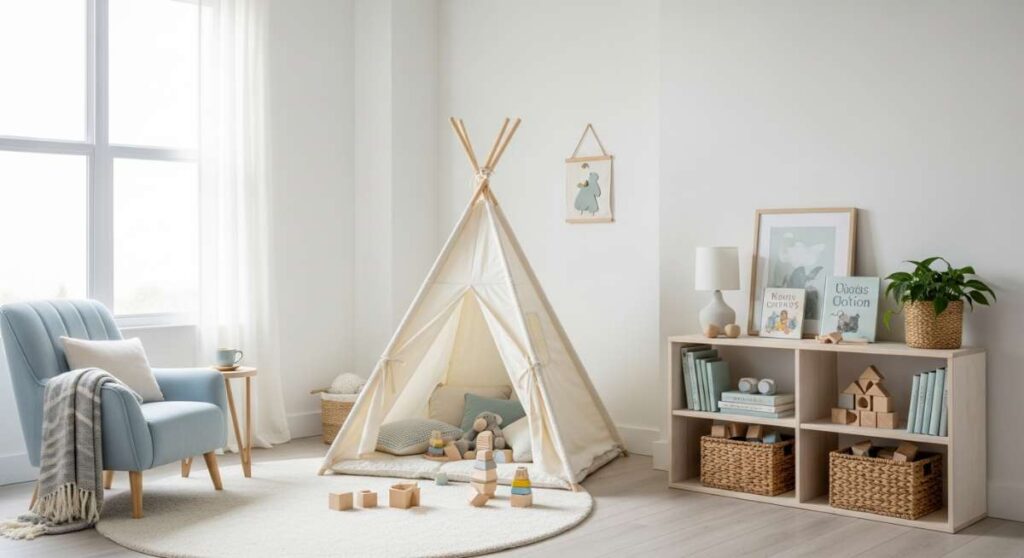
Beyond the Toy Box: How to Style a Dreamy Playroom They’ll Never Want to Leave
We’ve all been there: that moment you walk into the living room and realize every single square inch of the floor is covered in a chaotic mosaic of plastic bricks and stuffed animals. It’s the sound of a childhood well-lived, sure, but it’s also a visual reminder that our homes often feel like they’re being slowly overtaken by toy-clutter. I remember sitting on the floor of my own kids’ room, feeling overwhelmed by the primary colors and the lack of ‘flow,’ and thinking there had to be a better way to honor their imagination without sacrificing my own sense of peace and style.
The secret isn’t just buying more storage bins; it’s about shifting our perspective from ‘toy storage’ to ‘environment design.’ A dreamy play space is more than a room; it’s a sanctuary where textures are soft, light is warm, and the layout invites deep, uninterrupted focus. By blending functional aesthetics with the wild, untamed magic of play, we can create areas that don’t just house toys, but actually inspire the soul. Let’s dive into how we can turn those everyday spaces into the stuff of childhood legends.
How to Design a Modern Kids Backyard for Endless Family Fun
Why we love this
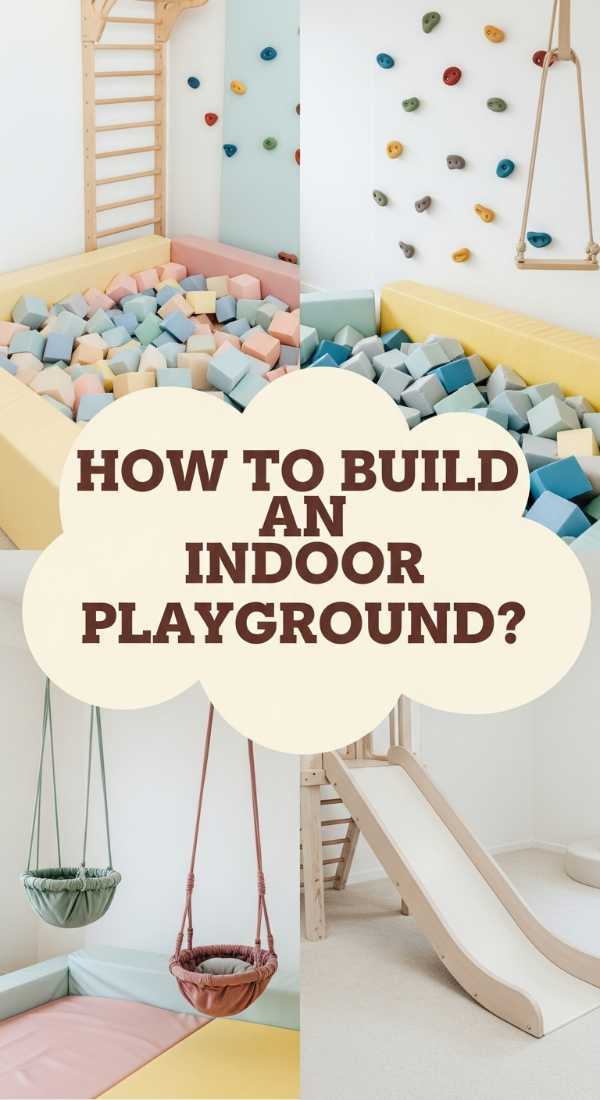
There is something profoundly refreshing about a modern backyard that feels like an extension of the home’s interior, blending sleek lines with the raw beauty of the outdoors. We love this approach because it replaces the neon plastic of yesteryear with the grounding aroma of cedar wood and the tactile luxury of smooth, weather-resistant stone. Imagine stepping out onto a patio where the air smells of freshly cut grass and sun-warmed timber, seeing a play structure that looks more like a piece of architectural art than a swing set. It creates a cohesive environment where parents can sip coffee in style while children engage in high-quality, physical play just a few feet away.
Essential Elements:
- Natural cedar or redwood play structures
- Poured-in-place rubber safety surfacing in neutral tones
- Built-in modern benches with outdoor-grade cushions
- Minimalist shade sails or cantilever umbrellas
- Native, non-toxic landscaping for a lush border
How to make it
- Begin by mapping out your ‘zones’ using landscape stakes and string; you want a clear distinction between the active play area and the relaxation zone to ensure flow.
- Level the ground for the play structure by removing at least 3-4 inches of topsoil, ensuring a perfectly flat foundation to prevent shifting over time.
- Install a commercial-grade weed barrier over the leveled soil, securing it with landscape staples every 12 inches to prevent any future maintenance headaches.
- Assemble your modern play tower, ensuring you pre-drill every hole to avoid splitting the high-quality wood; look for a ‘snug’ fit on all bolts as a visual cue that the structure is stabilized.
- Apply a high-quality, UV-resistant transparent stain to the wood; you’ll know it’s ready for a second coat when the first layer is no longer tacky to the touch and the wood grain looks deeply saturated.
- Fill the play perimeter with engineered wood fiber or neutral rubber mulch, maintaining a depth of 9-12 inches for optimal fall protection according to safety standards.
How to Build an Indoor Playground for Active Rainy Day Fun
Why we love this
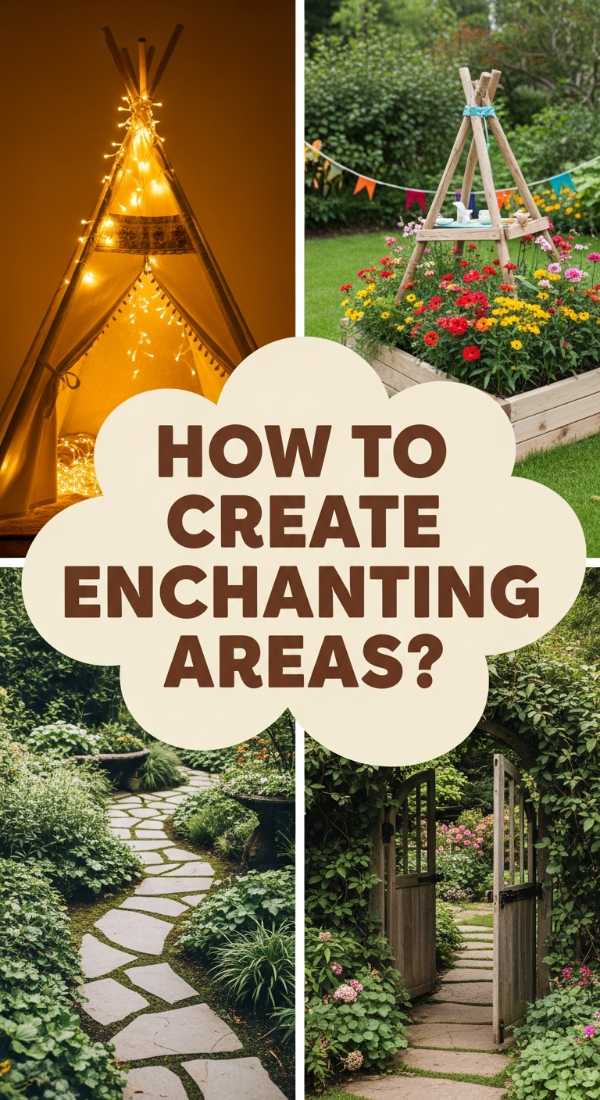
When the clouds roll in and the rain starts drumming against the windowpane, having an indoor sanctuary for movement is a complete sanity-saver. This concept is all about bringing the thrill of the park inside, using smooth birch plywood and soft, oatmeal-colored landing mats that feel like walking on a cloud. The scent is faint and clean—fresh wood and cotton—creating an atmosphere that encourages burning energy without the overstimulation of a bright commercial gym. It turns a boring Tuesday afternoon into an epic mountain-climbing adventure, all while keeping your home looking like a curated interior design magazine.
Essential Elements:
- Wall-mounted Swedish ladders or stall bars
- Foldable gymnastic mats in muted colors
- Ceiling-mounted yoga swings or sensory nests
- Wooden Pikler triangles or climbing arches
- Soft, felt storage bins for keeping gear tidy
How to make it
- Identify a load-bearing wall for your climbing structures; use a high-quality stud finder to mark exactly where the wooden beams sit behind the drywall.
- Secure the stall bars or Swedish ladder using heavy-duty lag bolts, ensuring the hardware penetrates at least 2.5 inches into the center of the stud for maximum weight capacity.
- If installing a ceiling swing, locate the ceiling joist and drill a pilot hole; use a heavy-duty carabiner and eye-bolt rated for at least 300 lbs to ensure safety during vigorous swinging.
- Layout the landing mats beneath the climbing area, ensuring there is at least a 4-foot ‘fall zone’ in every direction from the equipment.
- Check the ‘doneness’ of the installation by applying your own body weight to each rung or swing; there should be zero creaking or lateral movement in the hardware.
- Finalize the space by adding soft lighting—think dimmable LED strips—to create a cozy ‘cooldown’ vibe once the active play is finished.
How to Create Enchanting Outdoor Play Areas for Magical Childhood Memories

Why we love this
This is the stuff of fairy tales and deep-seated childhood nostalgia. Creating an enchanting outdoor nook is about capturing the whimsy of a secret garden, where the air is thick with the scent of jasmine and the soft glow of fairy lights twinkles as the sun dips below the horizon. We love the way this design invites slow, imaginative play—where a hollowed log becomes a dragon’s lair and a simple canvas teepee is a royal palace. The textures are varied and organic: crunchy gravel paths, soft velvet moss, and the rough, honest feel of natural wicker furniture, making every moment feel like a scene from a classic storybook.
Essential Elements:
- Weatherproof canvas bell tent or teepee
- Solar-powered copper fairy lights
- A vintage-style mud kitchen with brass fittings
- Stepping stones made of natural slate
- A perennial butterfly garden with lavender and milkweed
How to make it
- Choose a dappled-shade corner of the garden where the light filters through the trees to create that ‘magical’ glow during the golden hour.
- Clear the area of any debris and lay down a base of pea gravel or wood chips to create a defined, mud-free footprint for the play tent.
- Erect the canvas teepee, ensuring the poles are lashed tightly at the top with natural jute twine; the tension should be taut enough that the fabric doesn’t sag.
- String the solar fairy lights through the surrounding branches or along the tent poles, ensuring the solar panel is positioned to receive at least 6 hours of direct daily sunlight.
- Set up the mud kitchen by leveling a small wooden workbench and stocking it with stainless steel ‘potions’ bowls and wooden spoons.
- Plant a ‘sensory border’ around the zone using plants like lamb’s ear for softness and rosemary for scent; water them deeply until established to ensure a lush, green surround.
How to Implement Creative Kids Outdoor Play Ideas for Healthy Summer Lifestyles

Why we love this
Summer is synonymous with the feeling of sun-warmed skin and the refreshing splash of cool water. Implementing creative play ideas that focus on health and movement is about more than just ‘getting them out of the house’—it’s about fostering a lifestyle where movement is a joy. We love the inclusion of custom water play stations and DIY obstacle courses because they engage the whole body in a sensory-rich experience. The sound of laughter mixes with the splashing of water and the rhythmic thud of feet on grass, creating a vibrant, energetic atmosphere that feels like the ultimate childhood summer camp, right in your backyard.
Essential Elements:
- Customized PVC ‘car wash’ or misting station
- Balance beams made from reclaimed timber
- Chalkboard painted fence panels for giant outdoor art
- In-ground trampoline with a safety net
- A dedicated ‘nature find’ table for sorting rocks and leaves
How to make it
- Build the misting station by cutting 3/4 inch PVC pipes into 5-foot sections and connecting them into a ‘U’ shape using T-joints and elbows.
- Drill tiny 1/16 inch holes along the top bar of the PVC frame to create a fine mist; test the water pressure and adjust the holes if the spray isn’t reaching the desired height.
- Create the balance beam by sanding a 4×4 cedar post until it is smooth to the touch, then mounting it onto two low-profile wooden blocks.
- For the chalkboard fence, sand a section of your wooden fence and apply three coats of outdoor-rated chalkboard paint, allowing 24 hours of drying time between each coat.
- ‘Season’ the chalkboard by rubbing the side of a piece of chalk over the entire surface and then wiping it off with a damp cloth; this prevents ‘ghosting’ of the first drawings.
- Ensure the trampoline is installed over a level surface and that the safety net is zipped and tensioned; a visual cue of a good install is the mat having a firm, drum-like bounce.
How to Curate Stylish Kids Backyard Ideas for Aesthetic Home Living
Why we love this
Who says kid spaces have to be an eyesore? Curating a stylish backyard is about finding that perfect intersection between a child’s need for fun and a parent’s desire for a sophisticated retreat. We love this because it utilizes high-end materials like black powder-coated steel, white oak, and grey slate that complement a modern home’s architecture. The vibe is ‘sculptural playground’—where every piece of equipment looks like it belongs in a contemporary art gallery. It creates an atmosphere of calm and order, proving that family living and high-end design can coexist beautifully in the fresh open air.
Essential Elements:
- Black metal frame swings with leather seats
- Architectural playhouses with glass-paneled doors
- Sunken sandboxes with integrated wooden covers
- Monochromatic color schemes (greys, blacks, whites)
- Designer outdoor lighting like recessed LED wells
How to make it
- Select a color palette that mirrors your home’s exterior—for instance, if your house has black window frames, choose black hardware for all play structures.
- Build a sunken sandbox by excavating a 4×4 foot area to a depth of 12 inches; line it with heavy-duty landscape fabric to allow for drainage while keeping the sand clean.
- Frame the sandbox with pressure-treated 4x4s and finish with a deck-style lid that can be used as a stage when the sandbox is closed.
- Install the playhouse on a concrete pad or a leveled deck area to prevent moisture from rotting the base; check that the door hinges are plumb so the door swings freely.
- Mount the metal swing set using 6×6 support beams, ensuring they are anchored in concrete footings at least 2 feet deep for a ‘rock-solid’ feel.
- Add recessed lighting around the perimeter of the play area; the light should be a warm 2700K color temperature to keep the space feeling cozy and high-end at night.
How to Optimize Small Backyard Ideas for Kids to Maximize Outdoor Space
Why we love this
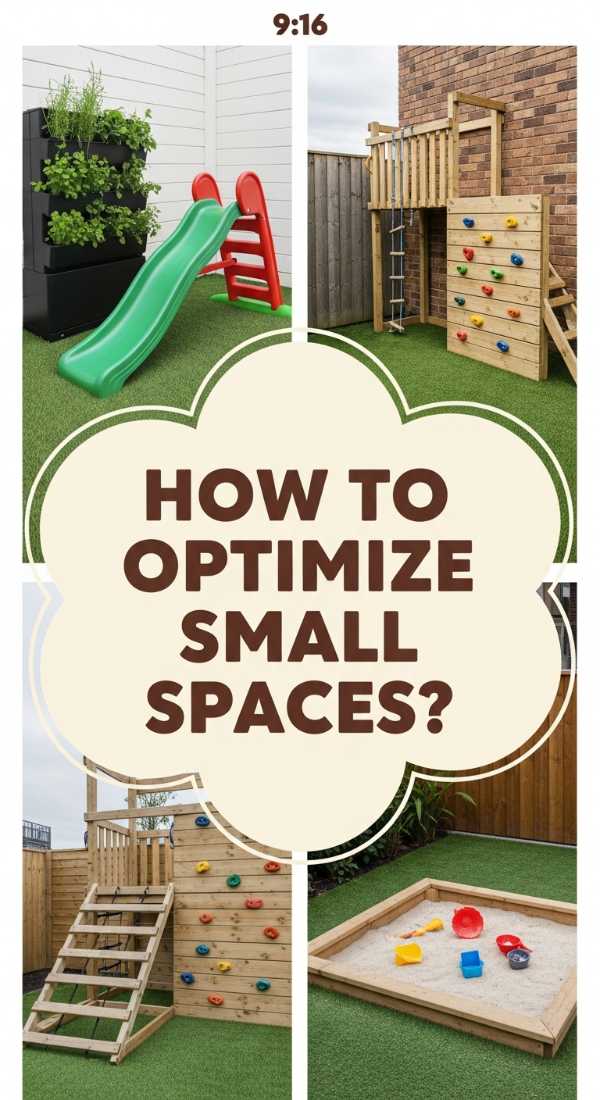
Small spaces demand big creativity, and there is something so satisfying about optimizing a compact urban yard into a powerhouse of play. We love this ‘vertical’ approach because it uses every inch of available space, from the walls to the corners. It feels like a cozy, secret urban oasis where the air is still and the walls are covered in climbing holds and hanging planters. The texture here is all about efficiency and multi-use: foldable benches that hide storage, and wall-mounted games that leave the floor clear for running. It’s proof that you don’t need an acre to create an adventure.
Essential Elements:
- Wall-mounted rock climbing holds on a fence
- Vertical herb gardens for sensory exploration
- Fold-down wooden play tables
- Corner-fitted sandboxes or water tables
- Artificial turf for a low-maintenance, green look
How to make it
- Transform a sturdy fence into a climbing wall by attaching 3/4 inch exterior grade plywood panels to the fence posts using heavy-duty screws.
- Space the climbing holds approximately 12-18 inches apart in a staggered pattern; use T-nuts on the back of the plywood so you can move the holds as the children grow.
- Install artificial turf by first removing existing grass and laying a 2-inch base of crushed stone for drainage; power-broom the turf so the blades stand upright for a natural look.
- Mount a fold-down table using heavy-duty gate hinges and a sliding latch; the ‘done’ cue is when the table stays perfectly level when locked in the ‘up’ position.
- Utilize corner space for a triangular sandbox, which saves central floor space; ensure it has a tight-fitting mesh cover to keep out local neighborhood cats.
- Add a vertical garden using felt pockets or cedar troughs; plant mint and lemon balm to give the small space a refreshing, clean aroma.
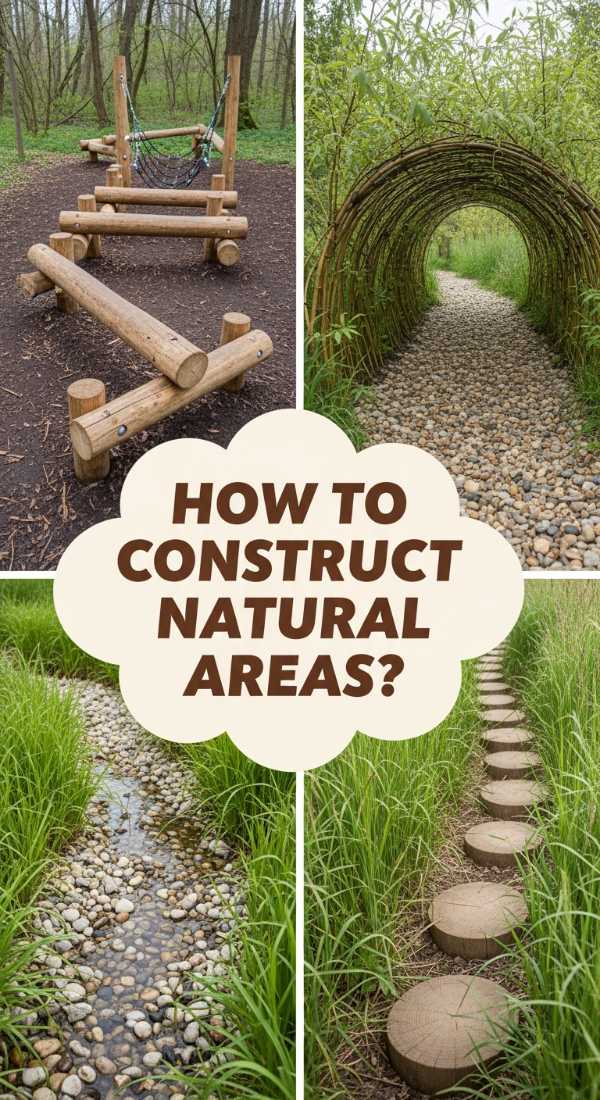
How to Construct a Natural Kids Outdoor Play Area for Wilderness Exploration

Why we love this
There is no substitute for the raw, grounding power of nature. A natural play area is designed to disappear into the landscape, using fallen logs, boulders, and bark mulch to create a ‘forest school’ vibe in your own backyard. We love the way this space smells of damp earth and pine needles, inviting children to get their hands dirty and their spirits high. It’s a sensory masterpiece—the rough bark of a climbing log, the smoothness of river stones, and the rustle of ornamental grasses. It encourages ‘loose parts’ play, where the environment is the teacher and the imagination has no limits.
Essential Elements:
- Climbing logs and ‘stump jumpers’ (sanded tree stumps)
- A dry creek bed made of river rocks
- Large boulders for natural seating and climbing
- Willow tunnels or ‘living’ playhouses
- Wood chip or bark mulch surfacing
How to make it
- Source rot-resistant logs like cedar or oak; peel the bark if you want a smoother look, or leave it for a more textured, ‘wild’ aesthetic.
- Dig holes for the ‘stump jumpers’ about 1/3 the height of the stump; backfill with gravel and soil to ensure they are stable and don’t wobble when stepped on.
- Create a dry creek bed by digging a shallow, winding trench and lining it with a mix of large river rocks and smaller pebbles; this provides a great tactile ‘path’ for kids.
- Plant a willow tunnel by pushing long, flexible willow rods into the ground in two rows and weaving the tops together; do this in early spring to see the ‘living’ house grow green by summer.
- Spread a thick layer (6 inches) of hardwood bark mulch across the entire zone; the mulch should feel ‘spongy’ underfoot, providing a natural safety cushion.
- Incorporate ‘loose parts’ like baskets of pinecones, sticks, and large shells to encourage children to build and create their own mini-worlds.
How to Arrange a Sensory Indoor Playground for Calming Toddler Development
Why we love this
Toddlers experience the world through their senses, and a dedicated sensory indoor space is like a warm hug for their developing brains. We love the soft, hushed tones of this design—think sage greens, soft creams, and the gentle sound of a bubble tube or white noise machine. The textures are the star of the show: squishy foam blocks, silky scarves, and textured wall panels. It’s a space designed to regulate the nervous system, providing a ‘low-demand’ environment where a child can explore at their own pace. It’s the perfect antidote to the high-energy, high-tech world we live in.
Essential Elements:
- LED bubble tubes or fiber optic light strands
- A ‘dark den’ or blackout tent for light play
- Wall-mounted busy boards with latches and zippers
- Weighted blankets and plush floor cushions
- Liquid floor tiles that change color when stepped on
How to make it
- Designate a quiet corner away from high-traffic areas; use heavy linen curtains to dampen sound and soften the visual perimeter.
- Install a bubble tube on a stable, level base; use distilled water to prevent mineral buildup and keep the water clear and the motor running quietly.
- Create a ‘texture wall’ by mounting 12×12 inch frames filled with different materials: faux fur, corrugated cardboard, sandpaper, and silk.
- Set up a light table or a blackout tent equipped with translucent magnetic tiles; the visual cue of ‘success’ is when the child engages in long-term focused exploration of the light.
- Arrange foam ‘soft play’ blocks in a corner, ensuring they are made of medical-grade vinyl that is easy to wipe down and smells neutral rather than chemical.
- Introduce a ‘calm down’ basket filled with fidget toys, scented playdough (lavender is best), and noise-canceling headphones for moments of overstimulation.
How to Transform Simple Backyard Ideas for Kids into Ultimate Adventure Zones
Why we love this
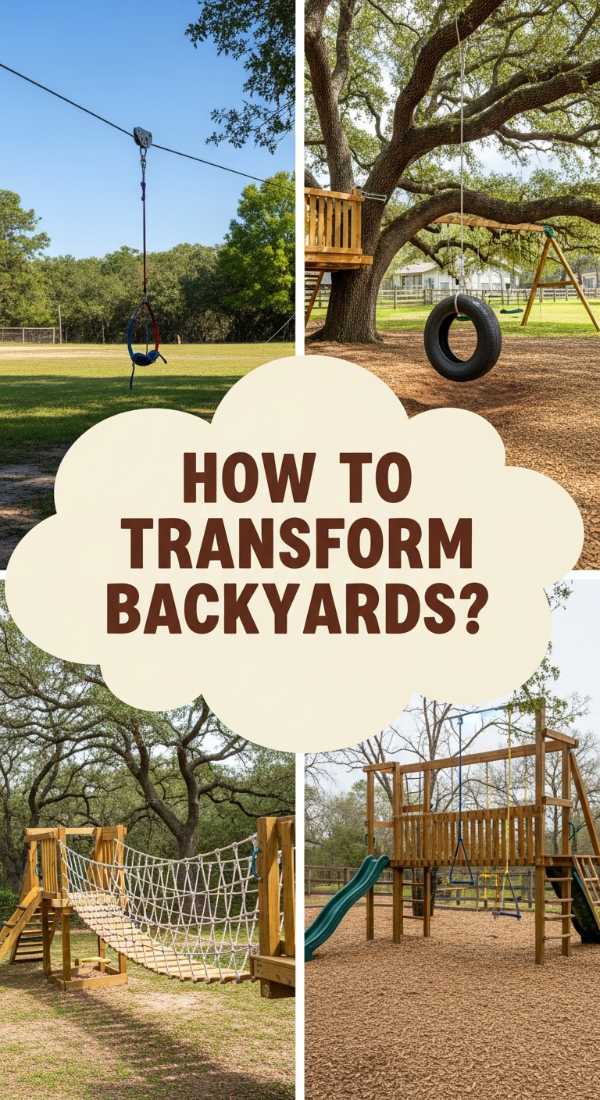
This is for the thrill-seekers and the mini-explorers! Transforming a simple yard into an adventure zone is about adding verticality and movement. We love the ‘high-adrenaline’ feel of a backyard zip line or a rope bridge that spans across garden beds. It turns your home into a destination. The atmosphere is electric—the zipping sound of a pulley, the sway of a rope ladder, and the feeling of the wind in your hair. It’s about building confidence and physical strength in a safe, controlled way, all while making your backyard the coolest spot on the block.
Essential Elements:
- Backyard zip line kit with a seat
- Cargo net climbing walls
- Rope bridges between trees or platforms
- A DIY ‘ninja’ warrior course
- Heavy-duty tire swings or web swings
How to make it
- For a zip line, select two sturdy trees at least 12 inches in diameter; ensure the ‘landing’ tree is at a slightly lower elevation to allow for a natural gravity-fed ride.
- Install the cable using tree-saver blocks to protect the bark; tighten the cable using a turnbuckle until the ‘sag’ is minimal when a weight is applied to the center.
- Set up a ‘ninja course’ by hanging various grips (rings, knots, bars) from a slackline tensioned between two trees; the line should be high enough that feet don’t touch the ground but low enough for easy mounting.
- Construct a cargo net wall by building a 4×4 timber frame and lashing a heavy-duty nylon net to the interior using galvanized staples and rope.
- Test the tension of all ropes; they should feel ‘taut’ and responsive. A visual cue of a safe rope is the lack of any fraying or ‘whitening’ at the stress points.
- Always include a thick layer of rubber mulch or sand under any ‘high-flying’ zones to ensure every adventure ends with a soft landing.
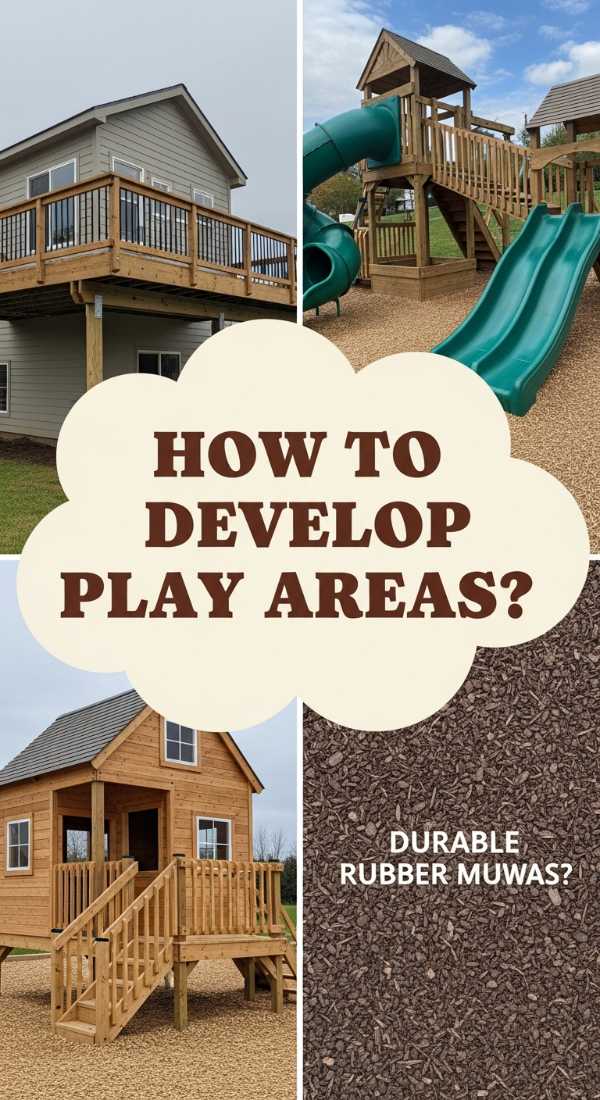
How to Develop an Outdoor Kids Play Area for Year Round Activity
[IMAGE_10]
Why we love this
The fun shouldn’t stop just because the thermometer drops! A year-round play area is an investment in consistent outdoor time, regardless of the season. We love the resilience of this design—using heated playhouses, all-weather materials, and bright, cheery colors that pop against the winter grey. The air might be crisp, but the atmosphere is warm and inviting, thanks to weather-shielded nooks and waterproof surfaces. It’s about teaching kids that there is no such thing as ‘bad weather,’ only bad clothing, and providing a space that supports that rugged, joyful outdoor lifestyle 365 days a year.
Essential Elements:
- Insulated wooden playhouses with shingle roofs
- Heated outdoor mats or small, safe porch heaters
- Synthetic grass that stays green in winter
- Weatherproof toy storage chests
- A sheltered ‘mud room’ area for boots and coats
How to make it
- Choose a playhouse with a solid shingle roof and ‘real’ windows to keep out drafts; apply a high-grade exterior sealant to every seam to ensure it’s watertight.
- Install a low-wattage, wall-mounted infrared heater inside the playhouse, ensuring it is out of reach of small hands and has an automatic tip-over shut-off.
- Swap out summer toys for winter-friendly gear like heavy-duty plastic shovels, sleds, and ‘snow-mold’ kits in the storage chests.
- Lay down heavy-duty rubber mats at the entrance of the play area to provide a non-slip surface during icy or rainy conditions.
- Ensure all wooden structures are treated with a water-repellent finish; water should ‘bead’ on the surface as a visual cue that the wood is protected from winter moisture.
- Install bright, warm-toned LED floodlights with motion sensors to make play possible during the shorter, darker days of winter, ensuring the space always feels safe and inviting.
Creating Memories That Last a Lifetime
In the end, styling a dreamy play space isn’t about having the most expensive gear or the biggest backyard. It’s about creating an intentional environment where children feel seen, safe, and inspired to explore. Whether you’re building a vertical climbing wall in a tiny urban courtyard or a sprawling natural adventure zone in the woods, the goal is the same: to foster a sense of wonder. When we put thought into the design of these spaces, we aren’t just decorating; we are building the backdrop for the most precious years of their lives. So, take a deep breath, pick a corner, and start building that dream—one shingle, one rock, or one fairy light at a time.