
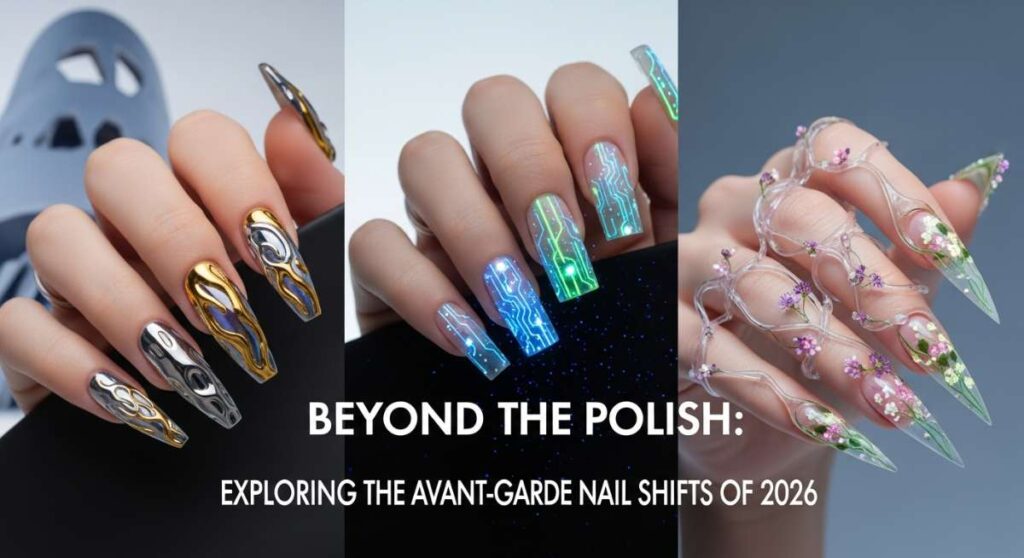
Beyond the Polish: Exploring the Avant-Garde Nail Shifts of 2026
Hi, my sweet loves! Welcome back to our little corner of the internet where we embrace all things soft, beautiful, and uniquely you. As we drift further into 2026, I’ve been feeling a shift in the air—a move toward fingertips that tell stories, that shimmer with our moods, and that act as tiny canvases for our wildest dreams. Nail art isn’t just about a color anymore; it’s about how that color makes your heart flutter when you’re typing a text or holding a warm cup of matcha.
Lately, I’ve been sitting by my window, watching the way the light catches on different textures, and it inspired me to curate this guide for you. We are moving beyond the basic polish and stepping into a world of avant-garde textures, chrome whispers, and retro revivals. Whether you’re feeling like a summer goth queen or a Mediterranean lemon-and-blue goddess, there is a tiny masterpiece waiting for your nails this season.
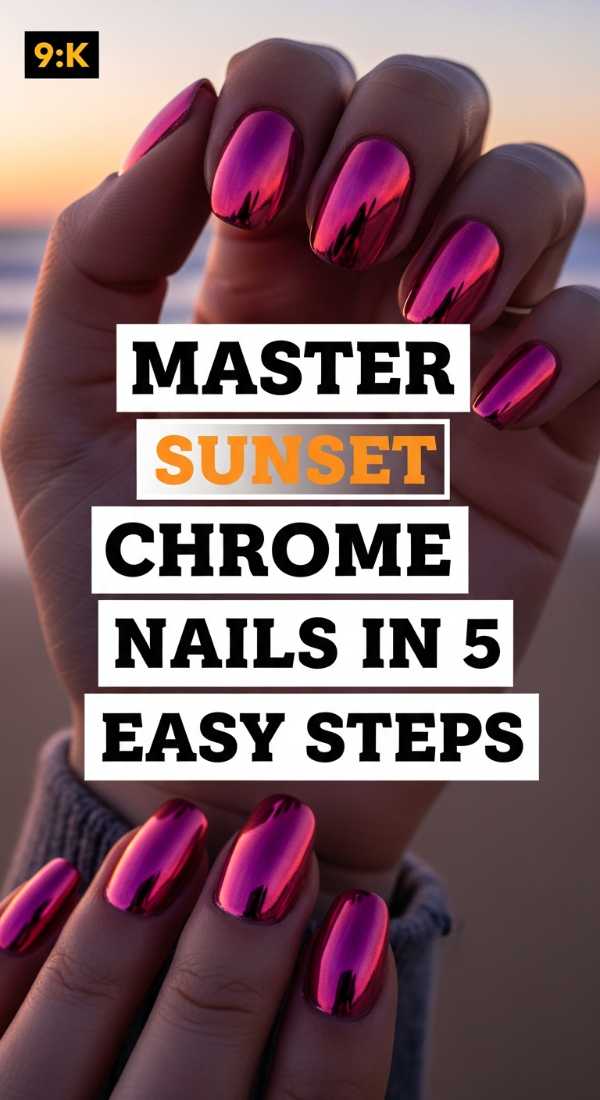
Master sunset chrome nails in 5 easy steps
Why to love this Design:
Imagine the sky just as the sun dips below the horizon, captured forever on your fingertips. This look is all about that ethereal, mirror-like glow that shifts every time you move your hands in the light. It’s warm, it’s inviting, and it feels like a permanent golden hour.
Essential Elements:
- Orange-to-pink gradient base
- Fine iridescent chrome powder
- Non-wipe glossy top coat
- Silicon applicator
How to Prepare:
- Apply a thin layer of sunset orange gel polish and cure.
- Sponge a soft magenta onto the tips for a gradient effect and cure again.
- Apply a non-wipe top coat and cure for only 30 seconds.
- Buff the chrome powder onto the warm nail surface until a mirror finish appears.
- Seal with a final high-gloss top coat and a full cure.
Budget Range
- Essie Expressie ‘Sunkissed’ ($10)
- Artdone Chrome Powder Set ($12)
- Beetles No-Wipe Top Coat ($8)
Achieve elegant graduation nails in 4 simple moves

Why to love this Design:
Graduation is such a milestone, my loves, and your nails should reflect that soft transition from one chapter to the next. This look is sophisticated, understated, and timeless, using milky whites and delicate gold leafing to celebrate your growth and your future.
Essential Elements:
- Milky white or ‘Oats’ polish
- Real gold leaf flakes
- Pointed tweezers
- Matte or satin top coat
How to Prepare:
- Paint two coats of a sheer, milky white polish for a cloud-like base.
- While the second coat is tacky, use tweezers to place tiny flecks of gold leaf near the cuticle.
- Gently press the gold leaf down with a clean fingertip to ensure it’s flat.
- Finish with a satin top coat to give it a modern, sophisticated texture.
Budget Range
- OPI ‘Funny Bunny’ ($11)
- Generic Gold Leaf Foil Flakes ($6)
- Zoya Satin Seal Top Coat ($12)
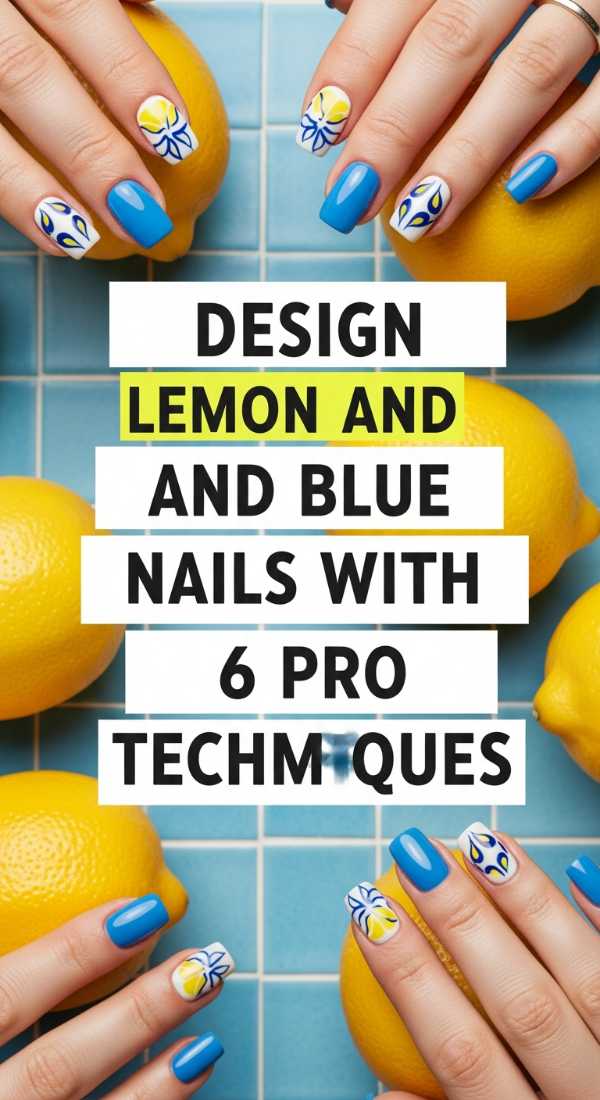
Design lemon and blue nails with 6 pro techniques
Why to love this Design:
This is pure Amalfi Coast energy in a bottle. The contrast between the zesty, bright yellow and the deep, Mediterranean blue is enough to make anyone want to book a flight to Italy. It’s fresh, it’s vibrant, and it brings a smile to your face every time you look down.
Essential Elements:
- Cobalt blue cream polish
- Pastel lemon yellow polish
- Ultra-fine liner brush
- Matte white base (for vibrancy)
How to Prepare:
- Apply a white base coat to make the lemon yellow pop.
- Paint alternating nails in solid cobalt blue and solid lemon.
- On the yellow nails, use a liner brush to draw tiny blue ’tiles’ or geometric shapes.
- On the blue nails, add a single tiny lemon slice detail using a dotting tool.
- Refine the edges with a clean-up brush dipped in acetone.
- Seal with a high-shine top coat to mimic ceramic tiles.
Budget Range
- Holler and Glow ‘Lemon Squeeze’ ($8)
- Sally Hansen ‘Pacific Blue’ ($9)
- Winstonia Fine Liner Brushes ($10)
Style edgy summer goth nails in 3 quick stages

Why to love this Design:
Who says dark colors are only for the winter? Summer goth is all about light textures—think sheer blacks, lace details, and a hint of silver. It’s for my loves who have a little mystery in their soul even when the sun is shining at its brightest.
Essential Elements:
- Sheer black ‘tint’ polish
- Opaque black stamping polish
- Silver micro-studs
How to Prepare:
- Apply two coats of the sheer black tint to create a ‘smoke’ effect.
- Use a stamping plate or hand-paint delicate spiderwebs or lace patterns in opaque black.
- Place one silver micro-stud at the base of each nail for an industrial-chic finish.
Budget Range
- Cirque Colors ‘Spotted’ or ‘Slate’ ($12)
- Maniology Stamping Plate ($8)
- Nail Art Studs Variety Pack ($7)
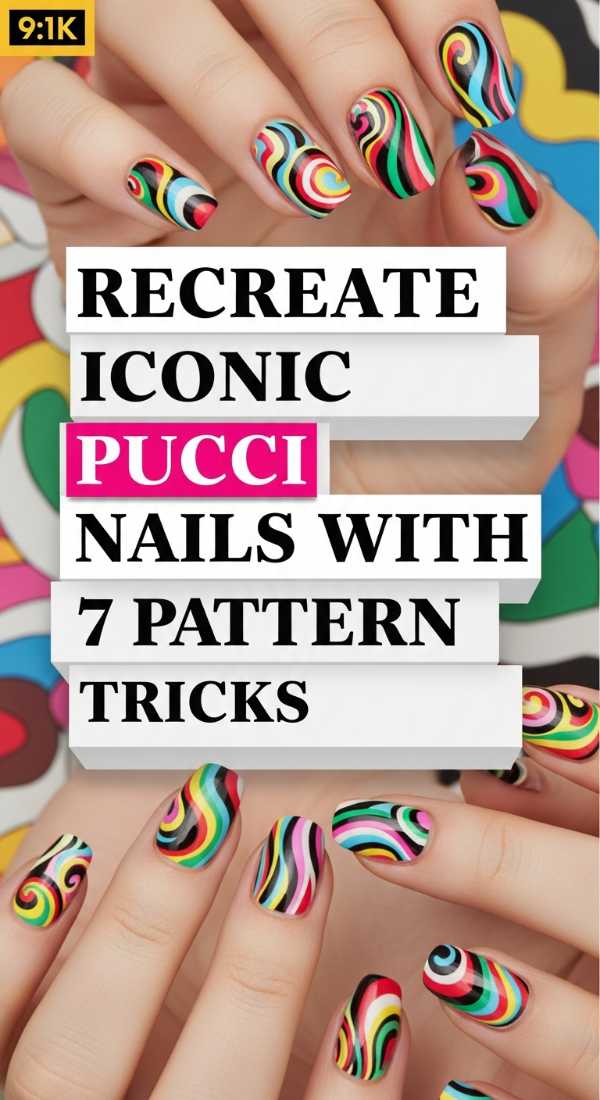
Recreate iconic pucci nails with 7 pattern tricks
Why to love this Design:
We are going full 70s glam with this one! The Pucci-inspired swirls are so fun and expressive. They represent the fluid nature of our lives—constantly moving, swirling, and blending into something beautiful and psychedelic.
Essential Elements:
- At least four contrasting pastel colors
- Long-hair striper brush
- Steady hand or a hand-rest
How to Prepare:
- Start with a neutral nude base to let the colors shine.
- Drop small beads of your four colors onto a palette.
- Using the striper brush, draw a large ‘S’ curve across the nail.
- Fill in the sections with alternating colors, following the curve.
- Add thin white lines between the colors to define the ‘Pucci’ look.
- Use a dotting tool to add small accents inside the larger swirls.
- Cure between layers if using gel to prevent the colors from bleeding.
Budget Range
- Modelones Pastel Gel Set ($15)
- Saviland Long Striper Brushes ($9)
- Orly ‘Bonder’ Base Coat ($10)
Paint neon cheetah print nails in 5 fun minutes

Why to love this Design:
This is high-octane energy! It’s for the nights when you’re dancing under neon lights and feeling absolutely unstoppable. Cheetah print is a classic, but in neon? It’s a 2026 revolution that feels both nostalgic and futuristic.
Essential Elements:
- Neon pink or lime green base
- Dark brown or black polish
- Medium-sized dotting tool
How to Prepare:
- Apply two coats of your chosen neon base and let dry completely.
- Use a dotting tool to create irregular ‘blobs’ of a slightly darker neon shade.
- Take your black polish and create two or three ‘C’ shapes around each blob.
- Add random tiny black dots in the empty spaces to fill the ‘fur’ pattern.
- Top with a quick-dry top coat to keep that neon glow bright.
Budget Range
- China Glaze ‘Electric Nights’ Neon ($8)
- Dotting Tool Set ($5)
- Seche Vite Fast Dry Top Coat ($9)
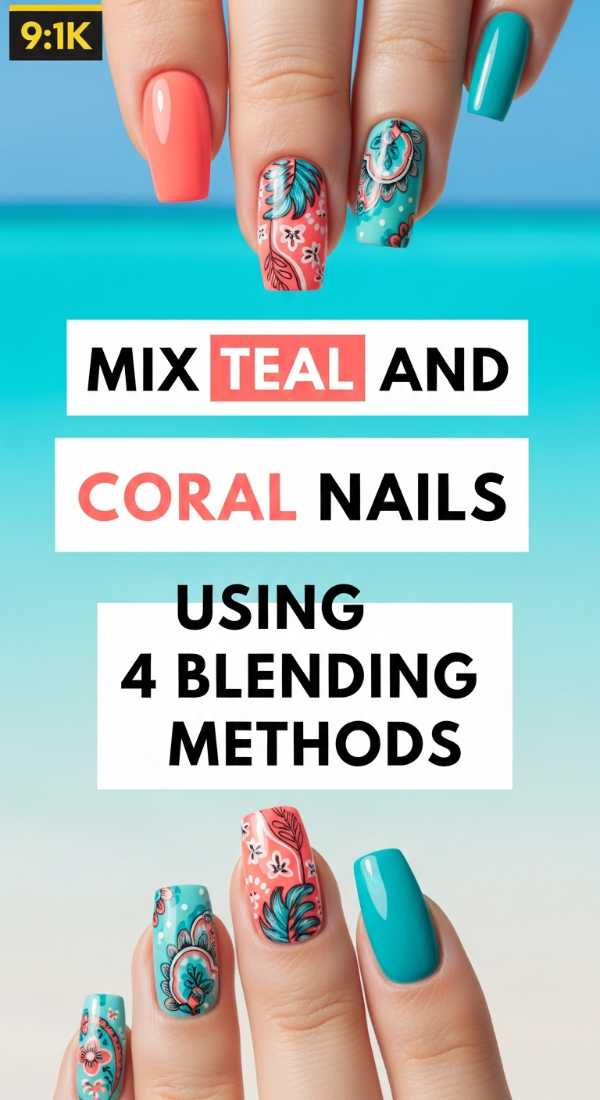
Mix teal and coral nails using 4 blending methods
Why to love this Design:
This color combination is like a tropical reef meeting a sunset. Teal and coral are complementary soulmates that bring out the best in each other. It’s a refreshing, juicy look that feels like a cold drink on a hot July afternoon.
Essential Elements:
- Deep teal cream polish
- Bright coral cream polish
- Makeup sponge for ombre
How to Prepare:
- Paint the left half of the nail teal and the right half coral while both are wet.
- Use a clean makeup sponge to gently tap the center line where they meet.
- Repeat the process for a second layer to deepen the saturation.
- Clean the cuticles with a brush and seal with a glossy top coat.
Budget Range
- Lights Lacquer ‘Paper Snow’ Base ($13)
- Essie ‘Turquoise & Caicos’ ($9)
- Revel Nail ‘Coral’ ($10)
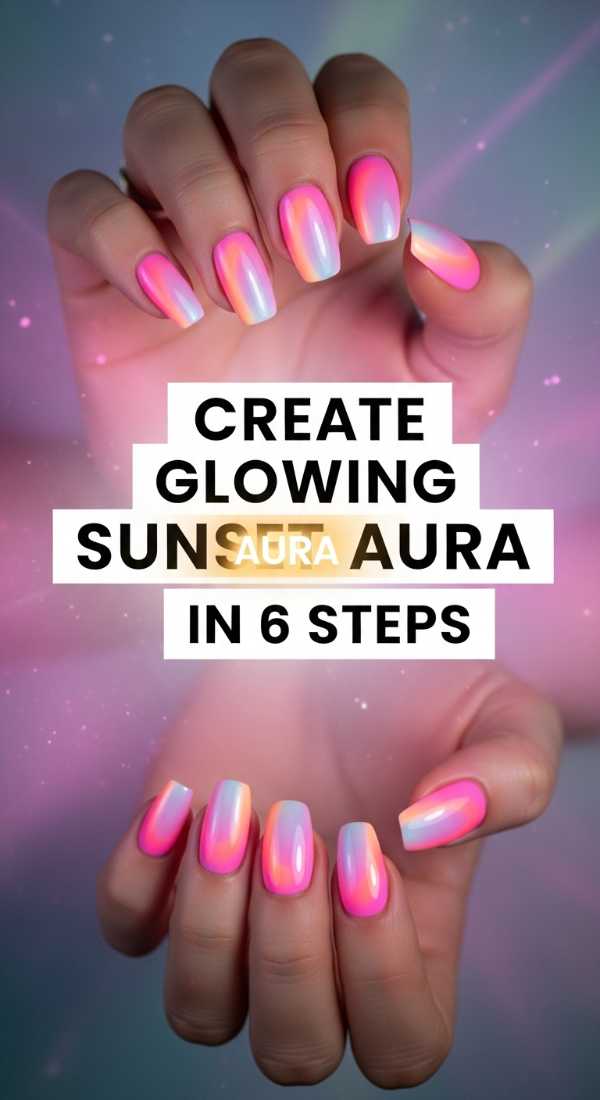
Create glowing sunset aura nails in 6 steps
Why to love this Design:
Aura nails are all about your energy, my loves. This sunset version uses soft gradients to create a ‘glow’ from the center of the nail outward. It’s meditative, soothing, and incredibly trendy for 2026’s spiritual aesthetic.
Essential Elements:
- Nude base polish
- Eyeshadow applicator or sponge
- Vibrant orange and soft purple shades
How to Prepare:
- Apply your nude base and cure or let dry.
- Using an eyeshadow applicator, dab a small circle of orange in the center of the nail.
- Lightly blend the edges of the orange circle outward so it fades.
- Dab an even smaller circle of soft purple in the very center of the orange.
- Softly blend the purple into the orange.
- Cover with a shimmer top coat to give it that ‘aura’ radiance.
Budget Range
- ILNP ‘Amber’ Holographic ($12)
- Disposable Eyeshadow Applicators ($4)
- Olive & June Nude Polish ($9)
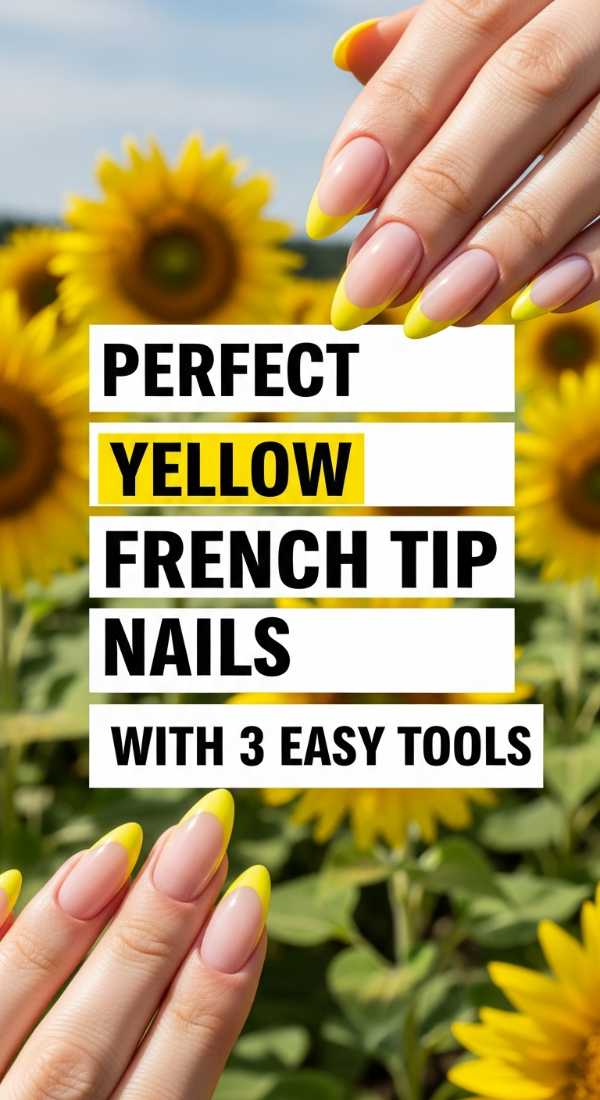
Perfect yellow French tip nails with 3 easy tools
Why to love this Design:
A French tip is a girl’s best friend, but let’s make it sunny! Switching the traditional white for a bright yellow makes the look modern and cheerful. It’s a clean-girl aesthetic with a little bit of a rebellious, colorful twist.
Essential Elements:
- French tip guides (stickers)
- Sunflower yellow polish
- Fine cleanup brush
How to Prepare:
- Place the French tip guide sticker just below the free edge of your nail.
- Paint the exposed tip with two coats of sunflower yellow.
- Peel the sticker off while the polish is still slightly damp for the crispest line possible.
Budget Range
- French Manicure Tip Guides ($5)
- Deborah Lippmann ‘Yellow Submarine’ ($20)
- Clean-up Brush ($6)
Rock 5 western teal nails for your next concert

Why to love this Design:
With the resurgence of cosmic cowboy vibes, these western teal nails are essential for concert season. Think turquoise jewelry, silver accents, and a bit of rugged charm. It’s a look that says you’re ready for the front row and the after-party.
Essential Elements:
- Turquoise or teal ‘stone’ effect polish
- Silver metallic paint
- Tiny turquoise rhinestones
How to Prepare:
- Apply a base of turquoise polish.
- Use a dry brush technique with black polish to create ‘marble’ veins like real stone.
- Paint a thin silver frame around the edge of two accent nails.
- Apply a tiny turquoise rhinestone at the base of the thumb.
- Finish with a matte top coat to give it a realistic stone texture.
Budget Range
- Cirque Colors ‘Turquoise’ ($12)
- Silver Nail Art Pen ($7)
- Swarovski Small Turquoise Crystals ($10)
Embrace Your Inner Artist
I hope these designs spark a little flame of creativity in your soul, my loves. 2026 is our year to be bold, to be soft, and to let our hands tell the world exactly who we are. Remember, there are no rules in art—only feelings. Whether you choose the glowing aura or the edgy summer goth, wear it with your head held high and a heart full of light. I can’t wait to see what you create!