
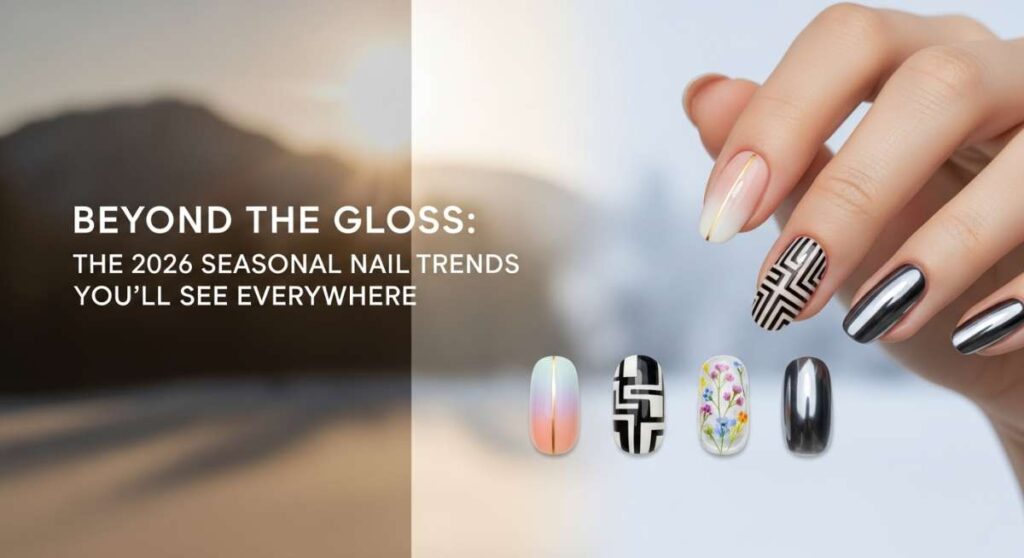
Beyond the Gloss: The 2026 Seasonal Nail Trends You’ll See Everywhere
Hello, my loves. I am sitting here in my favorite sun-drenched corner, wrapped in a blanket that feels like a cloud, thinking about how our hands tell so many stories. They hold our morning tea, they wave hello to strangers, and they carry the weight of our little daily victories. As we move into 2026, I’ve been feeling a shift—a gentle pull toward nails that aren’t just pretty, but are a soft reflection of who we are in this very moment.
Today, I want to take you on a journey through the colors and textures that are going to define our year. It’s not just about the polish; it’s about the ritual of taking care of ourselves, that quiet twenty minutes where nothing else matters but the stroke of a brush and the sparkle of a new shade. Let’s dive into these seasonal guides together, like we’re sharing secrets over a warm latte.
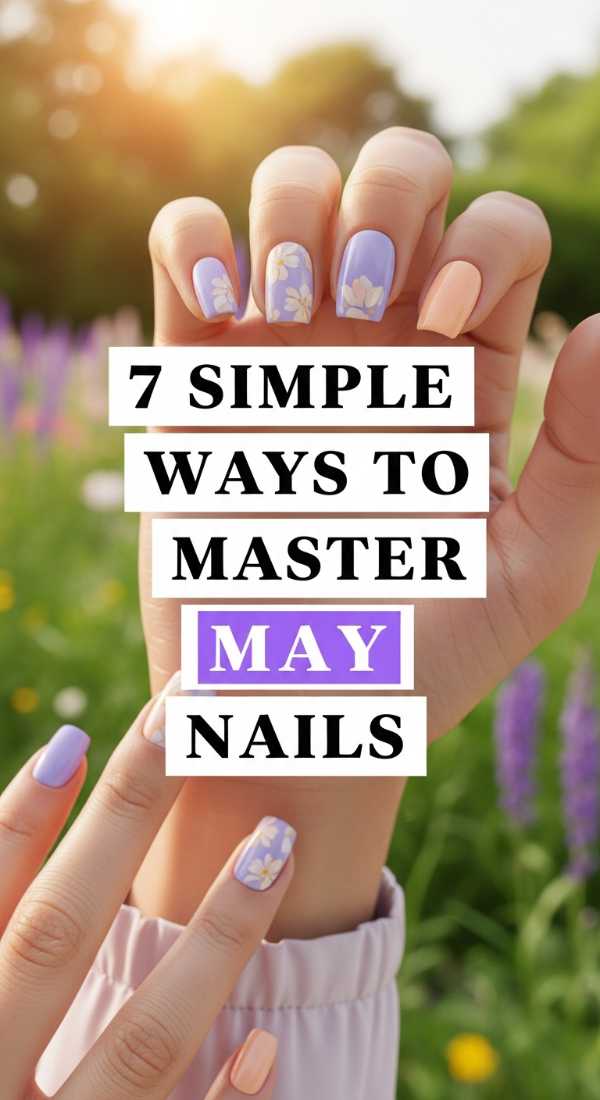
7 simple ways to master May nails
Why to love this Design:
May is all about the ‘in-between’—that magical threshold where spring is fully awake but summer is still whispering from around the corner. These nails capture the softness of morning dew and the first heat of the sun, making you feel grounded yet airy.
Essential Elements:
- Sheer milky white base
- Pressed dried flowers
- Ultra-fine gold leaf flakes
- Soft sage green accents
How to Prepare:
- Cleanse your nail beds with a gentle, non-stripping remover.
- Apply a nourishing base coat to protect your natural strength.
- Layer two thin coats of a milky, translucent polish.
- Use tweezers to carefully place tiny pressed flowers while the polish is tacky.
- Dab on gold leaf at the edges for a touch of whimsy.
- Seal with a high-shine top coat to preserve the botanical beauty.
- Massage a lavender cuticle oil into your fingers for that spa-like finish.
Budget Range
- Essie Marshmallow Polish ($10)
- Nail Art Dried Flower Set ($8)
- Sally Hansen Top Coat ($7)
5 quick steps for perfect graduation nails

Why to love this Design:
This is your milestone moment, darling. You’ve worked so hard, and your nails should reflect that quiet confidence and the bright future ahead. It’s a design that looks stunning holding a diploma and even better in those celebratory photos with your best friends.
Essential Elements:
- Classic French tips with a twist
- Holographic ‘2026’ decals
- Pearl accents
- Soft almond shape
How to Prepare:
- Shape your nails into a soft almond to elongate the fingers.
- Apply a nude-pink base that matches your skin tone perfectly.
- Paint a thin, crisp white line at the tip—or use a stamp for ease!
- Place a single tiny pearl at the base of your ring finger for elegance.
- Finish with a quick-dry top coat so you’re ready for the ceremony in minutes.
Budget Range
- Olive & June Press-on Kit ($12)
- Beetles Gel Liner Polish ($9)
- Flat-back Nail Pearls ($5)
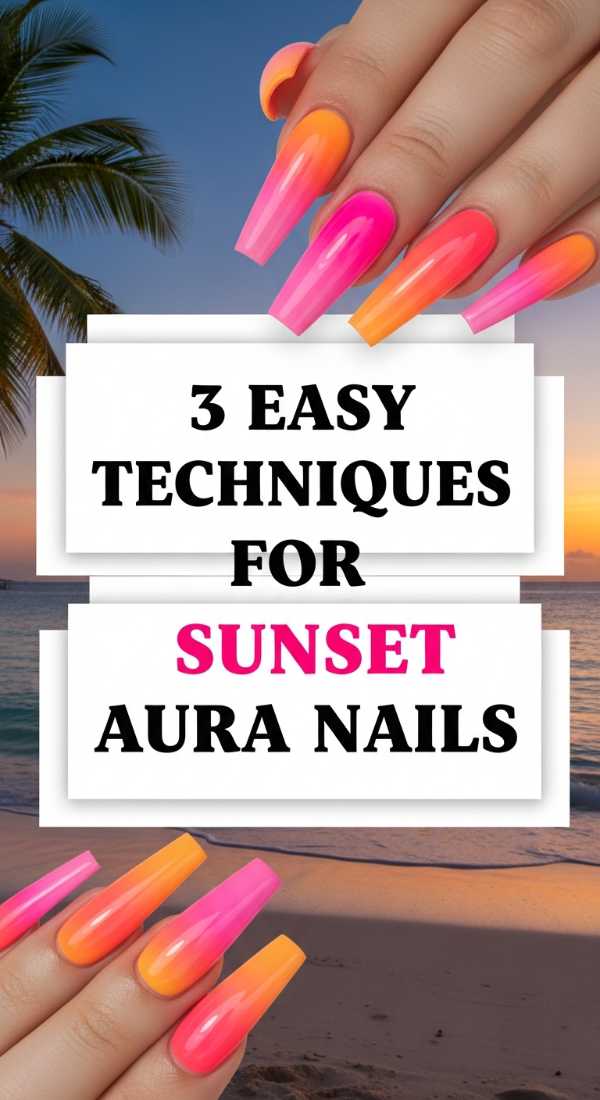
3 easy techniques for sunset aura nails
Why to love this Design:
Aura nails are like wearing your energy on your fingertips. This sunset variation feels like a warm hug at the end of a long day, blending oranges and pinks into a soft glow that looks different every time the light hits it.
Essential Elements:
- Makeup sponge for blending
- Vibrant coral and tangerine polishes
- Clear jelly top coat
How to Prepare:
- Apply a base of light peach and let it dry completely.
- Dab a small amount of coral polish onto a makeup sponge and press it into the center of the nail.
- Repeat with a darker tangerine in the very center, blending outward to create that ‘glow’ effect.
Budget Range
- Beauty Blender Sponges ($5)
- OPI ‘Data Peach’ ($11)
- Zoya ‘Cora’ ($12)
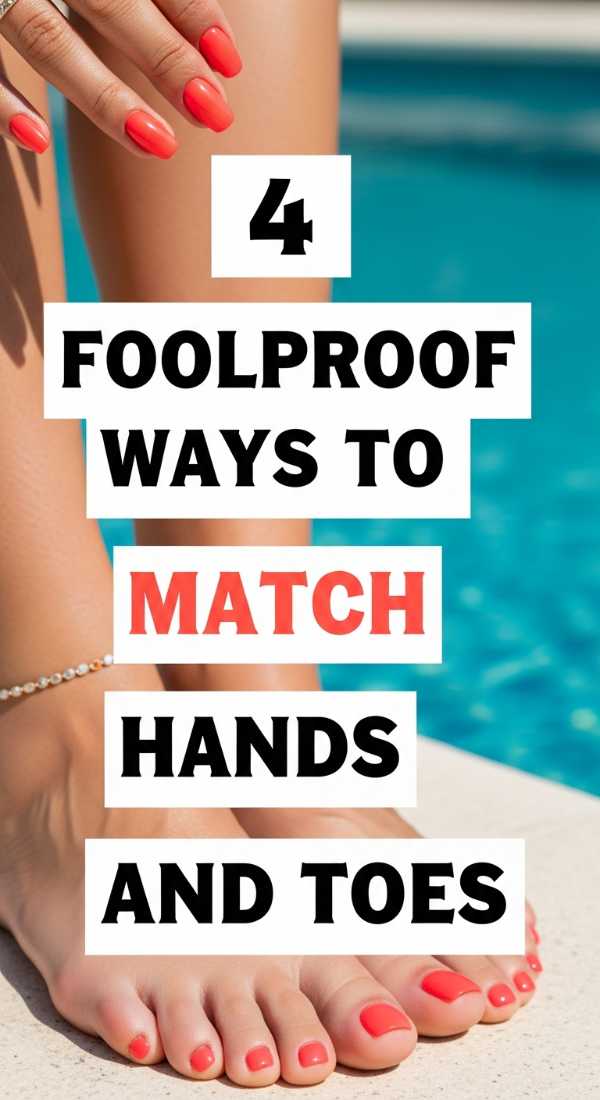
4 foolproof ways to match hands and toes
Why to love this Design:
There is something so satisfying about a coordinated look. It’s the ultimate way to feel ‘put together’ even if you’re just wearing a simple linen dress and sandals. It’s about harmony, not necessarily being identical.
Essential Elements:
- Complementary color palettes (not just matchy-matchy)
- High-gloss finish
- Uniform nail shape
How to Prepare:
- Pick a ‘hero’ color for your fingers (like a soft lavender).
- Choose a shade one or two tones darker for your toes (like a deep plum).
- Use the same top coat on both to ensure the shine matches perfectly.
- Add a tiny sparkle to the big toe and the ring finger for a hidden connection.
Budget Range
- Holler and Glow Duo ($14)
- Revlon Enamel Polish ($6)
- Glass Nail File ($10)
6 steps to recreate lemon nails designs

Why to love this Design:
When life gives you lemons, put them on your nails! This is pure, unadulterated summer joy. It’s zesty, it’s fresh, and it makes every outfit feel a little bit more like a vacation in the Amalfi Coast.
Essential Elements:
- Bright lemon yellow polish
- Fine-line brush for leaves
- White detailing polish
- Matte or glossy finish
How to Prepare:
- Start with a clean, buffed nail surface.
- Apply a sheer nude or a crisp white base coat.
- Use a dotting tool to create two yellow circles next to each other for the lemon body.
- Add a tiny green leaf using a thin striping brush.
- Dot a tiny bit of white in the center of the yellow for a ‘highlight.’
- Finish with a matte top coat for a trendy ‘porcelain’ look.
Budget Range
- Modelones Nail Art Brushes ($7)
- China Glaze ‘Lemonade’ ($8)
- Orly Matte Top ($12)
4 simple methods for sunset chrome nails
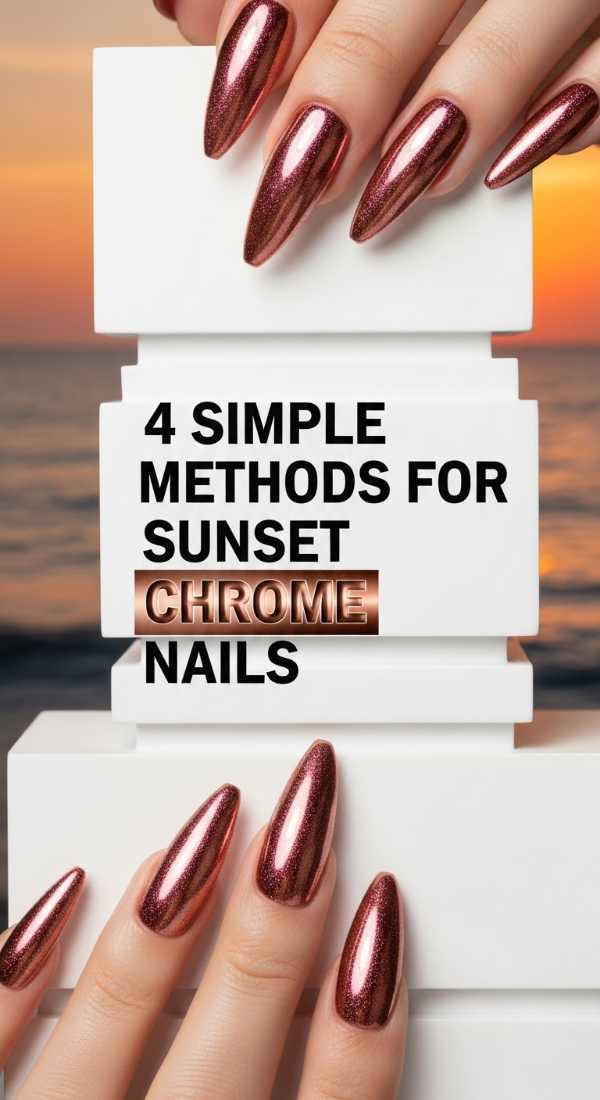
Why to love this Design:
Chrome is the trend that refuses to leave, and for good reason—it’s mesmerizing. The sunset version combines that metallic futuristic edge with the timeless beauty of the golden hour.
Essential Elements:
- Chrome powder (pink/gold shift)
- No-wipe gel top coat
- UV/LED lamp
How to Prepare:
- Apply a base color (warm pink works best) and cure.
- Apply a no-wipe top coat and cure for 30 seconds (it should be slightly tacky).
- Rub the chrome powder in using a silicone tool until it shines like a mirror.
- Seal with another layer of top coat and a full 60-second cure.
Budget Range
- Artdone Chrome Powder ($9)
- SUNUV LED Lamp ($25)
- Gelish Top It Off ($14)
5 steps to blend teal and coral nails

Why to love this Design:
This is the ultimate tropical escape. Teal and coral are complementary opposites on the color wheel, which means they make each other pop in the most beautiful, vibrant way possible. It’s daring and delightful.
Essential Elements:
- Deep teal creme polish
- Punchy coral cream polish
- Gold striping tape
How to Prepare:
- Paint half the nail teal and the other half coral.
- While wet, use a toothpick to swirl them together at the seam for a marble look.
- Alternatively, wait for them to dry and place a gold striping tape down the middle for a geometric vibe.
- Apply a thick ‘plumping’ top coat to even out the layers.
- Keep the shape square for a modern, edgy feel.
Budget Range
- Lights Lacquer ‘Teal’ ($13)
- Ella + Mila ‘Coral’ ($11)
- Nail Striping Tape Set ($6)
3 bold ways to style summer goth nails

Why to love this Design:
Who says dark colors are only for winter? Summer goth is for the souls who love the mystery. It’s about using sheer blacks, deep berries, and sharp shapes to contrast against the bright summer sun.
Essential Elements:
- Sheer ‘black veil’ polish
- Star and moon decals
- Stiletto shape
How to Prepare:
- Apply one coat of sheer black to create a ‘smoke’ effect.
- Use a stencil to create a tiny black heart on the middle finger.
- Add a single silver star decal to catch the moonlight during those late-night beach bonfires.
Budget Range
- Cirque Colors ‘Spotted’ ($14)
- Mooncat ‘Dark Horse’ ($15)
- Silver Star Stickers ($4)
6 easy steps to paint neon cheetah nails
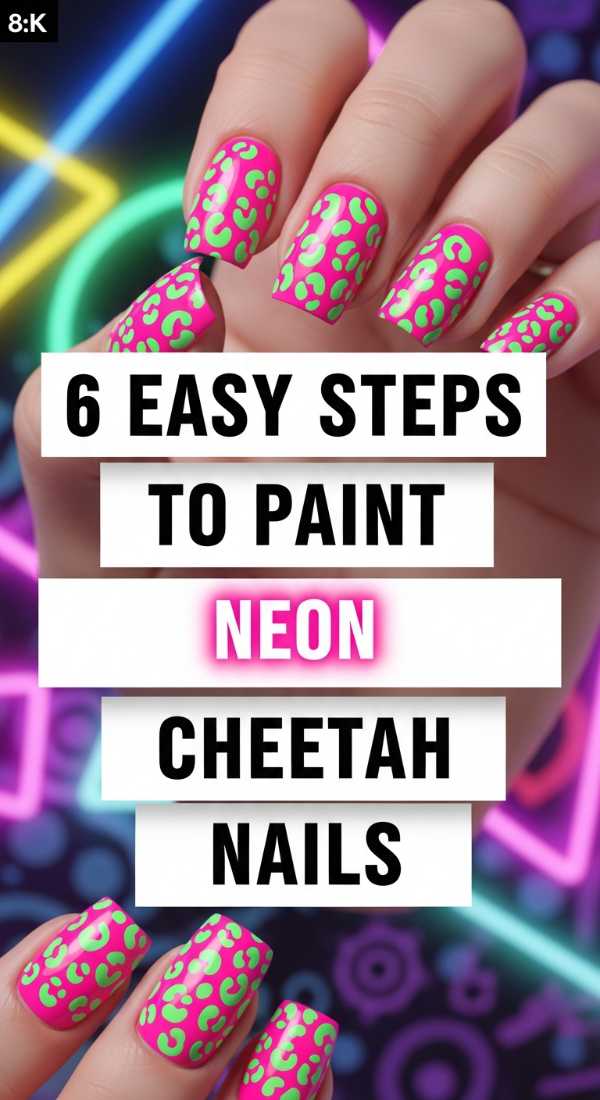
Why to love this Design:
Sometimes you just need to unleash your wild side. Neon cheetah is high-energy, nostalgic, and absolutely impossible to ignore. It’s the perfect look for a summer festival or a dance floor.
Essential Elements:
- Neon pink and lime green polishes
- Black detailing polish
- Dotting tool
How to Prepare:
- Apply your neon base color (go bright or go home!).
- Use a dotting tool to make irregular ‘blobs’ of a different neon color.
- Take your black polish and draw two or three ‘C’ shapes around each blob.
- Don’t worry about being perfect; cheetah print looks better when it’s messy!
- Add a few random black dots in the empty spaces.
- Top with a super-glossy coat for a 90s retro feel.
Budget Range
- KBShimmer Neons ($12)
- Dotting Tool Set ($5)
- Sinful Colors Black ($3)
5 quick ways to design pucci nails
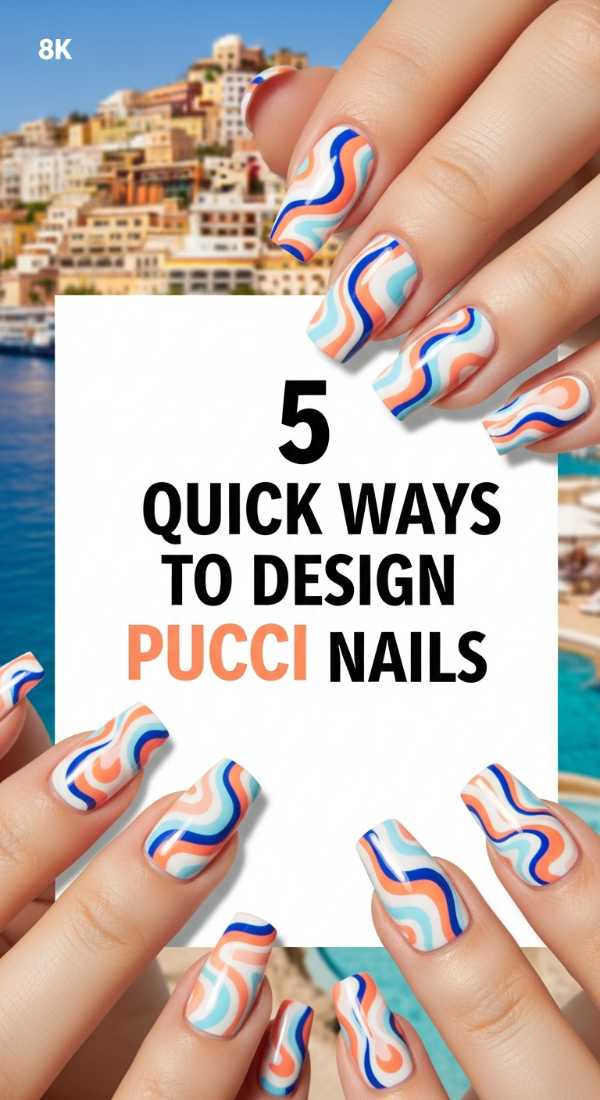
Why to love this Design:
Inspired by the iconic fashion house, Pucci nails are all about those groovy 70s swirls. They are sophisticated, artistic, and make your hands look like a piece of wearable vintage art.
Essential Elements:
- Pastel color palette (mint, lilac, lemon)
- Long striping brush
- Patience and a steady hand
How to Prepare:
- Paint your base in a neutral cream shade.
- Using a long brush, draw long, flowing ‘S’ curves across the nail.
- Fill in the sections created by the lines with different pastel colors.
- Outline the shapes in a thin white or black line to make them ‘pop.’
- Finish with a high-shine top coat to mimic a silk scarf texture.
Budget Range
- Gelish Art Form Paints ($15)
- DND Pastel Set ($20)
- Long Liner Brush ($8)
Embracing Your Seasonal Glow
As we wrap up our little journey through the trends of 2026, I hope you feel inspired to pick up a bottle of polish and play. Remember, my loves, beauty isn’t about perfection—it’s about the joy of expression. Whether you choose the soft whispers of May florals or the bold roar of neon cheetah, let your nails be a reflection of the wonderful light you carry inside. I can’t wait to see which look you choose first. Until next time, stay soft, stay bright, and keep shining.