
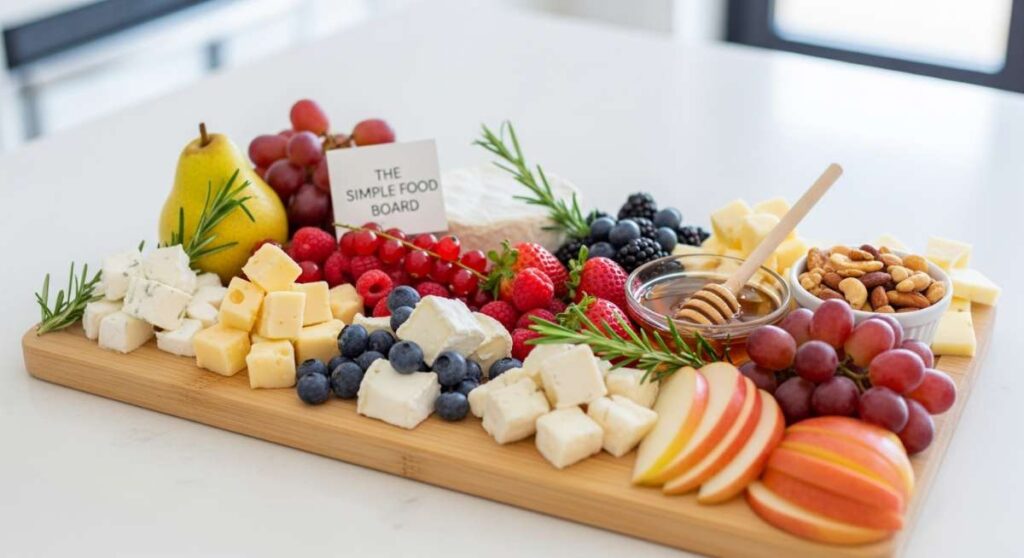
I remember the first time I hosted a summer gathering and felt the overwhelming pressure to source three different types of expensive aged gouda and artisanal honeycomb. My kitchen felt like a battlefield of marble slabs and tiny knives, and honestly? I missed half the conversation because I was too busy fanning out cured meats. Then it hit me: the real magic of a shared meal isn’t in the price of the brie, but in the accessibility of the flavors we actually crave. The ‘Simple Food Board’ is the viral evolution of the charcuterie trend that we all needed, focusing on high-impact, low-stress comfort foods that invite everyone to dig in without hesitation.
We are moving beyond the stiff, formal platters of the past and into an era of ‘assemble-yourself’ joy. Whether it’s a pile of warm dip surrounded by chips or a deconstructed pie that looks like a work of art, these boards are about the stories told over the food, not just the food itself. Today, I’m sharing the ultimate guide to the most viral additions to your next spread—from nostalgic desserts to the perfect beach day prep—so you can spend less time styling and more time savoring the season with the people you love.
How to make Shoneys strawberry pie

Why we love this
There is a profound, sugary nostalgia that comes with a slice of classic strawberry pie, reminiscent of neon-lit diners and sticky summer afternoons. This dish captures the essence of peak-season berries, suspended in a translucent, ruby-red glaze that shimmers under the kitchen lights. Each bite offers a satisfying contrast between the flaky, buttery crunch of the crust and the soft, cool burst of sweet fruit, finished with a cloud of whipped cream that melts instantly on the tongue. It’s a sensory journey through childhood summers, promising a refreshing sweetness that cuts through the heat of any afternoon.
Ingredients
- 1 pre-baked 9-inch pie crust
- 1 quart fresh strawberries, hulled and cleaned
- 1 cup granulated sugar
- 3 tablespoons cornstarch
- 1 cup water
- 3 tablespoons strawberry-flavored gelatin (like Jell-O)
- Whipped cream for topping
How to make it
- Begin by preparing your fresh strawberries; ensure they are completely dry after washing to prevent the glaze from becoming watery. Arrange the whole berries, tip-up, inside your cooled, pre-baked pie crust until the shell is densely packed.
- In a medium saucepan over medium heat, whisk together the sugar and cornstarch until no lumps remain, then slowly pour in the water. Continue to cook, whisking constantly, until the mixture reaches a rolling boil and transforms from cloudy to a clear, thick consistency, usually taking about 3-5 minutes.
- Once the mixture is clear and bubbling, remove it from the heat immediately and stir in the strawberry gelatin powder until it is fully dissolved and the glaze is a vibrant, translucent red.
- Carefully pour the warm glaze over the strawberries in the pie shell, starting from the center and working your way out to ensure every berry is encapsulated in the sweet syrup.
- Refrigerate the pie for at least 3 to 4 hours, or until the glaze is completely firm and set. Slice and serve with a generous dollop of whipped cream for the full retro experience.
How to make cheesy rotel dip
Why we love this
This dip is the undisputed king of the ‘simple board,’ offering a rich, velvety texture that coats every chip in a blanket of warm, savory bliss. The aroma of melted cheese mingled with the zesty kick of green chilies and vine-ripened tomatoes is enough to draw anyone into the kitchen from three rooms away. It’s a communal experience, thick and gooey, with a subtle heat that builds slowly and keeps you coming back for ‘just one more’ scoop. There is something deeply comforting about the smooth, orange glow of a perfectly melted cheese dip that promises a relaxed, fun atmosphere for any gathering.
Ingredients
- 16 oz processed cheese (Velveeta), cubed
- 1 can (10 oz) Ro-Tel Diced Tomatoes and Green Chilies
- 1/2 lb ground breakfast sausage or beef (optional)
- 1/4 teaspoon garlic powder
- Fresh cilantro for garnish
- Tortilla chips for serving
How to make it
- If you are using meat, start by browning the ground sausage or beef in a skillet over medium-high heat until it is fully cooked and crumbled, then drain the excess fat thoroughly to ensure a non-greasy dip.
- In a slow cooker or a heavy-bottomed saucepan over low heat, combine the cubed cheese and the entire can of Ro-Tel, including the juices which provide essential flavor and moisture.
- Stir the mixture frequently as it melts to prevent the cheese from scorching on the bottom; the goal is a perfectly smooth, homogenous texture without any lumps.
- Once the cheese is fully melted, stir in your browned meat and garlic powder, allowing the flavors to meld for about 10 minutes on the lowest heat setting.
- Transfer the dip to a serving bowl or keep it in the slow cooker on the ‘warm’ setting, garnishing with fresh cilantro before surrounding it with a mountain of salty, crunchy tortilla chips.
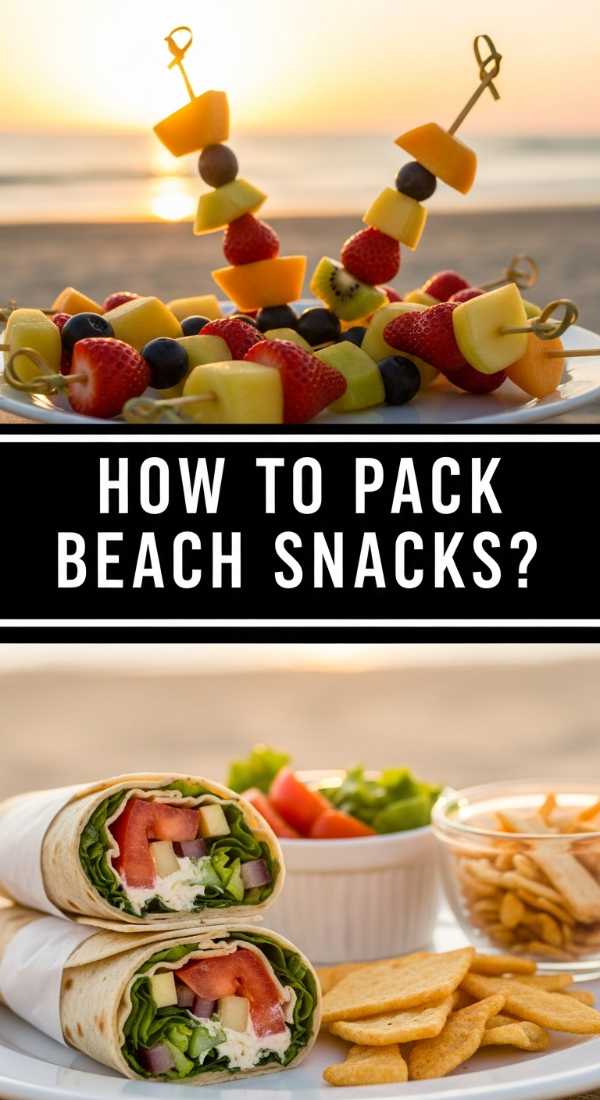
How to pack beach snacks
Why we love this
Packing for the beach is an art form that balances the need for hydration with the craving for something crisp, cool, and sand-free. Imagine opening your cooler to find perfectly chilled grapes that snap when you bite them, alongside pre-portioned containers that keep your food safe from the elements. There is a specific joy in enjoying a mess-free snack while the salt air hits your face, knowing that your prep work has turned a frantic outing into a seamless picnic. It’s about the convenience of handheld treats that provide a burst of energy for swimming while keeping your fingers clean and your spirits high.
Ingredients
- Frozen grapes or melon balls
- Individual hummus cups
- Pre-cut celery and carrot sticks
- Heavy-duty resealable bags
- Insulated cooler with ice packs
- Dry snacks like pretzels or rice cakes
How to make it
- The night before your trip, freeze a bag of grapes or melon pieces; these act as edible ice packs that keep your cooler cold and provide a refreshing, hydrating treat as they slowly thaw.
- Portion out wet snacks like hummus, salsa, or dip into individual small containers with tight-sealing lids to prevent cross-contamination and make them easy to grab without communal dipping.
- Wash and cut your crunchy vegetables into sticks, then store them in a reusable silicone bag with a damp paper towel to maintain their crispness and prevent wilting in the heat.
- Place heavier items and ice packs at the bottom of your insulated cooler, layering your delicate snacks on top, and ensure that dry items like pretzels are kept in a separate, waterproof compartment or bag.
- Always pack a set of wet wipes or a small bottle of fresh water specifically for rinsing sandy hands before you reach for your snacks, ensuring a grit-free dining experience.
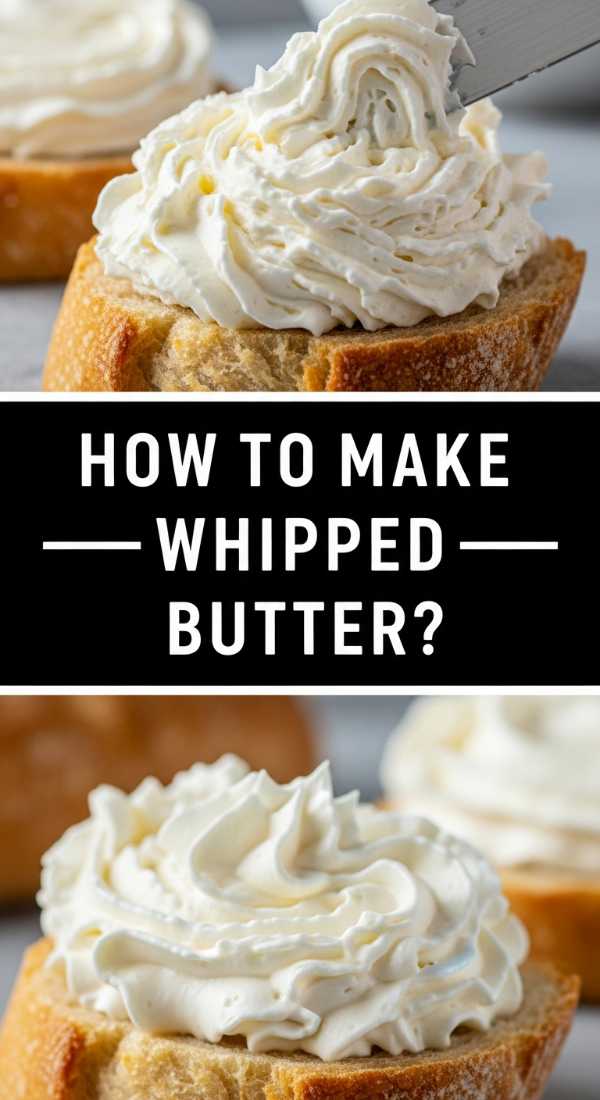
How to make whipped butter

Why we love this
Whipped butter is the ultimate luxury that transforms a humble piece of bread into a gourmet experience, boasting a texture that is as light and airy as a summer cloud. When you whip butter, you incorporate air that makes it spreadable and delicate, allowing it to melt almost instantly into the warm crevices of a crusty baguette. The addition of flaky sea salt creates a sensory explosion, where the richness of the cream is punctuated by sharp, savory crystals that dance on the palate. It is the centerpiece of the modern butter board, looking elegant and inviting with its soft, peaked swirls and golden hue.
Ingredients
- 1 cup (2 sticks) high-quality unsalted butter, softened to room temperature
- 1 tablespoon heavy cream (optional for extra fluffiness)
- 1/2 teaspoon flaky sea salt
- Optional: Fresh herbs or honey for flavoring
How to make it
- Ensure your butter is perfectly softened—it should give easily when pressed with a finger but not be melted or oily—which is the most critical step for achieving the correct volume.
- Place the softened butter in the bowl of a stand mixer fitted with the whisk attachment, or use a hand mixer in a deep bowl to prevent splashing.
- Begin whipping on low speed to break up the butter, then gradually increase to high speed, beating for about 5-7 minutes until the butter doubles in volume and turns a pale, creamy white.
- If you want an even lighter texture, add the tablespoon of heavy cream halfway through the whipping process to help emulsify and aerate the mixture further.
- Slowly fold in your flaky sea salt or other mix-ins by hand, then spoon the butter into a serving crock or spread it artistically across a wooden board, finishing with an extra sprinkle of salt for visual appeal.
How to prep camping meals
Why we love this
There is nothing quite like the smoky aroma of a meal cooking over an open fire, but the secret to enjoying it lies in the stress-free preparation done in the comfort of your own kitchen. Prepping camping meals is about reclaiming your time in nature, allowing you to swap a cutting board for a hiking trail while still enjoying a hearty, home-cooked feast. The textures are rustic and bold—tender marinated meats and charred vegetables that carry the charred essence of the woods. It turns outdoor cooking into a seamless ritual, where every ingredient is ready to hit the flame the moment the sun begins to set.
Ingredients
- Heavy-duty aluminum foil
- Pre-marinated proteins (chicken, steak, or tofu)
- Pre-chopped sturdy vegetables (potatoes, bell peppers, onions)
- Olive oil and seasoning blends
- Double-bagged resealable storage bags
How to make it
- Three days before your trip, chop all of your sturdier vegetables like potatoes and carrots into uniform sizes so they cook evenly; store them in airtight containers or bags to save space in your cooler.
- Marinate your proteins in leak-proof, double-bagged resealable bags, which allows the flavors to penetrate deeply during transport and eliminates the need for messy seasoning at the campsite.
- Create ‘foil packs’ by placing a portion of meat and vegetables onto a large square of heavy-duty foil, drizzling with oil and spices, and sealing the edges tightly to create a steam-trapping pouch.
- Label every container and bag with the contents and the date, organizing your cooler so the meals you plan to eat last are buried at the very bottom near the coldest ice.
- Pack a dedicated ‘spice kit’ in a small pill organizer or tiny jars, ensuring you have salt, pepper, and garlic powder ready to revive any dish without bringing your whole pantry.
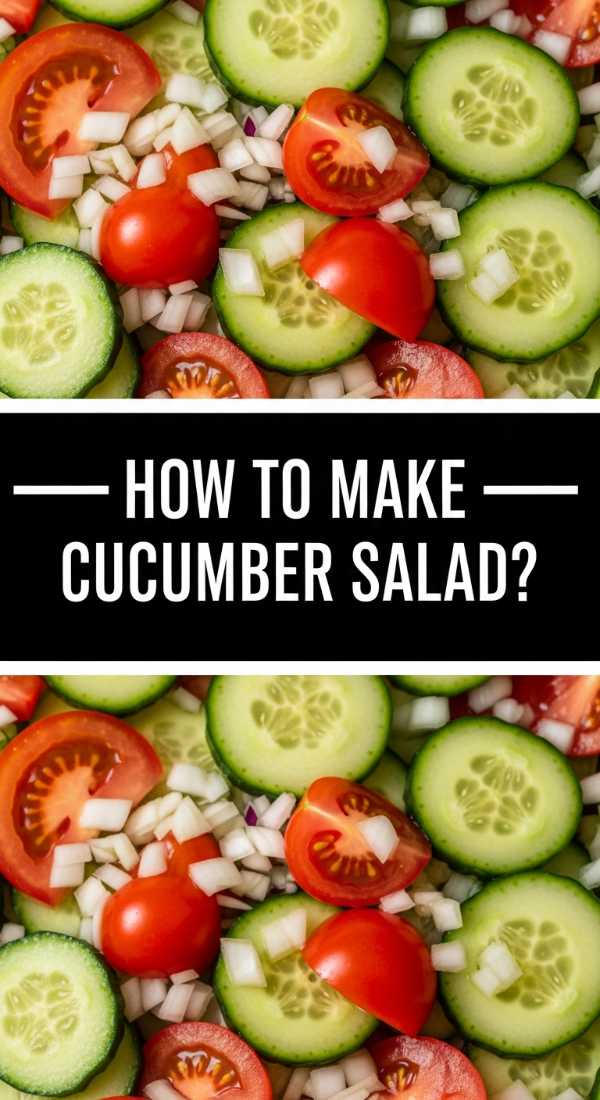
How to make cucumber salad

Why we love this
A fresh cucumber salad is the quintessential palate cleanser, offering a crisp, watery crunch that is instantly revitalizing on a humid day. The fragrance of fresh dill combined with the sharp, acidic tang of rice vinegar creates a bright flavor profile that wakes up the taste buds and balances out heavier grilled dishes. Each translucent slice of cucumber acts like a sponge, soaking up the savory brine while maintaining its structural integrity and satisfying snap. It’s a cooling, vibrant side dish that looks beautiful on a board, with its shades of emerald green and flecks of black pepper promising a burst of hydration.
Ingredients
- 2 large English cucumbers, thinly sliced
- 1/2 small red onion, thinly slivered
- 1/2 cup rice vinegar or apple cider vinegar
- 2 tablespoons granulated sugar
- 1 teaspoon salt
- 1/4 cup fresh dill, chopped
- Red pepper flakes (optional)
How to make it
- Thinly slice the English cucumbers—using a mandoline if possible for paper-thin uniformity—and place them in a colander over a bowl, sprinkling with a teaspoon of salt to draw out excess moisture for 20 minutes.
- While the cucumbers drain, whisk together the vinegar, sugar, and red pepper flakes in a large bowl until the sugar is completely dissolved, creating a clear, piquant dressing.
- Rinse the salted cucumbers lightly and pat them dry with a clean kitchen towel; this ensures the salad stays crunchy rather than becoming soggy in the liquid.
- Toss the cucumbers and slivered red onions into the dressing, ensuring every slice is well-coated, then fold in the fresh chopped dill gently to preserve its delicate color.
- Let the salad chill in the refrigerator for at least 30 minutes before serving, allowing the flavors to marry and the cucumbers to become icy cold and incredibly refreshing.
How to grill summer veggies

Why we love this
Grilling summer vegetables transforms humble garden produce into caramelized masterpieces, bringing out a hidden sweetness that only high heat can unlock. The sight of dark, charred grill marks against the bright purples of eggplant, the deep greens of zucchini, and the vibrant reds of bell peppers is a feast for the eyes. There’s a rustic, earthy aroma that fills the air as the natural sugars in the vegetables sizzle and smoke, creating a tender-crisp texture that feels both indulgent and healthy. It is the ultimate addition to a summer board, providing a smoky depth that complements everything from whipped feta to grilled breads.
Ingredients
- Zucchini, yellow squash, and bell peppers
- Asparagus or thick-cut red onions
- 3 tablespoons extra virgin olive oil
- 2 tablespoons balsamic glaze
- 1 teaspoon dried oregano and sea salt
- Lemon wedges for serving
How to make it
- Preheat your grill to medium-high heat (about 400°F) and ensure the grates are scrubbed clean and lightly oiled to prevent the vegetables from sticking to the metal.
- Slice your vegetables into large, flat planks or thick rounds; cutting them too small will cause them to fall through the grates, while larger surfaces allow for better charring and easier flipping.
- In a large bowl, toss the sliced vegetables with olive oil, oregano, and salt until they are evenly glistening, being careful not to use too much oil which can cause dangerous flare-ups on the grill.
- Place the vegetables directly over the heat and grill for 3-5 minutes per side, looking for distinct grill marks and a slight softening of the texture before moving them to a cooler part of the grill if they need more time to tenderize.
- Remove the veggies from the heat and immediately drizzle with a balsamic glaze and a squeeze of fresh lemon juice, which adds a bright acidity that cuts through the smoky, charred flavors.
How to cook summer meals
Why we love this
Cooking in the summer is all about the ‘low-and-slow’ philosophy or the ‘no-heat-required’ assembly that keeps your kitchen cool and your energy high. It’s a season of vibrant colors and light textures, where a meal might consist of a perfectly roasted chicken served cold alongside a mountain of fresh herbs and stone fruits. There is a breezy, effortless feeling to summer cooking, focusing on the quality of raw ingredients and the simple alchemy of citrus and salt. It’s food that makes you feel light and nourished, designed to be eaten slowly on a porch while the sun dips below the horizon.
Ingredients
- Rotisserie chicken or quick-seared shrimp
- Fresh peaches or plums
- Heirloom tomatoes
- Burrata or fresh mozzarella cheese
- Arugula or mixed baby greens
- Honey-lime vinaigrette
How to make it
- Focus on ‘assembly cooking’ by utilizing a high-quality pre-cooked protein like a rotisserie chicken, shredding the meat while it’s still warm to keep it juicy, then chilling it for a cold salad base.
- Prepare a ‘base board’ of fresh greens and sliced heirloom tomatoes, seasoning the tomatoes with salt and pepper immediately to draw out their flavorful juices which act as a natural dressing.
- Slice fresh summer stone fruits like peaches and give them a quick 60-second sear in a hot pan with a drop of honey to caramelize the edges without turning them to mush.
- Arrange your protein, fruits, and a ball of creamy burrata over the greens, using textures to create interest—think crunchy nuts, soft cheese, and succulent fruit.
- Finish the meal with a drizzle of a bright, citrus-based vinaigrette and plenty of torn basil leaves, serving immediately while the ingredients are at their peak of freshness and contrast.
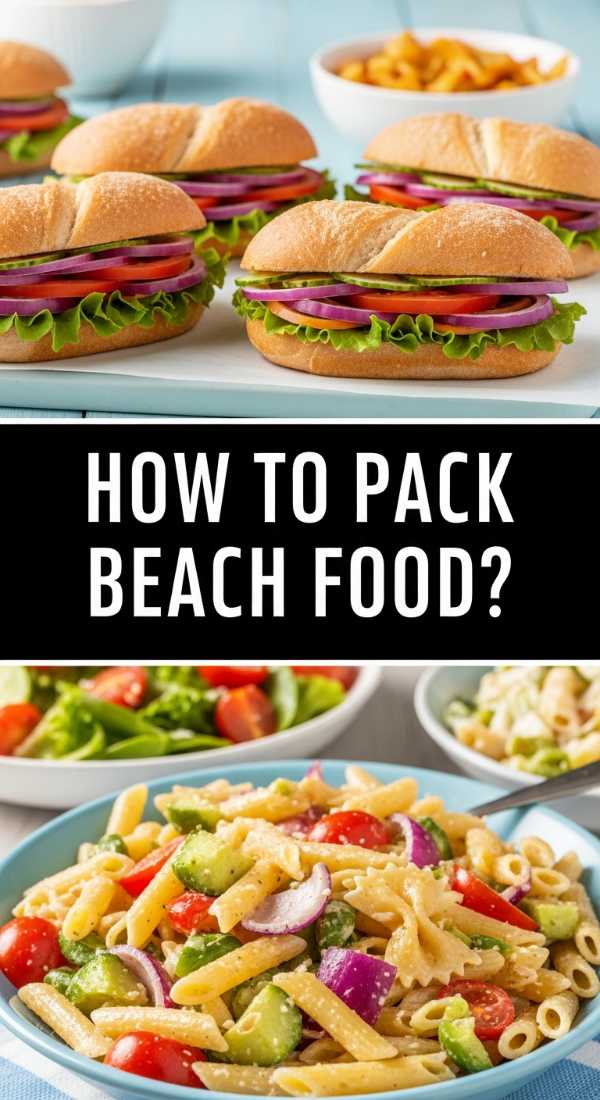
How to pack beach food

Why we love this
The perfect beach food is all about resilience—it needs to withstand the heat, the transport, and the inevitable stray grain of sand. There is a deep satisfaction in pulling out a perfectly insulated wrap or a crisp salad that hasn’t wilted, providing a cool sanctuary of flavor in the middle of a sun-drenched day. The best beach food is handheld and hearty, offering a balance of salty satisfaction and hydrating freshness that keeps you fueled for a day in the waves. It’s the ultimate reward after a long swim, tasting twice as good because of the salt on your skin and the sound of the ocean in the background.
Ingredients
- Hearty grain salads (quinoa or pasta)
- Pressed sandwiches or wraps
- Hard cheeses (cheddar or provolone)
- Frozen water bottles
- Sturdy fruit (apples or oranges)
How to make it
- Opt for pressed sandwiches by assembling them with meats and cheeses, then wrapping them tightly in parchment paper and weighing them down in the fridge overnight; this prevents them from becoming soggy and makes them easy to eat with one hand.
- Avoid mayo-based salads which can spoil in the heat; instead, create grain-based salads with oil and vinegar dressings that actually taste better as they marinate in your cooler.
- Use frozen water bottles as your primary ice source; as they melt throughout the day, they provide ice-cold drinking water while keeping your food at a safe temperature without the mess of loose ice.
- Pack your food in ‘reverse order’—place the items you will want for dinner at the bottom and your lunch and snacks at the very top so you don’t have to keep the cooler open while searching.
- Store sandwiches in vertical rows rather than stacking them, which prevents the bottom layers from getting crushed and allows for better air circulation around the chilled items.
How to prepare camping food
[IMAGE_10]
Why we love this
Preparing camping food is like building a kit for an adventure; it requires a bit of strategy but results in the most rewarding outdoor dining experience imaginable. There is something primal and deeply satisfying about eating food that you’ve prepped with your own hands, now sizzling over a campfire as the stars begin to emerge. It’s about the convenience of pre-mixed pancake batters in squeeze bottles and pre-cracked eggs in mason jars, making the rugged outdoors feel a little more like home. This preparation ensures that the ‘chef’ gets to enjoy the campfire stories just as much as everyone else, with all the hard work already done.
Ingredients
- Pre-cracked eggs in a sealed jar
- Pancake mix in a squeeze bottle
- Pre-cooked bacon or sausage
- Individual foil-wrapped baked potatoes
- Coffee grounds in pre-filled filters
How to make it
- Crack your eggs into a wide-mouth mason jar before you leave home; this saves space, prevents eggshells from breaking in your cooler, and makes it easy to pour exactly what you need into the pan.
- Prepare a dry pancake mix and store it in a cleaned-out ketchup or mustard squeeze bottle; when you’re ready for breakfast, just add water or milk to the bottle, shake vigorously, and squeeze perfect circles onto the griddle.
- Par-boil sturdy vegetables like potatoes or corn on the cob for 5-8 minutes before packing them; this significantly reduces the actual ‘cook time’ over the campfire, ensuring the outsides don’t burn before the insides are soft.
- Freeze any meats that you plan to eat on the second or third night of your trip; they will act as additional cooling blocks for your perishables and will be perfectly thawed by the time you’re ready to grill them.
- Pack a ‘cleanup kit’ consisting of biodegradable soap, a collapsible basin, and a quick-dry towel, ensuring that the transition from ‘dinner’ to ‘campfire relaxation’ is as fast as possible.
The New Way to Gather
As we move through the warmer months, remember that the most viral ‘food boards’ aren’t the ones that look perfect on a screen—they’re the ones that get finished. Whether you’re layering a Shoney’s-inspired pie for a backyard BBQ or packing the perfect sand-proof snack for the shore, the goal is always the same: connection. These simple food boards strip away the pretension and leave us with what really matters—good food, great company, and the ease of a summer afternoon well spent. So, grab a board, pick a recipe, and start building your own version of delicious simplicity.