
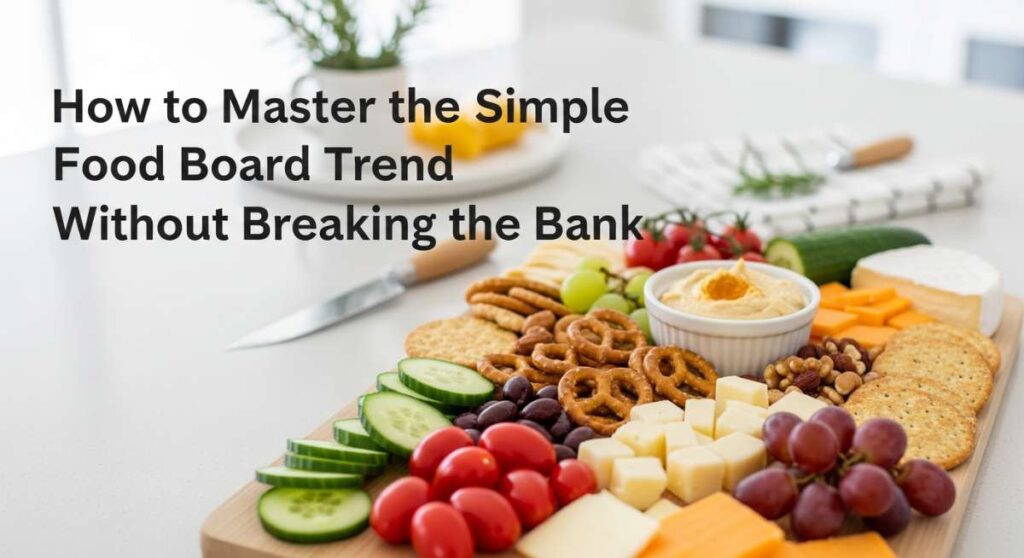
How to Master the Simple Food Board Trend Without Breaking the Bank
There is something inherently magical about a shared meal that looks as good as it tastes. We’ve all seen those sprawling, luxurious boards on our feeds—overflowing with exotic cheeses and gold-leafed garnishes—and while they are stunning, my wallet usually lets out a tiny whimper just looking at them. But here’s the secret: the heart of the food board trend isn’t about the price tag; it’s about the art of gathering and the joy of simple, vibrant ingredients presented with a little bit of love.
In this guide, I’m showing you how to reclaim the ‘board’ aesthetic using everyday staples you probably already have in your pantry or can grab for a few dollars at the local market. It’s about turning a Tuesday night dinner into a visual feast that feels intentional and cozy. We are stripping away the pretension and focusing on textures, colors, and flavors that make your soul happy without emptying your savings account.
How to make creamy chicken salad?
Why we love this
This isn’t your average cafeteria scoop; it is a velvety, crunch-filled celebration of textures that feels both nostalgic and sophisticated. Imagine the silky smoothness of high-quality mayonnaise binding together tender, hand-shredded chicken, while the sharp snap of fresh celery and the sweet pop of grapes create a symphony in every bite. It’s the kind of dish that smells of fresh herbs and home, perfect for piling onto a board with toasted baguette slices or crisp lettuce cups.
Ingredients
- 2 cups cooked chicken breast, shredded
- 1/2 cup mayonnaise
- 1/4 cup Greek yogurt (for tang)
- 2 stalks celery, finely diced
- 1/2 cup red grapes, halved
- 1 tablespoon fresh dill, chopped
- Salt and cracked black pepper to taste
- 1 teaspoon lemon juice
How to make it
- Begin by hand-shredding your cooked chicken while it is still slightly warm, as this allows the fibers to soak up the dressing more effectively than cold, cubed meat.
- In a large glass mixing bowl, whisk together the mayonnaise, Greek yogurt, lemon juice, and chopped dill until the dressing is completely emulsified and smooth.
- Fold the shredded chicken into the dressing using a spatula, ensuring every strand is well-coated. This is the stage where you add your salt and pepper—taste as you go, looking for a balance between the richness of the mayo and the brightness of the lemon.
- Gently fold in the diced celery and halved grapes; you want to be careful not to crush the grapes, as their juice will thin out the salad too much.
- Cover the bowl with plastic wrap and chill in the refrigerator for at least 30 minutes. This resting period is crucial because it allows the flavors to meld and the dressing to thicken to a perfect, scoopable consistency.
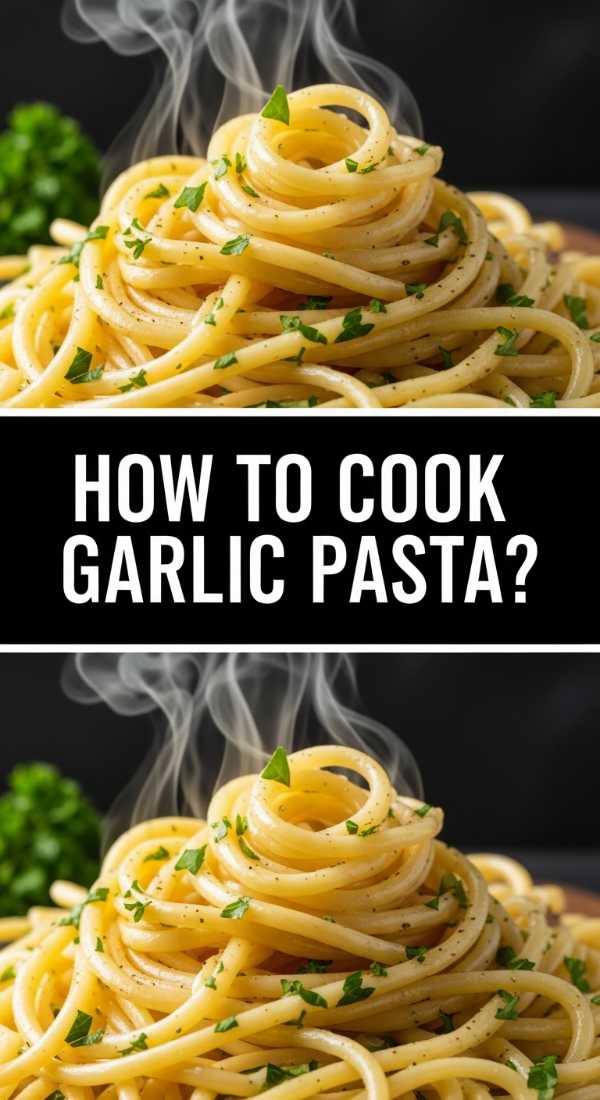
How to cook garlic butter pasta?

Why we love this
Garlic butter pasta is the ultimate culinary hug, a dish that transforms three humble ingredients into a glossy, aromatic masterpiece. The scent of garlic gently sizzling in golden butter is enough to make anyone’s mouth water, promising a meal that is rich, savory, and incredibly comforting. Each strand of pasta becomes encased in a shimmering, garlic-infused silk that feels luxurious on the palate, especially when finished with a flurry of sharp parmesan and fresh parsley.
Ingredients
- 8 oz spaghetti or linguine
- 4 tablespoons unsalted butter
- 4 cloves garlic, minced
- 1/2 cup grated parmesan cheese
- Fresh parsley, finely chopped
- Red pepper flakes (optional)
- Reserved pasta water
How to make it
- Bring a large pot of heavily salted water (it should taste like the sea) to a rolling boil and cook your pasta until it is just shy of al dente—usually about 1-2 minutes less than the package directions.
- While the pasta cooks, place a large skillet over medium-low heat and melt the butter. Once the butter begins to foam, add the minced garlic and a pinch of red pepper flakes.
- Sauté the garlic gently for about 3 minutes; you are looking for a pale golden color and a fragrant aroma. Be careful not to let the heat get too high, as burnt garlic will turn the entire dish bitter.
- Before draining the pasta, use a mug to scoop out about one cup of the starchy pasta water. This is your ‘liquid gold’ for creating the sauce.
- Add the undercooked pasta directly into the garlic butter skillet. Pour in half a cup of the reserved pasta water and the parmesan cheese. Toss vigorously with tongs over medium heat for 2 minutes. The starch in the water and the cheese will emulsify with the butter to create a creamy, clingy sauce. If it looks dry, add more pasta water a tablespoon at a time until the noodles are perfectly glossy.
How to roll mediterranean wraps?
Why we love this
Mediterranean wraps bring a burst of sunshine to your food board, offering a fresh and zesty profile that cuts through heavier elements. The combination of creamy hummus, salty feta, and the crisp, watery crunch of cucumbers creates a refreshing bite that feels light yet satisfying. There is a beautiful contrast between the soft, pillowy flour tortilla and the vibrant, colorful vegetables tucked inside, making them a visual and textural delight.
Ingredients
- Large flour tortillas or flatbreads
- 1 cup roasted red pepper hummus
- 1 cucumber, sliced into matchsticks
- 1 red bell pepper, thinly sliced
- 1/2 red onion, slivered
- 1/2 cup crumbled feta cheese
- Fresh baby spinach
How to make it
- Lay your tortilla flat on a clean cutting board and spread a generous, even layer of hummus across the entire surface, leaving about half an inch around the border to prevent leaking.
- Layer a handful of baby spinach in the center of the tortilla to create a soft bed for the other vegetables.
- Arrange the cucumber matchsticks, bell pepper slices, and red onion in a horizontal line across the lower third of the wrap. This specific placement ensures that every bite has an even distribution of crunch.
- Sprinkle the crumbled feta over the vegetables. For a professional touch, lightly press the feta into the hummus so it stays in place during the rolling process.
- Fold the left and right sides of the tortilla inward about two inches. Starting from the bottom, roll the tortilla upward tightly, using your fingers to tuck the fillings back as you go. Slice diagonally with a serrated knife for a beautiful presentation on your board.
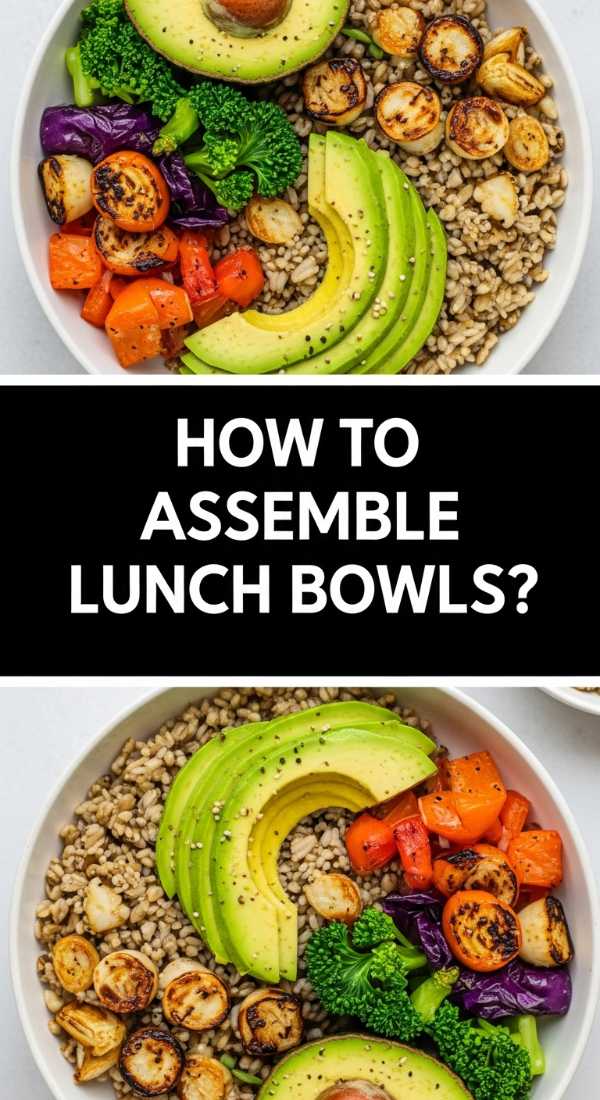
How to assemble vibrant power bowls?

Why we love this
Power bowls are the crown jewels of a food board, offering a rainbow of nutrients that look like a work of art. We love them because they are infinitely customizable, balancing the earthy depth of grains with the brightness of raw vegetables and the creamy fat of avocado. The sensation of diving into a bowl where every forkful offers a different combination of sweet, savory, and tangy flavors is truly exhilarating and makes healthy eating feel like an indulgence.
Ingredients
- 1 cup cooked quinoa or farro
- 1 cup roasted sweet potato cubes
- 1/2 cup canned chickpeas, rinsed
- 1/2 avocado, sliced
- Shredded purple cabbage
- Tahini dressing or lemon vinaigrette
- Pumpkin seeds for garnish
How to make it
- Start with a base of warm grains. If using quinoa, ensure it is fluffed with a fork to maintain a light, airy texture rather than a dense mass.
- Divide the bowl into sections or ‘zones’ visually. Place the grains in the center and arrange your colorful components around the perimeter in clusters. This ‘deconstructed’ look is what makes the bowl look professional and appetizing.
- Add the roasted sweet potatoes (which should be soft inside with slightly charred edges) and the shredded cabbage for a vibrant color pop.
- Place the chickpeas and avocado slices in their own sections. For the avocado, fan the slices out gently to add a gourmet touch.
- Drizzle the dressing in a zigzag pattern across the top rather than dumping it in one spot. Finish with a sprinkle of pumpkin seeds; these provide a necessary textural contrast to the softer ingredients in the bowl.
How to make roasted tomato soup?

Why we love this
Nothing beats the concentrated, umami-rich flavor of tomatoes that have been roasted until their skins are blistered and their sugars have caramelized. This soup is a deeply comforting, rustic masterpiece that fills the kitchen with a heady aroma of garlic and basil. It has a thick, luscious mouthfeel that is far superior to anything from a can, offering a balance of acidity and sweetness that pairs perfectly with a crusty piece of bread on your board.
Ingredients
- 3 lbs ripe plum tomatoes, halved
- 1 head of garlic, top sliced off
- 1 large onion, wedged
- 3 tablespoons olive oil
- 1 cup vegetable broth
- 1/4 cup fresh basil leaves
- Salt and pepper
How to make it
- Preheat your oven to 400°F (200°C). On a large sheet pan, arrange the halved tomatoes, onion wedges, and the head of garlic (cut side down). Drizzle generously with olive oil and sprinkle with salt and pepper.
- Roast for 40-45 minutes. You are looking for the tomatoes to be shriveled and slightly charred on the edges, and the onions to be translucent and soft. This charring is essential for a smoky, deep flavor.
- Once cooled slightly, squeeze the roasted garlic cloves out of their skins and into a high-speed blender. Add the roasted tomatoes, onions (including all the juices from the pan), and fresh basil.
- Add the vegetable broth and blend on high until the soup is completely smooth and velvety. If you prefer a more rustic texture, pulse it only a few times.
- Transfer the soup to a pot and simmer on low heat for 10 minutes to allow the flavors to deepen. Serve in small ramekins on your food board for easy dipping.
How to stack a gourmet sandwich?

Why we love this
A gourmet sandwich is all about the architecture of flavor. We love the way a well-stacked sandwich offers a vertical journey of taste, from the initial crunch of toasted sourdough to the creamy spread, the savory protein, and the refreshing crisp of greens. It turns a quick lunch into a multi-dimensional experience where every layer is seasoned and purposeful, making it the focal point of any casual food board.
Ingredients
- 2 slices thick sourdough bread
- 3 slices deli turkey or prosciutto
- 2 slices provolone cheese
- 1/2 heirloom tomato, sliced
- Arugula tossed in lemon juice
- Pesto or garlic aioli
How to make it
- Start by toasting your bread. Use a griddle with a small amount of butter over medium heat until the bread is golden brown and ‘shatters’ when you tap it with a knife.
- Apply your spread (pesto or aioli) to both slices of bread. This acts as a moisture barrier to keep the bread from getting soggy from the vegetables.
- Place the cheese slices on the bottom piece of bread while it’s still hot so they begin to soften. Layer the meat on top in ‘ribbons’ rather than flat sheets; folding the meat creates air pockets that make the sandwich feel lighter and more substantial.
- Season your tomato slices with a pinch of salt and pepper before adding them to the stack. This tiny step significantly boosts the tomato flavor.
- Top with the dressed arugula and the second slice of bread. Use a long toothpick to hold the layers in place and slice through the center with a sharp chef’s knife in one clean motion to reveal the beautiful interior layers.
How to prepare zesty shrimp tacos?

Why we love this
Zesty shrimp tacos bring an explosion of bright, coastal flavors to your board. The shrimp are succulent and spicy, providing a quick-cooking protein that feels elevated. When paired with a cool lime crema and a crunchy slaw, you get a perfect balance of heat, acid, and creaminess. The vibrant pink of the shrimp and the green of the cilantro make these a visual standout that guests will gravitate toward immediately.
Ingredients
- 1 lb medium shrimp, peeled and deveined
- 1 tablespoon taco seasoning (chili powder, cumin, garlic powder)
- Small corn tortillas
- 2 cups shredded cabbage
- 1/4 cup sour cream mixed with lime juice
- Fresh cilantro and lime wedges
How to make it
- Pat the shrimp completely dry with paper towels. This is the most important step for getting a good sear; if they are wet, they will steam instead of browning.
- Toss the shrimp in a bowl with the taco seasoning and a tablespoon of oil until evenly coated.
- Heat a cast-iron skillet over medium-high heat. Once the pan is shimmering, add the shrimp in a single layer. Cook for 2 minutes per side until they are opaque and have developed a slightly charred crust. Do not overcrowd the pan; cook in batches if necessary.
- Warm the corn tortillas directly over a low gas flame for 10 seconds per side to get those beautiful char marks and make them pliable.
- To assemble, place a small handful of cabbage on the tortilla, top with 3-4 shrimp, a drizzle of the lime crema, and a sprig of cilantro. Serve immediately with extra lime wedges on the side for that essential final hit of acidity.
How to pack a balanced bento?
Why we love this
The bento box is the ultimate expression of ‘food as art’ within the board trend. We love the philosophy of ‘Hara Hachi Bu’ (eating until 80% full) that the bento encourages, alongside the stunning organization of colors and shapes. It’s a meditative way to enjoy a variety of small bites—salty, sweet, pickled, and fresh—all coexisting in a harmonious, visually pleasing arrangement that makes the meal feel special.
Ingredients
- 1/2 cup cooked white rice (sushi rice preferred)
- 4-5 slices of cucumber or pickled radish
- 1 hard-boiled egg, halved
- Edamame beans, steamed
- Fresh fruit (berries or orange slices)
- Small protein portion (teriyaki chicken or tofu)
How to make it
- Start with the ‘anchor’ of the bento: the rice. Press it into a small rectangular section of your container or board. Sprinkle with furikake or black sesame seeds for a professional look.
- Place your main protein next to the rice. If it has a sauce, ensure it is contained so it doesn’t soak into the other ingredients.
- Use the hard-boiled egg as a color bridge. The bright yellow yolk provides a beautiful contrast to the green of the edamame.
- Fill the smaller gaps with ‘fillers’ like the cucumber slices or pickled vegetables. The goal is a ‘no-gap’ aesthetic where everything looks snug and intentional.
- Finish with the fruit in a separate corner to provide a sweet palate cleanser. The key to a great bento is the variety of textures—ensure you have something soft, something crunchy, and something chewy.
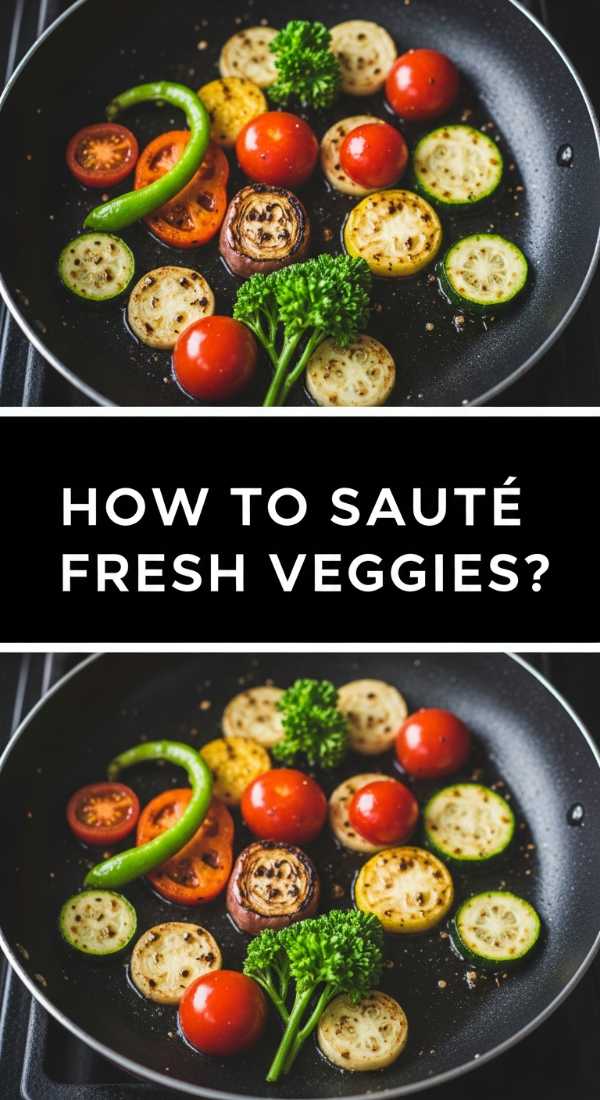
How to sauté colorful veggie stir fry?
Why we love this
A veggie stir fry is a masterclass in high-heat cooking that preserves the integrity and vibrance of the vegetables. We love the ‘snap’ of a perfectly cooked bell pepper and the way a glossy, ginger-soy glaze clings to every surface. It’s a fast-paced, exciting way to cook that results in a dish that is bursting with life and savory depth, making it a fantastic warm addition to a shared board.
Ingredients
- 2 cups mixed vegetables (broccoli, bell peppers, carrots, snap peas)
- 2 tablespoons soy sauce
- 1 tablespoon honey or brown sugar
- 1 teaspoon grated fresh ginger
- 2 cloves garlic, minced
- 1 tablespoon toasted sesame oil
How to make it
- Prep all your vegetables before you turn on the heat. Stir frying happens very fast, and you won’t have time to chop once the oil is hot. Cut everything into uniform sizes so they cook at the same rate.
- Whisk together the soy sauce, honey, ginger, and garlic in a small bowl to create your stir-fry sauce.
- Heat a wok or large skillet over high heat until a drop of water flicked onto the surface sizzles and evaporates instantly. Add the sesame oil.
- Toss in the toughest vegetables first (carrots and broccoli). Stir constantly for 2-3 minutes. You want them to turn bright green but remain crisp-tender.
- Add the peppers and snap peas for another 2 minutes. Pour the sauce over the vegetables; it should bubble and thicken almost immediately into a glossy lacquer. Toss one last time to coat and remove from heat to prevent overcooking.
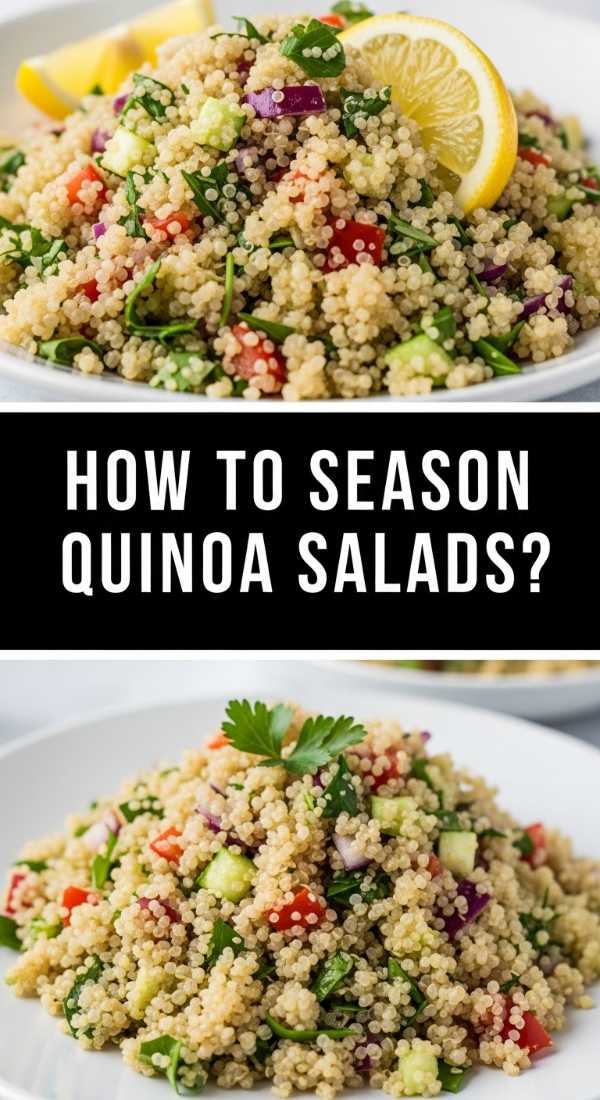
How to season a lemon quinoa salad?
[IMAGE_10]
Why we love this
Lemon quinoa salad is the perfect ‘blank canvas’ dish that brightens up any spread. We love the way the nutty, fluffy grains of quinoa act as little sponges for the citrusy dressing, creating a flavor profile that is incredibly clean and energizing. It’s light, protein-packed, and offers a wonderful zing that refreshes the palate between bites of richer foods. It’s the kind of side dish that looks like a bowl of jewels on your board.
Ingredients
- 2 cups cooked quinoa, cooled
- 1/4 cup extra virgin olive oil
- Zest and juice of 2 large lemons
- 1/2 cup flat-leaf parsley, finely chopped
- 1/4 cup red onion, minced
- Salt and cracked black pepper
How to make it
- In a small jar, combine the olive oil, lemon juice, lemon zest, salt, and pepper. Shake vigorously until the dressing is milky and emulsified. Using both the juice and the zest is the secret to a deep, multi-layered citrus flavor.
- Place the cooled quinoa in a large mixing bowl. It is vital that the quinoa is cold or room temperature; if it is hot, it will wilt the fresh herbs.
- Pour half of the dressing over the quinoa and toss with a fork. Using a fork instead of a spoon keeps the quinoa fluffy and prevents it from becoming a gummy mass.
- Add the minced red onion and the chopped parsley. Be generous with the parsley; it should act almost like a salad green rather than just a garnish.
- Add the remaining dressing and toss again. Let the salad sit for 15 minutes before serving. This allows the quinoa to fully absorb the lemon and oil, resulting in a much more flavorful dish than if served immediately.
Conclusion: Creating Your Signature Board
Mastering the simple food board trend isn’t about following a rigid set of rules; it’s about embracing the beauty of the ingredients and the joy of sharing. By focusing on these ten versatile components, you can mix and match to create a spread that fits any occasion, from a solo movie night to a festive gathering with friends. Remember, the most important ingredient is your own creativity—so don’t be afraid to experiment, swap ingredients, and make these recipes your own. Happy hosting!