
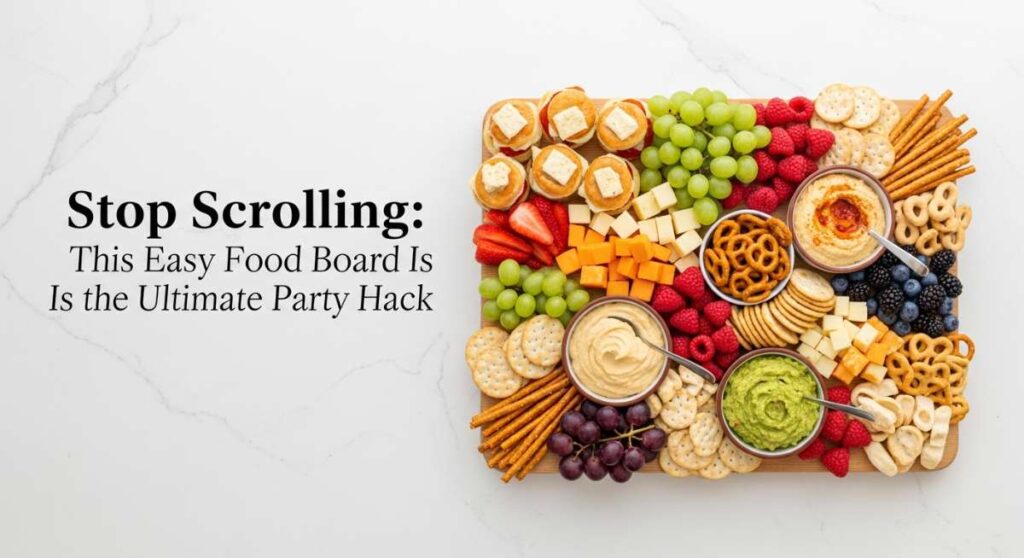
We’ve all been there—you want to host a gorgeous gathering that looks like it stepped right out of a glossy magazine, but the thought of spending five hours in the kitchen while your friends are laughing in the living room is enough to make you reach for the takeout menu. I used to be that host, stressed and covered in flour, until I discovered the magic of the ‘Viral Food Board.’ It’s more than just a trend; it’s a lifestyle shift that prioritizes connection over complicated plating.
This easy food board hack is all about creating a modular, interactive dining experience where everyone finds something they love. Imagine a table overflowing with vibrant colors, textures, and aromas that invite your guests to build their own perfect plate. Whether it’s a casual Friday night or a celebratory brunch, this approach removes the pressure of formal serving and replaces it with a communal, joyful vibe that keeps everyone talking long after the last bite is gone.
How to make a fresh chicken salad

Why we love this
There is something incredibly nostalgic and comforting about a perfectly executed chicken salad, especially when it’s served chilled on a warm afternoon. We love the contrast between the tender, poached chicken breast and the sharp, refreshing crunch of celery and red onion, all bound together by a silky, herb-flecked dressing. The aroma is bright with lemon zest and fresh dill, creating a sensory experience that feels like a garden picnic in every bite. It’s light yet satisfying, offering a creamy mouthfeel that balances beautifully with the other savory elements on your board.
Ingredients
- 2 lbs boneless, skinless chicken breasts
- 1 cup high-quality mayonnaise
- 2 tablespoons Dijon mustard
- 1 cup finely diced celery
- 1/2 cup minced red onion
- 1/4 cup fresh dill, chopped
- 1 tablespoon fresh lemon juice
- Salt and cracked black pepper to taste
How to make it
- Begin by poaching the chicken: Place the breasts in a single layer in a large pot and cover with cool water or chicken broth by one inch. Add a pinch of salt and bring to a very gentle simmer over medium heat. Do not let it boil vigorously, or the chicken will become tough.
- Cook for 12-15 minutes until the internal temperature reaches 165°F. Remove from liquid and let it rest for 10 minutes before dicing into uniform half-inch cubes.
- In a large chilled mixing bowl, whisk together the mayonnaise, Dijon mustard, lemon juice, and chopped dill until the dressing is completely smooth and emulsified.
- Fold in the diced chicken, celery, and red onion. Use a rubber spatula to gently coat every piece of chicken without mashing it.
- Taste and season generously with salt and pepper. Refrigerate for at least one hour before serving to allow the flavors to meld and the dressing to set.
How to prep healthy quinoa bowls
Why we love this
Quinoa bowls are the ultimate canvas for nutritional creativity, offering a nutty, earthy base that carries flavors from across the globe. We love the way the tiny, pearlescent grains pop between your teeth, providing a satisfying texture that feels both substantial and light. When tossed with roasted vegetables and a drizzle of tahini, the aroma becomes warm and inviting, grounding the entire food board with its wholesome presence. It’s the kind of dish that makes you feel vibrant and energized, filling your kitchen with the scent of toasted grains and fresh herbs.
Ingredients
- 2 cups tri-color quinoa
- 4 cups vegetable broth
- 1 pint cherry tomatoes, halved
- 2 cucumbers, diced
- 1/2 cup crumbled feta cheese
- 1/4 cup extra virgin olive oil
- 1 lemon, juiced
- Fresh parsley, chopped
How to make it
- Rinse the quinoa thoroughly in a fine-mesh strainer under cold running water for at least 30 seconds. This removes the natural saponins which can cause a bitter taste.
- In a medium saucepan, combine the rinsed quinoa and vegetable broth. Bring to a rolling boil over high heat, then immediately reduce the heat to the lowest setting and cover with a tight-fitting lid.
- Simmer for exactly 15 minutes without lifting the lid. Remove from the heat and let the pot sit, covered, for an additional 10 minutes to allow the steam to finish the cooking process.
- Fluff the quinoa gently with a fork to separate the grains and let it cool to room temperature.
- Toss the fluffed quinoa with the cherry tomatoes, cucumbers, feta, olive oil, and lemon juice. Garnish with a heavy handful of fresh parsley just before placing on the board.
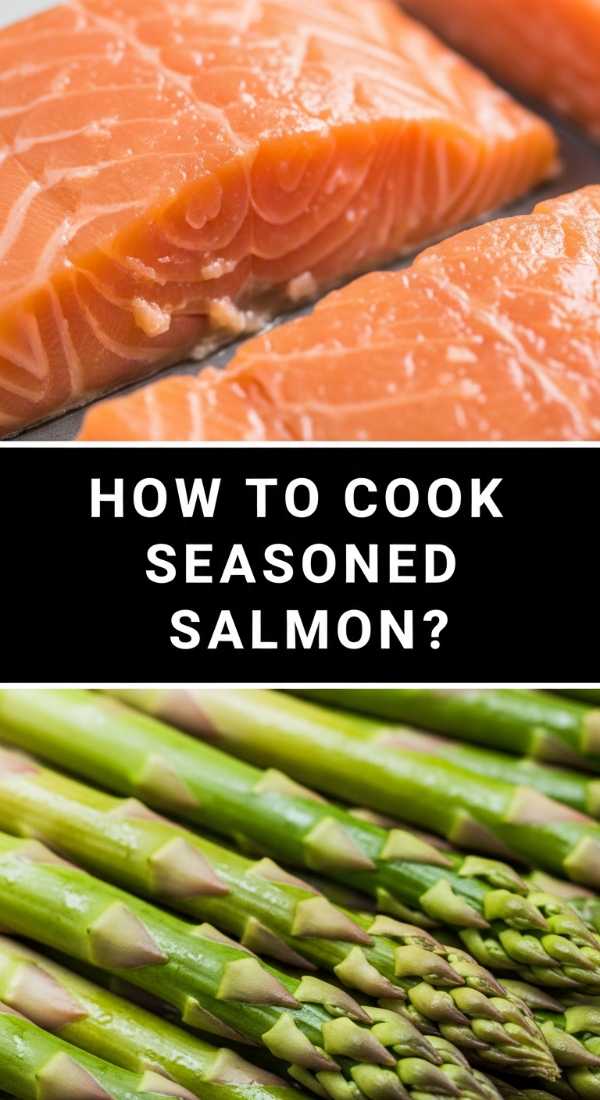
How to cook seasoned salmon fillets
Why we love this
Salmon brings a touch of elegance and a rich, buttery decadence to any food board. We love the visual appeal of the vibrant coral flesh seared to a golden-brown crisp on the outside while remaining tender and flakey on the inside. As the fish hits the pan, the air fills with the savory scent of caramelizing fats and Mediterranean spices, making everyone’s mouth water in anticipation. It’s a sensory powerhouse that offers a melt-in-your-mouth experience, providing a high-protein anchor that feels both indulgent and incredibly clean.
Ingredients
- 4 salmon fillets (6 oz each)
- 2 tablespoons olive oil
- 1 teaspoon smoked paprika
- 1 teaspoon garlic powder
- 1/2 teaspoon onion powder
- Zest of one lemon
- Kosher salt and coarse black pepper
How to make it
- Remove the salmon from the refrigerator 20 minutes before cooking to bring it to room temperature, which ensures even cooking throughout the fillet.
- Pat the skin and flesh sides of the salmon extremely dry with paper towels. Any moisture on the surface will create steam and prevent that signature golden crust.
- In a small bowl, mix the paprika, garlic powder, onion powder, lemon zest, salt, and pepper. Rub the spice blend generously over the top and sides of the fillets.
- Heat olive oil in a heavy stainless steel or cast-iron skillet over medium-high heat until the oil shimmers and just begins to smoke.
- Place the salmon fillets skin-side down in the pan. Press down lightly with a spatula for the first 30 seconds to ensure the skin makes full contact. Cook undisturbed for 4-5 minutes until the skin is crispy.
- Carefully flip the fillets and cook for another 2-3 minutes depending on thickness. The salmon should be opaque on the sides but still slightly translucent in the center. Let rest for 3 minutes before serving.
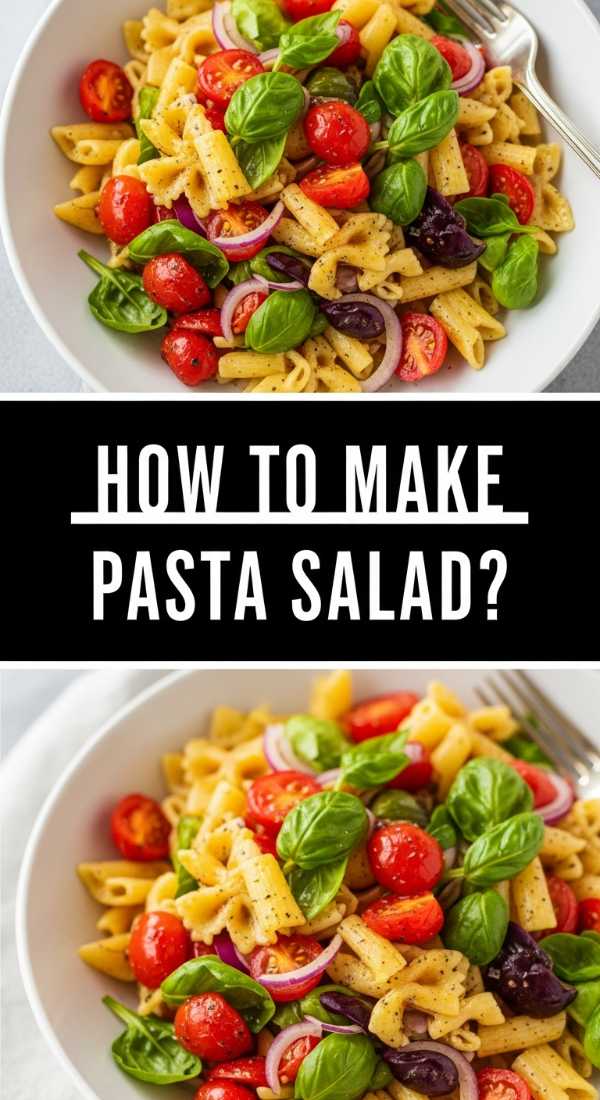
How to make zesty pasta salad

Why we love this
This pasta salad is a total crowd-pleaser that brings a zingy, acidic punch to balance the richer items on your board. We love the bouncy texture of al dente fusilli as it traps the vibrant vinaigrette in its spirals, ensuring a burst of flavor in every single forkful. The aroma of dried oregano, garlic, and red wine vinegar creates a Mediterranean atmosphere that is both rustic and refined. It’s colorful, cheerful, and provides that essential chewy component that makes a food board feel like a complete, well-rounded meal.
Ingredients
- 1 lb fusilli or rotini pasta
- 1 cup Italian vinaigrette
- 1 cup kalamata olives, pitted
- 1 cup bell peppers, finely diced
- 1/2 cup red onion, minced
- 1/2 cup grated parmesan cheese
- 1/4 cup fresh basil leaves, julienned
How to make it
- Bring a large pot of heavily salted water to a rolling boil. Use about 1 tablespoon of salt per gallon of water; it should taste like the sea to properly season the pasta from within.
- Cook the pasta for 1-2 minutes less than the package instructions suggest. You want a firm ‘al dente’ texture so it doesn’t become mushy after absorbing the dressing.
- Drain the pasta and immediately rinse under cold water to stop the cooking process and remove excess starch. This prevents the pasta from sticking together.
- In a large bowl, whisk your vinaigrette to ensure it’s fully emulsified. Add the cold pasta, olives, peppers, and red onion.
- Toss thoroughly to coat. Add the parmesan cheese and basil at the very end to keep the cheese from clumping and the basil from bruising. Let it sit for 30 minutes before serving to maximize flavor absorption.
How to wrap mediterranean pitas

Why we love this
There is a tactile joy in assembling and eating a Mediterranean pita that connects you directly to your food. We love the contrast between the warm, pillowy softness of a toasted pita and the cool, creamy swipe of hummus or tzatziki hidden inside. The scent of charred flour and warm yeast is intoxicating, especially when paired with the sharp bite of pickled onions and fresh greens. It’s a handheld vessel of flavor that allows your guests to customize their experience, making the food board feel personal and interactive.
Ingredients
- 6 large pita breads
- 1 cup hummus or baba ganoush
- 2 cups shredded romaine lettuce
- 1 cup sliced cucumbers
- 1/2 cup pickled red onions
- Fresh mint leaves
How to make it
- Preheat a dry cast-iron skillet or griddle over medium heat. Place each pita in the pan for about 30-45 seconds per side until they are warm, flexible, and show light golden char marks.
- Keep the pitas wrapped in a clean kitchen towel while you prep the fillings to maintain their moisture and heat.
- To assemble, spread a generous tablespoon of hummus across the center of the pita, leaving a one-inch border at the edges.
- Layer a small handful of shredded lettuce, followed by cucumber slices and pickled onions. Do not overfill, or the pita will tear when folded.
- Fold the bottom third of the pita up, then fold the sides inward to create a pocket. Secure with a toothpick if placing on the board, or leave them open-faced for guests to fold themselves.
How to roast sweet potato tacos

Why we love this
Sweet potato tacos bring a surprising and delightful smokiness to the board that appeals to vegetarians and meat-eaters alike. We love the way the natural sugars in the potatoes caramelize in the oven, creating a soft, velvety interior and a slightly charred, chewy exterior. The aroma of cumin and chili powder roasting in the oven fills the house with a cozy, southwestern warmth that is hard to resist. Paired with a lime-crema, it’s a bright, earthy, and satisfying dish that adds a beautiful pop of orange to your presentation.
Ingredients
- 3 large sweet potatoes, peeled and cubed
- 3 tablespoons avocado oil
- 1 tablespoon chili powder
- 1 teaspoon ground cumin
- 12 small corn tortillas
- 1 avocado, sliced
- Fresh cilantro and lime wedges
How to make it
- Preheat your oven to 425°F. High heat is essential for achieving caramelization without turning the potatoes into mush.
- On a large rimmed baking sheet, toss the cubed sweet potatoes with avocado oil, chili powder, cumin, and a generous pinch of salt. Ensure every cube is lightly and evenly coated.
- Spread the potatoes in a single layer, ensuring they aren’t crowded. If the pan is too full, they will steam instead of roast.
- Bake for 20-25 minutes, tossing them halfway through the cooking time. Look for browned edges and a fork-tender center.
- While the potatoes roast, warm the corn tortillas directly over a low gas flame for 10 seconds per side until they are soft and slightly charred. Stack them in foil to stay warm. Serve the potatoes in a bowl next to the tortillas for a build-your-own taco station.
How to sear garlic beef stirfry
Why we love this
A garlic beef stirfry adds a savory, umami-rich depth to the food board that feels incredibly satisfying. We love the intense sizzle of the beef as it hits a screaming-hot pan, creating a deeply browned crust that locks in all the juices. The aroma is legendary—pungent garlic and salty soy sauce mingling with the sweet scent of toasted sesame oil. Each bite offers a tender, succulent texture that provides a bold contrast to the lighter salads and breads, making the board feel like a complete and hearty feast.
Ingredients
- 1.5 lbs flank steak, thinly sliced against the grain
- 3 tablespoons soy sauce
- 5 cloves garlic, minced
- 1 tablespoon grated fresh ginger
- 2 tablespoons sesame oil
- 1 bunch scallions, sliced
- Sesame seeds for garnish
How to make it
- Slice the beef while it is slightly frozen to achieve ultra-thin, uniform strips. This is the secret to a professional-grade stirfry texture.
- In a bowl, marinate the beef with soy sauce, minced garlic, and ginger for at least 30 minutes in the refrigerator. This tenderizes the fibers and infuses the meat with flavor.
- Heat a wok or large heavy skillet over high heat until a drop of water flicked onto the surface dances and evaporates instantly. Add the sesame oil.
- Work in small batches to avoid crowding the pan. Spread the beef out and let it sear undisturbed for 60 seconds to develop a dark crust.
- Toss the beef quickly for another 1-2 minutes until just cooked through. Remove from heat immediately and garnish with scallions and sesame seeds. The beef should be glossy, dark, and aromatic.
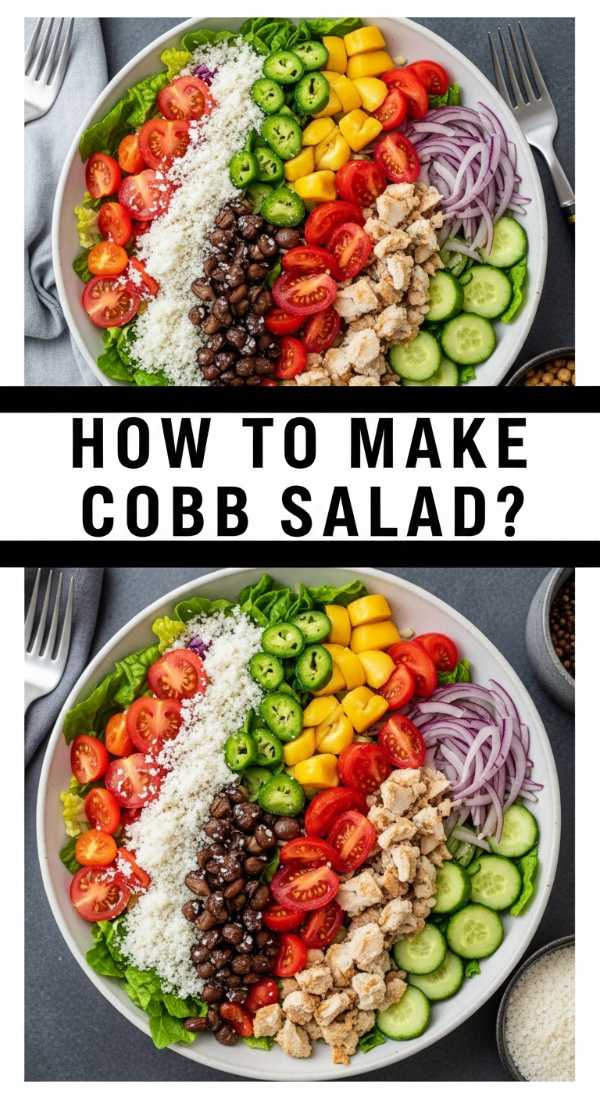
How to assemble loaded cobb salads
Why we love this
The Cobb salad is a visual masterpiece that brings organization and variety to your board in a way few other dishes can. We love the rhythmic rows of colorful ingredients—vibrant green avocado, golden hard-boiled eggs, and deep red tomatoes—that look like a work of edible art. The smell of crisp, salty bacon combined with the funky tang of blue cheese is a classic profile that never fails to entice. It offers a medley of textures, from the crunch of the lettuce to the creaminess of the dressing, ensuring every bite is a new discovery.
Ingredients
- 6 cups chopped romaine lettuce
- 4 hard-boiled eggs, peeled and sliced
- 1/2 lb bacon, cooked and crumbled
- 1 pint cherry tomatoes, halved
- 2 avocados, diced
- 1 cup blue cheese crumbles
- Creamy ranch or blue cheese dressing
How to make it
- Prepare your ‘rows’ first. Hard boil the eggs by placing them in cold water, bringing to a boil, then covering and removing from heat for exactly 11 minutes before shocking in an ice bath.
- Cook the bacon in a cold oven set to 400°F for about 15-20 minutes until perfectly straight and crisp. Drain on paper towels and crumble into small pieces.
- Lay a thick bed of chopped romaine lettuce on a large, shallow platter. This acts as the foundation for your design.
- Carefully arrange the eggs, bacon, tomatoes, avocados, and blue cheese in tight, parallel lines across the top of the lettuce. The key to the ‘viral’ look is precision and color contrast.
- Serve the dressing in a small bowl on the side so guests can drizzle it themselves, preventing the lettuce from wilting while it sits on the board.
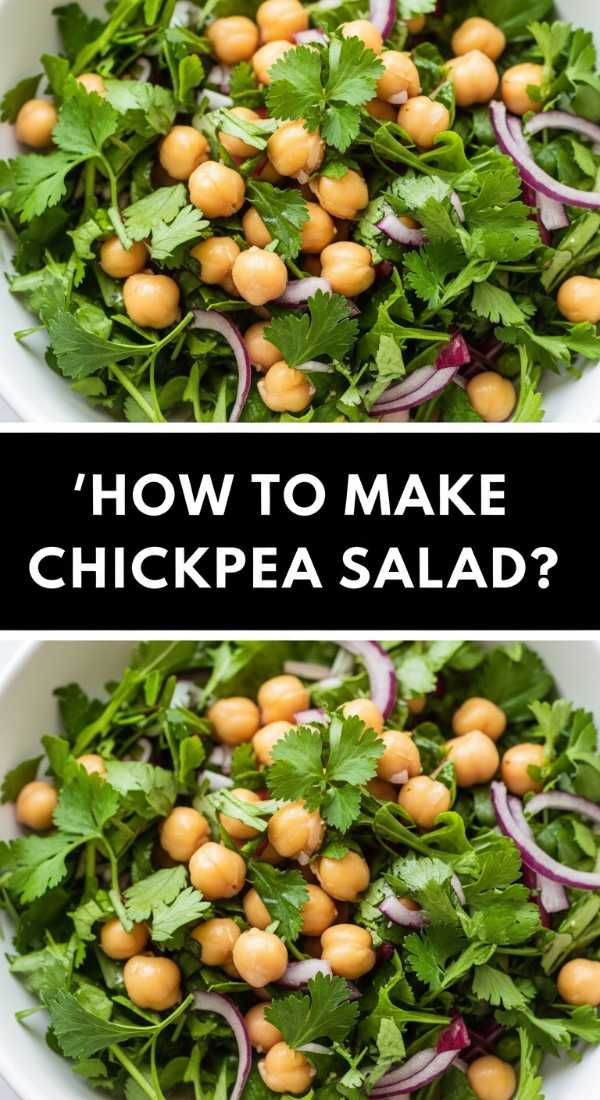
How to mix lemon chickpea salad

Why we love this
This lemon chickpea salad is the bright, zesty heartbeat of a healthy food board. We love how the hearty, starchy chickpeas provide a canvas for the sharp, citrusy dressing and the refreshing bite of raw red onion. The aroma is dominated by fresh lemon and cracked black pepper, offering a clean and invigorating scent that clears the palate between richer dishes. It’s a vegan-friendly protein source that feels substantial yet light, with a wonderful poppy texture that adds a different dimension to your spread.
Ingredients
- 2 cans (15 oz) chickpeas, rinsed and drained
- 1/4 cup extra virgin olive oil
- Zest and juice of 2 large lemons
- 1/2 cup chopped fresh parsley
- 1/4 cup red onion, finely minced
- 1 teaspoon dried oregano
- Salt and pepper to taste
How to make it
- Rinse the canned chickpeas thoroughly under cold water until the foam (aquafaba) is completely washed away. Pat them dry with a clean towel; removing the moisture helps the dressing cling to the skin.
- In a small jar, combine the olive oil, lemon juice, lemon zest, and oregano. Shake vigorously until the dressing is milky and emulsified.
- Place the chickpeas in a medium bowl and add the minced red onion and chopped parsley.
- Pour the dressing over the chickpeas and toss well with a large spoon. Press down on a few of the chickpeas with the back of the spoon to break them slightly; this releases some starch and helps thicken the dressing.
- Season generously with salt and pepper. This salad actually tastes better after sitting for 2 hours, as the chickpeas absorb the lemon juice and become more flavorful.
How to stack club sandwiches
[IMAGE_10]
Why we love this
The club sandwich is the king of the food board, offering height, architecture, and a satisfying crunch that everyone loves. We love the triple-decker structure that allows for multiple layers of savory turkey, salty bacon, and crisp lettuce, all held together by toasted bread. The aroma of warm toast and smoked meats is a classic deli scent that brings a sense of abundance to the table. Biting into a perfectly stacked club provides a symphony of textures, from the initial snap of the toasted bread to the soft, juicy layers of meat and tomato inside.
Ingredients
- 12 slices sourdough or white pullman bread
- 1 lb sliced deli turkey breast
- 12 slices cooked bacon
- 1 head bibb lettuce
- 2 large tomatoes, thinly sliced
- 1/2 cup mayonnaise
- Toothpicks with frills
How to make it
- Toast all 12 slices of bread until they are a deep golden brown. Using a toaster or a broiler is fine, but ensure the bread is firm enough to support the weight of the fillings.
- Lay out three slices of toast in a row. Spread a thin, even layer of mayonnaise on one side of each slice.
- On the first slice, layer a leaf of lettuce, two slices of tomato, and a portion of turkey. Top this with the second slice of toast, mayo-side down.
- Spread more mayonnaise on the top of that second slice. Layer more lettuce, three strips of bacon, and another portion of turkey.
- Place the third slice of toast on top, mayo-side down. Press down firmly with the palm of your hand to compress the layers.
- Insert four toothpicks into the midpoints of each side of the sandwich. Use a sharp serrated knife to cut the sandwich diagonally into four triangles. Arrange them cut-side up on the board to show off the beautiful internal layers.
Conclusion: The Art of the Board
Building a food board isn’t just about the recipes; it’s about the freedom to enjoy your own party. By prepping these individual components, you create a vibrant tapestry of flavors that caters to every palate. Remember to fill the gaps with nuts, grapes, or olives for that truly ‘viral’ aesthetic. Now, put down your phone, step into the kitchen, and get ready to be the host everyone talks about for all the right reasons!