

Why Everyone Is Obsessed With These Simple DIY Food Boards
There is something deeply grounding about a beautifully arranged food board. In a world that often feels rushed and chaotic, the act of slowing down to assemble a vibrant, nutrient-dense spread is more than just a culinary trend; it is a form of self-care. I remember the first time I set out a DIY breakfast board on a lazy Sunday morning—the light hitting the fresh berries, the steam rising from the eggs, and the collective sigh of my family as they gathered around. It turned a simple meal into an event.
The obsession with these boards comes down to the freedom they provide. They are customizable, visually stunning, and remarkably easy to put together once you know the basics. Whether you are prepping for a busy work week or hosting a brunch with friends, mastering these individual components will elevate your kitchen game and make every meal feel like a viral-worthy masterpiece.
How to make high protein bowls
Why we love this
High protein bowls are the ultimate fuel for a busy lifestyle, offering a satisfying crunch and a variety of textures that keep your palate engaged. There is something incredibly comforting about the combination of warm, seasoned grains, tender seared protein, and the crisp snap of fresh vegetables. As you drizzle a creamy dressing over the top, the aromas of roasted garlic and herbs waft up, promising a meal that is as nourishing as it is delicious. It feels like a hug in a bowl, leaving you energized without the mid-afternoon slump.
Ingredients
- 1 cup cooked quinoa or brown rice
- 6 oz grilled chicken breast or firm tofu, cubed
- 1/2 cup steamed broccoli florets
- 1/4 avocado, sliced
- 2 tbsp pumpkin seeds
- Lemon tahini dressing
How to make it
- Start by preparing your base grains; ensure they are fluffy by letting them steam with the lid on for 5 minutes after cooking.
- Season your protein of choice with sea salt, cracked pepper, and smoked paprika. Sear in a cast-iron skillet over medium-high heat until a golden-brown crust forms (about 4-5 minutes per side for chicken).
- Lightly steam your greens just until they turn a vibrant emerald green; do not overcook, as you want to maintain a slight snap.
- Layer the grains at the bottom of a wide, shallow bowl to create a stable foundation.
- Arrange the protein and vegetables in distinct sections on top of the grains to create a visual ‘rainbow’ effect.
- Finish by tucking in slices of creamy avocado and sprinkling pumpkin seeds for an added textural contrast.
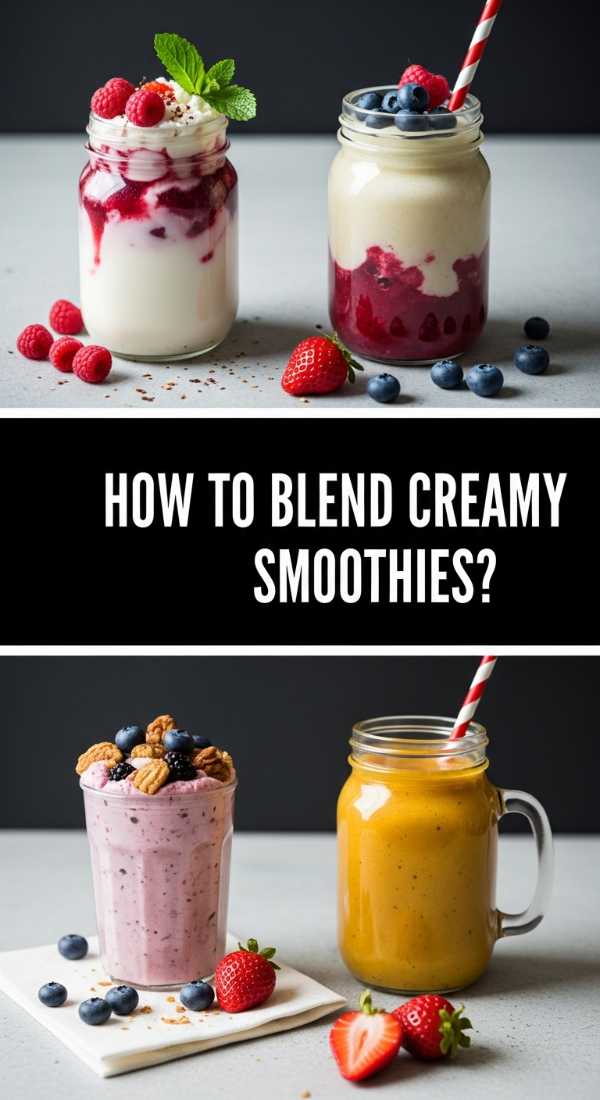
How to blend creamy smoothies
Why we love this
A perfectly blended smoothie is a masterclass in velvet-smooth texture and refreshing flavor. Imagine the frostiness of frozen fruit meeting the silkiness of almond butter, creating a thick, spoonable treat that feels like a decadent milkshake but packs a nutritional punch. The cold, sweet scent of berries mixed with a hint of vanilla is the perfect wake-up call for your senses. It’s a refreshing, icy experience that coats the tongue and provides an instant burst of vitality on a warm morning.
Ingredients
- 1 1/2 cups frozen mixed berries
- 1 frozen banana
- 1 cup unsweetened almond milk
- 1 tbsp almond butter
- 1 scoop vanilla protein powder (optional)
How to make it
- Add your liquid base to the blender first; this prevents the frozen ingredients from getting stuck at the bottom and ensures a smooth vortex.
- Layer in your protein powder and nut butter next so they incorporate fully into the liquid without sticking to the sides of the jar.
- Add the frozen banana and berries on top; the weight of the frozen fruit helps push everything down into the blades.
- Start the blender on the lowest speed to break up the large chunks, then gradually increase to high speed.
- Blend for a full 60 seconds. You are looking for a thick consistency where a small vortex forms in the center of the liquid.
- If the blend is too thick, add liquid one tablespoon at a time until the desired ‘soft serve’ consistency is reached.
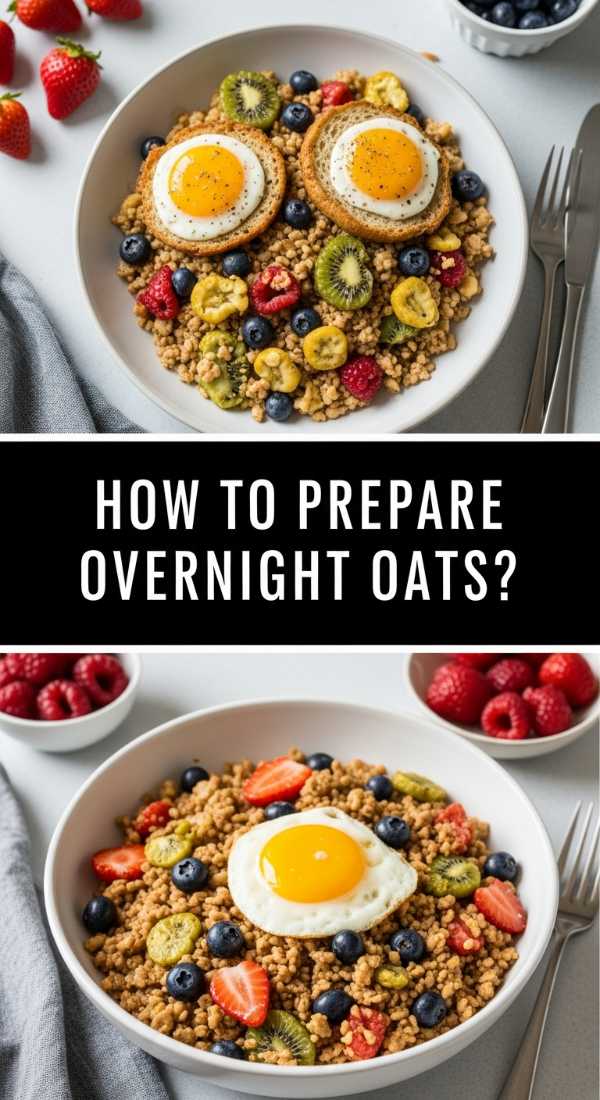
How to prepare overnight oats
Why we love this
Overnight oats are the secret weapon of the organized morning person, turning humble grains into a pudding-like delicacy while you sleep. The oats absorb the creaminess of the milk and the subtle sweetness of maple syrup, resulting in a dense, satisfying texture that is soft but still has a pleasant chew. Opening the jar in the morning reveals a perfectly set mixture, ready to be topped with juicy fruit and crunchy nuts. It is the ultimate convenience meal that never sacrifices flavor or mouthfeel.
Ingredients
- 1/2 cup rolled oats (not instant)
- 1/2 cup milk of choice
- 1/4 cup Greek yogurt
- 1 tsp chia seeds
- 1 tsp maple syrup
- Fresh berries and nuts for topping
How to make it
- In a wide-mouth glass jar, combine the rolled oats and chia seeds; the chia seeds are essential for achieving that thick, jam-like consistency.
- Pour in your milk and add the Greek yogurt; whisk vigorously with a fork to ensure no clumps of yogurt remain.
- Stir in your sweetener of choice, ensuring it is evenly distributed throughout the mixture.
- Seal the jar tightly and give it a final shake to make sure every oat is submerged in liquid.
- Place in the refrigerator for at least 6 hours, though 12 hours is ideal for the softest texture.
- Before serving, stir once more to loosen the mixture; if it’s too thick, splash in a little extra milk before adding your fresh toppings.
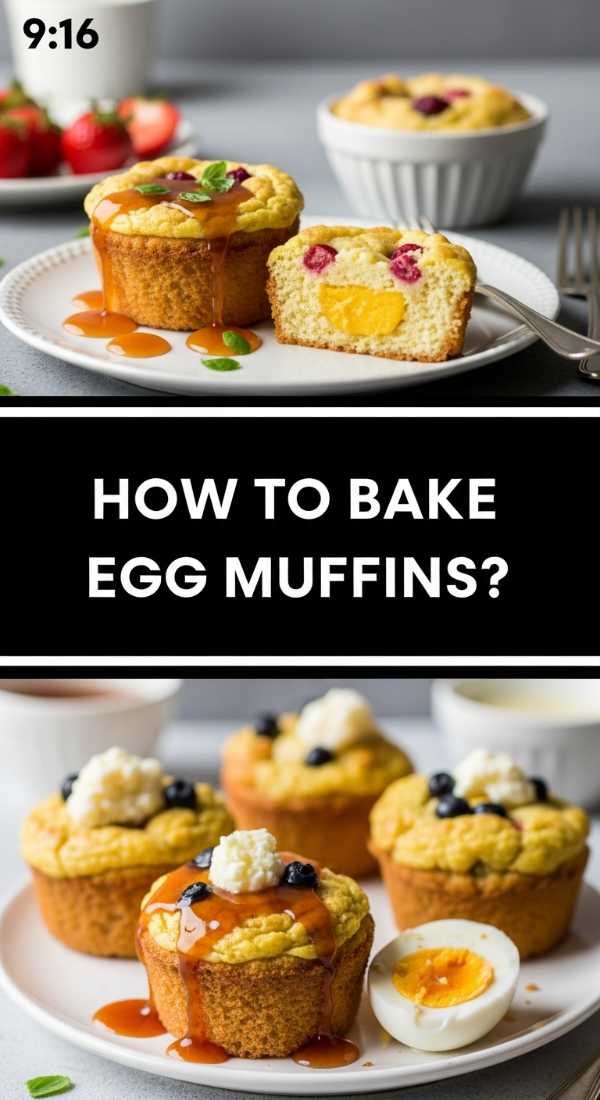
How to bake egg muffins

Why we love this
Egg muffins are like miniature savory cakes that offer a delightful pop of flavor in every bite. They come out of the oven puffed and golden, with the scent of melted cheese and sautéed peppers filling the kitchen. The texture is light and airy, almost like a crustless quiche, with pockets of tender vegetables and savory protein scattered throughout. They are incredibly satisfying to eat, providing a portable, warm, and protein-packed start to the day that feels much more indulgent than it actually is.
Ingredients
- 6 large eggs
- 1/4 cup milk
- 1/2 cup chopped spinach
- 1/4 cup diced bell peppers
- 1/4 cup shredded cheddar cheese
- Salt and pepper to taste
How to make it
- Preheat your oven to 350°F (175°C) and generously grease a non-stick muffin tin with olive oil or cooking spray to ensure easy removal.
- In a large bowl, whisk the eggs and milk together with a pinch of salt until the mixture is slightly frothy; adding air here ensures a light, fluffy muffin.
- Sauté your vegetables (spinach and peppers) in a pan for 2-3 minutes first to remove excess moisture; this prevents the muffins from becoming watery.
- Divide the sautéed vegetables and cheese equally among 6 muffin cups.
- Pour the egg mixture over the fillings until each cup is about 3/4 full, allowing room for the muffins to rise without overflowing.
- Bake for 18-22 minutes. You’ll know they are done when the centers are set to the touch and the edges are slightly pulling away from the tin.
How to cook crispy potatoes

Why we love this
There is nothing quite like the sound of a perfectly crispy potato being bitten into—a sharp, golden crunch that gives way to a fluffy, cloud-like interior. These potatoes carry the earthy aroma of rosemary and the richness of high-quality olive oil, making them the star of any food board. The contrast between the salty, seasoned skin and the buttery center is a culinary delight that satisfies every savory craving. They are warm, rustic, and deeply comforting, providing a hearty base that pairs beautifully with almost anything.
Ingredients
- 1 lb baby potatoes, halved
- 2 tbsp olive oil
- 1 tsp garlic powder
- 1 tsp dried rosemary
- Sea salt and cracked black pepper
How to make it
- Start by par-boiling your halved potatoes in salted water for 5-7 minutes. This step softens the starch and ensures the insides stay fluffy while the outsides get extra crispy.
- Drain the potatoes and give them a rough shake in the colander to ‘scuff’ the edges; these rough bits will become the crunchiest parts once roasted.
- Toss the potatoes in olive oil, garlic powder, and rosemary until every piece is thoroughly coated.
- Arrange them on a preheated baking sheet, cut-side down. Do not crowd the pan; airflow is key to crispiness.
- Roast at 425°F (220°C) for 20-25 minutes. Do not flip them too early; wait until the undersides are a deep, mahogany brown.
- Finish with a final sprinkle of flaky sea salt immediately after removing them from the oven.
How to whip fluffy omelets

Why we love this
A fluffy omelet is the hallmark of a cozy, slow morning. It sits on the plate like a soft, golden pillow, exhaling steam and the rich scent of clarified butter. When done right, the texture is supple and delicate, practically melting on the tongue. It’s the kind of dish that makes you want to linger over your coffee, enjoying the way the mild egg flavor highlights the sharpness of a little cheese or the brightness of fresh herbs tucked inside. It feels sophisticated yet completely accessible.
Ingredients
- 2 large eggs
- 1 tbsp heavy cream
- 1 tsp butter
- Pinch of salt
- Fresh chives, finely chopped
How to make it
- Crack your eggs into a bowl and add the heavy cream; whisk vigorously for at least 30 seconds to incorporate as much air as possible.
- Heat a small non-stick skillet over medium-low heat. Add the butter and wait until it foams but does not turn brown.
- Pour in the egg mixture. Using a heat-resistant spatula, gently move the cooked edges toward the center, tilting the pan so the raw egg fills the gaps.
- Once the bottom is set but the top still looks slightly moist (about 2 minutes), reduce the heat to low.
- Carefully fold the omelet in half. The residual heat will finish cooking the interior without browning the exterior.
- Slide it onto a warm plate and garnish with fresh chives for a pop of color and a mild onion bite.
How to toast breakfast sandwiches
Why we love this
The breakfast sandwich is a masterclass in balance: the crunch of toasted sourdough, the richness of a runny yolk, and the salty bite of melted cheese. As the bread toasts in a pan, the aroma of browned butter begins to fill the air, creating an irresistible invitation to the kitchen. Taking that first bite, where the different temperatures and textures collide, is pure bliss. It’s a sturdy, hand-held meal that feels both indulgent and practical, providing a savory foundation for a great day ahead.
Ingredients
- 2 slices sourdough bread
- 1 large egg
- 1 slice sharp cheddar cheese
- 1 tsp butter
- Handful of arugula
How to make it
- Butter one side of each slice of sourdough generously. Place them butter-side down in a medium-heat skillet until they are golden and crackly.
- While the bread toasts, fry your egg in the same pan. For the best sandwich experience, go for a ‘medium’ fry where the white is set but the yolk is still thick and jammy.
- Place the slice of cheddar cheese on one piece of the toasted bread while it’s still in the pan so it begins to melt from the residual heat.
- Place the fried egg on top of the cheese. The warmth of the egg will help finish the melting process.
- Add a small handful of fresh arugula for a peppery bite and to cut through the richness of the cheese and egg.
- Close the sandwich and press down slightly with your spatula for 30 seconds to bond the layers together before serving.
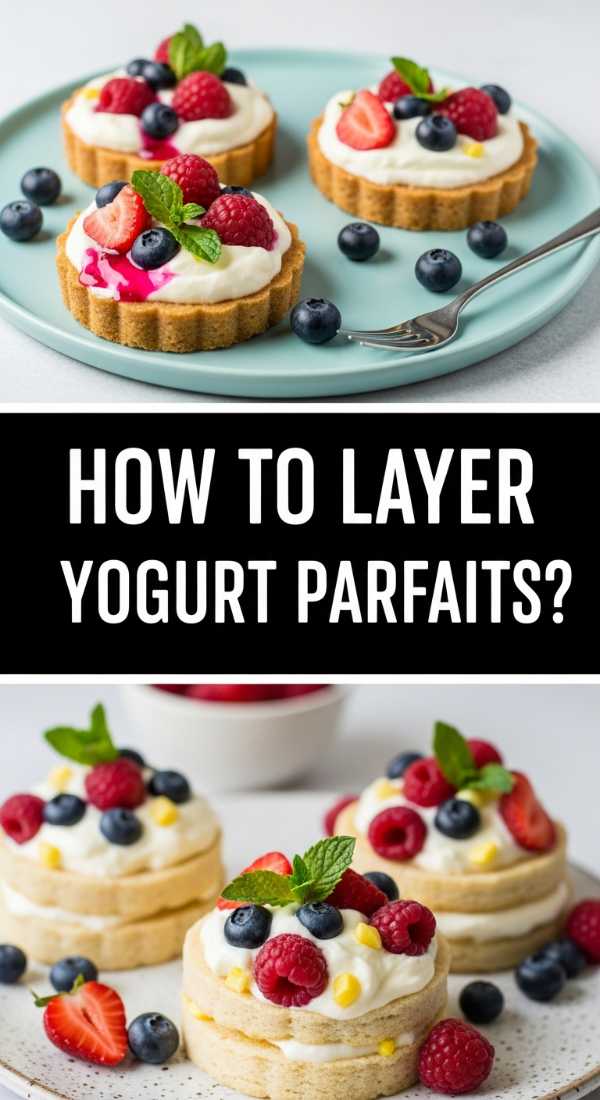
How to layer yogurt parfaits

Why we love this
There is a rhythmic beauty to a layered yogurt parfait, with its alternating bands of creamy white, vibrant fruit reds, and earthy granola browns. It is a feast for the eyes before it ever reaches the table. The experience is all about the contrast: the cooling, tangy yogurt meets the sweet burst of fresh berries and the satisfying, cinnamon-scented crunch of toasted oats. Each spoonful is a different ratio of flavors and textures, making it an exciting and refreshing dish that feels like a healthy dessert for breakfast.
Ingredients
- 1 cup plain or vanilla Greek yogurt
- 1/2 cup granola
- 1/2 cup fresh raspberries or blueberries
- 1 tsp honey or agave nectar
How to make it
- Start with a clear glass or jar so you can appreciate the visual layers you are about to create.
- Spoon 1/3 of the yogurt into the bottom of the glass, smoothing it out to create an even base.
- Add a layer of fresh fruit. Press the fruit against the glass so the colors are visible from the outside.
- Sprinkle a thin layer of granola over the fruit. Pro tip: using a fine-textured granola ensures a crunch in every bite without being too bulky.
- Repeat the layers twice more, finishing with a dollop of yogurt on top.
- Drizzle the honey over the final layer and add a few whole berries and a mint leaf for a professional-looking garnish.
How to scramble silky eggs

Why we love this
Silky scrambled eggs are the height of breakfast luxury. Unlike the dry, rubbery versions we’ve all had, these eggs are soft, custard-like, and incredibly rich. They have a luminous sheen and a delicate aroma of sweet cream and butter. Every bite is effortless and smooth, coating the palate with a savory warmth that feels incredibly sophisticated. It is a slow-food technique that yields a high-reward result, turning a simple staple into something that feels like it belongs in a five-star bistro.
Ingredients
- 3 large eggs
- 1 tbsp cold butter, cubed
- 1 tsp crème fraîche or heavy cream
- Salt to taste
How to make it
- The secret to silkiness is a cold start: crack the eggs into a small saucepan (not a frying pan) and add the cubes of cold butter before turning on the heat.
- Place the pan over medium heat and stir constantly with a rubber spatula. Do not stop stirring; you want to prevent large curds from forming.
- Every 30 seconds, remove the pan from the heat for 10 seconds while continuing to stir, then return it to the burner. This controls the temperature and prevents overcooking.
- When the eggs are still slightly runny and look like thick porridge (usually after 3-4 minutes), remove from heat permanently.
- Stir in the crème fraîche and salt. The cold cream will stop the cooking process immediately and add a beautiful tang.
- Serve immediately on a piece of warm toast to catch all the silky goodness.
How to fry cinnamon toast
[IMAGE_10]
Why we love this
Fried cinnamon toast is pure, unadulterated nostalgia in a pan. As the butter melts and the sugar begins to caramelize, the air fills with the intoxicating scent of warm spice and toasted grain. The result is a piece of bread that has a shatteringly crisp, sugary crust on the outside while remaining soft and tender on the inside. It is a warm, sweet, and comforting treat that feels like a cozy blanket for your soul. It’s the perfect finishing touch to a food board, offering a sweet crunch that everyone reaches for first.
Ingredients
- 2 slices thick-cut brioche or white bread
- 2 tbsp butter
- 1 tbsp granulated sugar
- 1 tsp ground cinnamon
How to make it
- In a small bowl, premix your sugar and cinnamon to ensure even distribution of the spice.
- Melt the butter in a skillet over medium heat until it is bubbling but not yet browning.
- Place the bread in the pan and swirl it around to soak up half of the butter. Toast for 2 minutes until the bottom is golden.
- Flip the bread and immediately sprinkle the toasted side generously with the cinnamon-sugar mixture.
- After another 2 minutes, flip the bread *again* so the sugar side is face-down against the hot pan.
- Fry for only 30-45 seconds on the sugar side; watch closely as the sugar will quickly melt into a dark, crispy caramel. Remove immediately to prevent burning.
The Art of the Board
Building these food boards isn’t just about the individual recipes; it’s about the harmony of bringing them all together. When you place a bowl of silky eggs next to a pile of crispy potatoes and a jar of overnight oats, you’re creating a landscape of flavors that invites people to dig in and stay a while. It’s a celebration of simple ingredients handled with care. So, grab your favorite wooden board, pick a few of these subtopics to master, and start creating your own viral-worthy spreads today!
Frequently Asked Questions
Can I make these components ahead of time?
Absolutely! The overnight oats and egg muffins are designed for meal prep. The potatoes can be par-boiled a day in advance, and the smoothies can be pre-portioned into freezer bags for quick blending.
How do I keep the crispy items from getting soggy on a board?
The best trick is to place crispy items like potatoes or fried toast on the board last, or even on a small raised wire rack or piece of parchment paper to allow airflow underneath them.
What is the best board to use for these displays?
A large, food-safe wooden cutting board or a slate slab works best. If you don’t have one, you can even use a clean baking sheet lined with parchment paper for a rustic look!