

How to Create a Pinterest-Worthy Gallery Wall on a Budget
We’ve all been there—staring at a blank, sterile white wall that feels more like a hospital room than a cozy sanctuary. It’s intimidating, right? You want that curated, ‘I just happen to have impeccable taste’ look you see on Pinterest, but the thought of putting fifty holes in your drywall or spending a month’s rent on custom framing is enough to make anyone reach for the nearest generic ‘Live, Laugh, Love’ sign and call it a day. But I promise you, creating a home that reflects your soul doesn’t have to break the bank or your spirit.
A gallery wall is more than just a collection of pictures; it’s a visual autobiography. It’s the texture of the frames under your fingertips, the way the morning light catches a gilded edge, and the rush of warmth you feel when you walk into a room that finally feels like you. Whether you are living in a tiny dorm or a spacious suburban home, your walls are a canvas for your story. Let’s dive into how we can transform those empty spaces into a breathtaking masterpiece, one frame at a time.
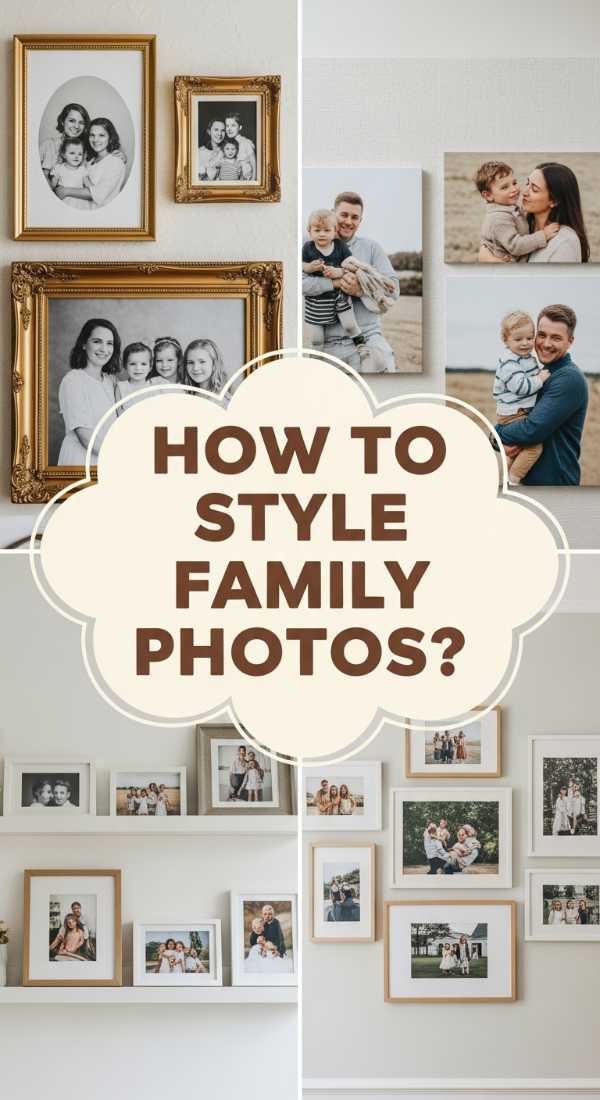
How to Arrange Family Photos Wall Decor for Lasting Memories
Why we love this
There is an incomparable warmth that radiates from a curated collection of family memories, turning a house into a living heritage. We love the tactile nostalgia of varied frame textures—from smooth mahogany to weathered driftwood—paired with the crisp visual of high-contrast black and white photography. Every time you pass this wall, you’ll feel the soft resonance of laughter and the lingering scent of old photo albums, creating an emotional anchor that grounds your entire living space in love and history.
Essential Elements:
- Uniform or eclectic frames in varying sizes.
- High-resolution family portraits (mix of candid and posed).
- Acid-free matting to prevent photo yellowing.
- A central ‘anchor’ piece to build around.
- Measuring tape and painter’s tape for layout.
How to make it
- Curate and Edit: Select 5-10 images that share a similar lighting or color palette. If the colors clash, convert them all to black and white for a sophisticated, unified look.
- Template Layout: Trace each frame onto kraft paper and cut out the shapes. Label them so you know which photo belongs to which cutout.
- Floor Testing: Lay your frames on the floor in front of the wall. Start with your largest ‘hero’ piece in the center and spiral outwards, maintaining a 2-3 inch gap between frames.
- Wall Prep: Tape your paper templates to the wall using painter’s tape. This allows you to step back and visualize the height—ensure the center of the gallery is roughly 57-60 inches from the floor (eye level).
- Precision Hanging: Hammer your nails directly through the paper templates. Once the nail is secure, tear the paper away, hang your frame, and use a bubble level to ensure every piece is perfectly horizontal.
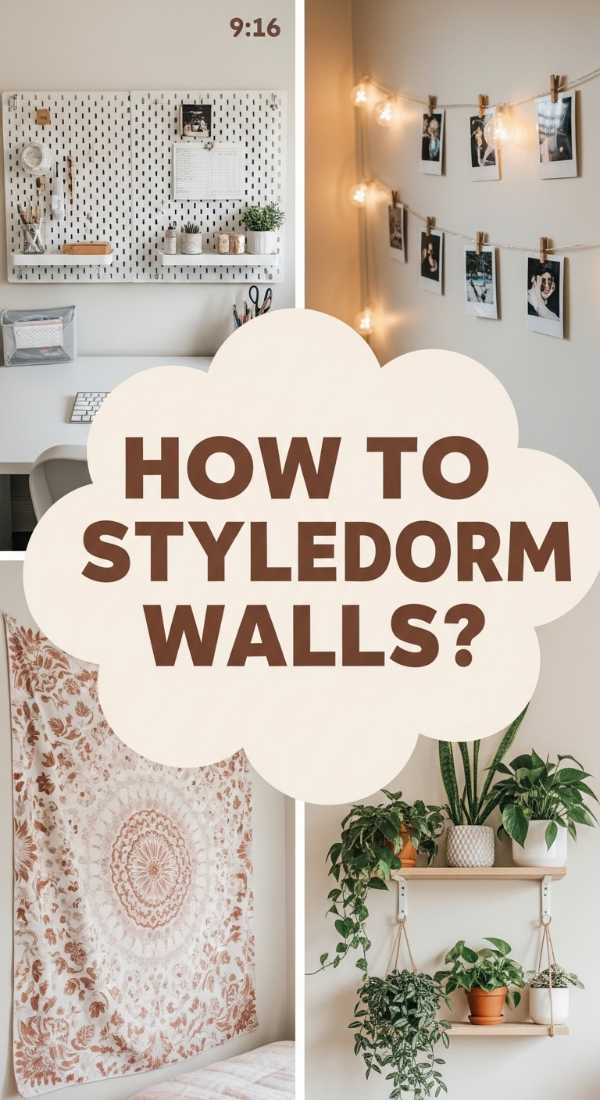
How to Personalize Dorm Wall Decor for a Cozy Homey Vibe
Why we love this
Dorm living can often feel cold and industrial, but a personalized wall setup acts as a cozy embrace at the end of a long day of lectures. We love the whimsical interplay of soft fairy lights against colorful art prints, creating a glow that smells faintly of vanilla candles and clean laundry. It’s about creating a tactile sanctuary where velvet-textured tapestries and glossy polaroids collide to express your evolving identity in a space that finally feels like home.
Essential Elements:
- Damage-free adhesive hooks (Command strips).
- Lightweight tapestries or fabric hangings.
- Clip-on string lights or LED strips.
- Removable wall decals or washi tape.
- Personal polaroids and postcards.
How to make it
- Texture First: Begin by hanging a large, lightweight fabric tapestry using adhesive clips. This covers the most ‘dorm gray’ surface area and immediately softens the acoustics of the room.
- Layered Lighting: Drape warm-toned string lights across the top of the tapestry or along the ceiling line. Use small clear adhesive hooks every 12 inches to prevent sagging.
- Washi Tape Frames: For posters and prints, avoid heavy frames. Create ‘faux frames’ by taping the edges with patterned washi tape directly onto the wall; this adds a pop of color without the weight.
- The Memory Grid: Use a decorative wire grid or a simple string with clothespins to display polaroids. This makes it easy to swap out photos as you make new friends throughout the semester.
- Check the Tension: Ensure all adhesive strips are pressed firmly for 30 seconds and allowed to ‘set’ for an hour before hanging any weight on them to prevent middle-of-the-night crashes.
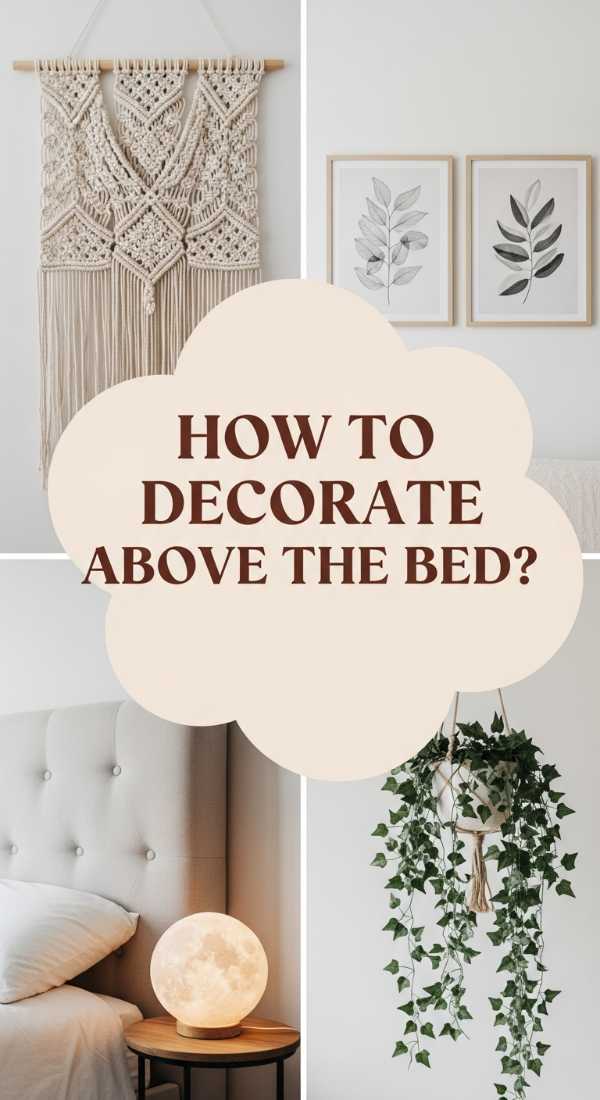
How to Design Above Bed Wall Decor for the Ultimate Night of Relaxation
Why we love this
The space above your headboard is the crown jewel of the bedroom, setting the tone for your deepest rest and sweetest dreams. We love the serene symmetry of oversized landscape art or the organic flow of a triptych that mimics the calming rhythm of ocean waves. It’s a sensory experience where the visual softness of the art complements the plushness of your pillows, creating a cocoon of tranquility that invites you to breathe deeply and let the day’s stress melt away.
Essential Elements:
- One oversized statement piece or a set of three (triptych).
- Sturdy wall anchors (for safety).
- Muted, calming color palettes (blues, greens, or neutrals).
- Decorative mirrors to bounce light.
- Low-profile frames to avoid a ‘heavy’ feeling overhead.
How to make it
- Scale Selection: Measure the width of your headboard. Your art should be approximately two-thirds to three-quarters the width of the bed to ensure it doesn’t look swallowed by the wall or overbearing.
- Safety Protocol: Since this hangs over your head, use heavy-duty wall anchors rather than simple nails. If you live in an earthquake-prone area, consider using lightweight canvas instead of glass-fronted frames.
- Height Adjustment: Hang the bottom of the frame 6-10 inches above the top of the headboard. This creates a cohesive look where the art feels connected to the furniture rather than floating aimlessly.
- Symmetry Check: If using a triptych, use a spacer (like a piece of 2×4 wood) to ensure the gaps between the three frames are exactly identical—usually 2 inches is the sweet spot.
- Leveling: Use a long level across the top of all three frames to ensure they create a perfectly straight horizon line, which is essential for a restful, balanced aesthetic.
How to Style Boho Wall Decor for an Earthy Atmosphere

Why we love this
Boho decor is a celebration of the wild and the rhythmic, bringing the grounding essence of the outdoors inside your sanctuary. We love the rich, fibrous texture of macrame wall hangings paired with the smooth, cool surface of terracotta planters nestled on floating shelves. It’s a multi-sensory delight where the faint scent of dried eucalyptus meets a visual feast of ochre and sage, making your living room feel like a sun-drenched garden retreat.
Essential Elements:
- Woven macrame or fiber art.
- Rattan baskets of varying depths.
- Floating wooden shelves.
- Living plants (vining species like Pothos).
- Raw wood or bamboo accents.
How to make it
- The Focal Fiber: Start with a large woven macrame piece as your center point. Hang it using a natural branch or a clean wooden dowel to emphasize the organic theme.
- Basket Clustering: Arrange 3-5 flat woven baskets around the macrame. Overlap the edges slightly to create depth and shadow, which adds to the ‘collected’ vibe.
- Greenery Integration: Install a small floating shelf and place a trailing plant on it. Allow the vines to drape naturally over the other elements, ‘softening’ the edges of the frames or baskets.
- Earth Tone Palette: Stick to a palette of terracotta, cream, mustard, and sage. If you have frames, use unfinished wood to maintain the raw, earthy aesthetic.
- Natural Lighting: Position your boho wall where it can catch natural sunlight, as the shifting shadows throughout the day will highlight the intricate textures of the weaving and wood.
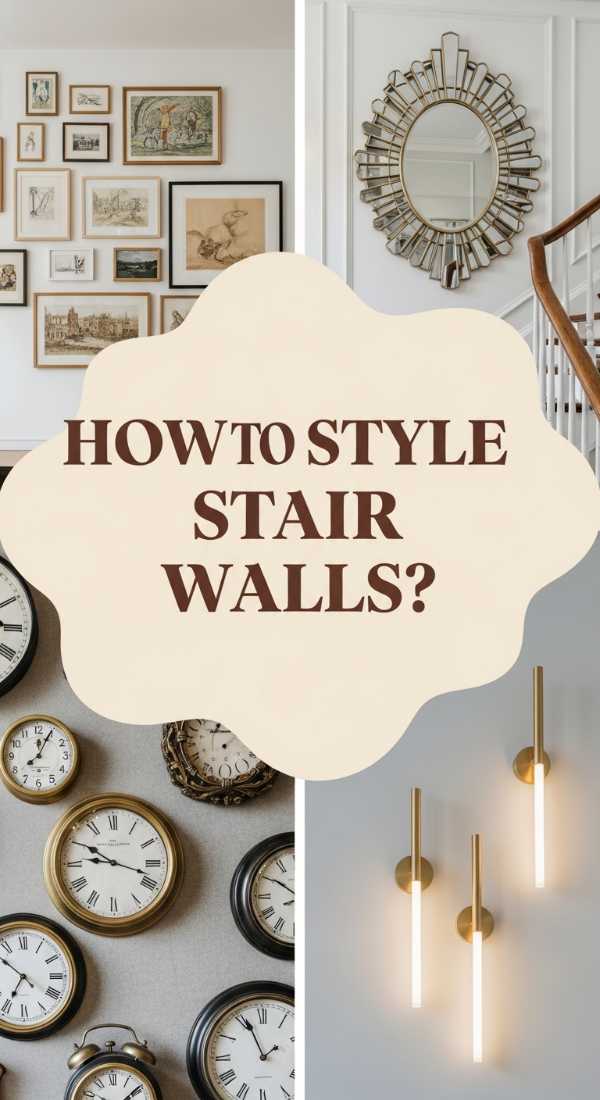
How to Plan Stairs Wall Decor Ideas for a Grand Entrance
Why we love this
The staircase is often a forgotten transition space, but with the right decor, it becomes a cinematic journey through your home. We love the dynamic movement of frames that ‘climb’ alongside you, creating a sense of rhythm and elevation. The visual impact of seeing a perfectly staggered gallery from the foyer creates a grand, welcoming atmosphere that feels both architectural and deeply personal, like walking through a private art gallery.
Essential Elements:
- A cohesive set of frames (usually all one color).
- Consistent spacing (the ‘stair-step’ method).
- High-contrast art or photos.
- Laser level (highly recommended).
- Pencil and measuring tape.
How to make it
- Determine the Incline: Measure the angle of your stairs. The easiest way is to mark a point 60 inches up from each step and connect those dots—this is your ‘center line.’
- Anchor the Landing: Start with a large piece at the bottom landing and another at the top landing to bookend the collection.
- The Staggered Layout: Place frames so that their centers follow the 60-inch incline line. Do not align the tops of the frames; instead, align the centers to mimic the upward movement of the stairs.
- Gap Consistency: Maintain a strict 2-inch gap between frames horizontally. Because the stairs move vertically, keeping the horizontal distance consistent is what prevents the wall from looking cluttered.
- Security: Use ‘museum putty’ or adhesive dots on the bottom corners of each frame. Staircases experience a lot of vibration from foot traffic, and this keeps the art from shifting crooked over time.
How to Craft Wall Decor DIY for Unique Self Expression

Why we love this
There is a profound satisfaction in looking at a wall and knowing your own hands created the beauty on display. We love the ‘perfectly imperfect’ nature of DIY art—the visible brushstrokes on a canvas or the delicate veins in a pressed flower. It’s an authentic expression of creativity that fills the room with a sense of pride and a scent of fresh paint and pressed botanicals, ensuring your home looks like no one else’s in the world.
Essential Elements:
- Blank canvases or thrifted frames.
- Acrylic paints or watercolors.
- Botanical press or heavy books.
- Hot glue gun and craft wire.
- Found objects (shells, vintage keys, textiles).
How to make it
- The Botanical Press: Collect local wildflowers, place them between parchment paper inside a heavy book for two weeks. Once dried, mount them on cardstock with a tiny drop of glue and frame them for an instant high-end ‘naturalist’ look.
- Textured Canvas: Mix acrylic paint with a bit of joint compound or baking soda to create a thick, plaster-like paste. Apply it to a canvas with a palette knife in sweeping motions for a modern, tactile piece of abstract art.
- Thrift Flip: Buy cheap, ugly art from a thrift store specifically for the frame. Spray paint the frame a matte black or gold, and replace the old art with a piece of fabric or a page from a vintage atlas.
- Assembly: When grouping DIY items, vary the medium. Mix a painted canvas with a 3D shadow box containing found objects to create visual intrigue.
- Finishing: Always sign or date the back of your DIY pieces. It turns a simple craft into a documented milestone of your creative journey.
How to Mount Skateboard Wall Decor for Urban Flair

Why we love this
Skateboard decor brings an edgy, street-style energy into a room that feels both youthful and sophisticated. We love the sleek, aerodynamic curve of the decks and the vibrant, often rebellious graphic art they display. It’s a tactile nod to urban culture that adds a pop of color and a sense of movement to the wall, smelling faintly of maple wood and grip tape—a perfect fit for a modern loft or a creative home office.
Essential Elements:
- Graphic skateboard decks (new or vintage).
- Specialized wall mounts or heavy-duty fishing line.
- Drill and wall anchors.
- Spirit level.
- Soft cloth for dusting.
How to make it
- Mount Selection: Purchase ‘no-drill’ skateboard wall mounts that utilize the existing truck holes in the deck. This allows you to hang the board without damaging the graphic.
- Orientation: Decide if you want a vertical ‘waterfall’ look or a horizontal ‘row.’ Vertical hanging is great for narrow walls, while horizontal rows make a space feel wider.
- Spacing: If hanging multiple boards, leave 4-6 inches between them. This allows the individual graphics to ‘breathe’ and prevents the wall from looking like a cluttered retail shop.
- Lighting: Use a directional spotlight or a ‘picture light’ mounted above the decks. The gloss finish on many skateboards reflects light beautifully, making the colors pop.
- Secure Attachment: Ensure the wall anchors are rated for at least 10 lbs. While decks are light, the leverage of the mount can pull on the drywall if not anchored properly.
How to Incorporate Mexican Wall Decor for Vibrant Living

Why we love this
Mexican-inspired decor is an explosion of joy and craftsmanship that breathes life into any room. We love the cool, glazed feel of hand-painted Talavera tiles and the intricate, punched details of tin mirrors (Hojalata). It’s a celebration of color—cobalt blues, fiery oranges, and vivid pinks—that makes a room feel festive and warm, like a sun-drenched afternoon in a bustling Oaxacan market.
Essential Elements:
- Talavera pottery or decorative plates.
- Punched tin mirrors or crosses.
- Otomi fabric prints or embroidery.
- Woven palm fans.
- Brightly colored niche boxes (Nichos).
How to make it
- The Plate Wall: Use spring-loaded plate hangers to mount hand-painted ceramic plates. Arrange them in a loose, circular ‘sunburst’ pattern around a central mirror.
- Tin Accents: Intersperse punched tin mirrors among softer elements like fabric prints. The reflective metal adds a ‘sparkle’ that catches candlelight beautifully in the evenings.
- Color Balance: To prevent the wall from being overwhelming, pick one ‘hero’ color (like Cobalt Blue) and ensure it appears in at least three different items on the wall.
- Texture Mix: Hang a hand-woven Otomi textile in a simple frame. The contrast between the rigid ceramic plates and the soft, intricate embroidery creates a sophisticated artisan look.
- Depth: Use ‘Nichos’ (small shadow boxes). Place a small candle or a clay figurine inside to add a 3D element that casts beautiful shadows against the wall.
How to Enhance Outdoor Wall Decor for Fresh Air Relaxation
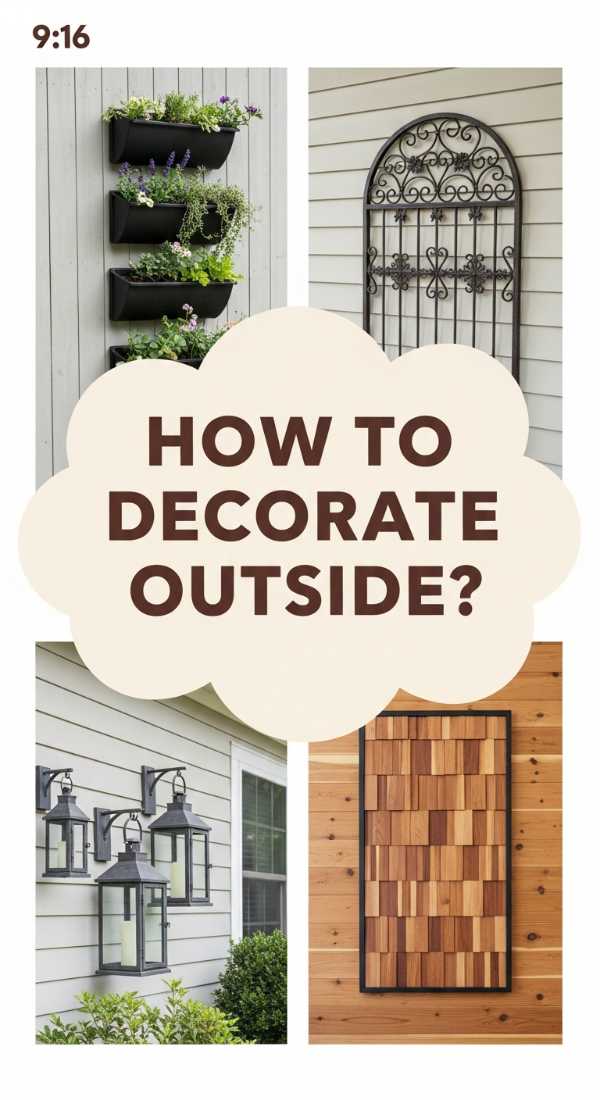
Why we love this
Transforming an exterior wall into a focal point extends your living space into nature, creating a seamless transition for alfresco entertaining. We love the rugged durability of weathered metal art and the living, breathing texture of a vertical garden. It’s a sensory experience where the sound of wind through a metal chime and the scent of sun-warmed cedar create a private oasis for morning coffee or sunset cocktails.
Essential Elements:
- Weather-resistant metal or stone art.
- Vertical planter boxes or ‘living wall’ kits.
- Outdoor-rated string lights (Edison bulbs).
- Cedar or pressure-treated wood lattices.
- Rust-proof hardware (stainless steel).
How to make it
- Weatherproofing: Choose materials like powder-coated steel, treated wood, or stone. If using wood, apply a UV-resistant sealant every year to prevent graying and cracking.
- The Living Wall: Install a vertical planter system. Fill it with succulents for low maintenance or herbs like rosemary and mint for a fragrant, functional wall.
- Lighting the Perimeter: Drape heavy-duty outdoor string lights along the top edge of the wall. Use ‘climbing’ clips to keep the cord taut and professional-looking.
- Focal Point: Hang a large-scale metal compass or sunburst. Ensure you use masonry screws if hanging on brick or stucco, and always pre-drill your holes.
- Contrast: If your exterior wall is a dark color, use light-colored stone or galvanized metal. If it’s a light-colored fence, use dark bronze or vibrant green plants to create a ‘pop.’
How to Curate Apartment Wall Decor for a Chic Professional Look
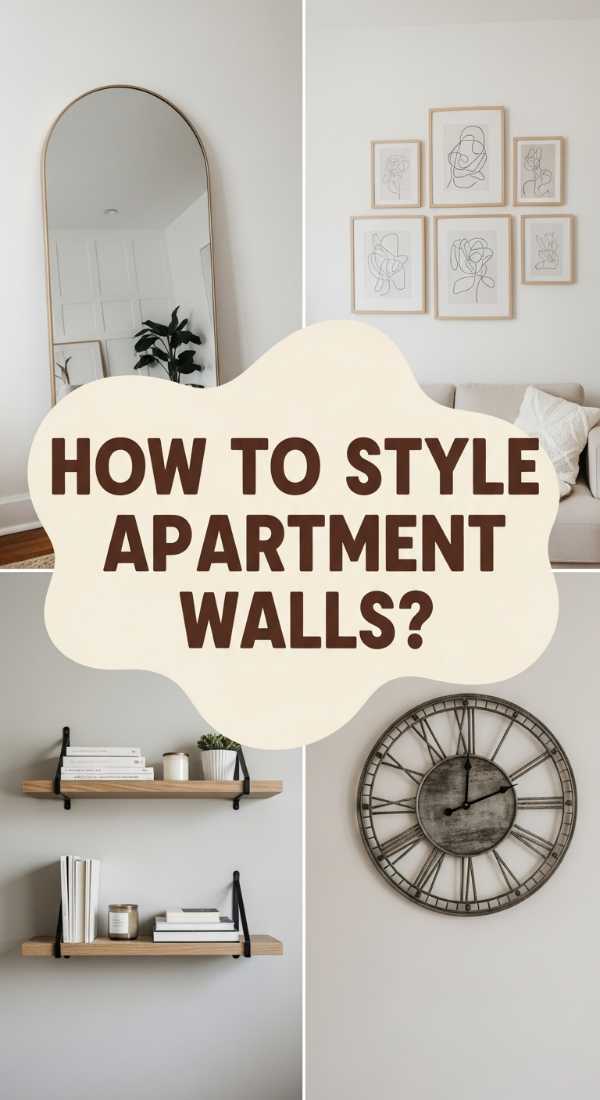
Why we love this
A chic, professional gallery wall is the ultimate ‘grown-up’ decor move, signaling a transition from temporary housing to a curated life. We love the sharp, clean lines of thin black frames and the airy feel of oversized white matting. It’s a visual representation of focus and sophistication, where the smooth glass surfaces and minimalist art create a sense of order and calm that is perfect for high-stakes Zoom calls or elegant evening soirées.
Essential Elements:
- Matching minimalist frames (black, white, or slim gold).
- Extra-wide white mats for a ‘gallery’ feel.
- Abstract line art or architectural photography.
- Large-scale pieces (fewer is more).
- Picture lights (battery-operated for renters).
How to make it
- The Grid Strategy: For a professional look, use a strict grid (e.g., two rows of three). Use a ruler to ensure the spacing is exactly 1.5 inches between every single frame.
- Oversized Matting: Buy frames that are much larger than your art. Placing a 5×7 print in an 11×14 frame with a wide white mat instantly makes the art look expensive and custom-made.
- Color Restraint: Stick to a monochromatic or neutral palette. Black, white, beige, and charcoal create a timeless, high-end aesthetic that never goes out of style.
- The Power Move: Hang one massive piece of art (at least 30×40 inches) on a single wall rather than a cluster. This ‘hero’ approach is the hallmark of professional interior design.
- Lighting: Add a wireless, rechargeable LED picture light above your main piece. It adds a museum-quality glow without the need for an electrician, elevating the entire room’s ambiance.
Conclusion: Your Walls, Your Story
At the end of the day, there are no ‘rules’ in home decor that are more important than your own happiness. Whether you choose a structured grid of professional prints or a chaotic, colorful collection of DIY projects and family photos, the goal is to create a space that makes you smile the moment you walk through the door. Start small, be patient with your layout, and don’t be afraid to move things around until they feel ‘just right.’ Your home is a work in progress, just like you—so enjoy the process of filling it with beauty!