
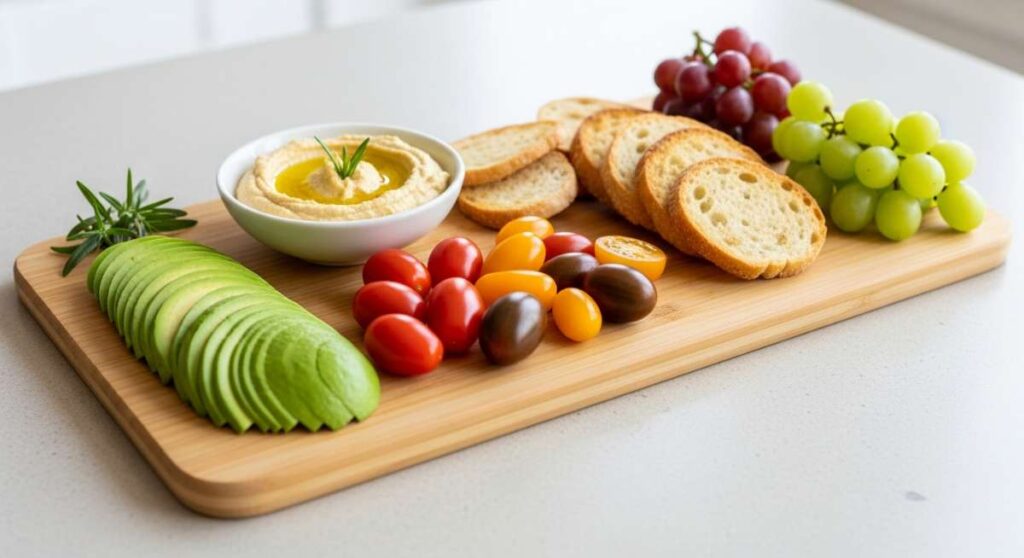
There is a specific kind of magic that happens when the sun begins to linger a little longer in the evening and the heavy, winter stews are replaced by the vibrant colors of fresh produce. Lately, my social media feed has been dominated by one thing: the Simple Food Board. It’s more than just a charcuterie tray; it’s an effortless, deconstructed approach to dining that celebrates the season’s best offerings without the stress of a formal dinner party. It’s about those long, lazy afternoons where the food is as beautiful as the company.
I used to spend hours in the kitchen, missing out on the laughter in the living room while I hovered over a hot stove. But this summer, I’ve embraced the art of the board. From garden-fresh snacks to chilled pastas and even treats for our feathered backyard friends, these boards are about creating a lifestyle that is both aesthetic and deeply nourishing. Let me walk you through my favorite elements that turn a simple wooden plank into the centerpiece of your summer memories.
How to prep summer meals?

Why we love this
Prepping summer meals isn’t just about saving time; it’s about preserving the fleeting crispness of a snap pea and the aromatic burst of freshly picked basil. When you open a fridge filled with pre-washed greens and neatly sliced peppers, you feel an immediate sense of calm and inspiration. The sensory experience of cool, damp vegetables against your fingertips and the bright, grassy scent of chopped herbs makes the act of assembly feel like a creative ritual rather than a chore. It ensures that every bite you take is at its peak freshness, keeping you fueled and hydrated through the heat of the day.
Ingredients
- Organic baby spinach and arugula
- Rainbow bell peppers
- English cucumbers
- Red onions
- Pre-cooked quinoa or farro
- Lemon-tahini dressing
- Fresh mint and cilantro
How to make it
- Begin by washing all produce in ice-cold water to ensure maximum crispness; pat them completely dry with a lint-free tea towel to prevent premature wilting.
- Slice bell peppers into uniform matchsticks and cucumbers into thin rounds, using a mandoline if available for that professional, translucent look.
- Cook your grains in salted water until ‘al dente’—look for a slight resistance when biting—then spread them on a baking sheet to cool rapidly, preventing them from becoming mushy.
- Portion the greens into glass airtight containers, placing a dry paper towel at the bottom to absorb excess moisture and extend shelf life to 5-7 days.
- Whisk together your dressing in a small mason jar until emulsified, and store it separately so the acids don’t ‘cook’ your vegetables before you’re ready to eat.
How to make rotel dip?

Why we love this
Rotel dip is the ultimate comfort food that brings a touch of nostalgic indulgence to any sophisticated food board. There is something irresistible about the sight of golden, molten cheese swirled with the vibrant red and green of diced tomatoes and green chilies. As the dip warms, it releases a savory, spicy aroma that instantly draws a crowd, promising a velvety texture that clings perfectly to a salty tortilla chip. It’s a sensory explosion of heat, salt, and creaminess that reminds us of backyard tailgates and spontaneous summer gatherings.
Ingredients
- 1 lb Velveeta or high-quality melting cheese
- 1 can (10 oz) Ro-Tel Diced Tomatoes and Green Chilies
- 1/2 lb browned ground sausage or beef (optional)
- 1/2 cup heavy cream for extra silkiness
- Fresh cilantro for garnish
- Pickled jalapeños
How to make it
- Cut the melting cheese into 1-inch cubes to ensure even melting and prevent the bottom from burning before the center is liquefied.
- If using meat, brown it in a skillet over medium-high heat until deeply caramelized and no pink remains; drain the grease thoroughly to keep the dip from becoming oily.
- In a slow cooker or a heavy-bottomed saucepan over low heat, combine the cheese cubes and the undrained can of tomatoes and chilies.
- Stir constantly with a silicone spatula, maintaining a low temperature—you want to see gentle wisps of steam but never large bubbles, which indicate the cheese is scorching.
- Once smooth, whisk in the heavy cream slowly to reach a pourable consistency, then garnish with fresh cilantro and serve immediately while the temperature is between 140°F and 150°F.
How to make hummingbird food?

Why we love this
While we feast, we can’t forget the tiny jewels of the garden that provide the soundtrack to our summer afternoons. Creating homemade hummingbird nectar is a gentle, mindful process that connects you directly to the local ecosystem. Watching a ruby-throated visitor hover near your feeder, their wings a blur of iridescent motion, is a meditative experience that elevates a simple porch hang into a nature documentary. The clear, sweet liquid is a life-giving energy source that ensures your garden remains a buzzing, vibrant sanctuary of life and color.
Ingredients
- 1 cup refined white granulated sugar
- 4 cups filtered water
- No red dye or artificial colors
How to make it
- Mix the sugar and water in a medium saucepan, using a ratio of 1 part sugar to 4 parts water to mimic the natural sucrose levels found in flower nectar.
- Heat the mixture over medium heat, stirring gently until the sugar crystals are completely dissolved and the liquid is perfectly transparent.
- Bring the solution to a light boil for just 1-2 minutes; this helps to slow down bacterial growth and ensures the water is purified without over-concentrating the sugar.
- Remove from heat and allow the nectar to cool completely to room temperature; never put hot nectar into a plastic feeder as it can leach chemicals.
- Store extra nectar in a clean glass jar in the refrigerator for up to two weeks, and remember to clean and refill your feeders every 3-5 days to prevent fermentation.
How to cook summer pasta?
Why we love this
Summer pasta is the antithesis of heavy winter noodles; it is light, fragrant, and celebrates the garden’s bounty with minimal interference. Picture long strands of linguine coated in a shimmering veil of extra virgin olive oil, speckled with the gold of lemon zest and the deep green of torn basil leaves. The aroma is citrusy and herbaceous, evoking the feeling of an al fresco dinner on the Mediterranean coast. Each bite offers a satisfying chew followed by the burst of blistered cherry tomatoes that release their sweet, jammy juices across your palate.
Ingredients
- 1 lb Spaghetti or Bucatini
- 2 cups cherry tomatoes
- 4 cloves garlic, thinly sliced
- 1/2 cup extra virgin olive oil
- 1 bunch fresh basil
- Zest of 2 lemons
- Red pepper flakes
How to make it
- Bring a large pot of heavily salted water—it should taste like the sea—to a rolling boil over high heat.
- Add the pasta and cook for 1-2 minutes less than the package directions; the pasta should have a firm core (al dente) as it will finish cooking in the sauce.
- While the pasta boils, heat olive oil in a wide skillet over medium-low heat; add sliced garlic and red pepper flakes, cooking until the garlic is golden and fragrant but not brown.
- Add cherry tomatoes to the oil and cook until their skins begin to wrinkle and pop; use the back of a wooden spoon to gently crush a few to create a base for the sauce.
- Transfer the pasta directly from the water into the skillet, adding a splash of starchy pasta water, and toss vigorously over high heat for 60 seconds until a glossy sauce coats every strand.
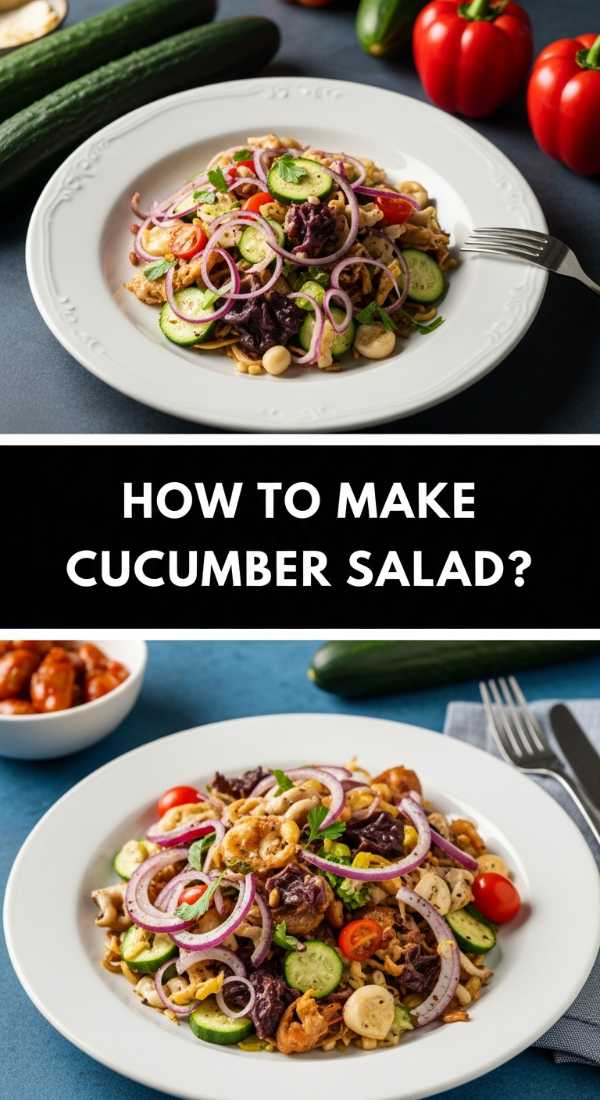
How to make cucumber salad?

Why we love this
There is nothing quite as refreshing as a crisp cucumber salad on a sweltering July afternoon. The sensory contrast between the ice-cold, crunchy cucumbers and the sharp, tangy snap of a vinegar-based dressing is an instant palate cleanser. When sliced paper-thin, the cucumbers become almost translucent, absorbing the flavors of dill and red onion while maintaining their structural integrity. The scent is incredibly clean and cooling, like a spa day in a bowl, making it the perfect hydrating side dish for a salty, savory food board.
Ingredients
- 3 large English cucumbers
- 1/2 red onion, shaved
- 1/2 cup white wine vinegar
- 2 tbsp sugar
- 1/4 cup fresh dill, chopped
- 1 tsp sea salt
- 1/2 tsp cracked black pepper
How to make it
- Slice the cucumbers into thin rounds; for the best texture, use a mandoline set to 1/8th inch to ensure they are thin enough to absorb the brine but thick enough to stay crunchy.
- Place the sliced cucumbers in a colander and sprinkle with sea salt, letting them sit for 15 minutes to draw out excess moisture—this prevents the salad from becoming watery.
- In a small bowl, whisk together the vinegar, sugar, pepper, and chopped dill until the sugar is completely dissolved and the dressing is clear.
- Pat the cucumbers dry with a paper towel and toss them in a large glass bowl with the shaved red onions.
- Pour the dressing over the vegetables and refrigerate for at least 30 minutes before serving; the cucumbers should look slightly wilted but still offer a distinct ‘snap’ when bitten.
How to grill summer kabobs?

Why we love this
Grilling kabobs is a sensory feast that defines the outdoor cooking experience. The hiss of the marinade hitting the hot grates, the billowing smoke scented with charred peppers and savory meat, and the visual beauty of the alternating colors make this a board favorite. There is a primal joy in eating food off a stick, and the caramelized edges of the vegetables offer a smoky sweetness that you just can’t achieve in an oven. It feels like a celebration of fire and fresh ingredients, perfect for communal grazing.
Ingredients
- 1 lb sirloin steak or chicken breast, cubed
- 2 bell peppers (red and yellow)
- 1 red onion
- 1 cup zucchini rounds
- 1/2 cup balsamic glaze or BBQ sauce
- Wooden or metal skewers
How to make it
- If using wooden skewers, soak them in water for at least 30 minutes to prevent them from igniting on the grill.
- Cut your protein and vegetables into uniform 1.5-inch pieces; this ensures that everything finishes cooking at the same time without the smaller pieces burning.
- Thread the ingredients onto the skewers, leaving a small gap between each item to allow the hot air to circulate and sear all sides of the food.
- Preheat your grill to medium-high (about 400°F); you should only be able to hold your hand over the grates for 3 seconds.
- Grill the kabobs for 8-12 minutes, turning them a quarter-turn every 2-3 minutes until the meat reaches an internal temperature of 145°F (for steak) or 165°F (for chicken) and the vegetable edges are blackened and soft.
How to make summer desserts?

Why we love this
Summer desserts should feel like a breeze—effortless, light, and bursting with the natural sugars of sun-ripened fruit. Imagine a platter of macerated strawberries and pillowy whipped cream, where the berries have released their deep crimson syrup and the cream is flecked with real vanilla bean. The texture is a dream of soft and succulent, providing a cool conclusion to a day spent in the sun. It’s the kind of sweetness that doesn’t weigh you down but instead leaves you feeling refreshed and satisfied.
Ingredients
- 1 quart fresh strawberries or peaches
- 2 tbsp granulated sugar
- 1 cup heavy whipping cream
- 1 tsp vanilla bean paste
- Fresh mint leaves
- Shortbread cookies for dipping
How to make it
- Slice your fruit into bite-sized pieces and toss them in a bowl with two tablespoons of sugar; let them sit (macerate) for at least 20 minutes until a natural syrup forms.
- Chill a metal mixing bowl and whisk in the freezer for 10 minutes; cold equipment is the secret to achieving stable, voluminous whipped cream.
- Pour the heavy cream and vanilla paste into the chilled bowl and whisk on medium-high speed until medium peaks form—the cream should hold its shape but still have soft, curled tips.
- Fold in a small amount of finely chopped mint into the cream for an unexpected, refreshing herbal note.
- Assemble the board by placing the bowl of fruit in the center, surrounded by the whipped cream and shortbread cookies, ensuring the cream is served immediately to maintain its airy texture.
How to mix summer drinks?

Why we love this
A perfectly mixed summer drink is like a liquid sunset in a glass. Whether it’s a sparkling mocktail or a gin-infused botanical delight, the sound of ice clinking against glass is the universal signal that it’s time to relax. These drinks feature vibrant garnishes like slapped mint leaves that release their oils and dehydrated citrus wheels that float elegantly on the surface. The taste is a balance of tart, sweet, and effervescent, providing a crisp hydration that cuts through the heat and complements every savory item on your food board.
Ingredients
- Freshly squeezed lemon or lime juice
- Simple syrup (1:1 sugar and water)
- Sparkling mineral water or club soda
- Fresh berries and herbs (basil, thyme, or mint)
- Ice (large cubes or crushed)
How to make it
- Start by ‘muddling’ your herbs and berries in the bottom of a glass or shaker; press down firmly but don’t shred them, as you want to release the oils without making the drink bitter.
- Add 1 ounce of citrus juice and 3/4 ounce of simple syrup to the glass, stirring to combine the base flavors.
- Fill the glass to the very brim with ice; using more ice actually keeps the drink colder longer and prevents the ice from melting too quickly and diluting the flavor.
- Top with sparkling water, pouring it slowly down the side of the glass to preserve the carbonation.
- Give it one gentle ‘lift’ with a long spoon to incorporate the syrup from the bottom, then garnish with a sprig of fresh herbs and a slice of fruit for that viral-worthy aesthetic.
How to make party sandwiches?
Why we love this
Party sandwiches, or ‘sliders’, are the hardworking heroes of the food board, offering a substantial bite that feels fancy yet approachable. There is something incredibly satisfying about the glossy, butter-brushed tops of the buns and the layers of savory deli meats and melted cheese hidden inside. As they bake, the edges of the bread become golden and crisp while the interior remains soft and steamy. They are easy to grab, easy to share, and carry a rich, buttery aroma that makes them disappear within minutes of being served.
Ingredients
- 1 pack sweet Hawaiian rolls
- 1/2 lb thin-sliced deli ham or turkey
- 6 slices Swiss or Provolone cheese
- 1/4 cup melted butter
- 1 tbsp Dijon mustard
- 1 tsp poppy seeds
How to make it
- Without pulling the rolls apart, slice the entire block of rolls in half horizontally using a long serrated knife to create a top and bottom ‘slab’.
- Layer the bottom half with the cheese first, then the meat, then another layer of cheese; this ‘cheese sandwich’ method protects the bread from getting soggy from the meat juices.
- Place the top slab of rolls back on and cut through the lines to create individual sliders before baking; this allows the heat to penetrate the sides of each sandwich.
- Whisk together melted butter, mustard, and poppy seeds, then brush the mixture generously over the tops of the rolls, ensuring the butter seeps into the cracks.
- Cover with foil and bake at 350°F for 10 minutes, then remove the foil and bake for another 5 minutes until the tops are golden brown and the cheese is visibly bubbling.
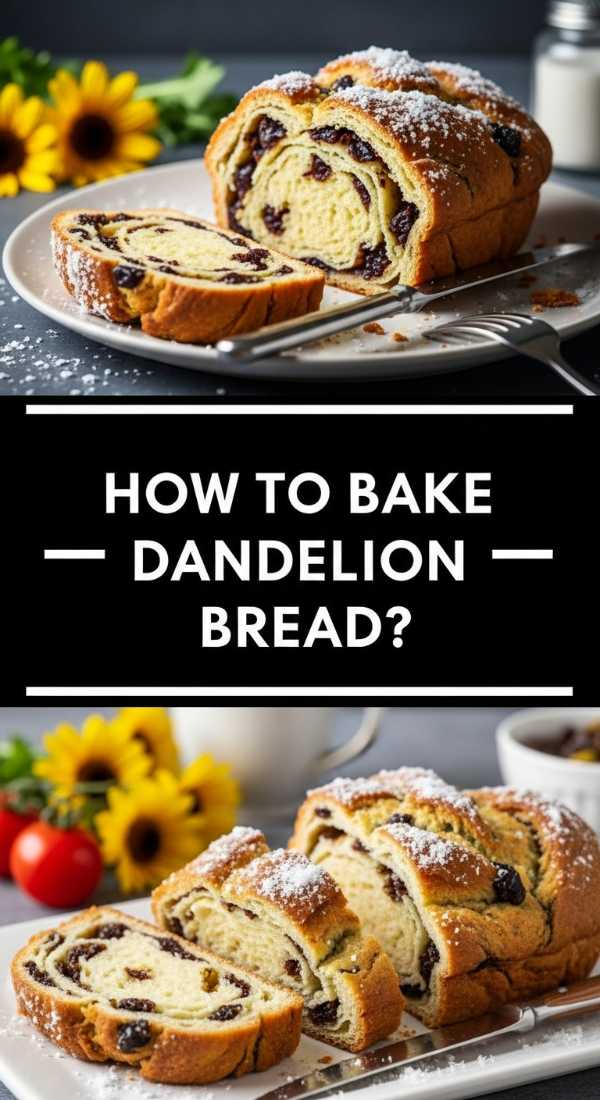
How to bake dandelion bread?
[IMAGE_10]
Why we love this
Dandelion bread is a beautiful, rustic tribute to the magic of foraging and the hidden treasures in our own backyards. The bread itself is often a slightly sweet, golden loaf, flecked with the bright yellow petals of dandelions which add a delicate, honey-like floral note. The crust is thick and crusty, while the inside is airy and soft, making it the perfect vessel for a smear of salted butter. It’s a conversation starter that tastes like a sunny meadow, bringing a touch of whimsical, cottagecore charm to your summer board.
Ingredients
- 2 cups all-purpose flour
- 1 cup fresh dandelion petals (yellow parts only)
- 1 tsp baking powder
- 1/2 tsp salt
- 1/4 cup honey or sugar
- 1 cup milk
- 1 egg
How to make it
- Harvest dandelion heads from a clean, pesticide-free area; pull the yellow petals away from the green base, as the green parts are very bitter and will ruin the flavor of the bread.
- In a large bowl, whisk together the flour, baking powder, and salt, then stir in the dandelion petals so they are well-coated and don’t clump together.
- In a separate bowl, beat the egg and whisk in the milk and honey until the honey is fully integrated into the liquid.
- Pour the wet ingredients into the dry and stir just until combined; over-mixing will lead to a tough, dense loaf rather than a tender crumb.
- Pour the batter into a greased loaf pan and bake at 350°F for 45-50 minutes, or until a toothpick inserted into the center comes out clean and the top is a deep, golden ochre.
Conclusion
Building a summer food board isn’t about perfection; it’s about the joy of assembly and the freedom to mix and match the flavors you love most. Whether you’re serving a crowd or just treating yourself to a beautiful solo lunch, these simple recipes bring a sense of occasion to the everyday. So, grab a board, head outside, and let the flavors of the season take over your kitchen and your heart.