
How to Make a Stunning Food Board in Under 10 Minutes
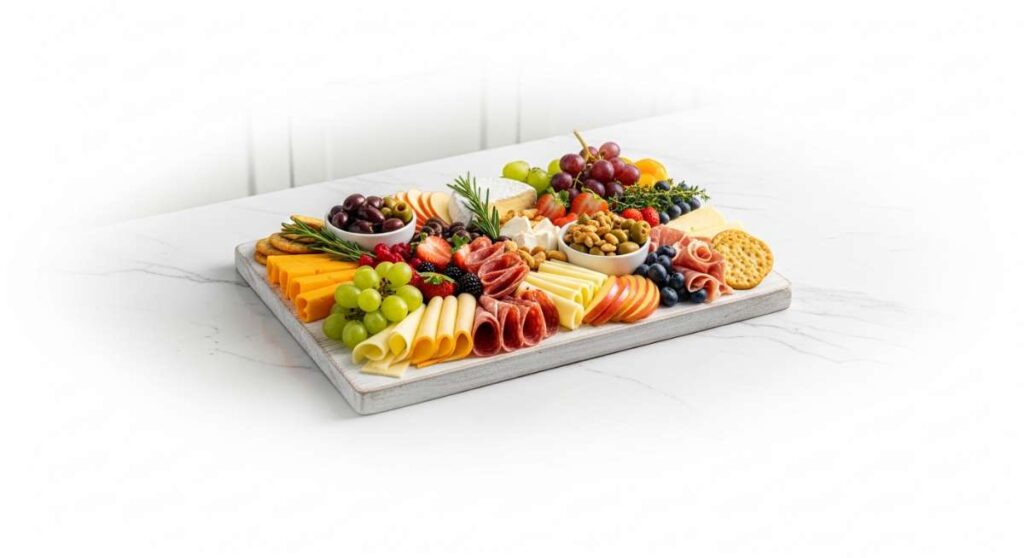
We’ve all been there—the sun is setting, the music is playing, and friends are laughing on the patio, but you’re stuck in the kitchen feeling overwhelmed. There is a specific kind of magic that happens when you set down a massive, colorful food board in the center of a table; it’s an instant conversation starter and a feast for the eyes. I used to spend hours prepping individual appetizers, but I’ve learned that the secret to a viral-worthy gathering is the art of the ‘lazy-girl’ assembly. It’s about high-quality ingredients, vibrant colors, and zero stress.
Today, I’m sharing my ultimate guide to creating a stunning food board that looks like it took hours but actually comes together in under ten minutes. Whether you are hosting a backyard bash or a quiet Sunday brunch, these ideas will elevate your hosting game to a professional level. Let’s dive into the themes and recipes that will make your board the star of the season!
10 Best Summer Dinner Ideas (Step-by-Step Guide)
Why we love this
Summer dinners should feel like a warm breeze—effortless, light, and filled with the bounty of the season. We love this approach because it transitions perfectly onto a large wooden board, allowing everyone to build their own plates with grilled proteins, charred corn, and heirloom tomatoes. There is something deeply satisfying about the crunch of a snap pea paired with the smoky aroma of a perfectly seared piece of fish or chicken, creating a sensory experience that celebrates the long, golden hours of July.
Ingredients
- Grilled lemon-herb chicken thighs
- Seared salmon fillets
- Fresh heirloom tomato slices with flaky sea salt
- Charred corn on the cob with lime butter
- Zucchini ribbons with mint
- Burrata cheese balls
- Toasted sourdough slices
- Avocado halves with chili flakes
- Fresh basil and cilantro sprigs
- Honey-balsamic reduction
How to make it
- Begin by preheating your outdoor grill or indoor cast-iron grill pan to a medium-high heat (about 400°F). Lightly coat the chicken and salmon with olive oil, salt, and cracked pepper to ensure a crisp exterior.
- Place the chicken thighs on the hottest part of the grill first, searing for 5-7 minutes per side until the internal temperature reaches 165°F and the skin is golden and slightly charred.
- Position the salmon on the cooler edge of the grill, cooking for 3-4 minutes per side; look for the flesh to turn opaque and flake easily with a fork while maintaining a tender center.
- While the proteins rest, toss the corn cobs onto the grill for 8 minutes, rotating frequently until kernels are charred in spots; immediately slather with lime-infused butter.
- Assemble the board by placing the warm proteins in the center, then fan out the cool tomato slices and zucchini ribbons around the edges. Tear the burrata open to expose the creamy center and drizzle the entire board with a honey-balsamic reduction for a sweet-and-savory finish.
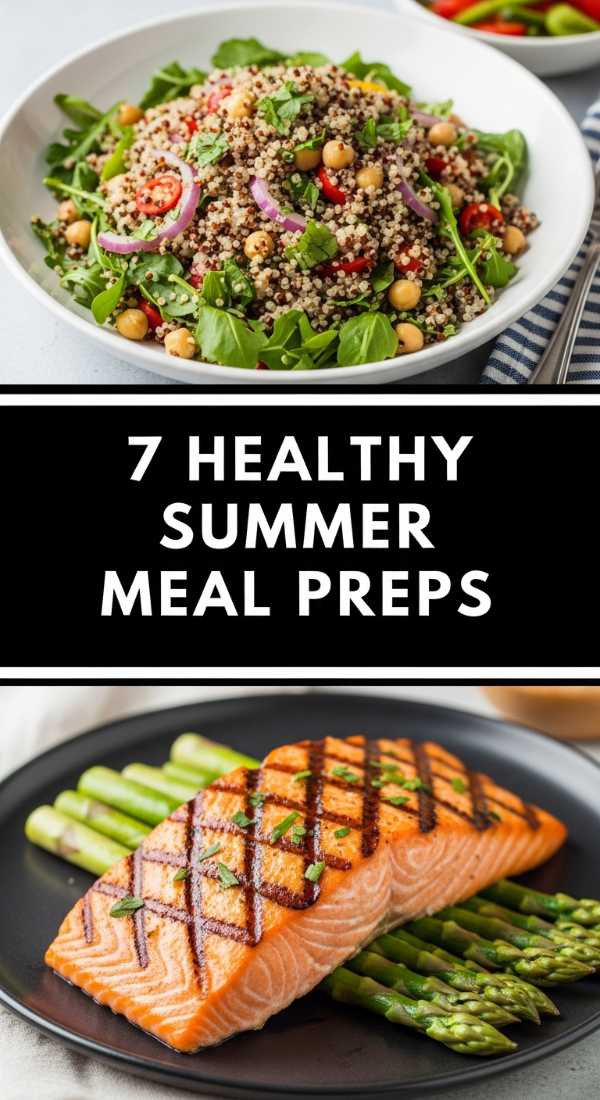
7 Healthy Summer Meal Prep Recipes (Step-by-Step Guide)
Why we love this
Meal prepping for summer isn’t just about utility; it’s about preserving that fresh, vibrant energy for the busy week ahead. We love this collection because it focuses on crisp textures, zesty citrus dressings, and proteins that taste just as good cold as they do warm. Imagine opening your fridge to see rows of colorful glass jars filled with quinoa, crunchy radishes, and bright greens—it’s a visual treat that makes healthy eating feel like a luxury rather than a chore.
Ingredients
- Tri-color quinoa
- Chickpeas (rinsed and drained)
- Massaged kale with lemon juice
- Roasted sweet potato cubes
- Sliced almonds or pumpkin seeds
- Shredded purple cabbage
- Lemon-tahini dressing
How to make it
- Start by rinsing 1 cup of quinoa under cold water to remove bitterness, then simmer in 2 cups of water or vegetable broth for 15 minutes until the germ separates and the liquid is absorbed.
- While the quinoa cooks, dice sweet potatoes into 1/2 inch cubes and toss with olive oil and cumin; roast at 400°F for 20-25 minutes until the edges are caramelized and soft.
- Prepare the kale by removing the tough ribs, chopping finely, and ‘massaging’ it with a teaspoon of olive oil and lemon juice for 2 minutes—this breaks down the fibers for a silky, tender texture.
- Whisk together tahini, lemon juice, minced garlic, and a splash of warm water until the dressing reaches a drizzling consistency.
- Layer the ingredients into airtight containers, starting with the dressing at the bottom, followed by the sturdy sweet potatoes and chickpeas, and ending with the delicate kale and cabbage on top to prevent wilting.
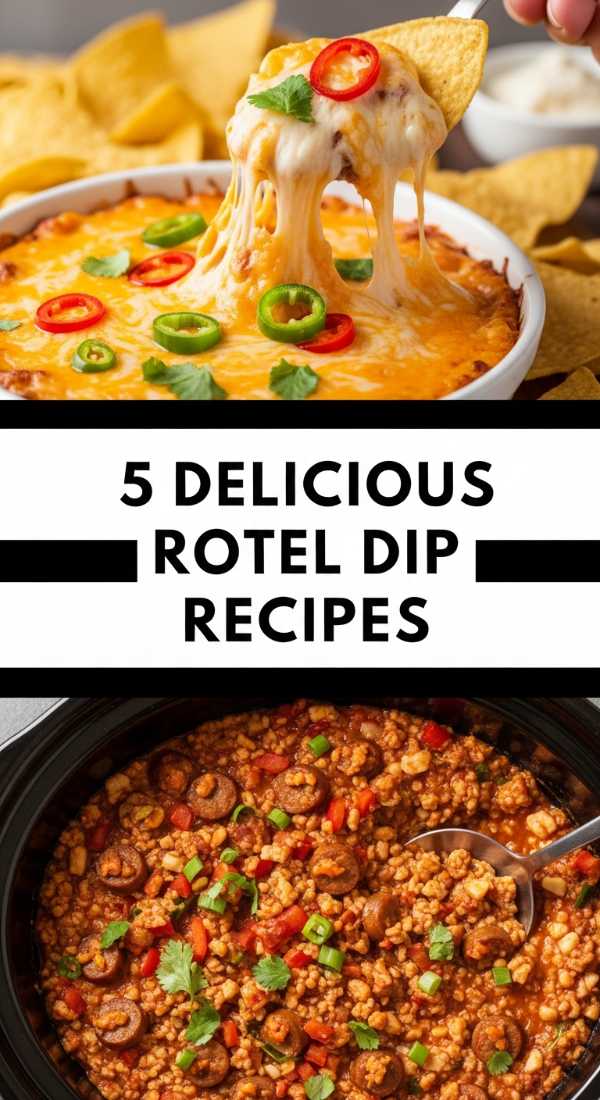
5 Delicious Rotel Dip Recipes (Step-by-Step Guide)
Why we love this
There is a nostalgic, gooey comfort in a Rotel dip that simply cannot be beaten when you need a crowd-pleaser in a hurry. We love this because it’s the ultimate ‘centerpiece’ for a snacking board, offering a creamy, spicy, and savory anchor for a sea of salty chips and crisp veggies. The way the melted cheese wraps around the diced tomatoes and green chilies creates a velvety texture that feels like a warm hug for your taste buds.
Ingredients
- 1 block (16 oz) Velveeta or high-quality melting cheese
- 2 cans (10 oz) Rotel Original Diced Tomatoes and Green Chilies
- 1 lb ground spicy sausage or chorizo
- 1/2 cup heavy cream (for extra silkiness)
- Fresh cilantro for garnish
- Pickled jalapeños
How to make it
- In a large skillet over medium heat, brown the ground sausage or chorizo, breaking it into small crumbles with a wooden spoon until fully cooked and no longer pink (about 8-10 minutes). Drain the excess fat.
- Turn the heat down to low and add the cubed melting cheese and the undrained cans of Rotel; the liquid from the tomatoes is essential for the right consistency.
- Stir continuously as the cheese melts to prevent scorching on the bottom of the pan; once mostly melted, stir in the heavy cream to achieve a professional, glossy finish.
- Transfer the mixture to a slow cooker on the ‘warm’ setting if serving over a long period, or pour it into a ceramic bowl immediately.
- Garnish with a handful of fresh cilantro and a few rings of pickled jalapeños to add a pop of acid that cuts through the richness of the cheese.
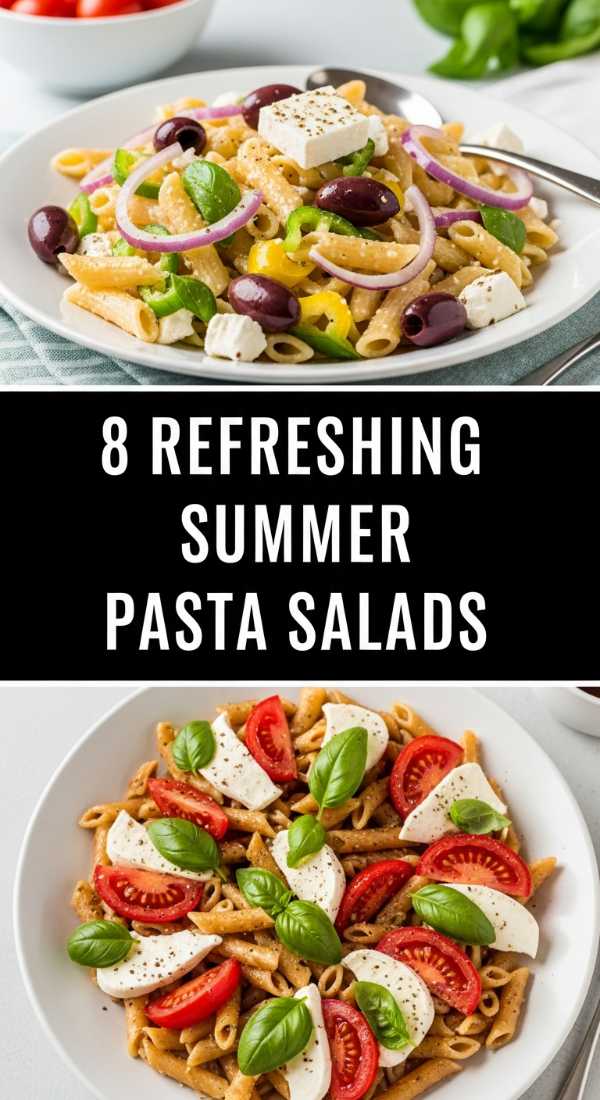
8 Refreshing Summer Pasta Salads (Step-by-Step Guide)

Why we love this
A great pasta salad is the backbone of any successful summer board, providing a satisfying heartiness that keeps guests full while remaining incredibly refreshing. We love this because of the contrast between the al dente pasta and the snap of fresh bell peppers, all tied together by a zingy vinaigrette that seeps into every crevice of the noodles. It’s a dish that actually tastes better as it sits, making it the perfect stress-free addition to your prep list.
Ingredients
- Rotini or Bowtie pasta
- English cucumber, diced
- Red bell pepper, finely chopped
- Kalamata olives
- Feta cheese crumbles
- Red onion, thinly sliced
- Italian herb vinaigrette
How to make it
- Boil a large pot of heavily salted water—it should taste like the sea—and cook the pasta for exactly 1 minute less than the package directions for perfect ‘al dente’ firmness.
- Drain the pasta and immediately rinse it under cold running water to stop the cooking process and wash away excess starch, which prevents the noodles from sticking together.
- In a large mixing bowl, combine the cooled pasta with the cucumbers, peppers, onions, and olives.
- Pour the vinaigrette over the mixture and toss thoroughly, ensuring every piece of pasta is coated; let it chill in the refrigerator for at least 30 minutes to allow the flavors to marry.
- Just before serving on your board, fold in the feta cheese crumbles gently so they stay intact and don’t turn the salad cloudy, and finish with a crack of fresh black pepper.
10 Best Sides for Cookouts (Step-by-Step Guide)

Why we love this
Cookout sides are the unsung heroes of the BBQ world, bringing balance to smoky meats with their brightness and acidity. We love this variety because it turns a standard board into a colorful mosaic of flavors—from creamy potato salads to vinegary slaws. The texture play here is incredible, ranging from the softness of a slow-cooked bean to the explosive crunch of a fresh radish, making every bite an exciting new discovery.
Ingredients
- Red skin potatoes (boiled and halved)
- Creamy mayo-mustard dressing
- Cabbage and carrot slaw mix
- Apple cider vinegar and honey dressing
- Baked beans with bacon bits
- Grilled pineapple rings
- Cornbread muffins
How to make it
- For the potato salad, boil the red potatoes in salted water until fork-tender (about 12-15 minutes), then let them cool completely before tossing with the mayo-mustard mixture to prevent the sauce from breaking.
- Prepare the slaw by whisking apple cider vinegar, honey, and celery seed, then tossing with the cabbage mix; let it sit for 10 minutes to soften slightly while retaining a crunch.
- Place the pineapple rings on a medium-high grill for 2 minutes per side until distinct grill marks appear and the natural sugars caramelize into a deep gold.
- Warm the baked beans in a small pot over low heat, adding a touch of brown sugar or liquid smoke for a deeper flavor profile.
- Arrange the sides in small, colorful ramekins across your board, filling the gaps with warm cornbread muffins to soak up any stray sauces.
6 Easy Mother’s Day Desserts (Step-by-Step Guide)
Why we love this
Mother’s Day deserves something sweet, elegant, and light, and a dessert board is the perfect way to show love without spending all day baking. We love this because it combines the decadence of dark chocolate with the ethereal sweetness of macerated berries and whipped cream. It feels sophisticated and thoughtful, yet it’s entirely approachable, allowing the natural beauty of the fruit to take center stage alongside delicate pastries.
Ingredients
- Fresh strawberries and raspberries
- Shortbread cookies
- Dark chocolate Ganache or dip
- Mini lemon tarts
- Fresh whipped cream with vanilla bean
- Macarons in pastel colors
- Mint leaves for garnish
How to make it
- Prepare the berries by washing and drying them thoroughly; toss the strawberries in a pinch of sugar to help them release their natural juices and shine.
- Create a quick ganache by heating 1/2 cup of heavy cream until simmering, then pouring it over 1 cup of dark chocolate chips; let sit for 5 minutes, then stir until glossy.
- Whip cold heavy cream with a tablespoon of powdered sugar and vanilla bean paste until stiff peaks form—the vanilla bean adds those beautiful tiny black flecks that look so professional.
- Place the bowl of chocolate and the bowl of whipped cream on opposite sides of your board to act as ‘anchors.’
- Fill in the spaces with the shortbread, macarons, and lemon tarts, using the mint leaves to tuck into any small holes for a fresh, garden-inspired aesthetic.
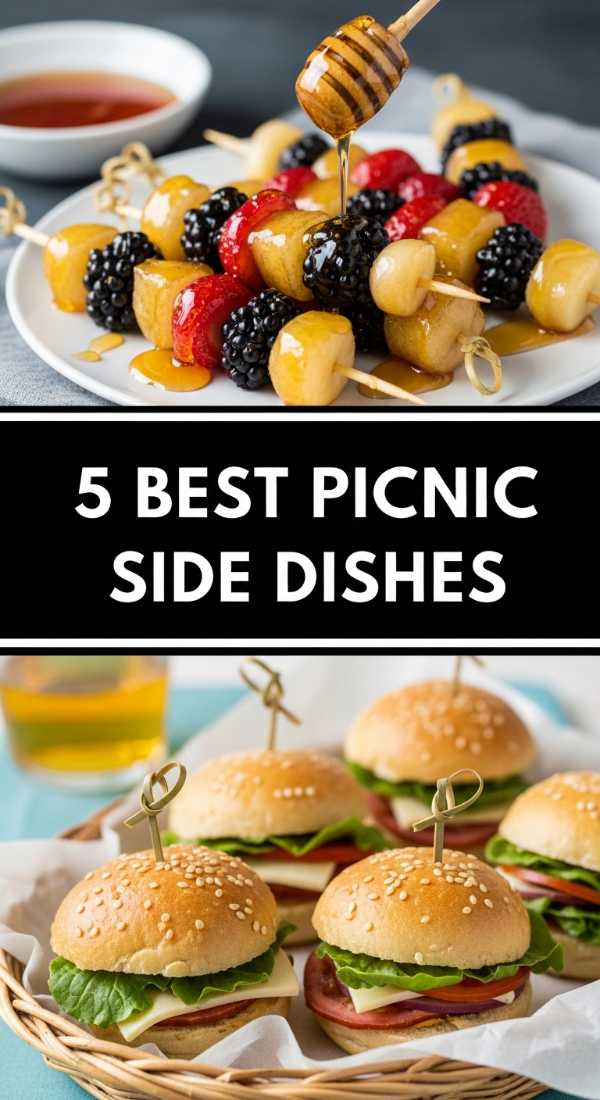
5 Best Picnic Side Dishes (Step-by-Step Guide)

Why we love this
Picnic sides need to be portable, durable, and packed with flavor, and when served on a board, they create an irresistible ‘grazing’ atmosphere. We love this because it moves away from soggy sandwiches and toward sophisticated, travel-friendly bites like caprese skewers and marinated artichokes. The aroma of basil and balsamic wafting from a picnic board is enough to make any park bench feel like a five-star dining destination.
Ingredients
- Cherry tomatoes and mini mozzarella balls
- Fresh basil leaves
- Marinated artichoke hearts
- Prosciutto-wrapped melon wedges
- Baguette slices
- Pesto dipping sauce
How to make it
- Construct the caprese skewers by threading one cherry tomato, one folded basil leaf, and one mozzarella ball onto a small bamboo pick; drizzle lightly with olive oil.
- Slice a cantaloupe into thin wedges and wrap a half-slice of salty prosciutto around the center of each, securing it with a toothpick if necessary.
- Drain the marinated artichokes and place them in a small leak-proof container that can sit directly on the board.
- Slice the baguette into thin rounds on a bias (at an angle) to create more surface area for dipping.
- Arrange the skewers and melon wedges in a circular pattern on the board, placing the pesto sauce in the center for easy dipping as you enjoy the outdoors.
12 Best Kabobs for Summer (Step-by-Step Guide)

Why we love this
Kabobs are the ultimate board food—they are built-in portions that look stunning when stacked high with their charred edges and rainbow of vegetables. We love this because it allows for endless customization; you can have spicy shrimp, savory beef, and tangy halloumi all on one platter. The smell of fire-roasted peppers and onions mixed with marinated meat is the literal scent of summer joy.
Ingredients
- Sirloin steak cubes or jumbo shrimp
- Bell pepper chunks (various colors)
- Red onion wedges
- Whole button mushrooms
- Halloumi cheese cubes
- Garlic-herb marinade
How to make it
- If using wooden skewers, soak them in water for at least 30 minutes prior to use to prevent them from catching fire on the grill.
- Thread the meat and vegetables alternatingly; ensure the pieces are roughly the same size (about 1 inch) so they cook at the same rate.
- Brush the kabobs generously with a marinade of olive oil, minced garlic, dried oregano, and lemon juice, letting them sit for 20 minutes to absorb the flavors.
- Grill over direct high heat for 3-4 minutes per side for shrimp, or 5-6 minutes per side for beef (aiming for a medium-rare pink center).
- Once cooked, pile the kabobs onto your board in a cross-hatch pattern, which creates height and makes the board look professionally styled.
7 Fun Drinks for Summer (Step-by-Step Guide)

Why we love this
No food board is complete without the perfect liquid pairing, and summer drinks are all about vibrant colors and ice-cold refreshment. We love this drink board concept because it’s interactive; guests can garnish their own sparkling lemonades or sangrias with fresh herbs and frozen fruit. It turns a simple beverage into a sensory ritual—the clink of ice, the splash of soda, and the fragrance of slapped mint.
Ingredients
- Fresh watermelon juice
- Sparkling water or club soda
- Lime juice and agave nectar
- Frozen berries (to act as ice cubes)
- Fresh mint and rosemary sprigs
- Cucumber ribbons
How to make it
- For a base ‘Summer Refresher,’ blend fresh watermelon chunks and strain the pulp to get a clear, vibrant pink juice.
- Set out a series of glasses filled with large ice cubes; placing a cucumber ribbon inside the glass against the wall creates a beautiful ‘spa’ look.
- Fill each glass halfway with the fruit juice base, then top with chilled sparkling water for a fizzy, light finish.
- Add a squeeze of fresh lime and a teaspoon of agave if you prefer a sweeter profile.
- Garnish the board with bowls of frozen berries and fresh herbs; instruct guests to ‘slap’ the mint between their hands before adding it to their drink to release the aromatic oils.
5 Best Cucumber Tomato Salads (Step-by-Step Guide)
[IMAGE_10]
Why we love this
The cucumber tomato salad is a timeless classic for a reason—it is the epitome of garden-fresh simplicity. We love this because it provides a cool, crisp counterpoint to heavier grilled items on the board. The juice that pools at the bottom of the bowl, a mix of tomato water, olive oil, and vinegar, is ‘liquid gold’ that is perfect for dipping crusty bread. It’s a clean, bright, and crunchy addition that cleanses the palate.
Ingredients
- Persian cucumbers (thinly sliced)
- Roma or cherry tomatoes (halved)
- Thinly sliced shallots
- Fresh dill and parsley
- Red wine vinegar
- Extra virgin olive oil
- Flaky sea salt
How to make it
- Slice the Persian cucumbers into 1/4 inch rounds; these are preferred over standard cucumbers because they have thinner skins and fewer seeds, staying crunchier longer.
- Cut the tomatoes and toss them in a bowl with a pinch of salt; let them sit for 5 minutes to draw out their natural juices which form the base of the dressing.
- Add the shallots and cucumbers to the tomatoes, then drizzle with 2 tablespoons of high-quality olive oil and 1 tablespoon of red wine vinegar.
- Finely chop the dill and parsley and fold them in gently; the herbs provide a grassy freshness that elevates the simple vegetables.
- Transfer the salad to a shallow bowl on your board and finish with a generous sprinkle of flaky sea salt right before serving to maintain the crunch of the cucumbers.
Wrapping Up Your Board Magic
Creating a viral food board isn’t about perfection; it’s about the abundance of the season and the joy of sharing a meal. By using these step-by-step guides, you can mix and match sections to create a board that fits your specific vibe. Remember to play with heights using small bowls, fill every gap with fresh herbs or nuts, and most importantly, enjoy the process. Your guests will feel the love you put into it, and you’ll actually get to spend your time where it matters most: at the table with them.