
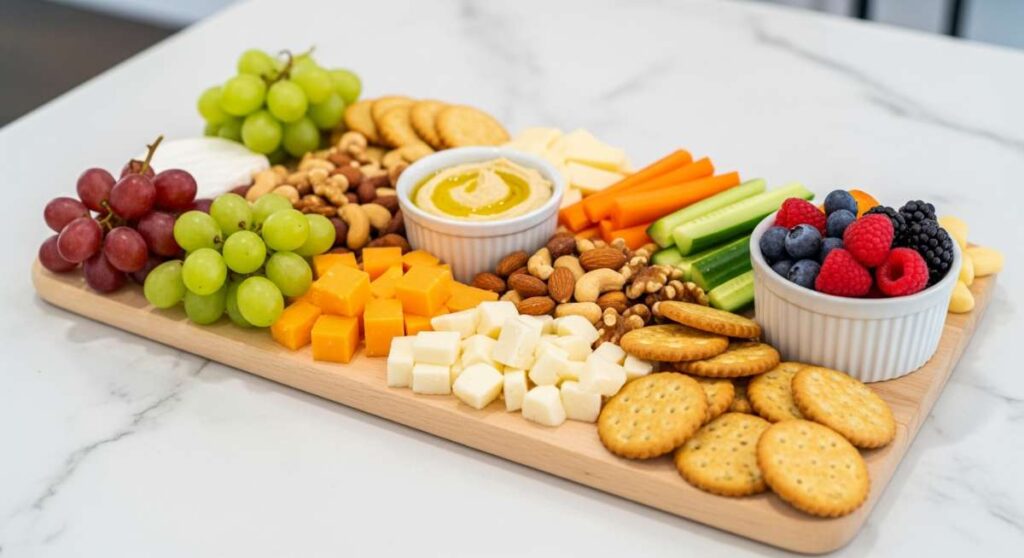
Why Everyone is Obsessed with This 5-Minute Simple Food Board
We’ve all been there—the sun is setting, the house is warm, and the last thing you want to do is stand over a steaming stove for an hour. There’s a certain magic in the simplicity of a ‘food board’ that has taken the internet by storm lately. It’s not just about the convenience; it’s about that slow, intentional way of eating where you can pick and choose exactly what your body is craving in the moment without the formality of a heavy meal. It’s a celebration of textures and colors that makes even a Tuesday night feel like a special occasion.
Lately, my kitchen has become a sanctuary of assembly rather than just cooking. I’ve found that when I lay out a spread of fresh fruits, savory proteins, and crunchy accents, my family lingers longer at the table. We talk more, we laugh more, and we actually taste our food. This viral 5-minute approach isn’t just a trend; it’s a lifestyle shift toward effortless hosting and nourishing ourselves without the stress. Whether you’re meal prepping for a busy week or throwing a last-minute backyard bash, these ideas are designed to keep you out of the kitchen and into the moment.
10 Summer Meal Preps To Make (Step-by-Step Guide)

Why we love this
There is nothing quite like the feeling of opening your fridge on a humid Tuesday and seeing a row of colorful, perfectly portioned glass containers waiting for you. These summer meal preps capture the essence of the season—think zesty lemon-herb vinaigrettes soaking into crisp quinoa and succulent grilled chicken that retains its juiciness even after a day in the fridge. Each bite is a refreshing burst of garden-fresh flavor that keeps you energized without that heavy, post-lunch slump. It’s the ultimate gift to your future self, promising a week of stress-free, vibrant nourishment.
Ingredients
- 2 lbs Grilled Chicken Breast, sliced
- 4 cups Cooked Quinoa or Farro
- 2 cups Cherry Tomatoes, halved
- 3 English Cucumbers, diced
- 1 bunch Fresh Parsley, chopped
- Lemon-Tahini Dressing
- Roasted Chickpeas for crunch
How to make it
- Start by prepping your base grains; boil your quinoa in salted water or vegetable broth until the ‘tails’ appear, then fluff with a fork and let it cool completely to avoid sogginess in the containers.
- Season your chicken breasts with sea salt, cracked black pepper, and dried oregano, then sear them in a cast-iron skillet over medium-high heat for about 6 minutes per side until the internal temperature reaches 165°F.
- While the chicken rests, dice your cucumbers and halve your tomatoes, ensuring they are relatively uniform in size for a consistent texture in every bite.
- Whisk together your dressing using fresh lemon juice, creamy tahini, a clove of minced garlic, and a splash of maple syrup until emulsified and silky.
- Layer your containers starting with the grains at the bottom, followed by the heavy vegetables, then the sliced chicken, and keep the dressing in a separate small condiment cup to maintain the crispness of the greens.
5 Best Party Rotel Dips (Step-by-Step Guide)

Why we love this
The sound of a chip breaking into a thick, velvety pool of Rotel dip is essentially the official soundtrack of a great party. This dish is pure nostalgia wrapped in a warm, cheesy embrace, offering a spicy kick from the green chilies that perfectly balances the rich, salty goodness of the melted cheese. It’s the kind of comfort food that draws a crowd, disappearing almost as fast as you can set it down on the table. The aroma of browned sausage and melted cheddar wafting through the air is an instant signal to guests that it’s time to relax and enjoy.
Ingredients
- 1 block (32 oz) Velveeta or high-quality melting cheese
- 2 cans (10 oz) Ro-Tel Diced Tomatoes and Green Chilies
- 1 lb Ground Breakfast Sausage or Chorizo
- 1 tsp Smoked Paprika
- Sliced Jalapeños for garnish
How to make it
- In a large skillet over medium heat, crumble and brown your sausage, using a wooden spoon to break it into very small pieces so the dip remains scoopable and uniform.
- Once the meat is fully cooked and slightly crispy at the edges, drain the excess fat thoroughly—this step is crucial to prevent an oily film on top of your finished dip.
- Cut your melting cheese into 1-inch cubes; this increases the surface area and ensures the cheese melts evenly without scorching.
- In a slow cooker or a heavy-bottomed pot, combine the cubed cheese, the cooked sausage, and the undrained cans of Ro-Tel (the juice provides the necessary acidity and liquid).
- Set the heat to low and stir every 10-15 minutes, watching for a smooth, glossy consistency; once fully melted, sprinkle with smoked paprika and serve immediately while bubbling.
Best Homemade Hummingbird Food Ever (Step-by-Step Guide)

Why we love this
There is a quiet, meditative joy in watching a hummingbird hover near your window, its wings a blurred whisper against the glass. Making your own nectar is a beautiful way to connect with the local ecosystem, providing a pure and safe energy source for these tiny, vibrant travelers. Unlike store-bought versions, this homemade blend is free from artificial dyes and preservatives, offering a crystal-clear sweetness that mimics the natural nectar of wildflowers. It transforms your garden into a sanctuary, inviting nature’s most delicate acrobats to linger just a little bit longer.
Ingredients
- 1 cup Granulated White Sugar
- 4 cups Filtered Water
- Absolutely no red dye or honey
How to make it
- Combine your filtered water and white granulated sugar in a clean saucepan; avoid using honey or brown sugar as these can promote dangerous fungal growth for the birds.
- Heat the mixture over medium heat, stirring constantly until the sugar crystals are completely dissolved and the liquid is perfectly transparent.
- Bring the solution to a brief boil for about 1-2 minutes to help eliminate any bacteria or impurities in the water that could cause the nectar to spoil quickly.
- Remove the pan from the heat and allow the nectar to cool to room temperature; never put hot nectar into a plastic feeder as it can warp the plastic and release chemicals.
- Fill your clean hummingbird feeders and store any leftover nectar in a sealed jar in the refrigerator for up to two weeks, ensuring you clean the feeders every 3 days to keep your feathered friends healthy.
7 Best Summer Pasta Recipes (Step-by-Step Guide)

Why we love this
Summer pasta is all about the ‘no-sauce’ sauce—where the heat of the noodles gently wilts the herbs and melts the cheese into a light, fragrant coating. Imagine twirling your fork into a nest of linguine tossed with sun-drenched cherry tomatoes that have just begun to burst, releasing their sweet, jammy juices. The aroma of torn basil leaves hitting the warm pasta is intoxicating, bringing a freshness that makes the meal feel light enough for a garden lunch. It’s a dish that celebrates the peak of the harvest, turning humble pantry staples into a sophisticated, sensory feast.
Ingredients
- 1 lb Spaghetti or Penne
- 2 cups Fresh Basil Leaves
- 1/2 cup Extra Virgin Olive Oil
- 3 cloves Garlic, thinly sliced
- 1 cup Grated Pecorino Romano
- Red Pepper Flakes
How to make it
- Bring a large pot of water to a rolling boil and salt it generously; the water should taste like the sea to properly season the pasta from the inside out.
- Cook the pasta until it is ‘al dente’—firm to the bite—as it will continue to cook slightly once tossed with the other ingredients.
- While the pasta cooks, gently warm your olive oil in a wide pan over low heat and add the sliced garlic, allowing it to soften and become fragrant without turning brown or bitter.
- Reserve exactly one cup of the starchy pasta water before draining the noodles; this ‘liquid gold’ is the secret to creating a silky emulsion that clings to the pasta.
- Toss the hot noodles into the garlic oil, add the reserved water and cheese, and stir vigorously until a creamy coating forms, then finish with a mountain of fresh, hand-torn basil.
5 Best Healthy Dandelion Recipes (Step-by-Step Guide)
Why we love this
Foraging in your own backyard brings a primal sort of satisfaction, and the humble dandelion is a nutritional powerhouse hiding in plain sight. These recipes transform what many consider a weed into a gourmet experience, offering a sophisticated bitterness that rivals radicchio or arugula. The greens are tender and peppery, while the golden petals add a whimsical, honey-scented sweetness to salads and teas. Eating dandelions feels like consuming the very essence of spring—bitter, bright, and incredibly revitalizing for the body after a long winter.
Ingredients
- 4 cups Freshly Foraged Dandelion Greens (ensure they are pesticide-free)
- 2 tbsp Toasted Pine Nuts
- Shaved Parmesan
- Lemon-Balsamic Glaze
- 1 clove Garlic, minced
How to make it
- Harvest your dandelions in the morning when they are most hydrated, selecting younger leaves which are significantly less bitter than the larger, older ones.
- Soak the greens in a bowl of cold water with a splash of vinegar for 10 minutes to remove any dirt or tiny insects, then pat them completely dry with a clean kitchen towel.
- To mellow the bitterness, blanch the greens in boiling water for exactly 60 seconds, then immediately plunge them into an ice bath to stop the cooking process and preserve the vibrant green color.
- Sauté the blanched greens in a hot pan with a drizzle of olive oil and minced garlic for 2-3 minutes until they are tender and slightly charred at the edges.
- Transfer to a plate, top with toasted pine nuts for crunch, and drizzle with a thick balsamic glaze to balance the earthy notes with a touch of sweetness.
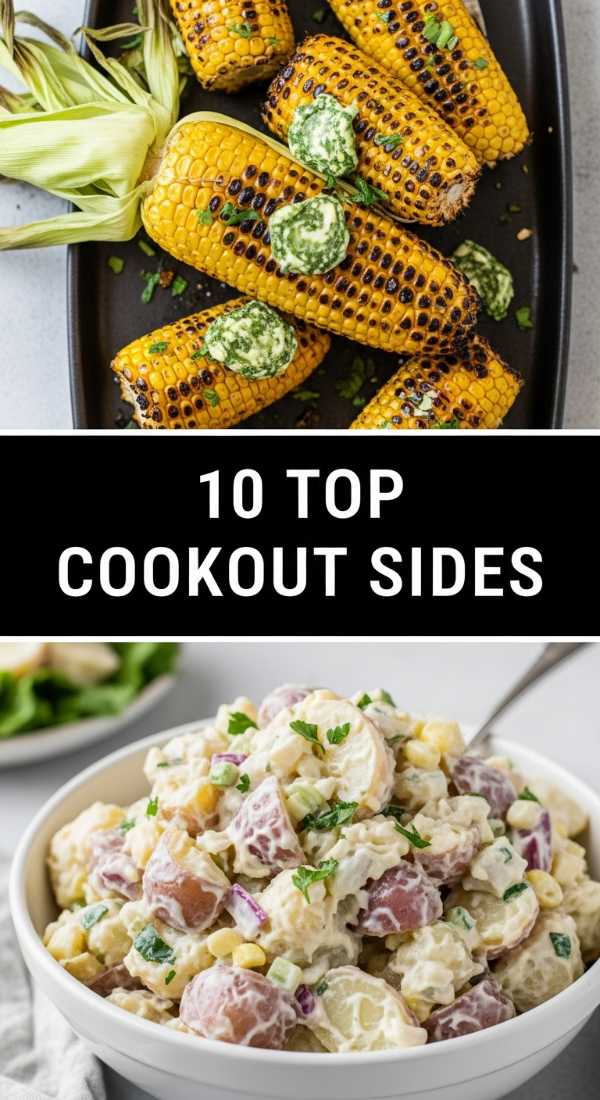
10 Top Easy Cookout Sides (Step-by-Step Guide)

Why we love this
A cookout is only as good as its side dishes, and these easy additions are designed to steal the spotlight from the main course. There’s something deeply satisfying about the crunch of a vinegar-based slaw or the smokey char on a cob of street corn slathered in lime crema. These sides provide the necessary brightness and acidity to cut through grilled meats, creating a balanced plate that feels thoughtful and abundant. They are the colorful supporting cast that turns a simple barbecue into a full-blown summer festival of flavors and textures.
Ingredients
- 6 ears of Sweet Corn
- 1/2 cup Cotija Cheese
- 1 tsp Chili Powder
- Fresh Cilantro
- Lime Wedges
- 1/4 cup Mexican Crema or Mayo
How to make it
- Preheat your grill to medium-high heat (about 400°F) and lightly oil the grates to prevent the corn from sticking.
- Shuck the corn and place the ears directly onto the grates, rotating them every 2-3 minutes until they are charred in spots and the kernels are bright yellow and tender.
- While the corn is hot, use a pastry brush to apply a thin, even layer of Mexican crema or mayonnaise across the entire surface of each ear.
- Roll the coated corn in a plate filled with crumbled Cotija cheese, ensuring the cheese adheres to the creamy base.
- Dust with a sprinkle of chili powder for heat and a handful of chopped cilantro, serving immediately with a squeeze of fresh lime to brighten all the smoky flavors.
Best Cucumber Tomato Onion Salad (Step-by-Step Guide)

Why we love this
This salad is the undisputed queen of summer potlucks because it only gets better as it sits, marinating in its own delicious juices. The snap of the English cucumber against the yielding softness of a vine-ripened tomato creates a textural contrast that is incredibly refreshing on a hot afternoon. As the red onion slices soften in the vinegar, they lose their sharp bite and become sweet and tangy, tying the whole dish together. It’s a clean, vibrant, and hydrating bowl of sunshine that pairs perfectly with everything from grilled fish to a thick crusty loaf of bread.
Ingredients
- 3 Large English Cucumbers, sliced into half-moons
- 4 Roma Tomatoes, chopped
- 1 small Red Onion, thinly sliced into rings
- 1/4 cup Apple Cider Vinegar
- 2 tbsp Extra Virgin Olive Oil
- 1 tsp Dried Oregano
- Salt and Pepper to taste
How to make it
- Slice your cucumbers into uniform half-moons; if using standard cucumbers instead of English, be sure to peel them and scrape out the seeds to prevent the salad from becoming too watery.
- Thinly slice the red onion and place the slices in a small bowl of cold water for 10 minutes; this ‘mellowing’ technique removes the harsh sulfurous sting while keeping the crunch.
- Combine the cucumbers, tomatoes, and drained onions in a large glass bowl, tossing gently to mix without bruising the tomatoes.
- In a separate jar, whisk together the apple cider vinegar, olive oil, oregano, salt, and pepper until the dressing is fully emulsified.
- Pour the dressing over the vegetables and toss thoroughly; let the salad sit in the refrigerator for at least 30 minutes before serving to allow the flavors to meld and the vegetables to pickle slightly.
8 Top Refreshing Summer Desserts (Step-by-Step Guide)

Why we love this
When the temperature climbs, the best desserts are the ones that offer a chilling reprieve without the heaviness of chocolate or pastry. These refreshing treats focus on the natural sugars of peak-season fruit—think frozen watermelon granitas that sparkle like jewels or airy lemon mousses that feel like eating a cloud. The sensation of something ice-cold melting on your tongue after a day in the sun is pure bliss. These desserts are light, bright, and visually stunning, making them the perfect finale to a breezy outdoor dinner party.
Ingredients
- 1 Medium Watermelon, cubed and frozen
- 2 tbsp Fresh Lime Juice
- 1 tbsp Honey or Agave
- Fresh Mint Leaves for garnish
How to make it
- Cut a seedless watermelon into 1-inch cubes and spread them in a single layer on a baking sheet lined with parchment paper, freezing for at least 4 hours until rock solid.
- Place the frozen cubes into a high-powered blender or food processor, working in batches if necessary to avoid overtaxing the motor.
- Add the lime juice and honey to the blender; the acidity of the lime enhances the watermelon’s flavor while the honey ensures a smooth, scoopable texture.
- Pulse the mixture until it reaches a consistency similar to coarse snow or sorbet, being careful not to over-blend into a liquid.
- Spoon the granita into chilled glasses and serve immediately with a sprig of mint, or return to the freezer for 30 minutes for a firmer texture that can be scooped like ice cream.
10 Best July Party Ideas (Step-by-Step Guide)
Why we love this
July is the heart of summer, a time for patriotic palettes and festive gatherings that stretch long into the twilight hours. The best party ideas are the ones that encourage movement and interaction—like a ‘Build Your Own Taco’ station or a dedicated ‘S’mores Fire Pit’ where guests can customize their treats. There is a palpable energy in the air during July, and these ideas tap into that spirit of freedom and fun. From red, white, and blue sangria to lawn games that spark friendly competition, these concepts ensure your home is the place where memories are made.
Ingredients
- Themed Decor (Flags, String Lights)
- Batch Cocktails/Mocktails
- Outdoor Seating Areas
- Lawn Games (Cornhole, Giant Jenga)
- Finger Food Platters
How to make it
- Start by defining ‘zones’ in your outdoor space: a high-energy area for games, a shaded lounge area for conversation, and a central station for food and drinks to prevent bottlenecks.
- Prepare a signature batch cocktail 2 hours before guests arrive, allowing the flavors to marry; use plenty of ice and frozen fruit to keep the beverage cold without diluting it.
- Set up a self-serve food board with a variety of proteins, cheeses, and crackers, ensuring you place the board in a shaded spot or over a tray of ice to keep perishables fresh.
- As the sun begins to set, transition the vibe by lighting string lights or lanterns and starting a controlled fire pit for roasting marshmallows.
- Provide a ‘party favor’ that doubles as a utility, like customized sunscreen bottles or colorful hand fans, to keep guests comfortable throughout the heat of the day.
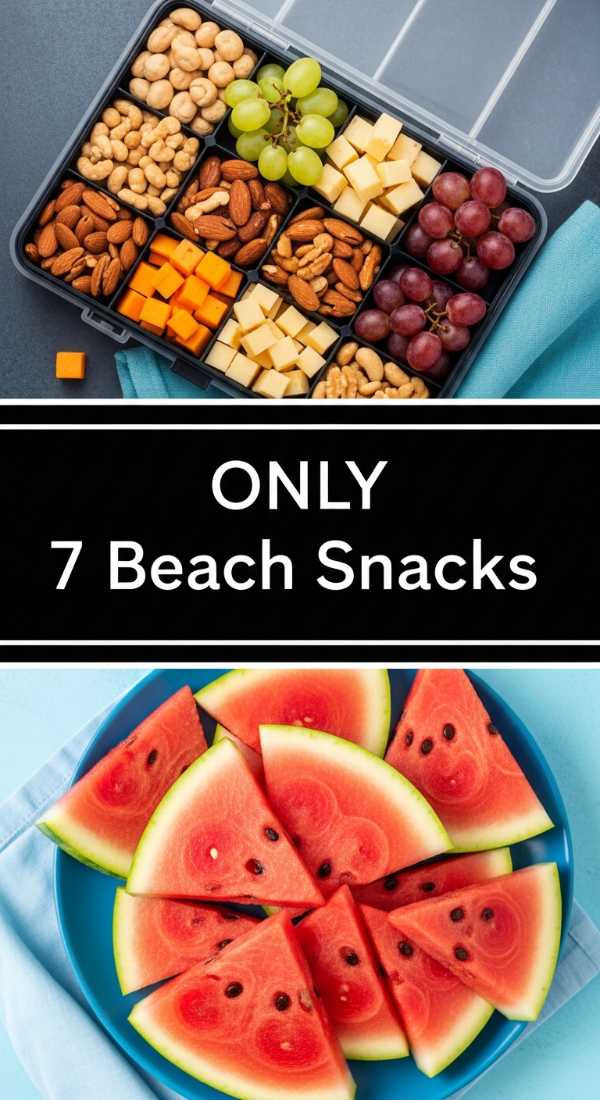
7 Best Easy Beach Snack Ideas (Step-by-Step Guide)
[IMAGE_10]
Why we love this
Eating at the beach is an art form—you need snacks that are sand-proof, heat-resistant, and incredibly easy to handle with one hand while the other holds a book. These snack ideas focus on high-hydration fruits and sturdy proteins that won’t wilt or melt under the glare of the coastal sun. There is nothing like the taste of a cold, crisp grape or a salty pretzel when you’ve been swimming in the ocean. It’s about portable, mess-free fuel that keeps the energy high so you can spend every possible second soaking up the salt air and the sound of the waves.
Ingredients
- Frozen Grapes
- Individual Hummus Cups
- Pre-cut Celery and Carrot Sticks
- Beef Jerky or Turkey Sticks
- Reusable Silicone Bags
How to make it
- Wash and dry your grapes thoroughly, then remove them from the stems and place them in a single layer in a reusable silicone bag before freezing overnight; they act as delicious little ice cubes.
- Choose ‘sturdy’ vegetables like carrots and celery that won’t go limp in the heat, and slice them into long batons that are easy to dip into individual hummus containers.
- Pack your cooler using the ‘sandwich’ method: place heavy ice packs at the bottom, followed by your drinks, then a middle layer of snacks, and a final thin ice pack on top.
- Avoid any chocolate or soft cheeses that will turn into a mess; instead, opt for nuts, seeds, and dried meats that provide sustained energy and handle ambient heat well.
- Use airtight, snap-top containers to ensure that not a single grain of sand finds its way into your food, and always pack a separate ‘dry bag’ for napkins and wet wipes.
Conclusion
Embracing the viral food board lifestyle is about more than just a pretty presentation; it’s about reclaiming your time and enjoying the vibrant flavors of the season. Whether you’re prepping for the week or hosting the ultimate July bash, these simple, step-by-step guides prove that you don’t need hours in the kitchen to create something truly spectacular. Now, go grab a board, gather your favorite people, and let the summer snacking begin!