

There is something inherently magical about the way we gather during the warmer months, isn’t there? It’s that golden hour glow, the sound of cicadas in the distance, and the effortless shift toward grazing rather than formal dining. Lately, my social media feed has been completely taken over by the ‘Simple Food Board’ trend, and honestly, I am not mad about it. It’s a rebellion against the over-complicated, expensive charcuterie spreads of years past, favoring instead the kind of soulful, accessible food that makes your heart feel as full as your plate.
I think we’re all craving a bit more simplicity and a lot more connection. These boards aren’t just about the food; they are about the conversation that happens while you’re reaching for that last scoop of dip or the shared laugh over a dripping fruit slice. Whether you’re hosting a backyard bash or just trying to make a Tuesday night feel a little more special, these easy, vibrant recipes are the secret sauce to a summer well-lived. Let’s dive into the components that make these boards so irresistible.
How to make creamy rotel dip?
Why we love this
There is a deep, soulful nostalgia attached to a warm bowl of Rotel dip that instantly transports you to game days and family reunions. We love it for that velvety, molten texture that coats a salty tortilla chip perfectly, offering a comforting hum of mild spice from the green chilies that isn’t too overwhelming. The aroma of browned meat mingling with melted cheese is enough to bring everyone running to the kitchen, creating a tactile, communal experience that defines the essence of casual snacking. It is the ultimate crowd-pleaser because it feels like home in a bowl, balancing richness with just enough acidity from the tomatoes.
Ingredients
- 1 lb Ground Beef or Breakfast Sausage
- 1 block (16 oz) Processed Cheese (Velveeta), cubed
- 1 can (10 oz) Ro-Tel Diced Tomatoes and Green Chilies
- 1/2 cup Whole Milk (optional for desired consistency)
- 1/2 tsp Garlic Powder
- Fresh Cilantro for garnish
How to make it
- Place a large skillet or heavy-bottomed pot over medium-high heat and add your ground meat. Break it apart with a wooden spoon and cook until it is thoroughly browned and no longer pink, which usually takes about 6-8 minutes.
- Drain the excess grease carefully from the skillet to ensure your dip isn’t oily. Return the meat to the heat and turn the burner down to low.
- Add the cubed processed cheese to the skillet along with the entire can of Ro-Tel (do not drain the liquid from the can, as this provides essential flavor and moisture).
- Stir constantly with a heat-resistant spatula. You want the cheese to melt slowly and evenly without scorching on the bottom of the pan. If the mixture seems too thick, splash in a little milk until it reaches a silky, pourable consistency.
- Once the cheese is fully melted and the dip is bubbling gently, stir in the garlic powder. Serve immediately in a warmed bowl to keep it fluid, garnishing with fresh cilantro for a pop of color and brightness.
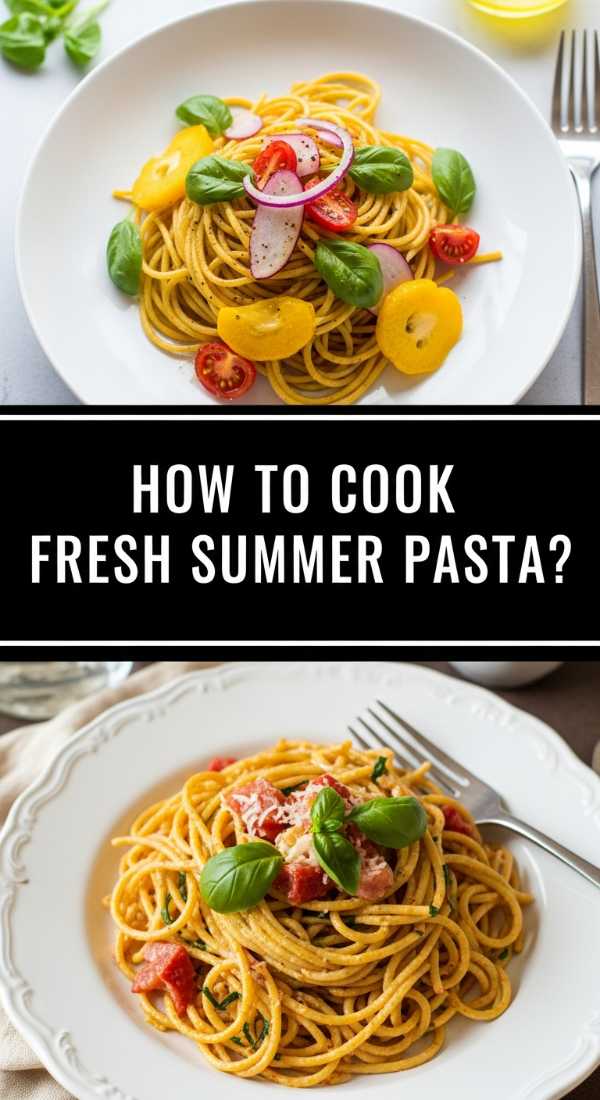
How to cook fresh summer pasta?

Why we love this
Summer pasta is the antithesis of the heavy, cream-laden dishes of winter; it is light, vibrant, and celebrates the peak of the season’s bounty. We love the way a simple emulsion of high-quality olive oil and pasta water creates a glossy sheen over al dente strands, carrying the scents of torn basil and blistered cherry tomatoes directly to your palate. The texture is a playful mix of tender pasta and the slight ‘pop’ of fresh vegetables, making every bite feel clean and nourishing. It’s the kind of dish that tastes like sunshine and garden soil in the best possible way, leaving you satisfied without feeling weighed down.
Ingredients
- 1 lb Linguine or Spaghetti
- 2 cups Cherry Tomatoes, halved
- 3 cloves Garlic, thinly sliced
- 1/4 cup Extra Virgin Olive Oil
- 1/2 cup Fresh Basil leaves, chiffonade
- 1/2 cup Freshly grated Parmesan cheese
- Red pepper flakes to taste
- Salt and black pepper
How to make it
- Bring a large pot of heavily salted water (it should taste like the sea) to a rolling boil. Cook the pasta according to package instructions until it is strictly al dente; it should still have a firm bite in the center.
- While the pasta cooks, heat olive oil in a wide skillet over medium heat. Add the sliced garlic and red pepper flakes, sautéing for about 1 minute until the garlic is fragrant and just begins to turn a very pale golden brown—do not let it burn or it will turn bitter.
- Toss the halved cherry tomatoes into the skillet with a pinch of salt. Cook them for 4-5 minutes, stirring occasionally, until they begin to soften and release their juices, creating a rustic sauce.
- Before draining the pasta, reserve exactly 1 cup of the starchy pasta water. Drain the pasta and immediately transfer it into the skillet with the tomatoes.
- Increase the heat to medium-high and pour in half of the reserved pasta water. Toss vigorously with tongs for 2 minutes, adding more water if needed, until a light sauce forms and clings to the noodles. Remove from heat, fold in the basil and parmesan, and serve with a final drizzle of olive oil.
How to make hummingbird nectar?

Why we love this
Adding a bird feeder to your lifestyle isn’t just about the birds; it’s about inviting a sense of wonder and movement into your daily view. We love this homemade nectar because it is a pure, chemical-free way to sustain these tiny, iridescent jewels, and there is an incredible satisfaction in watching them hovering right outside your window. The simple ritual of boiling water and sugar feels like a quiet meditation on nature, and the resulting clear liquid is exactly what these high-energy creatures need to thrive. It turns your backyard or balcony into a living theater, adding a layer of peace and natural beauty to your morning coffee routine.
Ingredients
- 1 cup White Granulated Sugar
- 4 cups Filtered Water
How to make it
- Combine the sugar and water in a medium saucepan. It is crucial to use only plain white sugar, as honey, brown sugar, or artificial sweeteners can be harmful or even fatal to hummingbirds.
- Place the pan over medium heat and bring the mixture to a low boil. Stirring occasionally is necessary to ensure the sugar crystals dissolve completely into the water.
- Boil the solution for approximately 2 minutes. This brief boiling period helps to eliminate any impurities or bacteria in the water and sugar, which helps the nectar stay fresh longer in the feeder.
- Remove the pan from the heat and let it cool completely to room temperature. Never put hot nectar into a feeder, as it can warp the plastic or harm the birds.
- Once cool, fill your hummingbird feeder. Store any leftover nectar in a clean, sealed jar in the refrigerator for up to two weeks. Remember to clean your feeder every 3-5 days to prevent mold growth.
How to grill perfect kabobs?
Why we love this
Kabobs are the quintessential summer food because they combine the primal joy of open-flame cooking with the organized beauty of a rainbow on a stick. We love the contrast between the charred, smoky exterior of the meat and the succulent, juice-filled centers of the grilled vegetables like bell peppers and red onions. The aroma of searing protein and caramelizing sugars from a marinade creates an irresistible scent that defines outdoor entertaining. Each skewer is a self-contained meal that offers a variety of textures—crunchy, tender, and chewy—making them fun to eat and visually stunning on a serving board.
Ingredients
- 1.5 lbs Sirloin Steak or Chicken Breast, cut into 1-inch cubes
- 2 Bell Peppers (varying colors), cut into chunks
- 1 Red Onion, cut into wedges
- 1 cup Zucchini slices
- 1/2 cup Soy Sauce
- 1/4 cup Olive Oil
- 2 tbsp Honey
- 3 cloves Garlic, minced
How to make it
- In a large bowl, whisk together the soy sauce, olive oil, honey, and minced garlic. Add your cubed meat to the marinade, ensuring every piece is coated. Cover and refrigerate for at least 30 minutes, though 2-4 hours is ideal for maximum flavor penetration.
- If using wooden skewers, soak them in water for at least 30 minutes prior to grilling to prevent them from catching fire on the grates.
- Thread the meat and vegetables onto the skewers, alternating colors and textures. Avoid packing them too tightly; leaving a tiny bit of space between items allows the heat to circulate and cook everything evenly.
- Preheat your grill to medium-high heat (about 400°F). Lightly oil the grates using a brush or a rolled-up paper towel dipped in oil held with tongs.
- Place the kabobs on the grill. Cook for 8-12 minutes, turning them a quarter turn every 2-3 minutes. You are looking for distinct grill marks and meat that reaches an internal temperature of 145°F for beef or 165°F for chicken. Let them rest for 5 minutes before serving to lock in the juices.
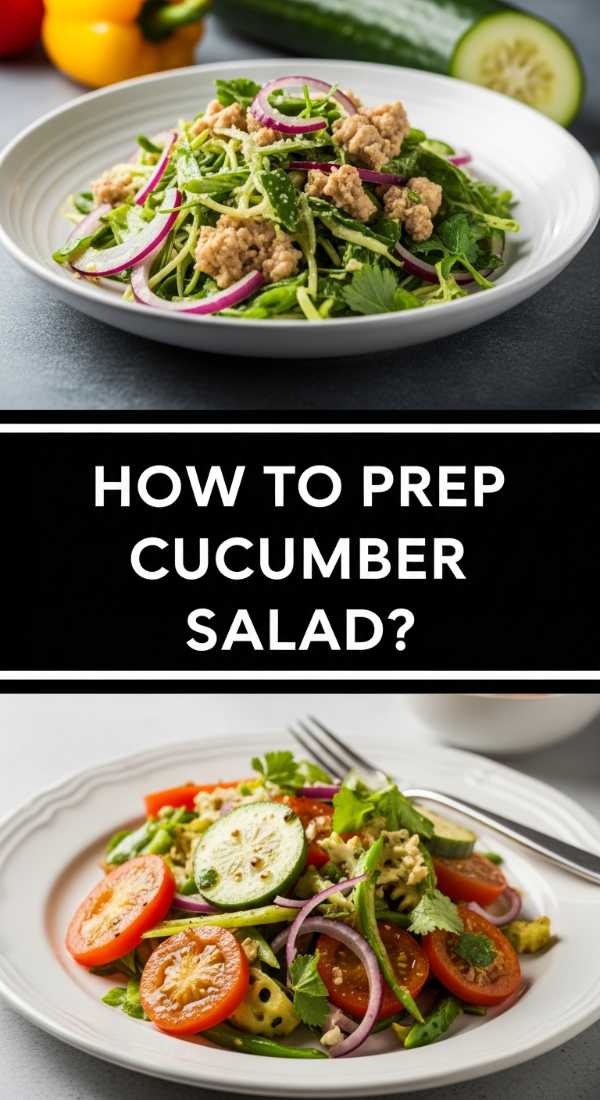
How to prep cucumber salad?

Why we love this
On a sweltering afternoon, a crisp cucumber salad is like a cold glass of water for your palate, offering an instant sense of refreshment. We love the satisfying, audible ‘crunch’ of thin cucumber slices paired with the sharp, acidic tang of a vinegar-based dressing and the bite of red onions. The cooling properties of the cucumber are balanced by the herbal notes of fresh dill, creating a fragrance that is clean and garden-fresh. It’s a texture-forward dish that stays vibrant even after sitting out, making it the perfect low-maintenance addition to any summer spread or picnic basket.
Ingredients
- 2 large English Cucumbers, thinly sliced
- 1/2 Red Onion, thinly sliced into half-moons
- 1/2 cup White Wine Vinegar or Apple Cider Vinegar
- 1 tbsp Sugar
- 1 tsp Salt
- 2 tbsp Fresh Dill, chopped
- 1/2 tsp Black Pepper
How to make it
- Start by slicing your cucumbers as thinly as possible. Using a mandoline slicer is highly recommended for achieving those translucent, uniform rounds that soak up the dressing perfectly.
- Place the sliced cucumbers and red onions in a large glass bowl. Sprinkle them with the salt and let them sit for about 10 minutes; this draws out excess moisture and ensures the salad doesn’t become watery later.
- In a small separate jar, whisk together the vinegar, sugar, and black pepper until the sugar is completely dissolved.
- Drain any liquid that has pooled at the bottom of the cucumber bowl. Pour the vinegar mixture over the vegetables and toss well to ensure every slice is submerged or coated.
- Fold in the fresh chopped dill. For the best flavor, cover the bowl and let it marinate in the refrigerator for at least 30 minutes before serving. This allows the onions to mellow and the cucumbers to pick up the bright, vinegary notes.
How to simmer summer soup?

Why we love this
Summer soup is a hidden gem of the season, proving that bowls aren’t just for winter comfort but for celebrating the height of produce like corn, zucchini, and yellow squash. We love the way a light, golden broth can carry the sweetness of peak-season corn while maintaining a delicate profile that won’t make you feel overheated. The aroma is herbaceous and light, often brightened with a squeeze of lemon or a dollop of pesto right before serving. The texture is a beautiful medley of tender-crisp vegetables swimming in a savory liquid, offering a sophisticated and hydrating way to enjoy a meal on a breezy patio evening.
Ingredients
- 2 tbsp Butter or Olive Oil
- 1 Leek, white and light green parts only, sliced
- 2 Summer Squashes, diced
- 2 cups Fresh Corn kernels (off the cob)
- 4 cups Vegetable or Chicken Stock
- 1 tsp Fresh Thyme
- Salt and Lemon juice to taste
How to make it
- In a large Dutch oven or heavy pot, melt the butter over medium heat. Add the sliced leeks and sauté for 3-5 minutes until they are soft and translucent, taking care not to brown them as they should remain sweet and delicate.
- Add the diced summer squash and corn kernels to the pot. Stir frequently for about 5 minutes, allowing the vegetables to slightly soften and release their natural sugars.
- Pour in the stock and add the fresh thyme. Bring the mixture to a gentle simmer—do not let it reach a violent boil, as you want to preserve the integrity and bright color of the vegetables.
- Lower the heat and simmer for 15 minutes. Test a piece of squash; it should be tender but still hold its shape perfectly.
- Taste the broth and season with salt and pepper. Just before serving, stir in a teaspoon of fresh lemon juice to brighten the flavors and cut through the richness of the butter. Serve warm or at room temperature with crusty bread.
How to plan summer meals?

Why we love this
The beauty of summer meal planning lies in the freedom it grants you to actually enjoy the long, sun-drenched days rather than spending them inside a hot kitchen. We love the mental clarity that comes from knowing you have a plan that revolves around minimal cooking and maximum freshness, utilizing seasonal ingredients that require very little interference. It feels like an act of self-care to organize your week around light salads, grilled proteins, and no-cook boards that keep the house cool and the spirit light. The ritual of looking at what is fresh at the farmer’s market and building a menu around it connects you to the rhythm of the season in a deeply satisfying way.
Ingredients
- A Weekly Planner or Digital App
- Seasonal Produce List (Corn, Peaches, Tomatoes, etc.)
- Inventory of Pantry Staples (Grains, Oils, Spices)
- A list of “No-Cook” options
How to make it
- Begin your planning session by checking your local weather forecast. On the hottest days, plan for “no-cook” meals like large food boards or cold salads. Save your grilling or light stovetop cooking for the cooler evenings.
- Audit your fridge and pantry to see what needs to be used up. Focus on high-quality basics: a great olive oil, a variety of vinegars, and plenty of fresh herbs can transform any basic ingredient into a summer feast.
- Choose one primary protein that can be cooked in a large batch—like grilled chicken or roasted chickpeas—and used across three different meals (e.g., in a salad, inside a wrap, and atop a grain bowl).
- Create a shopping list based strictly on what is in season. Not only is the produce at its peak flavor right now, but it is also generally more affordable and requires less seasoning to taste incredible.
- Schedule a ‘prep hour’ on Sunday. Wash and dry your greens, chop your hard vegetables, and whisk together two versatile dressings. This small investment of time ensures that during the week, you are only minutes away from a fresh, stress-free meal.
How to build dessert boxes?

Why we love this
Dessert boxes are the ultimate expression of edible art, turning sweet treats into a curated experience that feels incredibly indulgent and thoughtful. We love the sheer variety they offer—the way a tart raspberry can sit next to a rich, dark chocolate square, separated by a cloud-like marshmallow or a crisp shortbread cookie. The visual appeal is undeniable, with various shapes, colors, and textures arranged in a way that invites you to linger and try a little bit of everything. It removes the pressure of baking a single, perfect cake and instead celebrates the joy of grazing, making it the perfect centerpiece for a cozy movie night or a sophisticated garden party.
Ingredients
- Selection of Mini Cookies (Macarons, Shortbread)
- Fresh Berries (Strawberries, Blueberries)
- Dark and Milk Chocolate pieces
- Nuts (Marcona Almonds or Candied Walnuts)
- Small candies or Truffles
- A decorative wooden or cardboard box
How to make it
- Select a box with several compartments or use small cupcake liners to create sections. This prevents flavors from mingling—nobody wants their chocolate tasting like a tart strawberry.
- Start by placing your largest items first, such as larger cookies or small bowls of dip (like Nutella or fruit dip). Place these in opposite corners to anchor the design.
- Fill in the secondary spaces with medium-sized items like clusters of grapes or stacks of graham crackers. Ensure you are varying the colors; place bright red berries next to dark chocolate for a high-contrast, professional look.
- Use your smallest items—nuts, chocolate chips, or tiny candies—as ‘fillers’ to plug any gaps. The goal is to make the box look overflowing and abundant, with no visible bottom.
- Add a final touch of garnish, such as a few sprigs of mint or edible flowers, to give the box a fresh, ‘lifestyle’ aesthetic. If you’re transporting the box, place a piece of parchment paper on top before closing the lid to keep everything secure.
How to mix refreshing drinks?
Why we love this
There is a specific, clinking sound of ice against glass that signals the start of relaxation, and a well-mixed drink is the cornerstone of that experience. We love the way fresh citrus and muddled herbs create an aromatic profile that is both invigorating and cooling, offering a sophisticated alternative to plain water. The beauty of a refreshing summer drink lies in the balance of sweet, sour, and sparkling elements that dance on the tongue and provide instant relief from the heat. Whether it’s a mocktail or a cocktail, the act of garnishing a glass with a sprig of rosemary or a dehydrated lime wheel makes the simple act of hydrating feel like a luxurious celebration.
Ingredients
- Base liquid (Sparkling water, Ginger ale, or Tonic)
- Fresh Citrus (Limes, Lemons, or Grapefruit)
- Sweetener (Simple syrup, Agave, or Honey)
- Fresh Herbs (Mint, Basil, or Rosemary)
- Large Ice Cubes
How to make it
- Start with a clean, chilled glass. If you want an extra touch of class, run a lime wedge around the rim and dip it in sugar or sea salt depending on your flavor profile.
- Place your herbs and a splash of your sweetener in the bottom of the glass. Use a muddler or the back of a spoon to gently bruise the herbs—you want to release the fragrant oils without shredding the leaves into tiny bits.
- Fill the glass to the very top with large ice cubes. Large cubes melt slower than crushed ice, meaning your drink stays cold without becoming watered down too quickly.
- Squeeze in your fresh citrus juice. For one drink, the juice of half a lime or lemon is usually the perfect amount of acidity to balance the sweetness.
- Top the glass with your sparkling base. Stir gently with a long spoon to pull the flavors from the bottom to the top. Finish with a generous garnish of fresh herbs or a slice of fruit, and serve immediately while the bubbles are at their peak.
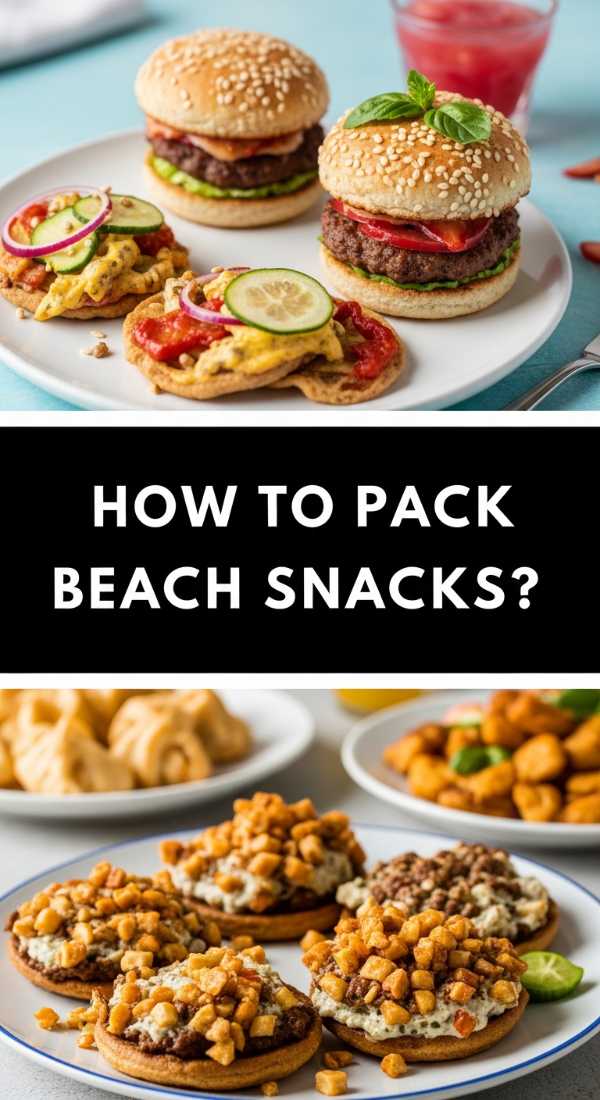
How to pack beach snacks?
[IMAGE_10]
Why we love this
Packing snacks for the beach is a strategic art form that ensures your day by the ocean isn’t interrupted by hunger or, worse, sandy food. We love the clever use of individual containers and chilled thermoses that keep everything from grapes to hummus at the perfect, crisp temperature despite the blazing sun. There is a specific joy in opening a cooler to find neatly organized, salt-rimmed treats that provide a burst of energy after a long swim. It’s about practicality meeting pleasure, allowing you to stay fueled and hydrated while the sound of the waves provides the perfect soundtrack to your seaside picnic.
Ingredients
- Hard-sided cooler and high-quality Ice Packs
- Individual airtight containers (Glass or BPA-free plastic)
- Frozen Grapes or Watermelon chunks
- Pre-cut veggies and individual Dip cups
- Salty snacks in resealable bags
- Plenty of wet wipes and napkins
How to make it
- The night before your trip, freeze a few water bottles. These act as extra ice packs in your cooler and provide ice-cold water to drink as they melt throughout the day.
- Prep all fruit and vegetables into bite-sized pieces. Avoid things that require a fork or knife; “hand-held” is the golden rule for the beach. Drying your fruit thoroughly before packing prevents it from getting mushy.
- Pack your cooler in layers. Place the heaviest and least delicate items (like drinks) at the bottom, closest to the ice packs. Place your sandwiches or delicate fruits at the very top.
- Use individual portion cups for dips like hummus or guacamole. This prevents double-dipping and ensures that if sand gets into one person’s snack, it doesn’t ruin the entire batch.
- Place your salty snacks (chips, pretzels) in a separate, dry bag outside the cooler to prevent them from becoming damp from condensation. Always include a dedicated ‘trash bag’ in your kit to ensure you leave the beach as beautiful as you found it.
The Art of the Effortless Summer
In the end, these boards and recipes are just a canvas for the memories you’re going to make. Whether it’s the dip that becomes your new signature or the hummingbird feeder that brings a daily dose of nature to your window, the goal is to lean into the ease of the season. Summer is fleeting, but the feeling of a shared meal and a slow afternoon is something that stays with you long after the sun goes down. So, grab a board, gather your favorites, and let the season unfold one delicious bite at a time.