

Why This Simple Food Board Strategy Is Breaking the Internet
There is something about the modern world that feels perpetually rushed, isn’t there? Between the endless pings of notifications and the hum of a busy household, finding a way to slow down and truly connect over a meal has become a lost art. That is exactly why the ‘Simple Food Board’ strategy has taken over my kitchen and my social media feed. It’s not just about the food; it’s about the permission to be messy, the joy of grazing, and the beautiful, tactile experience of sharing a platter with the people you love.
The secret to why this is breaking the internet isn’t some complicated culinary technique or an expensive gadget. It’s the sheer accessibility of it all. By moving away from formal plating and toward these vibrant, communal spreads, we are reclaiming our time and our joy. Whether it’s a lazy Sunday afternoon or a frantic Tuesday night, these boards turn simple ingredients into a celebration of flavor and togetherness.
How to make creamy rotel dip?

Why we love this
This dip is the ultimate nostalgia in a bowl, offering a velvety, molten texture that clings perfectly to a salty tortilla chip. The aroma of browned sausage mingled with the zesty, sharp scent of green chiles creates an immediate sense of comfort and home. Every bite is a harmonious blend of creamy cheese and a mild, spicy kick that wakes up the palate without overwhelming it, making it the undisputed star of any communal food board.
Ingredients
- 16 oz Velveeta cheese, cubed
- 1 can (10 oz) RoTel Original Diced Tomatoes and Green Chilies
- 1 lb ground breakfast sausage or lean ground beef
- 1/2 cup whole milk (for adjustng consistency)
- Fresh cilantro for garnish
How to make it
- Place a large skillet over medium-high heat and add your ground sausage or beef. Use a wooden spoon to break the meat into fine crumbles as it browns, ensuring no large chunks remain. Cook until the meat is deeply browned and no pink remains, which should take about 7-10 minutes.
- Drain the excess grease from the skillet thoroughly; this is crucial to prevent the dip from becoming oily. Once drained, return the meat to the pan and lower the heat to medium-low.
- Add the cubed Velveeta cheese and the entire can of RoTel (do not drain the juices from the can, as they provide essential acidity and flavor).
- Stir the mixture constantly with a heat-resistant spatula. As the cheese begins to melt, you will see the juices incorporate. If the mixture feels too thick or begins to pull away from the sides of the pan too quickly, add the milk one tablespoon at a time until it reaches a silky, pourable consistency.
- Once the cheese is completely melted and the dip is steaming hot, transfer it immediately to a warmed ceramic bowl or a small slow cooker set to ‘warm’ to maintain that perfect gooey texture throughout your gathering.
How to make hummingbird food?
Why we love this
There is a quiet, meditative magic in preparing a simple nectar that invites shimmering, iridescent visitors to your garden. This homemade syrup is far superior to store-bought versions because it lacks artificial dyes, offering a pure, clear energy source that mimics the natural nectar found in tubular flowers. Watching a hummingbird hover with blurring wings as it sips from your offering provides a sensory connection to nature that is both grounding and exhilarating.
Ingredients
- 1 cup granulated white sugar
- 4 cups filtered water
How to make it
- Begin by pouring your filtered water into a clean saucepan and bringing it to a rolling boil over high heat. Boiling the water is a critical step because it helps neutralize any impurities and ensures the sugar dissolves completely into a stable solution.
- Once the water reaches a boil, stir in the granulated white sugar. Continue to stir vigorously until the liquid becomes perfectly clear and no sugar crystals are visible at the bottom of the pot.
- Boil the mixture for exactly two minutes. This brief boiling period is sufficient to kill any bacteria or mold spores without over-concentrating the sugar through excessive evaporation.
- Remove the pan from the heat and allow the nectar to cool completely to room temperature. This is vital; never put hot nectar into a feeder as it can warp the plastic or harm the birds.
- Fill your hummingbird feeders and store any leftover nectar in a clean, airtight glass jar in the refrigerator for up to two weeks. Ensure you clean your feeders every 3-5 days to keep your feathered friends healthy.
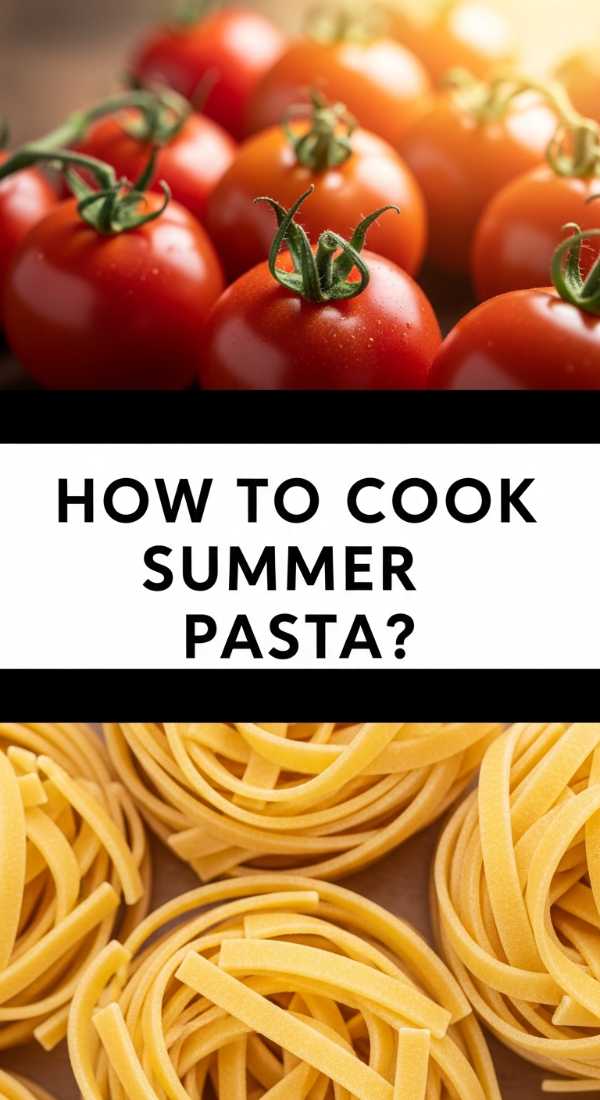
How to cook summer pasta?
Why we love this
Summer pasta is an olfactory journey through a sun-drenched garden, defined by the bright, acidic pop of cherry tomatoes and the peppery punch of fresh basil. The texture is light and ethereal, eschewing heavy creams for a delicate emulsion of extra virgin olive oil and starchy pasta water that coats each strand like silk. It feels sophisticated yet effortless, capturing the essence of warm evenings spent dining alfresco under a fading golden sky.
Ingredients
- 1 lb Spaghetti or Linguine
- 2 pints cherry tomatoes, halved
- 4 cloves garlic, thinly sliced
- 1/2 cup high-quality extra virgin olive oil
- 1 cup fresh basil leaves, torn
- 1/2 tsp red pepper flakes
- Freshly grated Parmesan cheese
How to make it
- Bring a large pot of heavily salted water to a boil. Use at least 2 tablespoons of salt; the water should taste like the sea to properly season the pasta from the inside out. Cook the pasta until it is ‘al dente’—firm to the bite—usually 1-2 minutes less than the package directions.
- While the pasta cooks, heat the olive oil in a wide skillet over medium heat. Add the thinly sliced garlic and red pepper flakes. Sauté for about 2 minutes until the garlic is fragrant and translucent, but be careful not to let it brown, as burnt garlic turns bitter.
- Toss in the halved cherry tomatoes and a pinch of salt. Increase the heat slightly and cook for 5-7 minutes, stirring occasionally, until the tomatoes begin to burst and release their juices, creating a rustic sauce.
- Before draining the pasta, reserve 1 cup of the starchy pasta water. This is the ‘liquid gold’ that will bind your sauce.
- Drain the pasta and add it directly to the skillet with the tomatoes. Pour in half of the reserved pasta water and toss vigorously over medium heat. Add the fresh basil and a generous handful of Parmesan. Continue tossing until the sauce thickens and clings to the pasta. If it looks dry, add more pasta water until it reaches a glossy, luxurious finish.
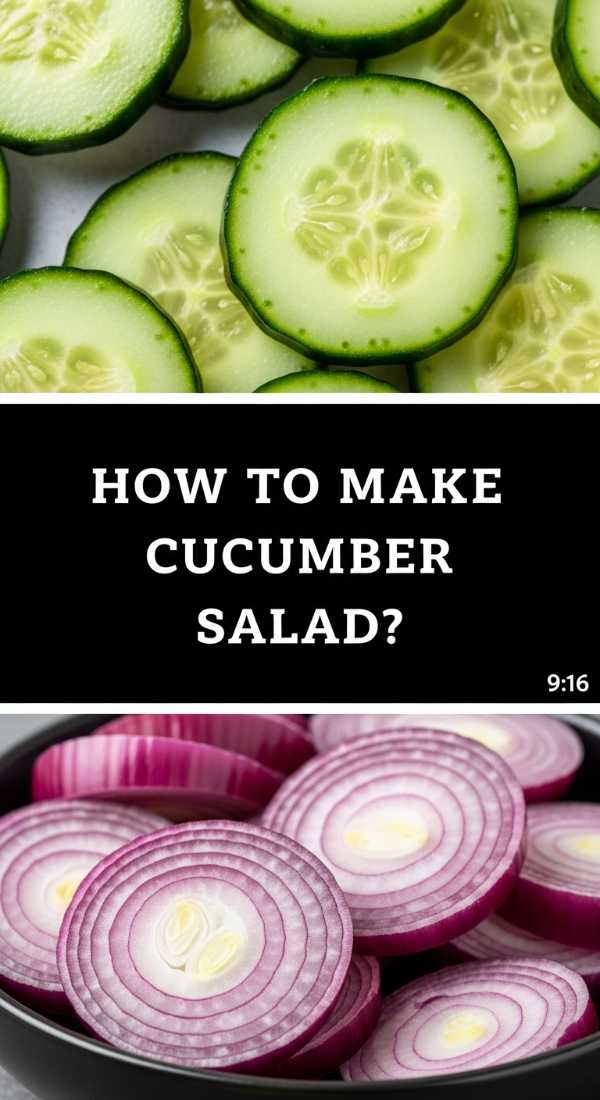
How to make cucumber salad?

Why we love this
The crunch of a perfectly chilled cucumber salad is the ultimate antidote to a sweltering summer day. It offers a refreshing explosion of hydration, paired with the sharp, clean tang of white vinegar and the earthy aroma of fresh dill. The thin, translucent slices of onion provide a subtle bite that balances the coolness of the cucumbers, making this dish a crisp, vibrant addition to any food board that cleanses the palate between richer bites.
Ingredients
- 3 large English cucumbers, thinly sliced
- 1/2 small red onion, shaved into rings
- 1/2 cup white vinegar
- 2 tbsp granulated sugar
- 1 tsp sea salt
- 1/4 cup fresh dill, chopped
- 1/2 tsp cracked black pepper
How to make it
- Start by slicing your English cucumbers into very thin rounds. Using a mandoline on a thin setting is recommended for uniform slices that will absorb the marinade evenly.
- Place the sliced cucumbers in a colander and sprinkle with the sea salt. Let them sit for about 15 minutes. This process, called ‘sweating,’ draws out excess moisture, ensuring your salad stays crunchy rather than watery.
- While the cucumbers rest, whisk together the white vinegar, sugar, and black pepper in a large glass bowl until the sugar is completely dissolved.
- Gently pat the cucumbers dry with a paper towel and add them to the bowl along with the shaved red onions and the chopped fresh dill.
- Toss everything together until the vegetables are thoroughly coated. Cover the bowl and refrigerate for at least 30 minutes before serving. This chilling time allows the flavors to meld and the cucumbers to become incredibly crisp and cold.
How to grill summer kabobs?

Why we love this
There is a primal satisfaction in the sizzle of kabobs hitting a hot grill, the smoke carrying the scent of charred peppers and caramelizing proteins. The visual appeal is undeniable—bright ribbons of bell pepper, red onion, and zucchini threaded alongside succulent pieces of meat. Each bite offers a variety of textures, from the snap of the flame-kissed vegetables to the tender, juicy center of the marinated meat, all tied together by a hint of woodsmoke.
Ingredients
- 2 lbs protein (chicken breast, steak, or shrimp), cut into 1-inch cubes
- 2 large bell peppers, cut into chunks
- 1 red onion, cut into wedges
- 1 zucchini, sliced into thick rounds
- 1/2 cup olive oil
- 3 tbsp balsamic vinegar
- 2 cloves garlic, minced
- 1 tsp dried oregano
How to make it
- In a large bowl, whisk together the olive oil, balsamic vinegar, minced garlic, and oregano to create a marinade. Add your protein cubes and toss to coat. Let this marinate in the refrigerator for at least 1 hour (or up to 4 hours for beef or chicken) to infuse the flavors and tenderize the meat.
- If using wooden skewers, soak them in water for at least 30 minutes prior to assembly to prevent them from burning on the grill.
- Thread the marinated protein and vegetables onto the skewers, alternating colors and textures. Avoid packing them too tightly; leaving a tiny bit of space between items ensures the heat can circulate and cook everything evenly.
- Preheat your grill to medium-high heat (about 400°F). Lightly oil the grates to prevent sticking. Place the kabobs on the grill and close the lid.
- Grill for about 10-12 minutes, turning the skewers 90 degrees every 3 minutes. This technique ensures beautiful char marks on all sides and a perfectly cooked interior. Look for the meat to reach its safe internal temperature and the vegetables to be tender-crisp with blackened edges.
How to make summer drinks?

Why we love this
A perfectly crafted summer drink is like a vacation in a glass, sparkling with effervescence and the bright, citrusy zing of fresh lime or lemon. The sound of ice cubes clinking against glass and the sight of muddled mint leaves swirling in a chilled liquid create an instant atmosphere of relaxation. These drinks provide a sophisticated, hydrating reprieve that feels celebratory, whether you’re adding a splash of spirits or keeping it a refreshing mocktail.
Ingredients
- 1 cup fresh berries (strawberries or raspberries)
- 1/4 cup fresh lime juice
- 2 tbsp simple syrup (equal parts sugar and water)
- Sparkling water or club soda
- Fresh mint sprigs
- Ice cubes
How to make it
- Prepare your simple syrup by heating equal parts sugar and water until dissolved, then cool. In the bottom of a sturdy glass or a cocktail shaker, place the fresh berries and the simple syrup.
- Use a muddler or the back of a wooden spoon to firmly press the berries, releasing their bright juices and aromatic oils. This step is essential for a deep, fruit-forward flavor.
- Add the fresh lime juice and a handful of ice to the shaker. Shake vigorously for about 15 seconds until the container feels frosty to the touch.
- Strain the mixture into tall glasses filled with fresh ice. This removes the pulp and seeds for a cleaner drinking experience.
- Top each glass with chilled sparkling water. Use a long spoon to gently stir from the bottom once to incorporate the fruit base without losing the carbonation. Garnish with a slap of fresh mint (smacking the mint against your hand releases its oils) and a lime wheel.
How to bake summer desserts?

Why we love this
Summer desserts are a celebration of the season’s bounty, focusing on the natural sweetness of sun-ripened stone fruits and berries. Imagine a rustic galette with a flaky, buttery crust that shatters upon impact, revealing a bubbling, jammy center of peaches or blackberries. The aroma of warm vanilla and caramelized fruit wafting from the oven is intoxicating, creating a dessert that feels wholesome, decadent, and deeply rooted in the harvest.
Ingredients
- 2 cups all-purpose flour
- 1 cup cold unsalted butter, cubed
- 1 tbsp sugar + 1/4 cup for filling
- 4 cups fresh fruit (peaches, berries, or plums)
- 1 tbsp cornstarch
- 1 egg (for egg wash)
- 1 tsp vanilla extract
How to make it
- To create a perfect flaky crust, combine flour and 1 tbsp sugar in a bowl. Work the cold, cubed butter into the flour using a pastry cutter or your fingertips until the mixture resembles coarse crumbs with some pea-sized pieces of butter remaining. Add 3-5 tablespoons of ice water, one at a time, until the dough just comes together. Wrap in plastic and chill for 1 hour.
- Preheat your oven to 400°F (200°C). In a separate bowl, toss your sliced fruit with 1/4 cup sugar, cornstarch, and vanilla extract. The cornstarch is vital as it thickens the fruit juices as they bake, preventing a soggy bottom.
- Roll out the chilled dough on a floured surface into a rough 12-inch circle. It doesn’t need to be perfect; the beauty is in the rustic appearance.
- Mound the fruit mixture into the center of the dough, leaving a 2-inch border. Fold the edges of the dough up and over the fruit, pleating as you go.
- Brush the crust with a beaten egg wash and sprinkle with a little extra sugar for crunch. Bake for 30-35 minutes until the crust is a deep golden brown and the fruit filling is thick and bubbling. Let it cool for at least 20 minutes to set before slicing.
How to prep picnic sides?

Why we love this
Picnic sides are the unsung heroes of outdoor dining, offering portable bursts of flavor that hold up beautifully even after a few hours in a basket. We love a classic potato salad that balances creamy dressing with the sharp snap of celery and the briny pop of capers or pickles. The texture is a delightful contrast between tender, waxy potatoes and a rich, emulsified sauce, providing a hearty and satisfying accompaniment to any main dish.
Ingredients
- 2 lbs Yukon Gold potatoes, cubed
- 1/2 cup mayonnaise
- 1 tbsp Dijon mustard
- 2 stalks celery, finely diced
- 1/4 cup red onion, minced
- 2 hard-boiled eggs, chopped
- 1 tbsp apple cider vinegar
- Salt and pepper to taste
How to make it
- Place the cubed potatoes in a large pot and cover with cold water. Add a generous pinch of salt. Bring to a boil, then reduce heat and simmer for 10-12 minutes. The potatoes are done when they are easily pierced with a fork but still hold their shape. Drain and let them cool slightly.
- While the potatoes are still warm (but not hot), drizzle them with the apple cider vinegar. This technique allows the potatoes to absorb the acidity, deepening the flavor profile of the entire salad.
- In a small bowl, whisk together the mayonnaise, Dijon mustard, salt, and pepper until smooth.
- In a large mixing bowl, combine the cooled potatoes, diced celery, minced red onion, and chopped hard-boiled eggs.
- Pour the dressing over the potato mixture and fold gently with a large spatula. Avoid over-mixing, as you want the potatoes to remain in distinct chunks rather than becoming mashed. Chill in the refrigerator for at least 2 hours before packing for your picnic to ensure the flavors have fully developed.
How to make summer soup?

Why we love this
A chilled summer soup, like a traditional Spanish Gazpacho, is a revelation of garden-fresh intensity. It’s essentially a liquid salad, vibrating with the flavors of raw peppers, cucumbers, and tomatoes, all brightened by a sharp splash of sherry vinegar. The texture is complex—smooth and velvety from pureed vegetables and olive oil, yet often garnished with finely diced vegetables for a refreshing crunch. It’s a cooling, elegant dish that feels incredibly light and nourishing.
Ingredients
- 2 lbs ripe tomatoes, cored and chopped
- 1 green bell pepper, chopped
- 1 cucumber, peeled and chopped
- 1 small red onion, chopped
- 1 clove garlic
- 2 tbsp sherry vinegar
- 1/3 cup extra virgin olive oil
- Salt to taste
How to make it
- Place the chopped tomatoes, bell pepper, cucumber, onion, and garlic into a high-powered blender. Puree on high speed until the mixture is completely smooth and liquid.
- With the blender running on a low setting, slowly stream in the extra virgin olive oil. This creates a stable emulsion, giving the soup a luxurious, creamy mouthfeel despite containing no dairy.
- Add the sherry vinegar and a generous pinch of salt. Pulse a few more times to incorporate. Taste and adjust the acidity or salt as needed; the flavors will mute slightly once chilled, so don’t be afraid to season boldly.
- Pour the soup through a fine-mesh strainer into a glass pitcher if you prefer an ultra-silky texture, or leave it as is for a more rustic feel.
- Cover and refrigerate for at least 4 hours, or ideally overnight. Serving gazpacho truly cold is essential for its refreshing quality. Pour into chilled bowls and garnish with a drizzle of olive oil and a few finely diced pieces of the same vegetables used in the base.
How to prep summer meals?
[IMAGE_10]
Why we love this
Summer meal prep is about working smarter, not harder, to maximize your time in the sun. It involves transforming a single afternoon of effort into a week of vibrant, ready-to-eat components that feel like a gift to your future self. We love the organization of translucent bins filled with pre-washed greens, roasted grains, and grilled proteins. It removes the ‘what’s for dinner’ stress and replaces it with a creative assembly process that is fast, healthy, and visually stunning.
Ingredients
- 3 lbs assorted proteins (chicken, tofu, or shrimp)
- 2 cups dry grains (quinoa, farro, or brown rice)
- 5 cups varied seasonal vegetables (broccoli, carrots, peppers)
- 1 cup homemade vinaigrette
- Pre-washed leafy greens
How to make it
- Dedicate a 2-hour window on a Sunday. Start by cooking your grains. Rinse 2 cups of dry grains and boil them in seasoned broth or water according to package instructions. Once cooked, spread them out on a baking sheet to cool quickly; this prevents them from becoming mushy in storage.
- Prepare your proteins in bulk. Season your chicken or tofu with a versatile blend of salt, pepper, garlic powder, and dried herbs. Grill or roast everything at once. Once cooled, slice into bite-sized strips or cubes.
- Roast a large sheet pan of sturdy vegetables (like carrots and broccoli) at 400°F with olive oil and salt for 20 minutes. Simultaneously, wash and chop raw vegetables (like cucumbers and peppers) for crunch.
- Prepare a large jar of ‘house’ vinaigrette—3 parts oil to 1 part acid (lemon juice or vinegar), plus a teaspoon of Dijon mustard and honey. Shake vigorously until emulsified.
- Store each component in separate airtight glass containers rather than pre-assembling full meals. This ‘modular’ approach allows you to mix and match flavors throughout the week, preventing meal fatigue and keeping ingredients fresher for longer. Assembly takes only 5 minutes when you’re ready to eat!
Bringing It All Together
The beauty of the food board strategy lies in its versatility and the way it invites people into the kitchen. By mastering these simple summer staples—from the creamy indulgence of a rotel dip to the organized efficiency of meal prep—you create a home that feels vibrant and welcoming. These recipes are more than just instructions; they are the building blocks for memories made around a shared table. So, clear off your biggest board, gather your favorite ingredients, and let the summer grazing begin!