
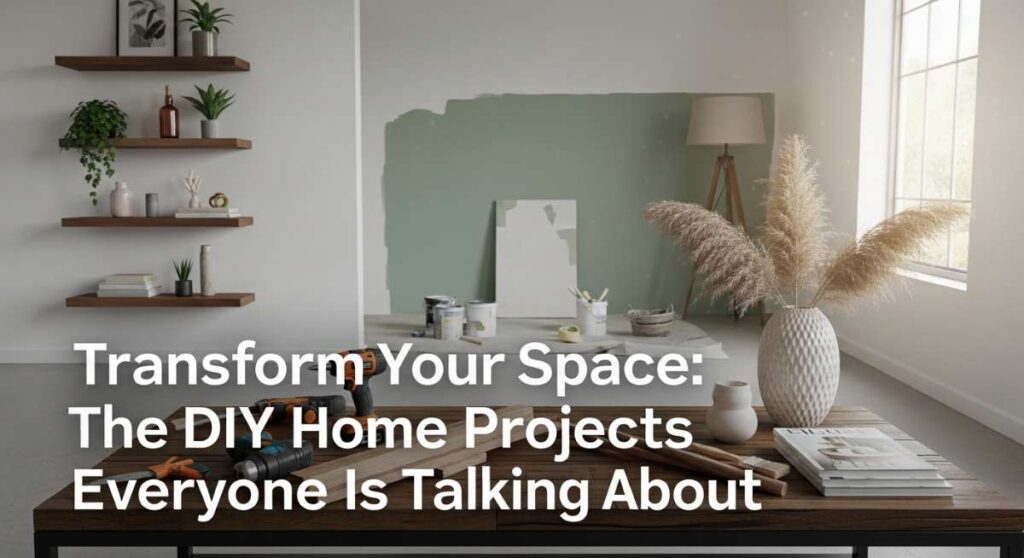
Transform Your Space: The DIY Home Projects Everyone Is Talking About
There is something undeniably magical about the moment you step back, wipe the dust from your hands, and look at a project you finished yourself. Our homes are more than just four walls; they are the backdrop of our lives, the places where we seek refuge after a long day and where we gather with the people who matter most. When we pour our own creativity into these spaces, we aren’t just fixing up a yard or painting a room—we are weaving our own stories into the very grain of the wood and the soil of the garden.
Lately, the internet has been buzzing with ingenious ways to elevate our everyday environments. From the practical joy of an organized chicken coop to the whimsical sparkle of glass art in the garden, these viral DIYs are all about blending functionality with that ‘wow’ factor. Whether you have a sprawling backyard or a modest front porch, these projects are designed to be approachable, satisfying, and deeply transformative. Let’s dive into the DIYs that are currently taking the lifestyle world by storm.
How to Build a Poop Shelf Chicken Coop for a Clean and Happy Flock

Why we love this
If you have ever stepped into a coop at dawn, you know that the air can be heavy and the cleanup daunting. A poop shelf is a game-changer that transforms the coop from a chore-heavy space into a pristine sanctuary for your feathered friends. Imagine the scent of fresh pine shavings and the sight of clean, happy hens instead of a cluttered floor. The smooth surface of a well-installed shelf makes the morning cleanup a simple five-minute task, leaving you more time to enjoy your coffee and the gentle clucking of a healthy flock.
Essential Elements:
- Smooth plywood or OSB board
- Scrap vinyl flooring or linoleum
- Heavy-duty adhesive or staples
- Sturdy wooden brackets or 2×4 supports
- Handheld metal scraper
- Sweet PDZ or sand (optional bedding for the shelf)
How to make it
- Measure the area directly beneath your chickens’ roosting bars. The shelf should be about 12 inches wider than the roosting area to catch all droppings effectively.
- Cut your plywood to these dimensions. To make the surface truly ‘wipe-clean,’ cut a piece of vinyl flooring to match and adhere it to the wood using a strong construction adhesive, smoothing out any bubbles.
- Install your support brackets to the coop walls. The shelf should sit approximately 8 to 10 inches below the roosting bars—low enough for the birds to move, but high enough to keep the floor space underneath open for floor bedding.
- Secure the vinyl-topped board onto the brackets using screws. Ensure the shelf is level so that any loose bedding or PDZ stays in place.
- Apply a thin layer of sand or Sweet PDZ (stall refresher) to the shelf. This neutralizes odors and makes the waste clump together for easy removal.
- Every morning, use a wide metal scraper to pull the droppings into a bucket. It’s a 60-second task that keeps the coop smelling like a dream and prevents the buildup of harmful ammonia.
How to Install a DIY Wood Trellis for a Lush Garden Entrance

Why we love this
A wooden trellis is like an open invitation into a secret garden. There is a romantic, tactile beauty in the way rough-sawn cedar meets the delicate tendrils of a climbing rose or the sweet-smelling jasmine. As the sun hits the wood, it releases a faint, earthy aroma that mixes with the floral scents of your garden. It creates a vertical tapestry of green and color that draws the eye upward, making even the smallest garden feel like a lush, multi-dimensional escape where nature and architecture dance together in harmony.
Essential Elements:
- Pressure-treated or cedar 2×2 and 1×2 boards
- Outdoor-rated wood screws
- Wood glue (exterior grade)
- Post hole digger and concrete (if free-standing)
- Wood stain or sealant
- Climbing plants like Clematis or Honeysuckle
How to make it
- Sketch your design. A classic grid or a ‘fan’ shape works best for beginners. For a standard 6-foot trellis, cut two vertical ‘legs’ from 2×2 cedar and several horizontal cross-pieces from 1×2 cedar.
- Lay your vertical legs flat on a level surface like a driveway. Space them according to your desired width (usually 24 to 30 inches).
- Apply a bead of exterior wood glue to the back of your first horizontal slat. Place it at the top of the vertical legs, ensuring it is perfectly square using a carpenter’s square tool.
- Drive two screws through each intersection point. Use a pre-drill bit to prevent the cedar from splitting, which is a common mistake that ruins the aesthetic.
- Repeat the spacing of your slats every 8 to 10 inches down the length of the trellis until you reach the bottom ‘anchor’ section.
- Apply a weather-resistant stain to protect the wood from graying and rotting. Let it dry for 24 hours.
- Secure the trellis to a wall using spacers (to allow air to flow behind the plants) or bury the legs 12 inches into the ground, securing with a small amount of quick-set concrete for stability.
How to Design a Rectangle Backyard Layout for Optimal Relaxation Flow
Why we love this
There is a profound sense of peace that comes from clean lines and intentional zones. A rectangular backyard layout offers a modern, high-end feel that mimics the flow of an indoor living room. We love how the crisp edges of a stone patio or a manicured lawn define different ‘rooms’—a spot for dining, a corner for fire-pit lounging, and a path for wandering. It’s about creating a visual rhythm that guides your feet and calms your mind, turning a simple patch of grass into a sophisticated outdoor retreat that feels balanced and expertly curated.
Essential Elements:
- Graph paper or landscape design software
- Large format pavers or flagstone
- River rocks or pea gravel for borders
- Modern outdoor furniture with clean lines
- String lights or solar path markers
- Low-profile shrubs (like Boxwood)
How to make it
- Map your yard on paper. Divide the rectangle into three distinct ‘rooms’: the dining zone (nearest the house), the transition zone (pathway), and the relaxation zone (the far end).
- Define the borders. Use a string line and stakes to mark out straight, 90-degree angles for your patio or lawn edges. Symmetry is the key to this look.
- Excavate the patio area to a depth of 4-6 inches. Fill with a base of crushed gravel, then a layer of sand, tamping it down until it is rock-solid and perfectly level.
- Lay your pavers in a ‘running bond’ or ‘stack bond’ pattern to emphasize the rectangular geometry. Use a rubber mallet to set each stone and check for levelness constantly.
- Fill the gaps between pavers with polymeric sand to prevent weeds and provide a finished, professional look.
- Line the perimeter with dark river rocks and evergreen shrubs to create a ‘frame’ around your rectangle. This adds texture and softens the hard edges while maintaining the geometric theme.
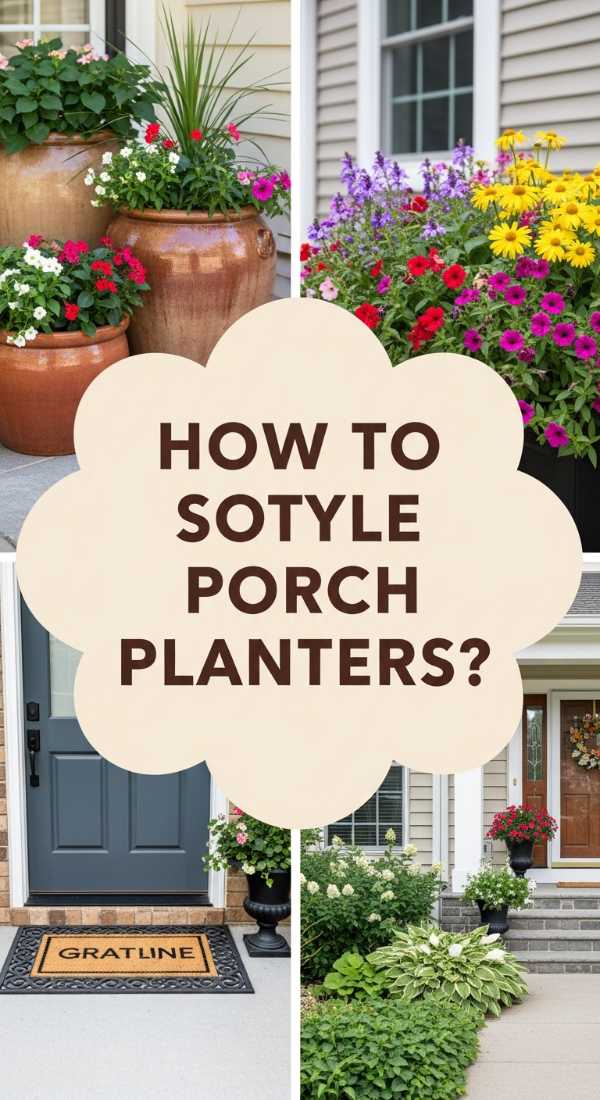
How to Style Front Porch Flower Pots for a Welcoming Home Vibe
Why we love this
Your front porch is the ‘handshake’ of your home, and nothing says ‘welcome’ like a masterfully styled container garden. We love the sensory explosion of vibrant petunias, the soft texture of dusty miller, and the refreshing scent of potted lavender catching the breeze as you open the door. It’s an instant mood booster that adds life and personality to your entryway. Using varying heights and textures creates a lush, abundant look that makes your home feel loved, cared for, and vibrantly alive from the moment you pull into the driveway.
Essential Elements:
- Large, high-quality planters (ceramic, terracotta, or composite)
- Thriller plants (tall, focal point like Dracaena or Grasses)
- Filler plants (mounding flowers like Geraniums or Petunias)
- Spiller plants (trailing vines like Creeping Jenny or Sweet Potato Vine)
- High-quality potting soil with perlite
- Slow-release fertilizer
How to make it
- Choose a color palette. For a viral look, stick to three colors—for example, white, soft purple, and lime green. Ensure your pots are large enough (at least 14-16 inches) to allow for root growth.
- Fill the bottom third of your pots with lightweight filler (like empty plastic water bottles) if the pots are very deep, then fill the rest with premium potting mix up to 2 inches from the rim.
- Plant your ‘Thriller’ first. This tall plant goes in the center (if the pot is seen from all sides) or the back (if it’s against a wall).
- Surround the Thriller with your ‘Fillers.’ These should be tucked in closely to create a full, lush appearance. Don’t be afraid to pack them in!
- Place your ‘Spillers’ along the edges. Angle them slightly outward so they are encouraged to drape over the sides of the pot.
- Water the pots immediately until water drains out the bottom. Add a tablespoon of slow-release fertilizer pellets to the top inch of soil to keep them blooming all summer long.
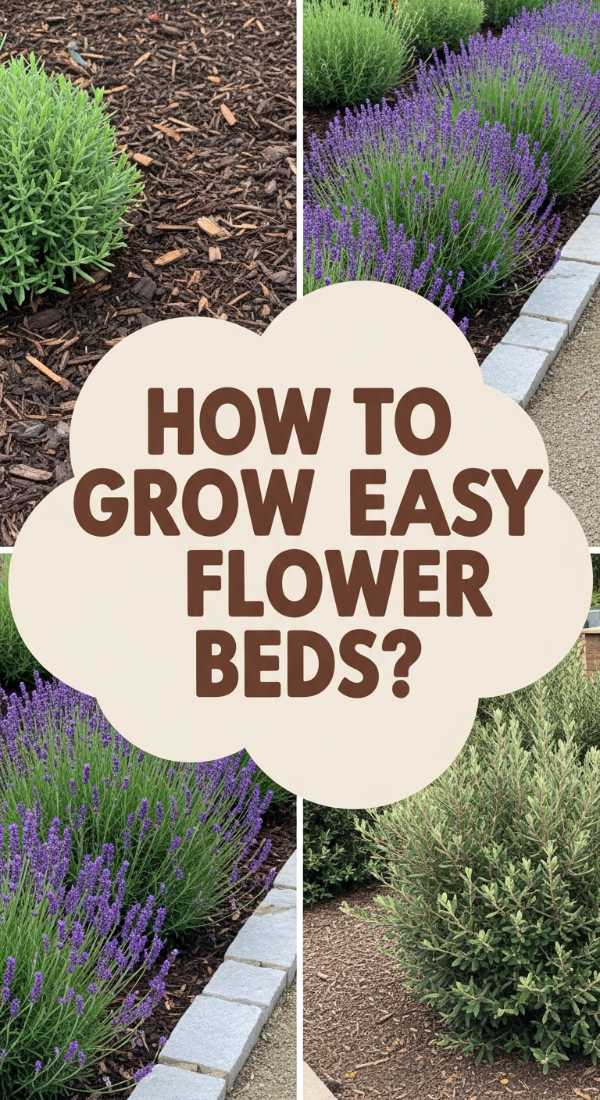
How to Create Low Maintenance Flower Bed Ideas for a Stress Free Yard
Why we love this
The best garden is one that you can actually enjoy rather than spend every waking hour weeding. We love the ‘set it and forget it’ philosophy of a low-maintenance bed that relies on perennials and smart mulching. Imagine a bed of silvery lambs ear and deep purple salvia that returns every year, getting bigger and more beautiful with almost zero effort from you. The scent of fresh cedar mulch provides a clean, professional finish that keeps the soil cool and moist, letting you spend your weekends in a hammock rather than on your knees with a trowel.
Essential Elements:
- Native perennial plants
- Professional-grade landscape fabric (optional)
- Cardboard for sheet mulching
- High-quality organic mulch (cedar or hemlock)
- Drip irrigation kit (optional but recommended)
- Edging material (stone or metal)
How to make it
- Select native plants that thrive in your specific hardiness zone. Native plants require less water and are naturally resistant to local pests.
- Clear the area of grass and weeds. A pro tip is to lay down a layer of corrugated cardboard over the soil; this smothers weeds and eventually decomposes into rich organic matter.
- Arrange your plants while they are still in their nursery pots. Place the tallest in the back and the shortest in the front, leaving at least 12-18 inches between them to allow for their mature size.
- Cut ‘X’ shapes in the cardboard and plant your perennials directly into the soil beneath.
- If using drip irrigation, snake the tubing around the base of the plants now. This ensures water goes directly to the roots, reducing evaporation and weed growth.
- Cover the entire area with a 3-inch layer of mulch. Keep the mulch a few inches away from the stems of the plants to prevent rot. This layer is your secret weapon against weeds and moisture loss.
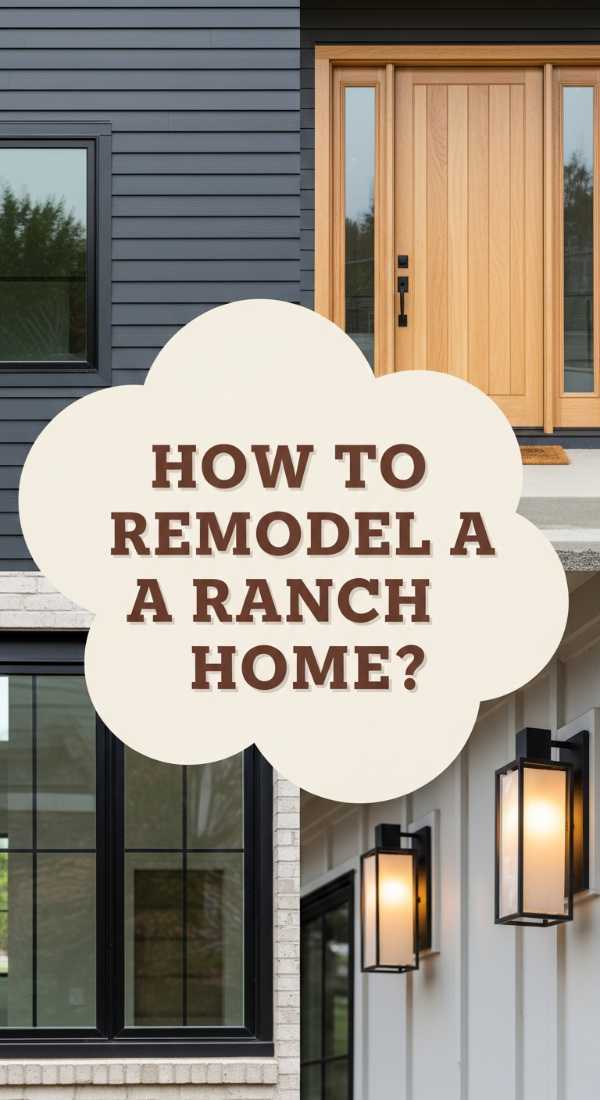
How to Modernize a Ranch Exterior Remodel for Instant Curb Appeal
Why we love this
Ranch-style homes have such incredible ‘bones,’ and modernizing them is like watching a classic movie get a high-definition restoration. We love the juxtaposition of crisp, dark paint against warm wood accents like cedar shutters or a new front door. It’s a transformation that feels expensive and sophisticated, yet it’s often achieved through the power of a fresh color palette and updated hardware. The result is a home that feels sleek, architectural, and completely refreshed, making it the envy of the neighborhood without losing its original mid-century charm.
Essential Elements:
- High-quality exterior paint (Satin finish)
- Cedar planks for shutters or porch pillars
- Modern black hardware (house numbers, handles)
- Updated outdoor sconce lighting
- Power washer and sandpaper
How to make it
- Begin with a thorough power wash of the siding and trim. Removing years of grit and oxidation is essential for paint adhesion.
- Choose a ‘modern moody’ color scheme. Think charcoal grays, navy blues, or creamy whites with stark black trim. Use a high-quality sprayer for a smooth, professional finish on the siding.
- Replace old, dated shutters with DIY cedar slat shutters. Simple 1×4 cedar boards joined together vertically provide a warm, organic texture that pops against dark paint.
- Swap out your old ‘builder-grade’ porch light for a modern, matte black lantern or a sleek cylinder sconce. Lighting is the ‘jewelry’ of the house.
- Update your house numbers. Choose a modern font and mount them vertically or on a dedicated wooden plaque to create a focal point.
- Stain any visible concrete porches or stairs in a coordinating slate gray to hide imperfections and finish the look.
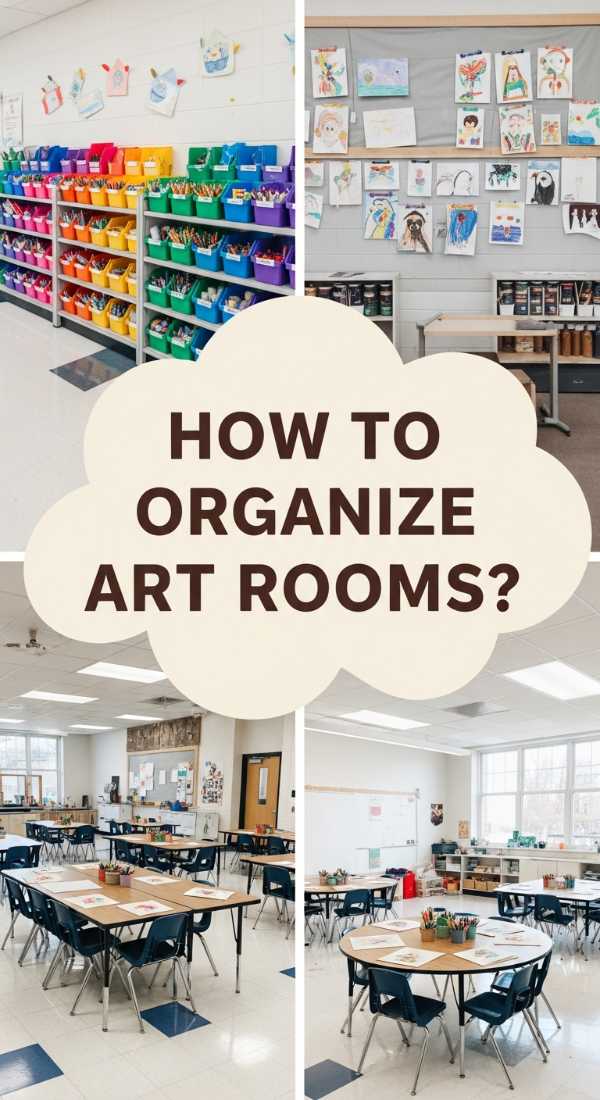
How to Decorate Elementary Art Rooms for Inspiring Creative Minds

Why we love this
Walking into a well-decorated art room should feel like walking into a giant box of crayons. We love the chaotic yet organized energy of a space filled with primary colors, dangling paper lanterns, and walls that celebrate student ‘masterpieces.’ It’s a sanctuary for messy hands and big dreams. By using color-coded stations and whimsical decor, you create an environment where children feel safe to take risks and explore their imagination. The tactile nature of the room—the rows of brushes, the stacks of bright paper—acts as a silent teacher, inviting everyone to create.
Essential Elements:
- Brightly colored storage bins and rolling carts
- Wall-mounted drying racks
- Large-scale color wheel posters
- Hanging decor (paper lanterns, pom-poms)
- Display wire with clips for student art
- Washable rugs in geometric patterns
How to make it
- Zone the room by color. Use red bins for markers, blue for paint, and yellow for paper. This visual shorthand helps children return items to the correct place independently.
- Create a ‘Gallery Wall’ using simple curtain wires or twine and clothespins. This allows for a rotating display of student work that can be swapped out in seconds, keeping the room feeling fresh.
- Hang paper lanterns of varying sizes and heights from the ceiling tiles. This lowers the visual ceiling, making a large classroom feel more intimate and magical.
- Label everything. Use a combination of words and pictures so that even the youngest artists know where the ‘fuzzy sticks’ (pipe cleaners) and ‘sticky juice’ (glue) belong.
- Set up a dedicated ‘Inspiration Station’ with a comfortable rug and books about famous artists. This gives students a place to go when they finish early or need a creative reset.
How to Build a DIY Duck Enclosure for a Safe Waterfowl Habitat

Why we love this
Ducks bring a sense of joyful, splashing life to a homestead that is entirely different from chickens. We love the sound of happy ‘quacks’ and the sight of them diving into fresh water. A dedicated enclosure ensures they are safe from predators while giving them the space they need to express their ‘duck-ness.’ Building a habitat with a focus on easy-to-clean water features means you get to enjoy their antics without the mess. It’s a peaceful, watery oasis that feels like a little piece of a nature preserve right in your backyard.
Essential Elements:
- Hardware cloth (1/2 inch mesh) for predator protection
- Treated timber for the frame
- A sturdy kiddie pool or a pre-formed pond liner
- Drainage valve for the pool
- Pea gravel or river stones for the ‘wet’ zone
- A secure, low-to-the-ground duck house
How to make it
- Choose a level spot with both sun and shade. Build a 4-foot tall frame using treated 2x4s, ensuring it is large enough for the ducks to roam (aim for 10-15 sq ft per duck).
- Wrap the entire frame in hardware cloth, burying the bottom 6 inches in a trench to prevent digging predators like foxes or raccoons from entering.
- Install your water feature. The best DIY tip is to elevate a plastic pool and install a PVC drain valve at the bottom. This allows you to drain the dirty water away from the enclosure via a hose.
- Surround the pool with a thick layer of pea gravel. Ducks are notorious for making mud; the gravel allows water to drain away, keeping their feet healthy and the enclosure tidy.
- Place a simple, well-ventilated house inside. Unlike chickens, ducks don’t need high roosts; they prefer to snuggle on a bed of thick straw on the floor.
- Ensure the door has a predator-proof latch (like a carabiner or a sliding bolt) that a raccoon cannot manipulate.
How to Set Up a DIY Grill Station Cheap for Ultimate Summer Cookouts

Why we love this
There is nothing quite like the aroma of charcoal and sizzling steaks on a warm July evening. We love a DIY grill station because it turns a solitary cooking task into a social event. Instead of running back and forth to the kitchen, you have everything—your tongs, your spices, your cold beverage—right at your fingertips. By using budget-friendly materials like reclaimed pallets or simple concrete blocks, you can create a rugged, ‘industrial-chic’ outdoor kitchen that feels like a luxury upgrade for a fraction of the cost.
Essential Elements:
- Reclaimed wooden pallets or 2×4 lumber
- Concrete pavers or a stainless steel sheet for the countertop
- Heavy-duty S-hooks for utensil hanging
- Exterior wood stain
- Magnetic knife or tool strip
- Bottle opener (wall-mounted)
How to make it
- Build two identical rectangular frames from 2x4s to act as your side supports. The height should be ‘counter height’—usually around 36 inches.
- Connect the two frames with horizontal slats to create shelves. Use one shelf for charcoal storage and another for plates and prep bowls.
- Sand the wood thoroughly to prevent splinters. Apply a dark, weather-resistant outdoor stain for a high-end look that hides charcoal dust.
- For the countertop, lay down a series of smooth concrete pavers or secure a piece of galvanized sheet metal. This provides a fire-resistant surface to set hot trays or prep food.
- Screw a series of S-hooks into the side of the station to hold your grill brush, tongs, and spatula.
- Add a wall-mounted bottle opener and a small magnetic strip to hold your grill thermometer and knives. This keeps your workspace clear and organized.
How to Curate Glass Yard Art for a Whimsical Garden Sanctuary
[IMAGE_10]
Why we love this
Garden art should be the ‘jewelry’ of your outdoor space, catching the light and adding a touch of the unexpected. We love glass yard art because it plays with the sun, casting colorful prisms onto your plants and glowing like jewels during the ‘golden hour.’ It’s a way to repurpose vintage glassware and thrift store finds into something sculptural and sophisticated. It adds a layer of whimsy and height to your flower beds, creating a garden that feels like a curated sanctuary where art and nature coexist in a sparkle of color.
Essential Elements:
- Thrifted glass plates, bowls, and vases (various colors)
- Clear, waterproof silicone adhesive (GE Silicone II is a favorite)
- Copper pipe or rebar for stakes
- Glass drill bits (optional)
- A sunny spot in the garden
How to make it
- Go ‘thrifting’ for glass. Look for interesting textures, like waffle-patterned plates or colored vases in cobalt blue, amber, and ruby red.
- Lay out your pieces to design a ‘flower’ or a ‘totem.’ A classic ‘glass flower’ consists of a large plate, a smaller plate, and a small bowl or votive holder stacked on top of each other.
- Clean all glass surfaces with rubbing alcohol to ensure a perfect bond. Apply a generous bead of clear silicone adhesive to the center of each piece and press them together.
- Weight the stack down with a heavy book or a rock and let it cure for at least 48 hours. This is crucial for the adhesive to become weatherproof.
- To mount, you can either glue a copper plumbing ‘cap’ to the back of the glass flower to slide over a copper pipe stake, or use a glass drill bit to create a center hole for a bolt.
- Position your glass art where it will catch the morning or evening sun. The light filtering through the colored glass will bring a magical, ethereal glow to your garden beds.
Conclusion
Transforming your home doesn’t always require a professional crew or a massive budget. As we’ve seen, the most impactful projects are often the ones that combine a bit of sweat equity with a lot of heart. Whether you are building a sanctuary for your animals, creating a lush garden entrance, or modernizing your home’s exterior, these DIYs allow you to put your personal stamp on the place you love most. So, pick the project that speaks to your soul, grab your tools, and start creating the home of your dreams, one weekend at a time.