
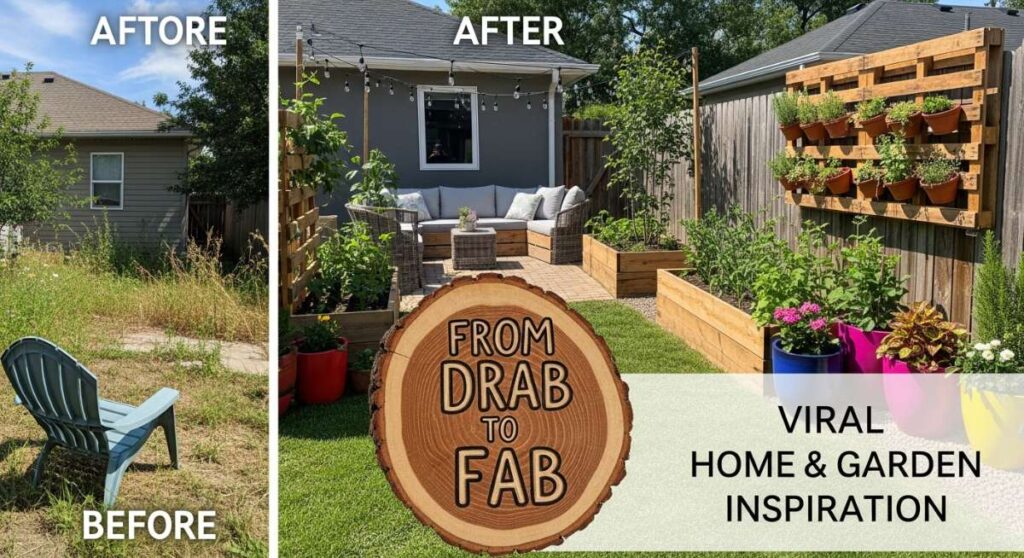
From Drab to Fab: Viral DIY Garden Trends for Your Backyard
There is something truly magical about watching a tired, neglected backyard blossom into a sanctuary that feels like an extension of your soul. We often spend so much time focusing on our indoor spaces that we forget the raw potential waiting just outside the sliding glass door. Whether it’s the way the golden hour light hits a newly planted flower bed or the sound of wind chimes catching a summer breeze, a well-tended garden offers a unique kind of peace that no interior renovation can quite match.
Lately, I’ve been obsessed with the DIY garden projects taking over my feed—those ‘drab to fab’ transformations that make you want to grab a shovel and a bag of mulch immediately. It’s not just about aesthetics; it’s about creating a lifestyle. From the rhythmic sound of a dry creek bed to the joy of watching kids play in a handmade mud kitchen, these trends are all about intentionality and beauty. Let’s dive into the viral projects that are turning standard backyards into lush, Instagram-worthy retreats.
How to Design Stunning Front Yard Flower Beds for Better Curb Appeal
Why we love this
A well-designed flower bed is the ultimate ‘welcome home’ hug for your property. There is nothing quite like the scent of blooming jasmine or the sight of vibrant hydrangeas swaying in the breeze to instantly lift your mood as you pull into the driveway. We love the way layered textures—from soft, velvety lamb’s ear to the architectural spikes of salvia—create a visual symphony that changes with the seasons, making your home feel established, cared for, and vibrantly alive.
Essential Elements:
- Hardwood mulch or cedar chips
- Steel or stone edging
- A mix of perennials (Coneflowers, Hostas, Daylilies)
- Slow-release organic fertilizer
- Quality topsoil and compost blend
How to make it
- Begin by marking your bed shape using a garden hose to create natural, organic curves; avoid harsh straight lines for a more professional look.
- Remove all grass and weeds from the designated area using a sharp spade, ensuring you dig at least 3 inches deep to clear out root systems.
- Amend the soil by tilling in a 4-inch layer of organic compost; the soil should feel crumbly and rich, like chocolate cake, which indicates perfect drainage and nutrient levels.
- Arrange your plants while still in their nursery pots to visualize the layout, placing taller species in the back and shorter groundcovers at the front.
- Dig holes twice as wide as the root ball, sprinkle in a handful of slow-release fertilizer, and plant so the crown is level with the soil surface.
- Apply a 3-inch layer of mulch, being careful not to pile it against the plant stems, and water deeply until the soil is saturated but not swampy.
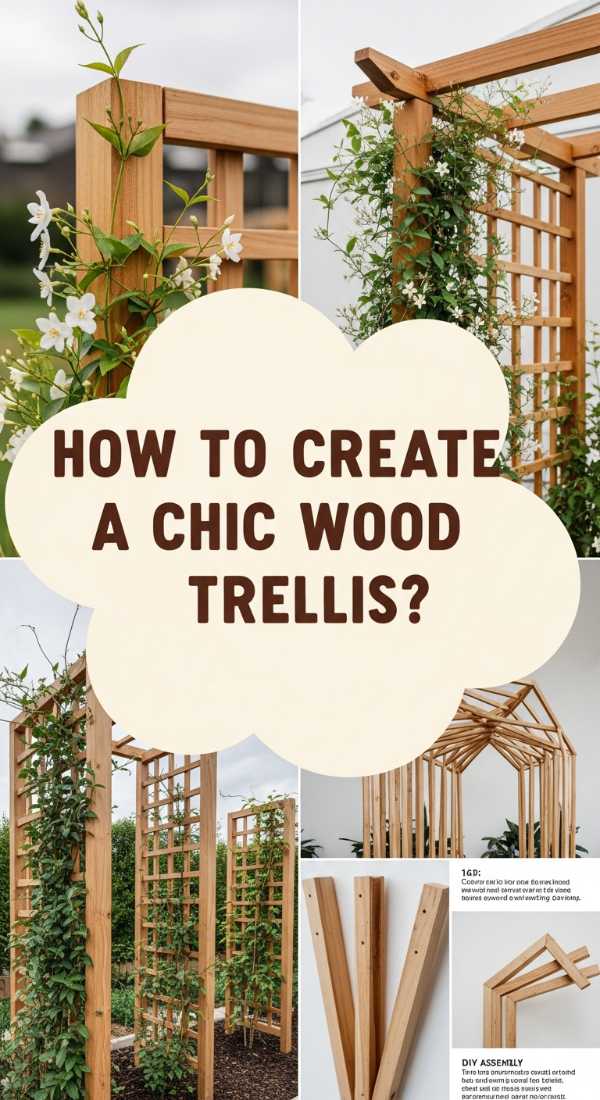
How to Create a Chic Wood Trellis for a Lush Garden Oasis
Why we love this
Vertical interest is the secret weapon of garden designers, and a custom wood trellis adds a touch of architectural elegance that feels both modern and timeless. Imagine the intoxicating aroma of honeysuckle or the romantic sprawl of climbing roses weaving through the slats, creating a living wall of greenery. The warm, earthy scent of cedar wood combined with the tactile softness of vine leaves transforms a flat fence into a three-dimensional masterpiece that provides privacy and serenity.
Essential Elements:
- Pressure-treated or Cedar 2×2 boards
- Outdoor-rated wood screws
- Weatherproof wood stain or sealant
- Level and miter saw
- Climbing plants (Clematis, Star Jasmine, or Wisteria)
How to make it
- Measure your space and cut your vertical supports to the desired height, ensuring they are tall enough to be anchored at least 12 inches into the ground or attached securely to a wall.
- Space your horizontal slats roughly 6 to 10 inches apart; use a spacer block to ensure perfect consistency across the entire height of the trellis.
- Pre-drill holes for every screw to prevent the cedar from splitting, which is a common visual cue of a DIY job versus a professional one.
- Apply a high-quality UV-resistant stain; for a modern look, go with a dark charcoal, or keep it classic with a clear teak oil that highlights the natural grain.
- Secure the trellis to your support structure using spacers so there is a 2-inch gap between the trellis and the wall, allowing air to circulate and vines to wrap around easily.
- Plant your climbers at the base and gently lead the first few tendrils onto the bottom slats using soft garden twine.
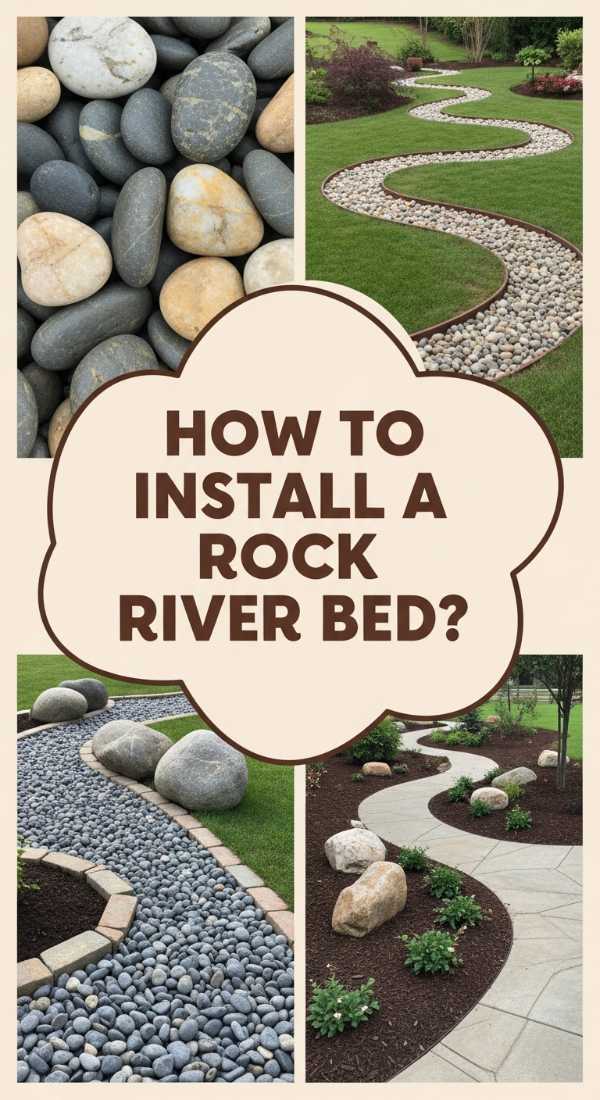
How to Install a Rock River Bed for a Peaceful Backyard Sanctuary

Why we love this
A rock river bed brings a sense of Zen and movement to even the driest corners of a yard. We adore the way the smooth, cool river stones feel underfoot and the way they shimmer after a light rain, mimicking the flow of a natural stream. It’s a sensory experience that combines the rugged texture of boulders with the delicate shadows cast by surrounding ornamental grasses, providing a low-maintenance solution that looks expensive and feels incredibly grounding.
Essential Elements:
- Heavy-duty landscape fabric
- River rocks in varying sizes (1-inch to 5-inch)
- Larger anchor boulders for ‘banks’
- Landscape staples
- Assorted ornamental grasses (Blue Fescue or Maiden Grass)
How to make it
- Dig a shallow trench roughly 6-8 inches deep, following the natural slope of your yard to ensure water drainage is directed away from your home’s foundation.
- Line the entire trench with heavy-duty weed barrier, overlapping the edges by 6 inches and securing it firmly with landscape staples.
- Place your largest ‘anchor’ boulders first at the bends of your ‘river’ to create a realistic look; they should look like they’ve been there for decades.
- Fill the base with medium-sized river rocks, then scatter smaller pebbles on top to fill in the gaps, creating a graded, natural texture.
- Check the ‘flow’ by pouring water at the top; the water should disappear into the rocks or flow gently toward the drainage point without pooling.
- Finish the look by planting drought-tolerant grasses along the edges to soften the rock lines and add movement.
How to Build an Outdoor Pool Bar for the Ultimate Summer Lounge
Why we love this
There is nothing that says ‘vacation at home’ like a dedicated pool bar. We love the social energy this creates—the clinking of ice cubes in a glass, the smell of fresh lime zest, and the feeling of the sun on your shoulders while you chat with friends. It’s the ultimate lifestyle upgrade that turns a simple swim into an event, providing a sleek, functional space to serve up chilled drinks and summer memories under the open sky.
Essential Elements:
- Weather-resistant wood (Cedar or Teak)
- Concrete or stone countertop
- Outdoor bar stools
- Built-in cooler or ice bucket
- Waterproof LED strip lighting
How to make it
- Build a sturdy frame using 4×4 pressure-treated posts, ensuring the height is exactly 42 inches for standard bar stool comfort.
- Sheath the frame in cedar planks or stone veneer; if using wood, leave 1/8 inch gaps to allow for expansion during humid summer days.
- For the countertop, use a pre-cast concrete slab or large format outdoor tiles; ensure the surface is perfectly level so drinks don’t slide.
- Install a drop-in stainless steel cooler box into the countertop by cutting a precise opening with a jigsaw and sealing the edges with silicone.
- Apply a marine-grade sealant to all wood surfaces to protect against chlorine splashes and UV rays; look for a ‘beading’ effect when water hits the surface.
- Add a footrail at the base, roughly 8 inches off the ground, to provide ergonomic support for your guests while they lounge.
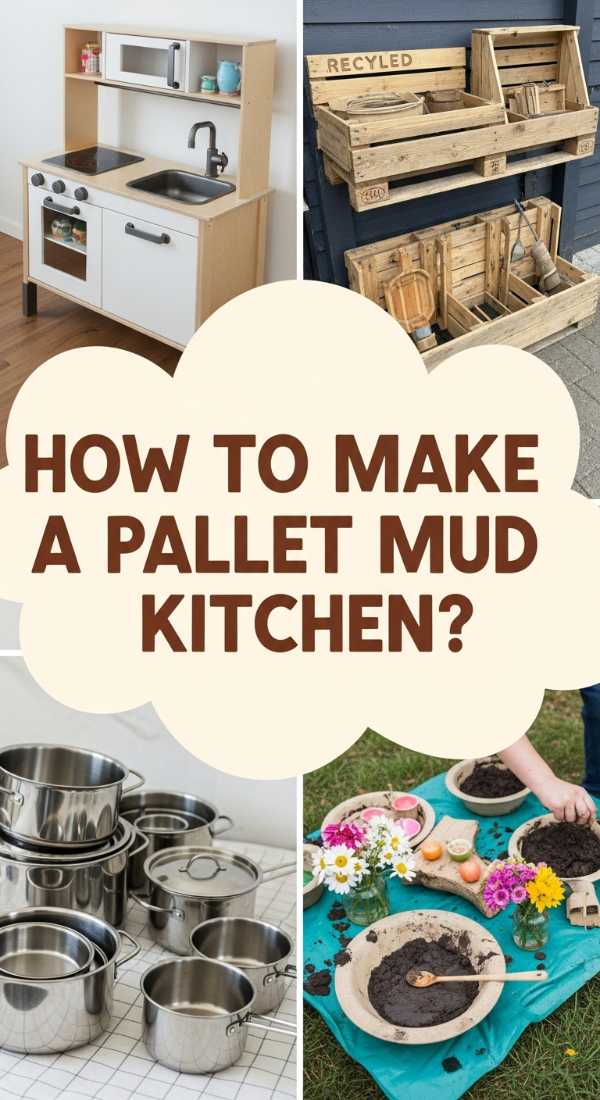
How to Make a Rustic Pallet Mud Kitchen for Hours of Nature Play
Why we love this
This is pure childhood magic. A mud kitchen encourages the kind of messy, tactile play that modern life often lacks. We love the earthy scent of damp soil mixed with ‘herbs’ (aka weeds) and the sight of little hands busy ‘baking’ mud pies. It’s a rustic, sustainable way to upcycle pallets into a station of creativity, where the only limit is a child’s imagination and the amount of water in the watering can.
Essential Elements:
- Heat-treated (HT) pallets
- Old stainless steel sink or plastic tubs
- Hooks for utensils
- Outdoor-safe paint or wood sealer
- Assorted ‘kitchen’ tools (whisks, spoons, old pots)
How to make it
- Select pallets marked with ‘HT’ (Heat Treated) rather than ‘MB’ (Methyl Bromide) to ensure they are safe for children to touch and play around.
- Sand all surfaces vigorously with 80-grit sandpaper followed by 120-grit until the wood is smooth to the touch, eliminating any risk of splinters.
- Construct a base frame and a backsplash using two pallets, securing them with heavy-duty lag bolts for maximum stability during rough play.
- Cut a hole in the top pallet to fit your sink or tub; use a bead of outdoor construction adhesive to hold the sink firmly in place.
- Add a shelf below for pot storage and screw in hooks on the backsplash for hanging spoons and colanders.
- Finish with a bright, whimsical coat of exterior-grade paint; allow it to cure for at least 72 hours until the surface is no longer tacky before letting the kids dive in.
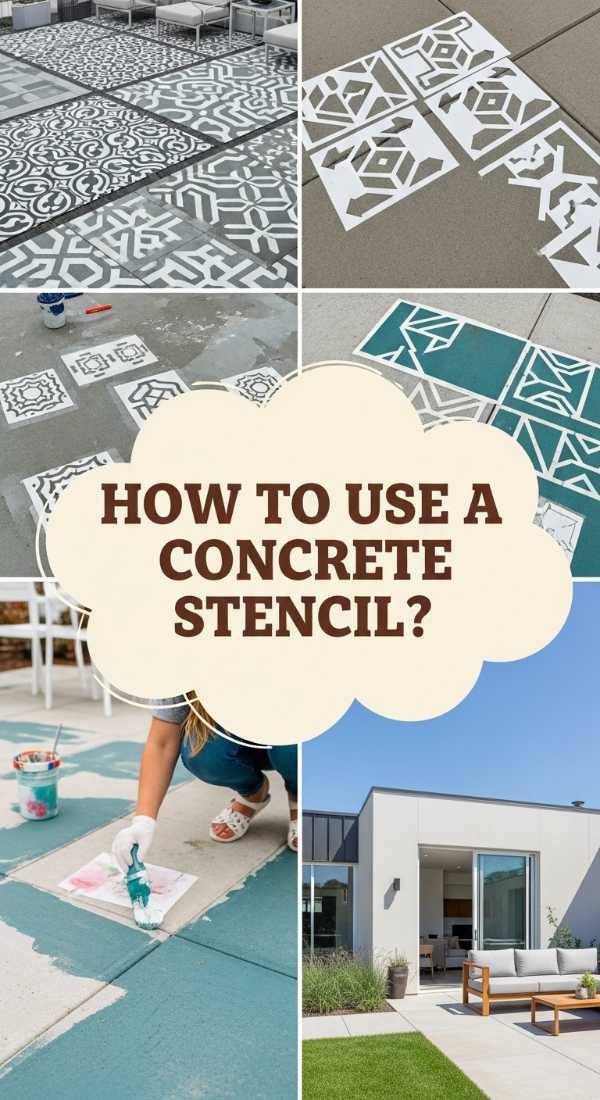
How to Use a Concrete Stencil for a High End Patio Makeover
Why we love this
Forget the boring gray slab! Concrete stenciling is a total game-changer for dated patios. We love how it mimics the high-end look of Belgian bluestone or hand-laid brick at a fraction of the cost. The transformation is visually stunning—the crisp, clean lines and the rich, multi-tonal finishes create a sophisticated outdoor ‘rug’ that anchors your furniture and makes your entire backyard feel like a designer showroom.
Essential Elements:
- Large-scale patio stencil
- Concrete stain or high-quality porch paint
- Non-slip additive
- Stipple brushes or high-density foam rollers
- Concrete sealer (matte or gloss)
How to make it
- Power wash the concrete surface thoroughly to remove all dirt, oil, and old sealants; the concrete must be ‘thirsty’ to absorb the new color.
- Apply a base coat of your ‘grout’ color and let it dry for at least 24 hours until it can withstand foot traffic without marking.
- Lay your stencil down, starting from the most visible corner, and secure it with painter’s tape to prevent any shifting during the application.
- Use a ‘dry brush’ technique with your accent color; dip the roller and then roll most of the paint off onto a rag so you don’t get ‘bleed’ under the stencil.
- Peel the stencil back while the paint is still slightly damp to get the sharpest lines; if the paint is too dry, it may chip at the edges.
- Once fully dry, apply two coats of clear concrete sealer mixed with a non-slip grit; the sealer is ready when it feels hard and glass-like to the touch.
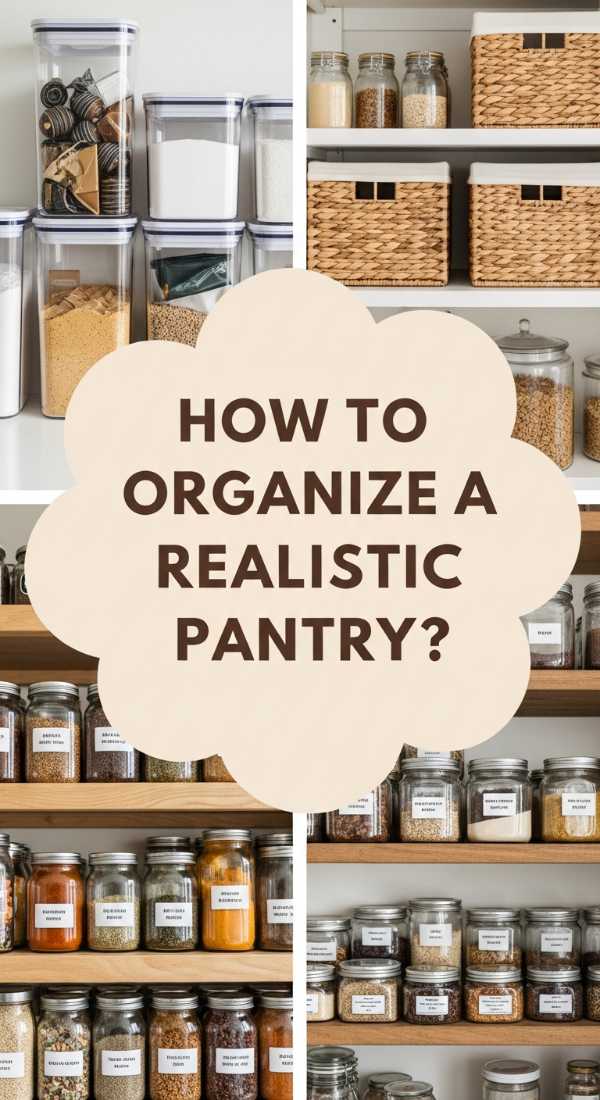
How to Achieve Realistic Pantry Organization for a Calm Kitchen Space
Why we love this
While the garden is your outdoor sanctuary, the pantry is the heart of indoor calm. We love the visual serenity of glass jars filled with grains and the quiet ‘clink’ of a lid sealing shut. Walking into a perfectly organized pantry feels like a deep breath for your brain—it’s the smell of dried herbs, the texture of woven baskets, and the efficiency of knowing exactly where everything is, making every meal prep a joy rather than a chore.
Essential Elements:
- Airtight glass or BPA-free plastic canisters
- Woven or wire baskets for bulk items
- Custom labels
- Tiered shelving for canned goods
- Lazy Susans for oils and vinegars
How to make it
- Empty the entire pantry and wipe down every shelf; use this time to check expiration dates and donate unopened items you won’t use.
- Group your items into ‘zones’: baking, breakfast, snacks, dinner prep, and backstock to minimize searching during busy mornings.
- Decant dry goods like flour, sugar, and pasta into clear containers; this not only looks beautiful but keeps food fresh longer by creating an airtight seal.
- Measure your shelf heights carefully before buying baskets; leave at least 2 inches of ‘finger room’ above the basket for easy access.
- Apply labels at eye level for consistency; ensure they are straight by using a piece of painter’s tape as a guide.
- Install a Lazy Susan in the corners or deep shelves to ensure that jars at the back don’t get lost in the ‘pantry abyss.’
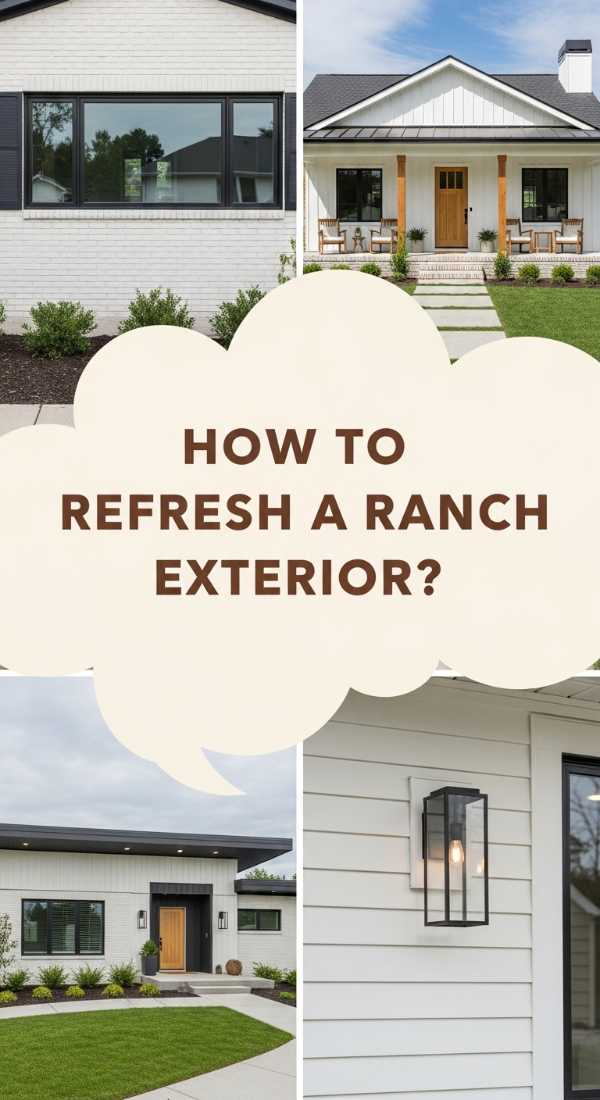
How to Refresh a Vintage Ranch Exterior for Modern Style Vibes
Why we love this
The classic ranch home has so much potential, and we love the ‘mid-century modern’ revival happening right now. It’s about the contrast between dark, moody paint tones and warm wood accents. The tactile feel of a new horizontal slat fence or the sleek look of modern black hardware against white brick creates a sophisticated, curated vibe that honors the home’s history while firmly planting it in the present day.
Essential Elements:
- Modern exterior paint (Charcoal, Navy, or Crisp White)
- Natural wood siding or shutters
- Black modern light fixtures
- Updated house numbers in a bold font
- New front door (or a bold paint refresh)
How to make it
- Clean the siding and trim thoroughly; if you have brick, consider a breathable mineral-based paint to allow the masonry to ‘breathe’ and prevent peeling.
- Choose a high-contrast color palette; use a dark shade for the body and a bright, warm wood for the entryway to create a focal point.
- Replace old, ornate light fixtures with clean-lined, matte black lanterns; ensure they are scaled properly (usually 1/3 the height of the door).
- Swap out dated hardware for modern levers and deadbolts; check for a ‘solid’ sound when the door closes to ensure everything is aligned.
- Install horizontal wood slats over any dated decorative elements like wrought iron pillars for an instant modern upgrade.
- Add oversized, modern house numbers vertically near the entrance; use a level to ensure they are perfectly spaced for a professional finish.
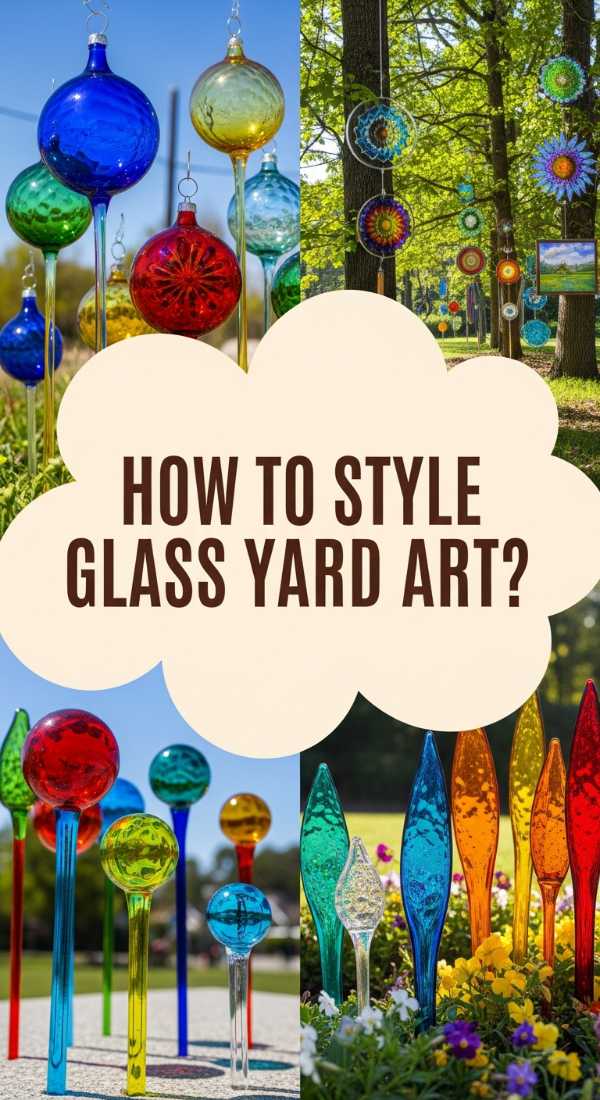
How to Style Unique Glass Yard Art for a Vibrant Outdoor Space
Why we love this
Glass art adds a whimsical, sparkling dimension to the garden that plants alone can’t provide. We love the way sunlight catches a glass totem, sending prisms of dancing color across the lawn. It provides a jewel-toned contrast to the deep greens of the foliage, and the smooth, cool texture of the glass is a lovely counterpoint to the rough bark of trees and the softness of flower petals. It’s a touch of magic that makes the garden feel like a curated gallery.
Essential Elements:
- Vintage glassware (plates, bowls, vases)
- Copper or rebar stakes
- Heavy-duty waterproof adhesive (E6000)
- Glass drill bits
- Decorative marbles or beads
How to make it
- Scour thrift stores for colorful glass pieces; look for ‘carnival glass’ or cobalt blue pieces that will hold their color even in direct sunlight.
- Clean all glass thoroughly with rubbing alcohol to remove oils; this ensures the adhesive creates a permanent, weatherproof bond.
- Stack your pieces to create ‘flowers’ or ‘totems,’ playing with heights and shapes until you find a balanced, aesthetically pleasing design.
- Apply a generous bead of E6000 adhesive between the layers; let the pieces cure flat for a full 24 hours—the glue should be completely clear and hard.
- Secure a copper pipe or sturdy stake into the ground, ensuring it is buried at least 10 inches deep so the art doesn’t tip in the wind.
- Mount your glass creation onto the stake; if using a pipe, the top vase can often slide right over it for a secure fit.
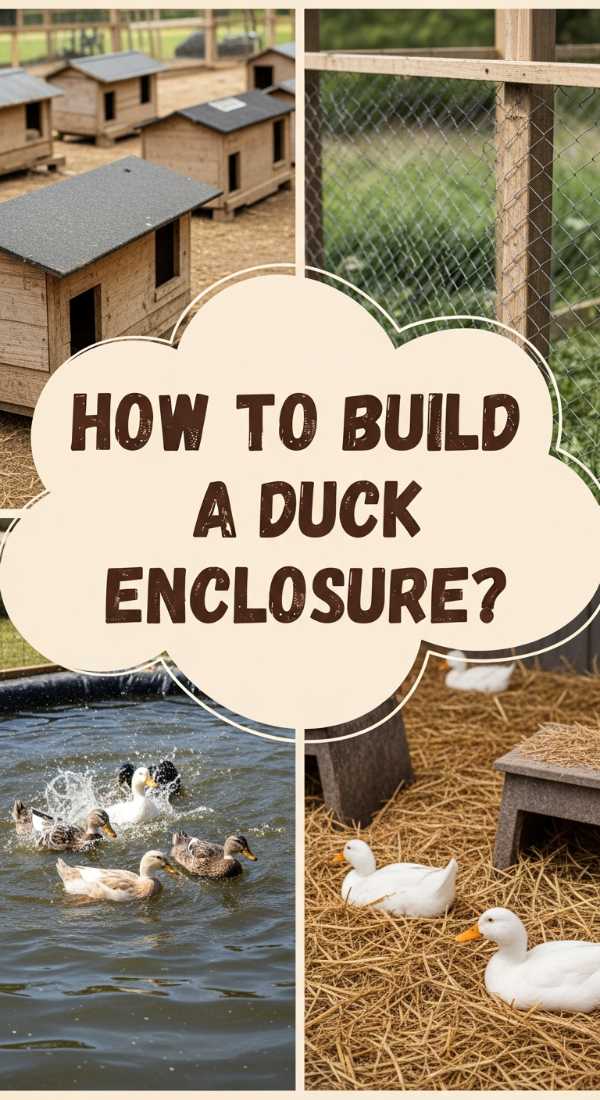
How to Construct a Secure Duck Enclosure for a Thriving Backyard Flock
[IMAGE_10]
Why we love this
There is nothing quite like the joyful ‘quack’ of happy ducks to make a backyard feel like a true homestead. We love the pastoral charm they bring—the sight of them waddling through the grass and the soft, downy feathers you find tucked in the straw. Building a secure, beautiful enclosure ensures your feathered friends are safe from predators while giving you a front-row seat to their charming antics and providing a sustainable source of rich, delicious eggs.
Essential Elements:
- Hardware cloth (not chicken wire)
- Pressure-treated lumber
- Solid roof panels (metal or asphalt)
- Secure door latches (predator-proof)
- A clean water source or small pond
How to make it
- Frame the enclosure using 2×4 lumber, ensuring the structure is tall enough for you to comfortably enter for cleaning and egg collection.
- Wrap the frame in 1/2-inch hardware cloth; avoid chicken wire, as predators can easily tear through it. Staple every 2 inches for maximum security.
- Dig a 12-inch deep trench around the perimeter and bury the hardware cloth; this ‘apron’ prevents burrowing predators like foxes from getting inside.
- Install a solid, slanted roof to protect the ducks from rain and snow; ensure there is a gap at the top for ventilation to prevent moisture buildup inside.
- Build a sturdy wooden ramp into their ‘house’ area, adding small slats of wood for grip so they don’t slip on wet days.
- Install two-step latches on all doors (the kind that require a thumb and a lift); raccoons are incredibly clever at opening simple sliding bolts.
Creating Your Personal Paradise
Transforming your backyard isn’t just about the physical labor; it’s about the feeling you get when you step outside and see your hard work reflected in the blooming flowers and the sturdy structures you’ve built with your own hands. Whether you start small with a glass totem or go big with a pool bar, every project adds a layer of personality to your home. So grab your tools, embrace the dirt, and start turning those ‘drab’ corners into the ‘fab’ sanctuary you deserve.