
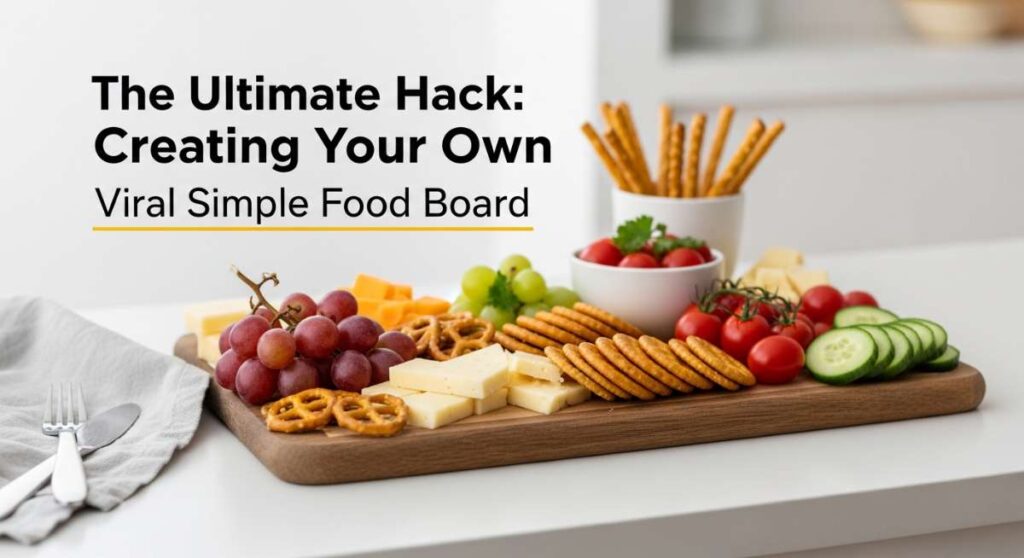
The Ultimate Hack: Creating Your Own Viral Simple Food Board
There is something inherently magical about a shared meal that looks as good as it tastes. We have all seen those stunning food boards scrolling through our feeds—the ones overflowing with textures, colors, and inviting aromas that seem to scream ‘gather around.’ For me, food has always been a love language, a way to slow down the frantic pace of life and truly connect with the people who matter most over a spread of something homemade and heartfelt.
The secret to a truly viral food board isn’t just about expensive ingredients; it’s about the soul you put into each component. It is about that perfect balance of a warm, cheesy dip nestled next to a crisp, refreshing salad, or a slice of flaky pie waiting to be devoured. Today, I am sharing the ultimate blueprint for your own simple food board, featuring the recipes that have turned my kitchen into the neighborhood’s favorite hangout spot. Let’s dive into the art of creating a spread that is as delicious as it is beautiful.
HOW TO BAKE STRAWBERRY PIE?

Why we love this
There is nothing quite like the scent of sun-ripened strawberries softening in a hot oven, filling the entire house with a sweet, nostalgic aroma that reminds us of golden summer afternoons. When you slice into this pie, the vibrant red filling is thick and glossy, providing a beautiful contrast to the buttery, golden-brown flakes of the crust that shatter with every forkful. The taste is a perfect harmony of tartness and concentrated berry sweetness, making every bite feel like a celebration of the season’s bounty.
Ingredients
- 2 ½ cups all-purpose flour
- 1 cup unsalted butter, chilled and cubed
- 1 teaspoon salt
- 1 teaspoon sugar
- 6-8 tablespoons ice water
- 5 cups fresh strawberries, hulled and halved
- ¾ cup granulated sugar
- 3 tablespoons cornstarch
- 1 tablespoon lemon juice
- 1 teaspoon vanilla extract
- 1 egg (for egg wash)
How to make it
- Begin by preparing your pastry; pulse the flour, salt, and sugar in a food processor, then add the cold butter cubes, pulsing until the mixture resembles coarse crumbs with pea-sized bits of butter remaining.
- Gradually drizzle in ice water one tablespoon at a time while pulsing, stopping the moment the dough begins to clump together; divide into two discs, wrap in plastic, and chill for at least one hour to allow the gluten to relax.
- In a large mixing bowl, gently toss your fresh strawberries with the granulated sugar, cornstarch, lemon juice, and vanilla, ensuring every berry is coated; let this sit for 15 minutes to macerate and create a natural syrup.
- Preheat your oven to 400°F (200°C) and roll out the first dough disc on a floured surface to fit a 9-inch pie plate, trimming the edges to leave a slight overhang.
- Pour the strawberry mixture into the crust, then roll out the second disc to create either a solid top with vents or a beautiful lattice pattern by weaving strips of dough over and under each other.
- Seal and crimp the edges, brush the top generously with a whisked egg wash, and bake for 45-55 minutes until the crust is deeply golden and the strawberry juices are bubbling thickly through the vents.
HOW TO MAKE ROTEL DIP?

Why we love this
This dip is the undisputed king of comfort food, offering a velvety, molten cheese texture that clings perfectly to a salty tortilla chip. As the heat from the green chilies and tomatoes cuts through the richness of the cheese, you get a savory, slightly spicy kick that keeps everyone coming back for more. It is the ultimate social food—warm, gooey, and effortlessly inviting, creating a hub of activity around the snack table at every gathering.
Ingredients
- 1 lb Velveeta cheese, cubed
- 1 can (10 oz) Ro-Tel Diced Tomatoes and Green Chilies
- 1 lb ground breakfast sausage or lean ground beef
- ½ teaspoon garlic powder
- Optional: Fresh cilantro and jalapeños for garnish
How to make it
- Start by browning your ground meat in a large skillet over medium-high heat, using a wooden spoon to break it into small, uniform crumbles until no pink remains and it is slightly crispy.
- Drain the excess grease from the skillet thoroughly; this is a critical step to ensure your dip remains smooth and doesn’t become oily or separated later.
- Lower the heat to medium-low and add the cubed Velveeta cheese and the entire can of Ro-Tel (do not drain the liquid from the can, as it provides essential flavor and moisture).
- Stir the mixture constantly with a heat-resistant spatula, allowing the cheese to melt slowly and incorporate with the meat and tomatoes without scorching the bottom.
- Once the dip is completely smooth and bubbling gently, stir in the garlic powder and transfer it to a small slow cooker on the ‘warm’ setting to maintain its pourable, silky consistency throughout your party.
HOW TO PREP BEACH SNACKS?

Why we love this
Beach snacks are all about freshness and ease, providing a burst of hydration and salt when the sun is high and the air is thick with sea salt. There is something incredibly satisfying about opening a cooler to find crisp, cold fruit and crunchy snacks that don’t feel heavy but give you exactly the energy you need for a day in the waves. They turn a simple towel on the sand into a gourmet picnic spot where the flavors are as bright as the coastal horizon.
Ingredients
- Fresh watermelon wedges
- Frozen grapes
- Individual hummus cups
- Pretzel sticks
- Turkey and cheese roll-ups
- Chilled sparkling water
How to make it
- Focus on moisture management by pre-slicing your watermelon into manageable wedges and storing them in airtight containers to prevent them from becoming mushy in the cooler.
- Freeze a bag of grapes overnight; these act as edible ice packs that stay cold for hours and provide a refreshing, sorbet-like texture when eaten under the hot sun.
- Prepare the turkey roll-ups by layering high-quality deli meat with a slice of provolone, rolling them tightly, and securing them with toothpicks for an easy, protein-packed finger food.
- Pack your cooler using a ‘last-in, first-out’ logic: place heavy ice packs at the bottom, followed by the meats and hummus, then place the delicate fruit and snacks on top to prevent crushing.
- Use individual serving containers for everything to minimize the risk of sand getting into the main supply, ensuring every bite remains crisp and grit-free.
HOW TO BAKE SQUISHY BREAD?

Why we love this
The sensation of tearing into a loaf of squishy, milk-based bread is pure bliss—the crust is thin and soft, while the interior is as light as a cloud and incredibly springy. As you pull it apart, you can see the delicate, feathery strands of dough that have been perfectly proofed, releasing a gentle aroma of toasted yeast and sweet butter. It is the kind of bread that begs to be slathered in jam or used for the softest sandwich you have ever tasted, melting away on the tongue with every bite.
Ingredients
- 3 ½ cups bread flour
- 1 cup warm milk (110°F)
- 2 ¼ teaspoons active dry yeast
- ¼ cup granulated sugar
- 1 teaspoon salt
- 1 large egg
- 4 tablespoons unsalted butter, softened
- 2 tablespoons heavy cream (for brushing)
How to make it
- Whisk the warm milk, sugar, and yeast together in the bowl of a stand mixer and let it sit for about 5-10 minutes until it becomes frothy and activated.
- Add the egg and half of the flour, mixing with the dough hook on low speed until combined, then gradually add the remaining flour and salt.
- Increase the mixer speed to medium and knead for 8-10 minutes; the dough should transition from sticky to smooth, elastic, and pass the ‘windowpane test’ where it can be stretched thin without tearing.
- Incorporate the softened butter one tablespoon at a time, continuing to knead until the butter is fully absorbed and the dough is luxuriously silky and slightly tacky.
- Place the dough in a greased bowl, cover with a damp cloth, and let it rise in a warm, draft-free spot for 1-1.5 hours until it has doubled in size.
- Gently deflate the dough, shape into rolls or a loaf, place in a greased pan for a second 45-minute rise, then brush with heavy cream and bake at 350°F (175°C) for 25-30 minutes until the top is a pale, golden brown.
HOW TO PLAN CAMPING MEALS?

Why we love this
There is an undeniable rugged charm to camping meals, where the smoky essence of an open fire transforms simple ingredients into something extraordinary. Eating outdoors makes every flavor seem more intense, whether it’s the char on a sausage or the buttery softness of a potato cooked in foil. It is about the ritual of the preparation—sitting around the crackling flames, sharing stories while the steam rises from the campfire, making the meal feel like a hard-earned reward for a day of adventure.
Ingredients
- Smoked sausages or bratwurst
- Baby potatoes, halved
- Sliced bell peppers and onions
- Olive oil
- Cajun seasoning or garlic herb blend
- Heavy-duty aluminum foil
How to make it
- Prepare your ‘foil packets’ at home by cutting large squares of heavy-duty aluminum foil; using the heavy-duty variety is essential to prevent tearing when moving them over hot coals.
- In a large bowl, toss the sliced sausages, potatoes, and vegetables with a generous amount of olive oil and your chosen seasonings, ensuring every surface is well-coated for maximum flavor.
- Distribute the mixture into the center of the foil squares, then fold the edges up and over, crimping them tightly to create a sealed pouch that will trap steam and cook the contents evenly.
- Once at the campsite, build a fire and allow it to burn down until you have a thick bed of glowing red coals rather than active high flames, which can burn the outside while leaving the inside raw.
- Place the packets directly on the coals or on a grate just above them, cooking for 20-30 minutes and flipping halfway through with tongs; check one packet for potato tenderness before removing all of them from the heat.
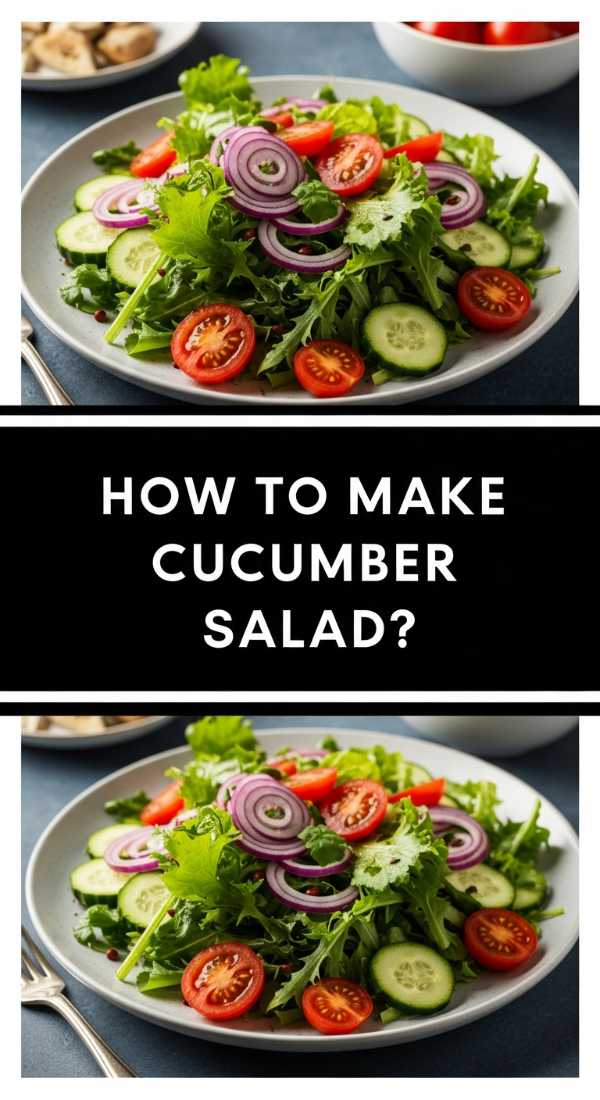
HOW TO MAKE CUCUMBER SALAD?
Why we love this
This cucumber salad is the ultimate palate cleanser, offering a sharp, vinegary snap that cuts through the richness of grilled meats or heavy dips. Each slice of cucumber provides a cool, watery crunch, while the red onions add a mild bite and the fresh dill brings an earthy, herbal top note that feels incredibly sophisticated. It is a bright, translucent dish that looks beautiful in a glass bowl, glistening with a light dressing that pools at the bottom, inviting you to take one more refreshing spoonful.
Ingredients
- 2 large English cucumbers, thinly sliced
- ½ red onion, shaved into half-moons
- ½ cup white wine vinegar
- 2 tablespoons sugar
- 1 teaspoon salt
- ¼ cup fresh dill, chopped
- Optional: ½ cup sour cream for a creamy version
How to make it
- Use a mandoline slicer to get paper-thin rounds of English cucumber; English cucumbers are preferred because their skin is thin and their seeds are negligible, resulting in a better texture.
- Place the cucumber slices in a colander, sprinkle with the salt, and let them sit for 20 minutes to draw out excess moisture; squeeze them gently afterward to ensure the salad doesn’t become watery.
- In a separate bowl, whisk together the white wine vinegar and sugar until the sugar is completely dissolved, creating a bright and balanced brine.
- Combine the sliced cucumbers, shaved red onions, and chopped fresh dill in a large mixing bowl, tossing gently to ensure the herbs are distributed.
- Pour the vinegar mixture over the vegetables (or stir in the sour cream now if you prefer the creamy style) and refrigerate for at least 30 minutes before serving to allow the flavors to marinate and the onions to soften slightly.
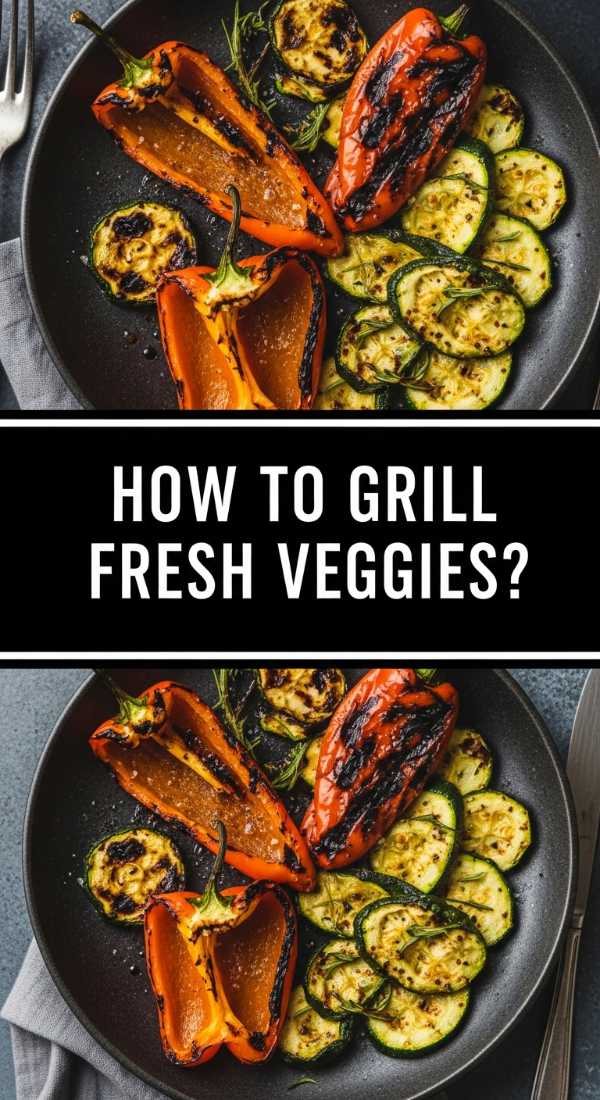
HOW TO GRILL FRESH VEGGIES?
Why we love this
Grilling vegetables coaxes out a deep, caramelized sweetness that you just can’t achieve through boiling or steaming. The high heat of the grates creates those iconic char marks, adding a hint of smokiness that perfectly complements the natural, earthy flavors of garden-fresh produce. It turns a side dish into the star of the show, with vibrant colors ranging from charred purple eggplant to bright orange peppers, all glistening with a touch of oil and sea salt.
Ingredients
- Zucchini and yellow squash, sliced lengthwise
- Bell peppers, quartered and deseeded
- Asparagus spears, woody ends trimmed
- Whole portobello mushroom caps
- Extra virgin olive oil
- Balsamic glaze
- Flaky sea salt and cracked black pepper
How to make it
- Preheat your grill to a medium-high heat (around 400°F); a clean, hot grate is essential to prevent the vegetables from sticking and to ensure those perfect sear marks.
- Brush every piece of vegetable generously with olive oil on both sides; do not skip this, as the oil acts as a heat conductor and prevents the delicate skins from drying out.
- Season the vegetables simply with sea salt and black pepper before they hit the grill, as seasonings can burn if applied too early without enough oil.
- Place the denser vegetables, like the peppers and mushrooms, on the grill first as they take longer to soften; add the zucchini and asparagus a few minutes later since they cook quite rapidly.
- Grill for 3-5 minutes per side, using tongs to flip them only once to preserve the integrity of the char marks; remove them when they are tender-crisp rather than mushy.
- Arrange the grilled veggies on your board and drizzle with a thick balsamic glaze just before serving to add a punch of acidity and visual flair.
HOW TO COOK SUMMER MEALS?

Why we love this
Summer meals are defined by their lightness and the way they celebrate ingredients at their absolute peak of flavor without over-complicating things. There is a breezy, effortless quality to these dishes—think chilled pastas, bright citrus notes, and lots of raw, crunchy elements that keep you feeling energized rather than weighed down. It is the type of cooking that encourages long, lingering dinners on the patio, where the food is vibrant, fresh, and perfectly suited for the warmth of the season.
Ingredients
- Cold pasta (fusilli or rotini)
- Cherry tomatoes, halved
- Fresh mozzarella pearls
- Pesto sauce or lemon-garlic vinaigrette
- Fresh basil leaves
- Grilled chicken strips or chickpeas
How to make it
- Cook your pasta in heavily salted water until it is just past al dente, as cold pasta tends to firm up significantly once chilled in the refrigerator.
- Drain the pasta and immediately rinse it under cold running water to stop the cooking process and remove excess starch, which prevents the noodles from sticking together.
- In a large bowl, combine the chilled pasta with the cherry tomatoes, mozzarella pearls, and your protein of choice, ensuring a good ratio of ‘mix-ins’ to pasta.
- Fold in a high-quality basil pesto or a zesty lemon-garlic vinaigrette, tossing thoroughly so every nook and cranny of the pasta is coated in flavor.
- Let the dish chill in the fridge for at least an hour; this ‘resting’ period allows the pasta to absorb the dressing, making it much more flavorful than if served immediately.
- Finish with a handful of torn fresh basil leaves just before serving to provide a burst of aromatic green color and a fresh peppery bite.
HOW TO MAKE FRUIT PIE?

Why we love this
A classic fruit pie is a masterpiece of textures—the way the thick, jammy fruit filling bubbles over the edge of a golden, lattice-top crust is purely mouth-watering. As it bakes, the sugars in the fruit caramelize, creating a complex, deep flavor that is balanced by a hint of lemon zest and warm spices like cinnamon. It is a hearty, rustic dessert that feels like home, especially when served warm with a melting scoop of vanilla bean ice cream that swirls into the fruit juices.
Ingredients
- 2 prepared pie crusts (homemade or store-bought)
- 6 cups mixed fruit (peaches, blueberries, and blackberries)
- ½ cup sugar
- ¼ cup flour (as a thickener)
- 1 teaspoon cinnamon
- 1 tablespoon lemon zest
- 1 tablespoon cold butter, cubed
How to make it
- Preheat your oven to 375°F (190°C) and place a baking sheet on the bottom rack to catch any potential fruit juice drips, which are common with juicy summer pies.
- Gently toss your mixed fruit with the sugar, flour, cinnamon, and lemon zest; if using very juicy fruits like peaches, let them sit for 10 minutes then drain a small amount of the excess liquid before filling.
- Lay your bottom crust into the pie plate and fill it with the fruit mixture, mounding it slightly in the center as the fruit will shrink significantly during the baking process.
- Dot the top of the fruit with the small cubes of cold butter; this adds a luxurious richness to the sauce that forms inside the pie.
- Cover with the second crust, either doing a full top with several large steam vents or a lattice; seal the edges tightly by pressing with a fork or pinching with your fingers.
- Bake for 50-60 minutes; if the edges are browning too quickly, cover them with a ring of aluminum foil halfway through to ensure the fruit center has enough time to cook through and thicken.
HOW TO SERVE CHEESY DIP?

Why we love this
The presentation of a cheesy dip is half the fun—seeing that golden, toasted cheese crust on top break away to reveal a steaming, creamy interior is a total sensory delight. It’s all about the ‘cheese pull,’ that stretchy, elastic moment that makes everyone reach for a piece of crusty bread or a cracker. Warm and indulgent, it acts as the anchor for any food board, providing a rich, savory base that complements almost everything else on the platter.
Ingredients
- 8 oz cream cheese, softened
- 1 cup shredded mozzarella
- ½ cup grated parmesan
- ½ cup sour cream
- 2 cloves garlic, minced
- 1 teaspoon dried oregano
- Crusty baguette slices for dipping
How to make it
- In a medium mixing bowl, beat the softened cream cheese until it is smooth and lump-free using a hand mixer or a sturdy spatula.
- Stir in the sour cream, minced garlic, and oregano until fully incorporated, then fold in the mozzarella and half of the parmesan cheese.
- Transfer the mixture to a small, oven-safe ceramic baking dish, smoothing out the top to ensure even heating throughout.
- Sprinkle the remaining parmesan cheese over the top in an even layer; this will create the savory, golden-brown crust that is so characteristic of a great baked dip.
- Bake at 375°F (190°C) for 20-25 minutes until the dip is bubbling around the edges and the cheese on top has melted into a beautiful golden hue.
- For an extra professional touch, turn the broiler on for the last 60 seconds to get those gorgeous toasted brown spots on the cheese, then serve immediately while the dip is at its maximum ‘stretchiness.’
Conclusion
Creating a viral simple food board is about more than just the individual recipes; it’s about the joy of assembly and the community it builds. Whether you are spending a day at the beach, camping under the stars, or hosting a casual Sunday brunch, these dishes provide the perfect foundation for a memorable meal. Remember to play with heights, colors, and textures when you lay everything out. Most importantly, don’t worry about perfection—the best food boards are the ones that are messy, abundant, and quickly polished off by happy guests. Happy hosting!