
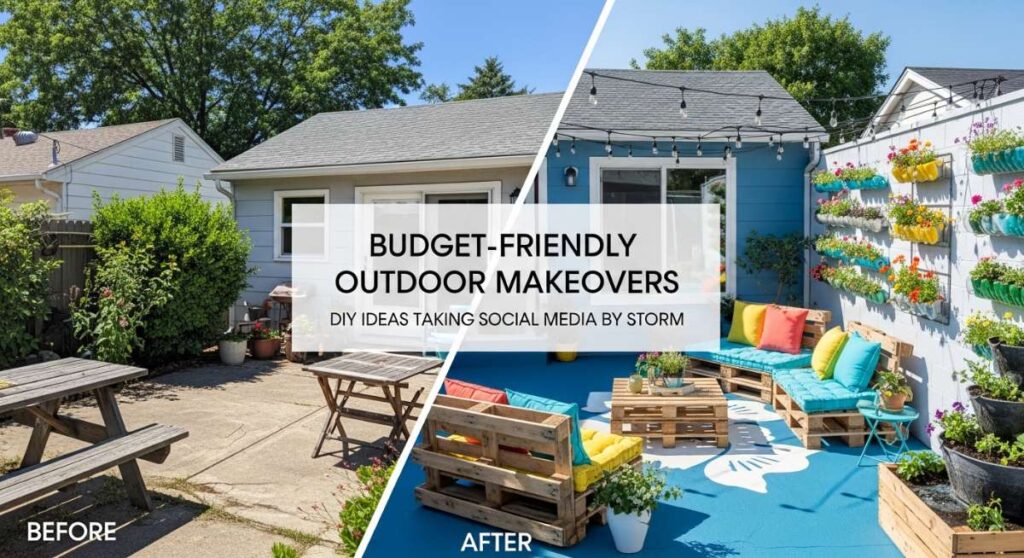
Budget-Friendly Outdoor Makeovers: DIY Ideas Taking Social Media by Storm
Ever caught yourself scrolling through Pinterest, sighing at those million-dollar backyards while clutching your lukewarm coffee? We’ve all been there, dreaming of a sanctuary that feels like a vacation but doesn’t require a second mortgage. There is something deeply soul-soothing about transforming a patch of dirt into a living, breathing extension of your home with your own two hands, smelling the fresh-turned earth and feeling the sun on your back as you create your own little piece of paradise.
This season, the “quiet luxury” of outdoor living is going viral, but the secret is that you don’t need a massive budget to achieve it. From the gentle chime of a DIY bird feeder to the rustic charm of upcycled pallets, these projects are about creating memories and reclaiming your peace. We are seeing a massive shift toward sustainable, handmade spaces that prioritize comfort over flashy price tags. Let’s dive into the DIY ideas that are taking social media by storm and turn your backyard into the oasis you deserve.
How to Craft a Budget Bird Sanctuary for Peaceful Garden Views
Why we love this
There is nothing quite like waking up to the gentle, melodic chorus of songbirds right outside your window. A dedicated bird sanctuary brings a sense of dynamic movement and life to your garden, offering a front-row seat to the wonders of nature. Imagine the soft rustle of wings and the vibrant splash of color as a cardinal visits your feeder while you enjoy your morning tea. It creates a meditative atmosphere that lowers stress and connects your home to the local ecosystem in a beautiful, sustainable way.
Essential Elements:
- Cedar bird feeders or recycled plastic containers.
- A shallow stone or ceramic bird bath.
- Native seed mixes (sunflower hearts, nyjer seed).
- Nesting materials like dried grass or short lengths of yarn.
- A variety of heights for perching, including shrubs and poles.
How to make it
- Identify a quiet corner of your yard that is visible from your favorite indoor window but remains safe from neighborhood cats and high-traffic noise.
- Select a sturdy mounting point; if using a pole, bury it at least 18 inches deep to ensure it doesn’t wobble during heavy winds or under the weight of larger birds.
- Position your bird bath in a partially shaded area to prevent the water from overheating; ensure the water is no deeper than two inches to keep smaller birds safe.
- Layer your feeders at different heights, using specialized seed in each to attract a variety of species—finches love hanging socks, while blue jays prefer platform feeders.
- Provide “cover” nearby, such as a dense bush or a pile of decorative brush, so birds have a quick place to hide if a predator appears.
- Clean your feeders and baths weekly with a weak vinegar solution to prevent the spread of avian diseases, ensuring the space remains a healthy haven.
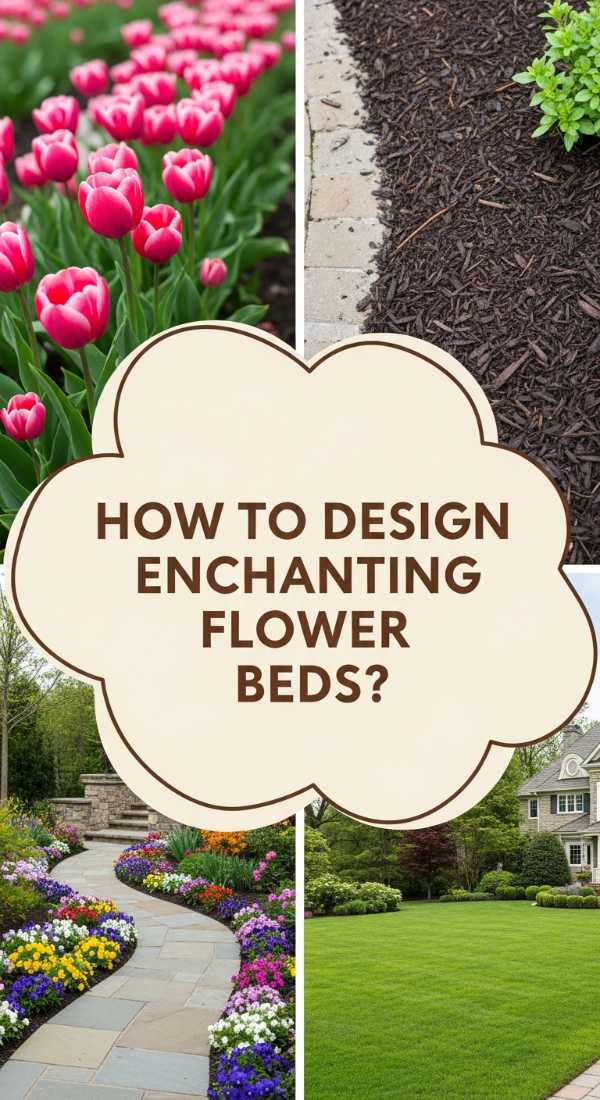
How to Design Enchanting Flower Beds for Instant Curb Appeal
Why we love this
Flower beds are the jewelry of the home, providing a sparkling first impression that makes every homecoming feel like a celebration. The heady scent of jasmine or lavender wafting through the air as you walk up the driveway creates an immediate sense of luxury and care. By layering textures—from soft, velvet-petaled pansies to structural, architectural hostas—you create a visual rhythm that draws the eye and makes even the smallest front yard feel like an expansive, curated estate.
Essential Elements:
- Organic compost and high-quality topsoil.
- A mix of perennials (for longevity) and annuals (for seasonal color).
- Natural wood mulch or cedar chips.
- Decorative edging (bricks, stones, or woven willow).
- Hand trowel and gardening gloves.
How to make it
- Mark out your bed boundaries using a garden hose or spray paint, opting for gentle curves rather than harsh straight lines to create a more organic, professional look.
- Clear all grass and weeds from the area; for a budget-friendly approach, use the “no-dig” method by layering wet cardboard over the grass to kill it naturally while adding nutrients.
- Mix three inches of organic compost into your existing soil using a garden fork, breaking up heavy clumps until the texture is fine, crumbly, and dark.
- Arrange your plants while they are still in their nursery pots to visualize the layout, placing taller species at the back and shorter, trailing varieties at the very edge.
- Dig holes twice as wide as the root ball, gently tease the roots out if they are bound, and plant them at the same depth they were in the pot.
- Apply a two-inch layer of mulch around the plants, being careful not to touch the stems, to lock in moisture and suppress future weed growth.
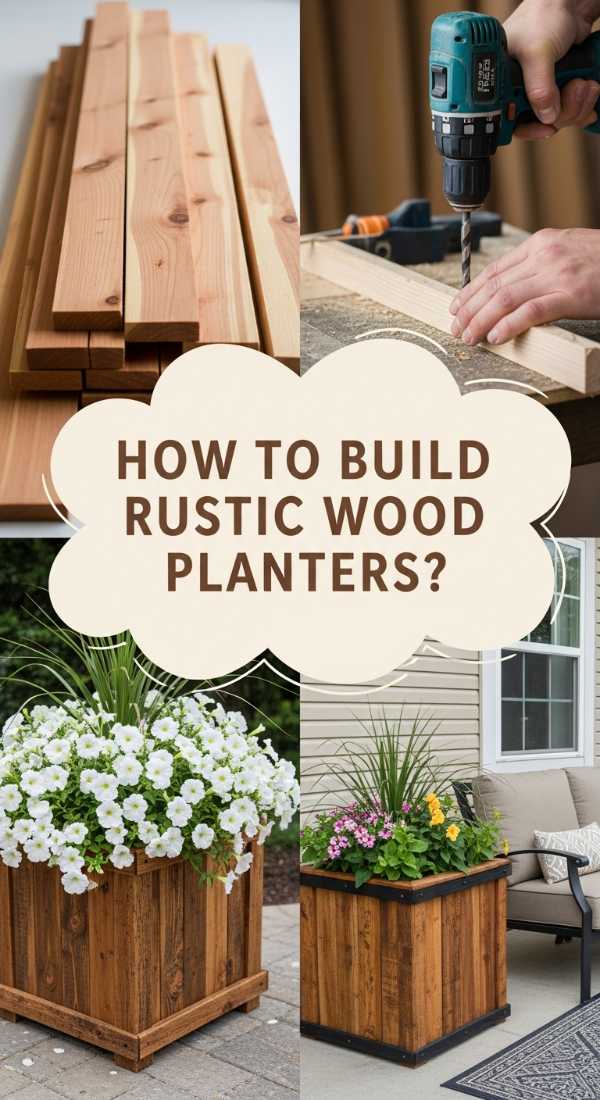
How to Build Rustic Wood Planters for a Lush Patio Oasis
Why we love this
There is a rugged, timeless beauty in handcrafted wood planters that store-bought plastic containers simply cannot replicate. The warm, amber tones of cedar or the weathered silver of reclaimed pine add an organic texture to your patio that feels grounded and high-end. As your plants grow, their green foliage spills over the raw wood edges, creating a lush, jungle-like sanctuary that smells of damp earth and fresh cedar, perfect for intimate evening gatherings under string lights.
Essential Elements:
- Untreated cedar or pressure-treated pine planks.
- Exterior-grade wood screws and wood glue.
- Electric drill and a miter saw.
- Landscape fabric for lining.
- Plastic feet or casters for drainage and mobility.
How to make it
- Measure and cut four side panels and one base panel; for a standard square planter, 12×12 inches is a versatile size that fits most patio corners.
- Apply a thin bead of waterproof wood glue to the edges and screw the side panels together to form a box, pre-drilling holes to prevent the wood from splitting.
- Attach the base panel, ensuring you drill at least four half-inch drainage holes in the bottom to prevent root rot.
- Sand the exterior of the planter with 80-grit sandpaper followed by 120-grit for a smooth finish that still retains its rustic grain.
- Staple landscape fabric to the inside of the planter to protect the wood from direct wet soil contact while still allowing water to drain through the holes.
- Elevate the planter using small wooden blocks or plastic feet to allow air to circulate underneath, which prevents moisture from rotting your patio surface.
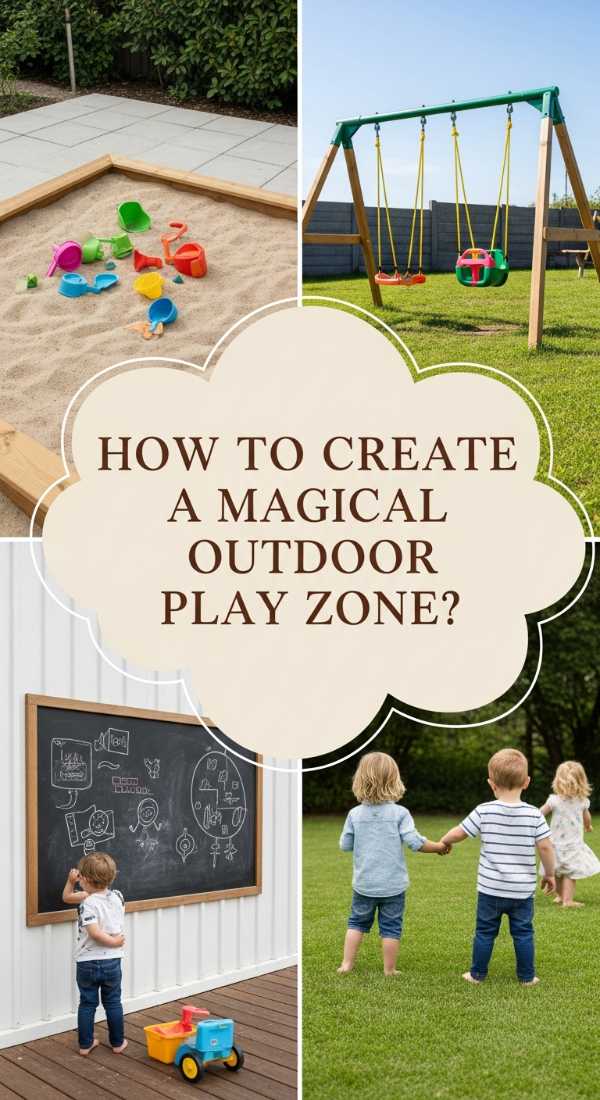
How to Create a Magical Outdoor Play Zone for Endless Summer Fun
Why we love this
Creating a dedicated play zone is about more than just toys; it is about fostering a space where imagination knows no bounds and the screen-free hours melt away. The sound of children’s laughter echoing through the garden, mixed with the sight of a colorful teepee or a chalkboard fence, turns a boring lawn into a kingdom of adventure. It provides a safe, sensory-rich environment where little ones can explore the textures of grass, the coolness of shade, and the joy of outdoor movement.
Essential Elements:
- Weather-resistant outdoor rugs or foam mats.
- Low-profile wooden climbing structures.
- Outdoor-rated chalkboard paint and plywood.
- Cotton canvas teepee or sun shade sail.
- Storage bins for outdoor-safe toys.
How to make it
- Select a level area of the yard that receives a mix of sun and shade throughout the day to ensure kids stay cool while they play.
- Lay down a base of soft mulch or interlocking foam tiles to provide a cushioned landing zone for active play and climbing.
- Construct a DIY chalkboard by painting a sheet of exterior-grade plywood with three coats of chalkboard paint and mounting it securely to a fence or wall.
- Set up a focal point, like a canvas teepee or a simple A-frame tent, to provide a “secret hideout” that encourages imaginative role-play.
- Install a low-hanging swing or a sensory station filled with smooth stones and magnifying glasses to encourage different types of engagement.
- Organize toys in labeled, weatherproof bins at a child’s height to teach independence and make the cleanup process part of the daily routine.
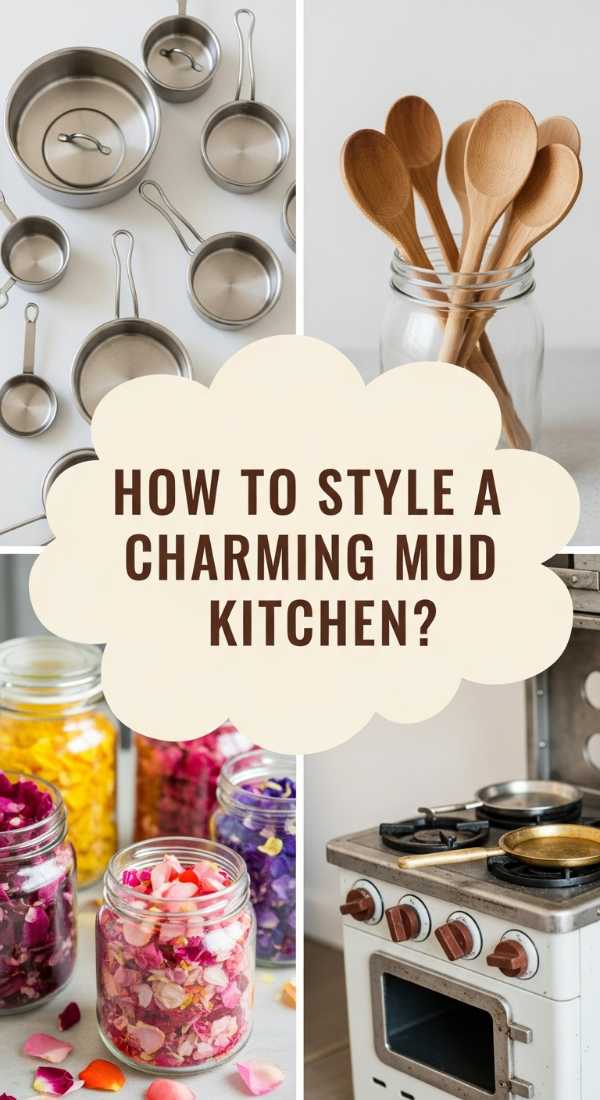
How to Style a Charming Mud Kitchen for Whimsical Sensory Play

Why we love this
A mud kitchen is the ultimate sensory playground, where “messy” becomes a masterclass in creativity and fine motor skills. There is something profoundly joyful about watching a child “bake” a mud pie garnished with dandelion yellow and clover green. The tactile sensation of squishy mud, the clinking of old metal spoons against pots, and the earthy aroma of wet soil create a rich, immersive experience that connects children to the elements in the most delightful way possible.
Essential Elements:
- Old wooden pallet or a small potting bench.
- Stainless steel bowls or an old drop-in sink.
- Assorted kitchen utensils (whisks, spoons, ladles).
- Hooks for hanging accessories.
- Natural “ingredients” like pinecones, pebbles, and petals.
How to make it
- Source a heat-treated wooden pallet and sand it thoroughly to remove all splinters, focusing especially on the edges and corners where little hands will rest.
- Cut a circular or rectangular hole in the top surface of the pallet or bench that is slightly smaller than the lip of your stainless steel bowl or sink.
- Drop the bowl into the hole, securing it with a bit of outdoor adhesive if necessary, to create a permanent basin for mixing and splashing.
- Install a small shelf above the workspace to hold “spice jars” filled with sand, dried lavender, and colorful pebbles for “seasoning” the mud creations.
- Add a series of hooks along the side to hang durable kitchen tools, ensuring they are positioned low enough for a child to reach easily.
- Place the kitchen near a water source, like a garden hose or a rain barrel, so the “chefs” have easy access to the most vital ingredient for their mud.
How to Arrange a Serene Hot Tub Retreat for Ultimate Home Relaxation
Why we love this
Turning a simple hot tub into a “retreat” is all about the atmosphere—the steam rising into the cool night air, the soft glow of lanterns, and the privacy of lush greenery. It’s the ultimate way to decompress after a long day, feeling the heat penetrate tired muscles while you gaze at the stars. When styled correctly with soft textiles and ambient lighting, your backyard spa becomes a high-end sanctuary that feels miles away from the chaos of daily life.
Essential Elements:
- Hot tub (plug-and-play or inflatable models work great for budgets).
- Privacy screens or tall potted bamboo.
- Outdoor string lights (Edison style for a warm glow).
- Waterproof side table for drinks and towels.
- Scented outdoor candles or essential oil diffusers.
How to make it
- Level the ground perfectly using a bed of leveled sand or a reinforced wooden deck, as even a slight tilt can stress the hot tub’s structure.
- Surround the area with tall, narrow plants like clumping bamboo or cedar lattice panels to create a sense of enclosure and shield the space from neighbors.
- String warm LED lights overhead, ensuring they are high enough to be safe from water splashes but low enough to cast a cozy, intimate glow.
- Place a weather-resistant rug leading up to the tub to keep feet clean and provide a slip-resistant surface for stepping in and out.
- Set up a small “spa station” nearby with a basket of rolled-up plush towels, a waterproof Bluetooth speaker, and a small tray for refreshments.
- Maintain the water chemistry daily using a simple test kit to ensure the water stays crystal clear and inviting for every soak.
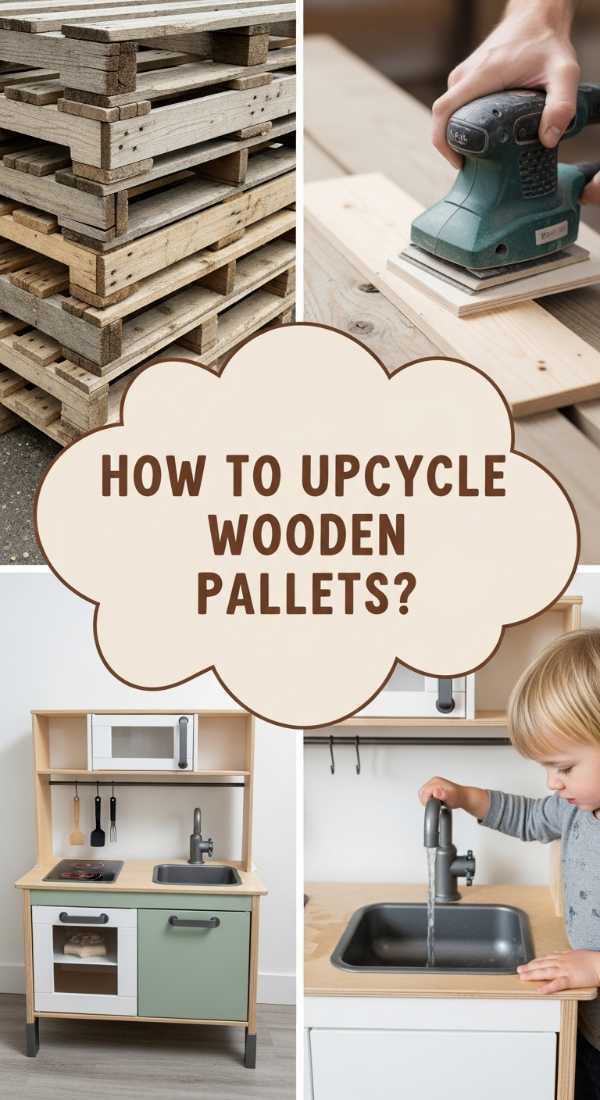
How to Upcycle Wooden Pallets for a Sustainable Backyard Play Space
Why we love this
Upcycling pallets is a win-win for your wallet and the planet, turning industrial waste into a rustic, architectural playground. There is a satisfying, chunky aesthetic to pallet furniture that looks incredible against the backdrop of a green lawn. Whether it’s a low-profile platform for lounging or a vertical climbing wall, the weathered wood provides a sturdy, tactile surface that feels both adventurous and eco-conscious, giving your backyard a unique, custom-built personality.
Essential Elements:
- Heat-treated (marked ‘HT’) wooden pallets.
- Heavy-duty crowbar and hammer for disassembly.
- Long-lasting exterior wood stain or paint.
- Galvanized bolts and washers for structural integrity.
- Sanding block and coarse sandpaper.
How to make it
- Inspect your pallets for the ‘HT’ stamp to ensure they haven’t been chemically treated, and use a crowbar to remove any rusted nails or damaged slats.
- Sand every surface of the wood with 60-grit sandpaper to remove rough spots, then finish with 120-grit for a touch-safe surface suitable for children.
- To build a simple platform, stack two pallets and bolt them together at the corners using long carriage bolts, ensuring they are perfectly flush.
- Apply two coats of a high-quality exterior stain or a bright, weather-resistant paint to protect the wood from UV damage and moisture.
- If creating a climbing wall, attach the pallet securely to a 4×4 post frame anchored in concrete to ensure it cannot tip over during vigorous play.
- Add finishing touches like rope handles or colorful climbing holds, checking all hardware weekly to ensure nothing has loosened over time.
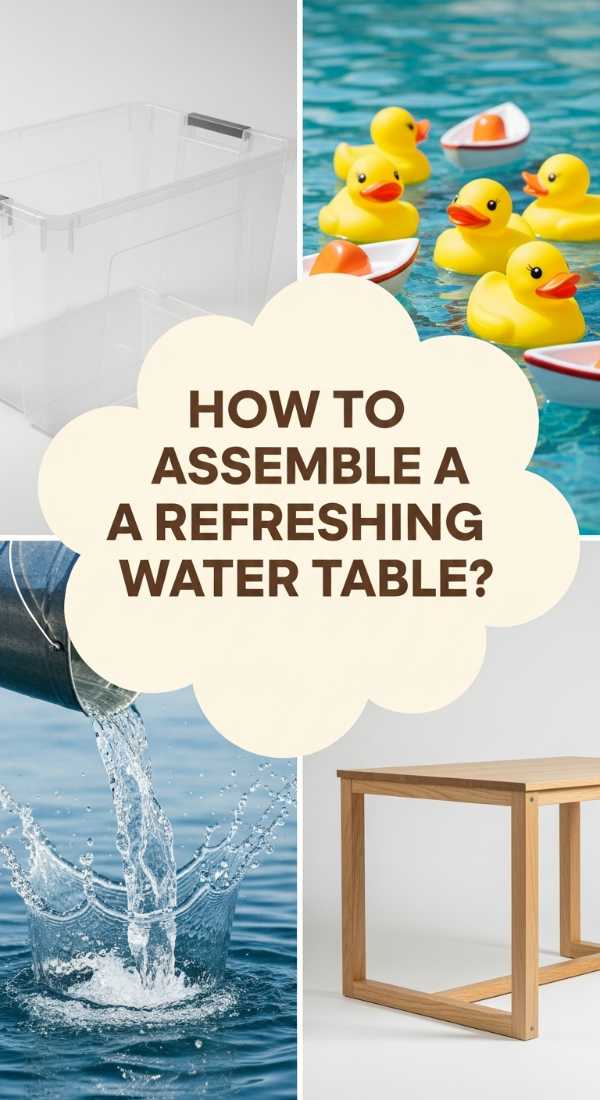
How to Assemble a Refreshing Water Table for Cool Afternoon Play

Why we love this
On a sweltering summer afternoon, a water table is like a mini-oasis that provides hours of cooling, splashing entertainment. The sound of trickling water and the sight of toy boats bobbing on the surface are instantly refreshing for kids and adults alike. It’s a brilliant way to introduce concepts of physics and flow through play, while the tactile sensation of cool water against warm skin makes it the perfect antidote to the July heat.
Essential Elements:
- Large, shallow plastic or galvanized metal tub.
- Sturdy wooden or PVC pipe stand.
- A variety of cups, funnels, and water wheels.
- Aquarium-grade clear tubing and a small manual pump.
- Non-toxic blue food coloring (optional for aesthetic).
How to make it
- Build a frame at waist-height for your child using 2×4 lumber or PVC pipes, ensuring it is wide enough to hold the tub securely without wobbling.
- Place the tub into the frame, and if using metal, ensure the edges are covered with a protective rubber trim to prevent any scratches.
- Attach a small hand-crank pump to one side of the table, connecting it to a tube that pours water back into the main basin to create a “waterfall” effect.
- Drill a small hole in the bottom of a few plastic cups and hang them from a crossbar above the table to create a “rain” station.
- Fill the table with clean water and add sensory items like floating foam shapes, sponges, and smooth sea glass for different textures.
- Change the water after every use to keep it hygienic, and store the table in a shaded area when not in play to prevent the plastic from becoming brittle.
How to Curate a Low Maintenance Garden for a Stunning Front Entry

Why we love this
A low-maintenance garden is the ultimate gift to your future self, offering high visual impact with minimal weekend toil. Imagine a front entry that always looks polished, featuring the architectural silver of succulents and the steady, reliable green of boxwoods. This style of gardening uses a “less is more” approach, emphasizing clean lines and interesting gravel textures that look sophisticated and modern year-round, regardless of how much time you have to prune or weed.
Essential Elements:
- Drought-tolerant plants (Sedum, Lavender, Yucca).
- Landscape fabric and galvanized U-pins.
- Decorative pea gravel or river stones.
- Large, focal-point boulders.
- Automatic drip irrigation kit (optional).
How to make it
- Remove all existing vegetation and level the soil, sloping it slightly away from your home’s foundation to ensure proper drainage.
- Lay down heavy-duty landscape fabric over the entire area, overlapping the seams by at least 6 inches to ensure no weeds can poke through the gaps.
- Cut ‘X’ shapes into the fabric only where you intend to plant, keeping the number of plants low to maintain a clean, minimalist aesthetic.
- Select slow-growing, hardy species that require little water; group them in odd numbers (3s or 5s) for a more natural, professionally designed look.
- Cover the remaining fabric with a 3-inch layer of decorative stone or gravel, which acts as a permanent mulch that won’t decompose or blow away.
- Place one or two large “hero” rocks or a piece of driftwood as a focal point to add height and interest without adding any maintenance requirements.
How to Construct Modern Vertical Planters for Small Space Greenery
[IMAGE_10]
Why we love this
Vertical planters are a game-changer for urban balconies and small patios, turning a flat, boring wall into a living tapestry of green. There is a sleek, modern elegance to seeing herbs and ferns growing upward, maximizing your footprint while providing a lush, forest-like backdrop. The scent of fresh mint and rosemary right at eye level is intoxicating, making your outdoor area feel like a high-end boutique hotel terrace where every inch of space is used with intention.
Essential Elements:
- Wall-mounted metal grids or wooden slats.
- Small terracotta or lightweight plastic pots.
- Heavy-duty S-hooks or zip ties.
- High-quality potting mix with perlite for drainage.
- A variety of trailing and upright plants.
How to make it
- Secure your main support structure (like a wire mesh panel or a series of horizontal cedar slats) to a sturdy wall using masonry screws or heavy-duty anchors.
- Select pots that have a prominent lip, which makes them easier to hang securely using wire loops or specialized pot hangers.
- Fill each pot with a lightweight potting mix, as garden soil is too heavy for vertical structures and doesn’t drain well enough for container living.
- Choose a mix of plants: put “spillers” (like creeping Jenny) in the bottom rows and “thrillers” (like upright ferns or grasses) in the top rows for visual balance.
- Space the pots at least 6 inches apart to allow for airflow and to give the plants room to grow without shading each other out.
- Water the top row first, as the runoff will often help hydrate the lower pots, and use a long-necked watering can or a misting bottle to reach the higher levels comfortably.
Transforming Your Space One DIY at a Time
As we’ve explored, creating a viral-worthy outdoor space isn’t about how much you spend, but about the heart and creativity you pour into it. Whether you are building a bird sanctuary or a modern vertical garden, these projects allow you to reclaim your outdoor living area and make it a true reflection of your lifestyle. So, grab your tools, head outside, and start building the retreat you’ve always dreamed of—your perfect summer starts now!