

The Ultimate Outdoor Living Guide: Easy Projects for a Dreamy Patio
There is a specific kind of magic that happens when the sun begins to set, the air turns golden, and you realize your own backyard has become your favorite destination. We’ve all felt that pull—the desire to step away from the glow of our screens and breathe in the scent of damp earth and blooming jasmine. For me, creating a dreamy outdoor space wasn’t just about aesthetics; it was about reclaiming a piece of peace in a noisy world. It’s about those slow Sunday mornings with a coffee in hand, watching the hummingbirds dart through the garden, and the sound of children’s laughter echoing from a DIY play nook.
Transforming your patio or garden doesn’t require a massive renovation budget or a team of contractors. It’s about the small, intentional touches that invite you to linger a little longer outside. Whether you’re looking to create a high-energy adventure zone for the kids or a serene spa retreat to melt away the day’s stress, the projects in this guide are designed to be approachable and soul-filling. Let’s roll up our sleeves and turn that patch of grass into the sanctuary you’ve always dreamed of.
How to Craft a Budget Bird Sanctuary for an Enchanting Garden Escape
Why we love this
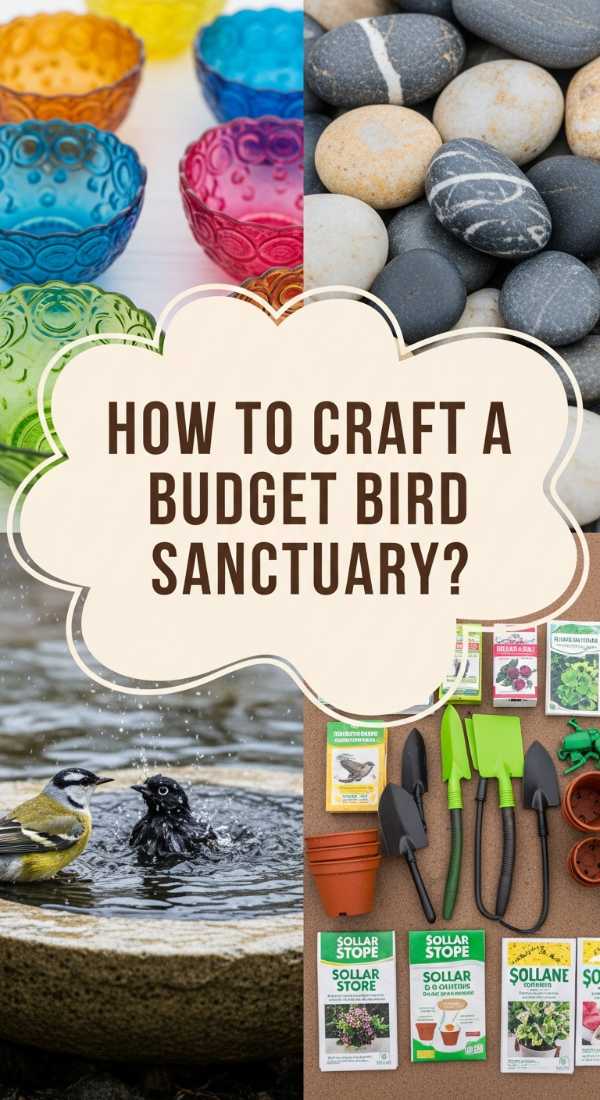
There is nothing quite like the soft, rhythmic flutter of wings and the cheerful morning chorus to make a garden feel truly alive. This bird sanctuary project invites nature right to your window, offering a serene focal point that changes with the seasons. Imagine the sight of bright red cardinals against green foliage and the soothing sound of splashing water in a stone basin. It adds a layer of dynamic beauty and ecological harmony to your outdoor space that feels like a secret woodland escape right in the suburbs.
Essential Elements:
- Cedar wood bird feeder
- Traditional stone or ceramic birdbath
- Native wildflower seeds (sunflowers, coneflowers)
- A bag of high-quality black oil sunflower seeds
- Durable outdoor mounting hooks or shepherd’s hooks
- Solar-powered water bubbler for the birdbath
How to make it
- Select a location that is visible from your favorite indoor window but also offers nearby ‘escape cover’ like a shrub or tree so birds feel safe from predators.
- Mount your cedar bird feeder at least 5 feet off the ground using a sturdy shepherd’s hook or a wall mount; ensure it is level to prevent seed spillage.
- Place your birdbath in a shaded area to keep the water cool; if the basin is deep, add several flat river stones so smaller birds have a safe place to perch while drinking.
- Install a solar-powered bubbler in the center of the birdbath; the sound of moving water is a literal magnet for local songbirds and prevents mosquito breeding.
- Plant a ‘pollinator circle’ around the base of your station using native perennials like Echinacea; these provide natural food sources and nesting materials throughout the year.
- Fill the feeder with black oil sunflower seeds, which have high fat content for energy, and commit to cleaning the feeder with a mild vinegar solution once a month to keep your feathered friends healthy.
How to Design a Lush Entrance for the Ultimate Curb Appeal

Why we love this
Your home’s entrance is the first handshake your house gives to the world, and a lush, green entryway creates an immediate sense of warmth and welcome. We love the way layered textures—from the waxy leaves of hostas to the delicate tendrils of climbing vines—can make even a small porch feel like a grand estate. The scent of blooming gardenias or jasmine near the door provides a sensory greeting that instantly lowers your heart rate as you return home after a long day.
Essential Elements:
- Two large, matching ceramic planters
- Climbing trellis or wall-mounted wire
- Evergreen shrubs (like Boxwood or Dwarf Alberta Spruce)
- Trailing ivy or Sweet Potato Vine
- High-quality potting mix with perlite
- Battery-operated lanterns for evening ambiance
How to make it
- Identify your entrance’s light exposure; if you face North, choose shade-loving plants like ferns, whereas South-facing entries require sun-tolerant varieties like Lavender.
- Place two large planters symmetrically on either side of your door; fill the bottom third with empty plastic water bottles or packing peanuts to save on heavy soil and improve drainage.
- Follow the ‘Thriller, Filler, Spiller’ method: Plant a tall evergreen ‘Thriller’ in the center, surround it with colorful ‘Fillers’ like geraniums, and tuck ‘Spillers’ like Creeping Jenny around the edges.
- Install a trellis against the wall adjacent to the door and plant a fast-growing vine; gently guide the initial runners through the trellis grid using soft garden twine.
- Apply a 1-inch layer of decorative mulch or moss over the soil surface to retain moisture and provide a polished, professional look.
- Add a pair of outdoor lanterns with warm-toned LED candles to the steps to highlight the greenery at night and create a safe, inviting glow for guests.
How to Build Rustic Planters for a Personalized Garden Sanctuary
Why we love this
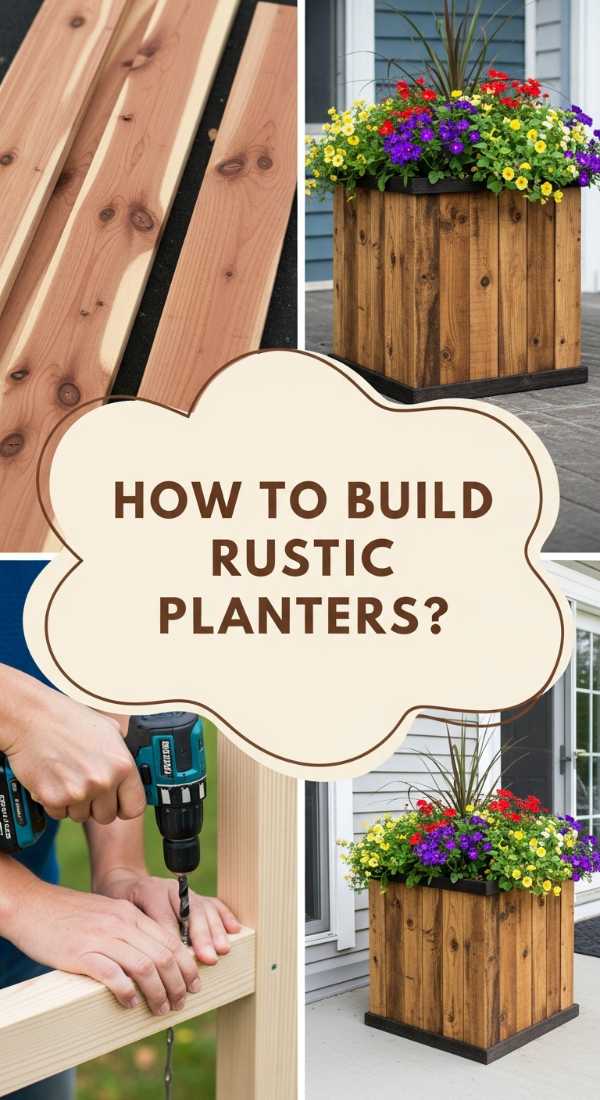
There’s a profound satisfaction in building something with your own two hands, and these rustic planters bring a touch of organic, farmhouse charm to any patio. We adore the contrast between the rough-hewn cedar and the vibrant, soft petals of summer flowers. These planters feel grounded and timeless, smelling faintly of sawdust and fresh earth, and they offer the perfect height to bring your gardening projects closer to eye level for easier maintenance and enjoyment.
Essential Elements:
- Reclaimed cedar or heat-treated pallet wood
- Exterior-grade wood screws (1.5 and 2 inch)
- Power drill and saw
- Landscape fabric for lining
- Wood stain or exterior sealant (optional)
- Heavy-duty staple gun
How to make it
- Cut your wood into four equal side panels and one bottom piece; for a standard square planter, 12×12 inches is a manageable and versatile size.
- Drill pilot holes before driving screws to prevent the wood from splitting, especially when working with cedar which can be brittle.
- Assemble the four sides first into a box shape, using a carpenter’s square to ensure the corners are exactly 90 degrees for a professional finish.
- Attach the bottom piece, ensuring you drill 3-4 drainage holes (half-inch diameter) to prevent root rot in your future plants.
- Line the inside of the box with landscape fabric, stapling it firmly to the top interior edge; this allows water to escape while keeping the soil from washing through the cracks.
- Finish the exterior with a weather-resistant transparent stain to highlight the natural grain, or leave it raw to develop a beautiful silvery-gray patina over time.
How to Create a Backyard Adventure Zone for Endless Childhood Magic
Why we love this
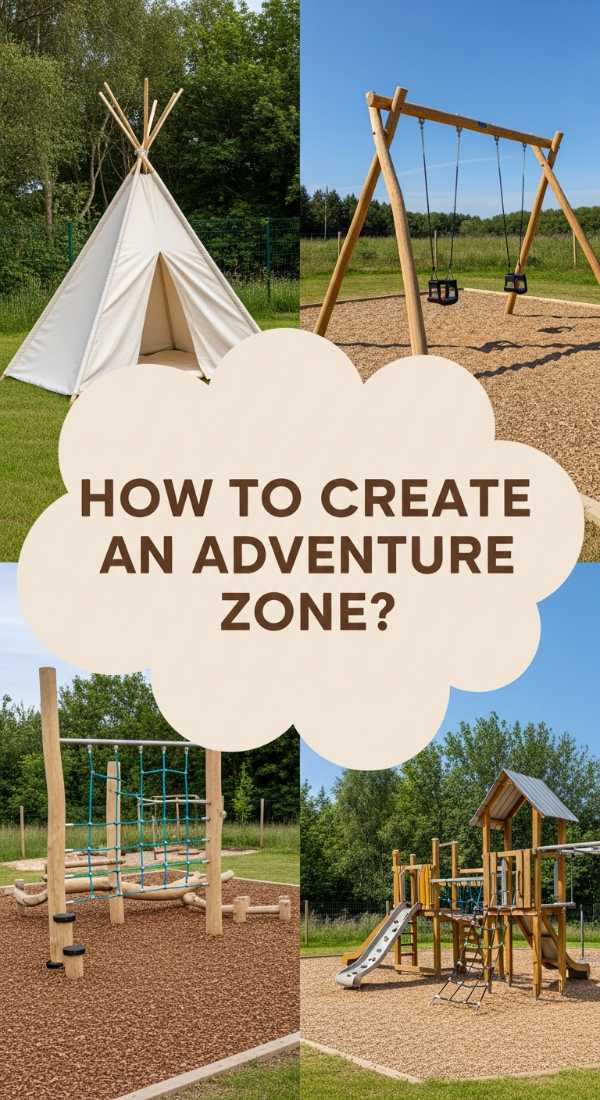
An adventure zone transforms a standard yard into a landscape of imagination, where every corner holds a new discovery. We love how this project encourages kids to get their hands dirty and engage with the physical world, moving away from digital distractions into a realm of tactile play. The smell of fresh pine chips and the feeling of smooth climbing stones underfoot create a sensory-rich environment that fosters independence, physical strength, and a deep, lasting love for the great outdoors.
Essential Elements:
- Wood chips or rubber mulch for a safety base
- Balance beams (pressure-treated 4x4s)
- A-frame climbing structure or climbing wall grips
- Large outdoor chalkboard
- Weatherproof storage bins for toys
- Hanging flag or bunting for a ‘basecamp’ feel
How to make it
- Define the ‘zone’ by clearing a flat area and laying down a heavy-duty weed barrier to prevent grass from reclaiming the play space.
- Spread a 3-inch thick layer of wood chips or playground mulch; this provides the necessary impact cushioning for active play and creates a clear visual boundary.
- Secure balance beams by half-burying 4×4 timbers in the ground, ensuring they are level and sanded smooth to prevent splinters.
- Install a vertical climbing wall against an existing fence or a sturdy A-frame; space the colorful grips no more than 12 inches apart to accommodate shorter legs.
- Mount a large sheet of chalkboard-painted plywood to a fence or wall; ensure you use exterior-grade paint and provide a small bucket of chunky ‘sidewalk’ chalk.
- Designate a ‘nature station’ corner with a low table where kids can display found treasures like cool rocks, interesting leaves, or bird feathers.
How to Style a Tiny Chef Station for Creative Outdoor Play

Why we love this
The mud kitchen, or ‘Tiny Chef Station,’ is the ultimate tribute to messy, uninhibited childhood joy. We love the way it blends domestic role-play with the wild elements of nature—mixing ‘soups’ with rainwater and decorating ‘cakes’ with marigold petals. It’s a sensory feast where the gritty texture of sand meets the cool flow of water, and the air is filled with the earthy scent of ‘cooking’ mud. It’s a project that looks adorable on a patio while providing hours of screen-free entertainment.
Essential Elements:
- Small wooden potting bench or upcycled crate
- Stainless steel mixing bowls and old whisks
- Plastic pump for water flow
- Chalkboard for the ‘Daily Menu’
- Hooks for hanging utensils
- Assorted natural ‘ingredients’ (pinecones, pebbles, flower petals)
How to make it
- Choose a sturdy, waist-high wooden base; if using an old potting bench, sand it down thoroughly to remove any old splinters or peeling paint.
- Cut two circular holes in the countertop surface that are slightly smaller than the diameter of your stainless steel bowls, allowing them to drop in and sit flush like a sink.
- Attach a series of small hooks along the backboard to hang spoons, mashers, and measuring cups; this teaches organizational skills while keeping tools accessible.
- Install a simple battery-operated or manual hand pump connected to a water jug hidden underneath the bench to provide a ‘working’ tap.
- Paint a small section of the backboard with chalkboard paint so the ‘chef’ can write out prices or the soup of the day.
- Stock the station with a ‘spice rack’ consisting of small jars filled with dried lavender, colorful sand, and small pebbles to encourage creative mixing.
How to Arrange a Spa Retreat for Total Evening Serenity

Why we love this
Turning a corner of your patio into a spa retreat is the ultimate gift of self-care. We love the juxtaposition of the cool night air against the warmth of a soaking tub or the soft glow of amber string lights. It’s a space designed for decompression, where the scent of eucalyptus and the gentle flicker of candles create a cocoon of peace. This isn’t just a design project; it’s a lifestyle upgrade that prioritizes rest and provides a sanctuary for quiet reflection under the stars.
Essential Elements:
- Inflatable or cedar soaking tub
- Outdoor privacy screens or bamboo fencing
- Weatherproof rug for bare feet
- String lights (Edison style for a warm glow)
- Outdoor side table for towels and oils
- Potted lavender and jasmine plants
How to make it
- Identify a secluded corner with access to a power outlet and a water source; ensure the ground is perfectly level and can support the weight of a filled tub.
- Erect privacy screens or tall potted bamboo to create a sense of enclosure and shield the area from neighbors’ views.
- Lay down a soft, mildew-resistant outdoor rug to provide a comfortable transition for bare feet from the house to the spa area.
- Drape Edison-style string lights overhead, but keep them on a dimmer switch; the goal is a soft, golden ambiance rather than bright illumination.
- Set up a small weather-resistant table nearby to hold a tray with rolled white towels, essential oils, and perhaps a waterproof Bluetooth speaker for ambient sounds.
- Surround the perimeter with fragrant plants like Lavender or Night-Blooming Jasmine, which release their calming scents most intensely during the evening hours.
How to Assemble an Upcycled Play Space for Sustainable Family Fun
Why we love this
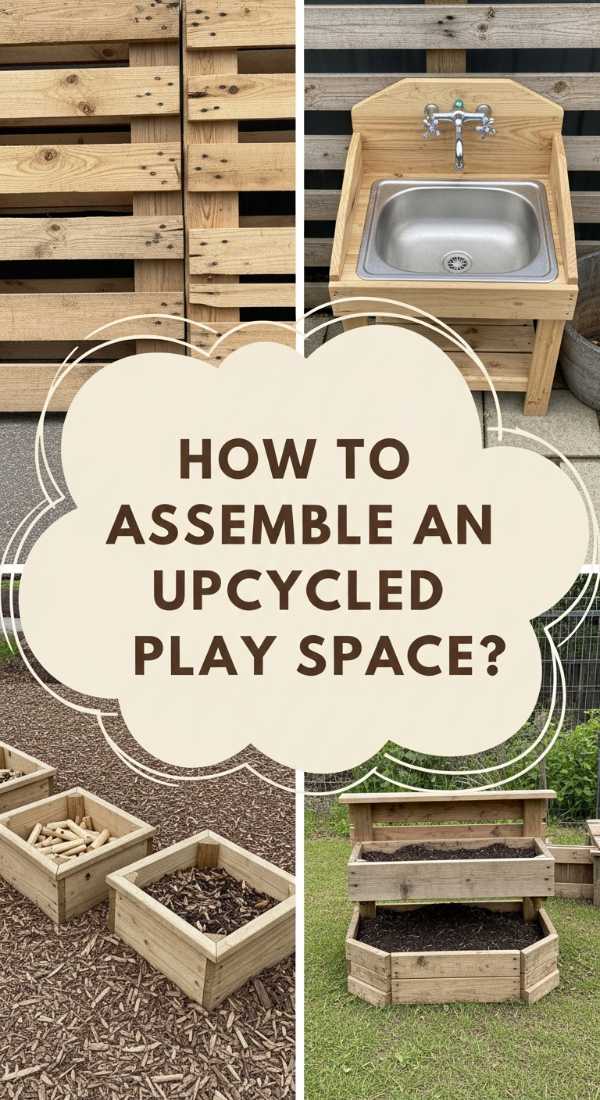
Sustainability meets play in this upcycled project, where forgotten materials are given a vibrant second life. We love the eclectic, bohemian vibe of using painted tires and wooden pallets to create a custom playground. It’s a wonderful way to teach children about recycling and creativity, showing them that ‘new’ doesn’t always mean ‘better.’ The bright colors and varied textures make it a visually stimulating environment that feels personal, crafty, and full of heart.
Essential Elements:
- Used tractor or car tires (cleaned thoroughly)
- Discarded wooden pallets (stamped ‘HT’ for heat-treated)
- Non-toxic, exterior spray paint in bright colors
- Heavy-duty bolts and washers
- Outdoor cushions or bean bags
- Sandpaper and a power sander
How to make it
- Scrub used tires with a high-pressure hose and degreaser to ensure they are completely clean and free of oily residue.
- Apply two coats of bright, exterior-grade spray paint to the tires; use vibrant primary colors to create a ‘pop’ of energy in the garden.
- Stack the tires and bolt them together securely to create a climbing tower or a multi-level planter, ensuring there are no pinch points for little fingers.
- Sand wooden pallets until they are smooth to the touch; check for and remove any protruding nails or staples before proceeding.
- Arrange the pallets into a low platform or a ‘reading nook’ and secure them to one another using long exterior screws and metal brackets.
- Top the pallet platform with weather-resistant cushions and throw pillows to create a cozy, sustainable lounge area for the whole family to enjoy.
How to Construct a Splashing Station for Cooling Summer Joy

Why we love this
When the summer heat becomes oppressive, a splashing station is the ultimate backyard hero. We love how this project brings the refreshing joy of a water park to a small scale, perfect for toddlers and pets alike. The sound of trickling water and the sight of translucent blue bins filled with toys create an instant cooling effect on the patio. It’s a tactile, wet, and wonderful way to stay active during the hottest months without needing a full-sized pool.
Essential Elements:
- Multi-level PVC pipe frame or a sturdy wooden table
- Large plastic bins of varying depths
- Submersible small water pump
- Plastic tubing and connectors
- Water toys (boats, cups, funnels)
- Anti-slip outdoor mat
How to make it
- Build a simple frame using 1.5-inch PVC pipes or repurpose an old coffee table; if using PVC, use ‘T’ connectors to create supports for the bins at different heights.
- Secure the plastic bins into the frame; ensure the top bin has a small hole and a tube leading to the bottom bin to create a ‘waterfall’ effect.
- Place a small submersible pump in the bottom bin and run the tubing up to the top bin, creating a continuous, recirculating loop of water.
- Add ‘dams’ and ‘locks’ using plastic scraps or sponges in the upper bins to allow children to experiment with water flow and gravity.
- Place an anti-slip mat underneath the entire station to prevent accidents on wet patio stones or decking.
- Fill the bins with clear water and add a few drops of blue food coloring or floating LED ‘lilies’ for an extra touch of visual magic during afternoon play.
How to Grow a Dreamy Floral Border for a Whimsical Home Exterior

Why we love this
A floral border acts like a living frame for your home, adding layers of color, height, and movement. We love the ‘English Cottage’ aesthetic where flowers spill over onto walkways and attract a flurry of butterflies and bees. The scent of sweet alyssum and the sight of tall foxgloves nodding in the breeze create a whimsical, romantic atmosphere that makes every stroll to the mailbox feel like a walk through a fairytale garden.
Essential Elements:
- A mix of perennial and annual seeds/starts
- Organic compost and mulch
- Garden spade and edging tool
- Soaker hose for consistent irrigation
- Bone meal or flower fertilizer
- Decorative stone or brick edging
How to make it
- Use a garden hose to ‘draw’ a curved line on the grass to define your border; curves feel more organic and whimsical than straight lines.
- Remove the sod and dig in 3 inches of organic compost to enrich the soil; well-fed soil is the secret to those lush, oversized blooms.
- Plan your layout: place tall ‘structural’ plants like Delphiniums in the back, mid-height flowers like Zinnias in the center, and low ‘creepers’ like Lobelia at the front.
- Install a soaker hose snaking through the plants and cover it with 2 inches of cedar mulch; this keeps the roots cool and delivers water exactly where it’s needed.
- Space plants according to their ‘mature width’ rather than their current size to prevent overcrowding and powdery mildew in the coming months.
- Edge the bed with reclaimed bricks or natural stones to prevent the grass from creeping in and to provide a clean, finished look to the landscape.
How to Curate Natural Sensory Props for a Montessori Garden Experience

Why we love this
Montessori-inspired spaces are all about fostering a child’s natural curiosity through beauty and order. We love how this project uses the raw materials of the earth—smooth stones, velvety moss, and crunchy pinecones—to create a quiet, focused play experience. It’s a low-stimulation, high-engagement approach that encourages children to observe the minute details of nature, from the patterns on a leaf to the weight of a river rock, fostering a deep sense of calm and wonder.
Essential Elements:
- Low-profile wooden trays or baskets
- River rocks of various sizes and colors
- Dried seed pods and large pinecones
- Small magnifying glass for exploration
- Wicker baskets for gathering
- A small, child-sized rake and brush
How to make it
- Designate a quiet, shaded corner of the patio or garden; use a low wooden table or a flat stump as the ‘work surface’ for the sensory props.
- Curate a collection of river stones and sort them by color or texture into small wicker baskets; this encourages the child to engage in sorting and categorizing.
- Provide a ‘discovery tray’ containing a magnifying glass, a soft-bristled brush, and a collection of bark pieces or seed pods for detailed examination.
- Incorporate a ‘sensory path’ of different textures—one square of soft moss, one of smooth pebbles, and one of crunchy dried leaves—for the child to walk on barefoot.
- Rotate the props seasonally: use acorns and colorful leaves in the fall, and dried flower heads and smooth sea glass in the summer to keep the experience fresh.
- Ensure everything is at the child’s eye level and within easy reach, allowing them to choose their own activity and explore at their own natural pace.
Conclusion
Building your dream outdoor space is a journey of small steps that lead to a significant shift in how you experience your home. Whether you start with a simple bird sanctuary or dive into a full-scale adventure zone, the goal remains the same: to create a place that reflects your family’s spirit and provides a breath of fresh air—literally. These projects are more than just DIY tasks; they are invitations to slow down, connect with nature, and make lasting memories in the beauty of the outdoors. Happy building!