

There is something truly soul-healing about stepping out into your own backyard and feeling like you have been transported to a high-end resort or a secluded woodland sanctuary. For years, I looked at my patchy grass and weathered deck and thought, ‘one day,’ but I realized that ‘one day’ only happens when we pick up a shovel and a vision. Our outdoor spaces are more than just property; they are the backdrop for summer sunsets, quiet morning coffees, and the echoes of laughter that linger long after the guests have gone home.
This weekend, I am challenging you to stop scrolling through those viral Pinterest boards and start creating your own slice of paradise. Whether you have a sprawling acre or a tiny urban patio, these DIY projects are designed to add immediate value, beauty, and function to your life. From the soothing sounds of a bird sanctuary to the magical glow of evening pathway lights, let’s transform your outdoor living area into the viral-worthy oasis you deserve.
How to Create an Elegant Bird Sanctuary for a Peaceful Garden Escape
Why we love this
Imagine waking up to a symphony of melodic chirps and the gentle flutter of wings right outside your window. An elegant bird sanctuary transforms a static garden into a living, breathing ecosystem that offers endless moments of zen throughout your day. The sight of a bright cardinal splashing in clean water or a goldfinch darting through native blooms adds a layer of dynamic beauty that no statue can replicate. It creates a rhythmic connection to nature that lowers blood pressure and invites a sense of profound peace into your hectic modern life.
Essential Elements:
- Tiered stone or ceramic birdbath
- High-quality cedar bird feeders
- Variety of birdseed (sunflower hearts, nyjer, suet)
- Native shrubs for nesting (like Holly or Elderberry)
- Solar-powered water bubbler or fountain
- Binoculars and a field guide
How to make it
- Select a location that offers both visibility from your window and safety for the birds, preferably near ‘cover’ like a large bush where birds can hide from predators.
- Install your birdbath on a level surface; if it is deep, add smooth river stones to the bottom so birds can stand while they bathe without fear of drowning.
- Place a solar-powered bubbler in the center of the water; moving water is more attractive to birds and prevents mosquitoes from breeding.
- Mount your feeders at varying heights—some birds are ground feeders while others prefer high perches—ensuring they are at least 10 feet away from structures where squirrels can jump.
- Plant a ‘protection thicket’ using native species nearby to provide natural shelter and a food source during winter months.
- Establish a cleaning routine: scrub the birdbath every three days with a stiff brush and water to ensure the sanctuary stays healthy and vibrant.
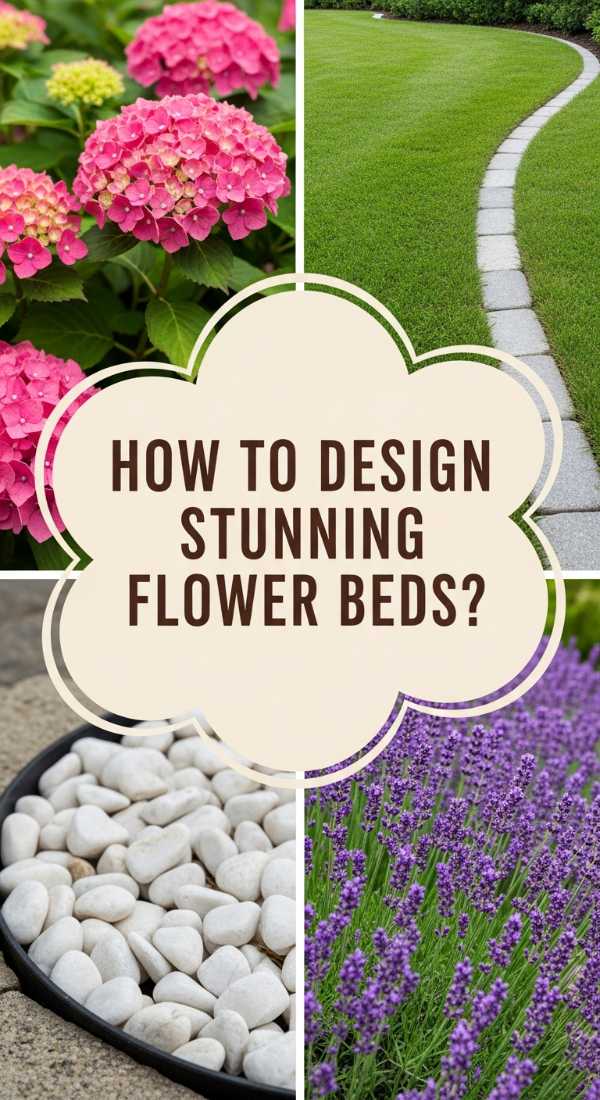
How to Design Stunning Flower Beds for Gorgeous Curb Appeal

Why we love this
Nothing says ‘welcome home’ quite like a riot of color and the intoxicating perfume of fresh blossoms lining your walkway. Well-designed flower beds act as the frame for your home’s architecture, softening hard lines with velvety petals and architectural foliage that changes with the seasons. We love the way a curated palette of deep purples, crisp whites, and vibrant greens can instantly elevate a home’s aesthetic, making it look polished, cared for, and undeniably expensive. It is a sensory experience that starts the moment you pull into the driveway.
Essential Elements:
- Assorted perennials (Lavender, Hostas, Coneflowers)
- Seasonal annuals for pops of color
- Hardwood mulch (dark brown or black)
- Natural stone or metal landscape edging
- High-quality garden soil and compost
- Slow-release organic fertilizer
How to make it
- Mark out your bed shapes using a garden hose or spray paint, opting for gentle curves rather than stiff straight lines for a more organic, professional look.
- Remove all grass and weeds from the marked area using a sharp spade, ensuring you dig deep enough to remove the root systems entirely.
- Mix 3 inches of organic compost into your existing soil to a depth of 6-8 inches to create a nutrient-rich environment for new roots to thrive.
- Arrange your plants while they are still in their nursery pots; place the tallest varieties at the back and the shortest, cascading types along the front edge.
- Dig holes twice as wide as the root ball, sprinkle in some starter fertilizer, and plant each specimen at the same depth it was in the pot.
- Apply a 2-3 inch layer of mulch over the entire bed, keeping it an inch away from the plant stems to prevent rot, and water deeply immediately after planting.
How to Build Custom Cedar Planters for a Professional Garden Look

Why we love this
There is a rugged, timeless elegance to the scent of fresh-cut cedar and the golden hue of its natural grain. Custom planters allow you to add vertical interest to your deck or patio while providing the perfect drainage and soil control for picky plants like heirloom tomatoes or delicate hydrangeas. As the cedar weathers to a beautiful silvery-grey over time, these structures become a permanent part of your home’s character. They offer a structured, clean-lined look that mimics high-end landscaping designs without the designer price tag.
Essential Elements:
- Weather-resistant Cedar boards (1×6 or 2×4 depending on size)
- Galvanized or stainless steel wood screws
- Landscape fabric for lining
- Electric drill and miter saw
- Exterior wood sealer
- Potting mix and drainage gravel
How to make it
- Measure and cut your cedar boards into four equal sides and four corner posts; for a standard planter, 18-inch lengths work beautifully.
- Create the side panels by screwing the horizontal boards into the corner posts from the inside to hide the screw heads for a clean finish.
- Assemble the four sides into a box, checking for squareness with a carpenter’s square before driving the final screws.
- Attach floor slats to the bottom, leaving 1/4-inch gaps between them to allow for essential water drainage.
- Sand the exterior of the cedar to a smooth finish and apply a UV-resistant clear sealer to preserve the warm wood tones if desired.
- Line the interior with landscape fabric, stapling it to the sides, then fill with a layer of gravel followed by high-quality potting soil.
How to Arrange a Magical Play Zone for Endless Summer Fun

Why we love this
A magical play zone is where childhood memories are minted, characterized by the feeling of grass between toes and the thrill of unstructured outdoor imagination. By creating a dedicated space that feels like a ‘secret garden’ for kids, you encourage them to trade screens for sunshine and movement. We love the way a few simple elements—a canvas teepee, some soft outdoor rugs, and hanging lanterns—can turn a corner of the yard into a kingdom of adventure. It’s a whimsical retreat that feels safe, inviting, and purely joyful.
Essential Elements:
- Weatherproof canvas teepee or play tent
- Interlocking foam tiles or outdoor rugs
- String lights or solar lanterns
- Large floor cushions and blankets
- Basket of outdoor-friendly toys (balls, hoops, bubbles)
- Chalkboard paint and a wooden easel
How to make it
- Find a level, shaded area of the yard, preferably within a clear line of sight from your main seating area for easy supervision.
- Clear the ground of any rocks or debris and lay down a moisture-barrier tarp followed by soft, interlocking foam mats or a durable outdoor rug.
- Set up the central structure, like a teepee, ensuring the poles are anchored securely into the ground or weighted so they won’t tip in the wind.
- Drape shatterproof solar string lights around the top of the tent, ensuring all wires are tucked away safely and the solar panel gets enough daily sun.
- Create a ‘cozy corner’ inside with weather-resistant cushions and a crate of books to encourage quiet time in nature.
- Define the boundary of the zone with a low border of smooth river rocks or a ring of colorful perennial flowers to make the space feel intentional.
How to Style an Adorable Mud Kitchen for Creative Outdoor Play

Why we love this
The mud kitchen is the ultimate sensory playground, where the ‘ingredients’ are pinecones, mud, and dandelion petals. There is a rustic, nostalgic charm to watching children engage in ‘messy play’—it’s tactile, grounded, and incredibly beneficial for their development. We love the aesthetic of a mini wooden kitchen stocked with vintage pots and pans, nestled against a garden fence. It turns the outdoors into a creative laboratory where the only limit is the imagination, and the clean-up is as easy as a quick spray with the garden hose.
Essential Elements:
- Upcycled wooden pallet or small potting bench
- Old stainless steel sink or plastic wash basins
- Real kitchen utensils (whisks, spoons, ladles)
- Wall-mounted hooks and shelves
- Assorted ‘nature jars’ (filled with acorns, pebbles, sand)
- Working outdoor faucet or a large water dispenser
How to make it
- Build or modify a wooden bench so it stands at waist-height for your child, ensuring all surfaces are sanded down to prevent splinters.
- Cut a hole in the countertop to drop in your sink or wash basin, securing it with waterproof adhesive if necessary.
- Install a backsplash using a piece of exterior-grade plywood or a small section of picket fencing to hang hooks for utensils.
- Attach a battery-operated ‘faucet’ or simply place a 2-gallon water dispenser on a shelf above the sink to provide a controlled water source.
- Style the kitchen with durable, second-hand metal cookware—avoid plastic as it can degrade and crack in the sun.
- Stock a nearby ‘pantry’ shelf with baskets containing safe natural materials like dried corn, smooth stones, and wood chips for ‘cooking.’
How to Transform a Simple Patio for the Ultimate Hot Tub Retreat
Why we love this
There is nothing quite like the feeling of sinking into steaming, bubbling water while the cool night air kisses your face. Transforming your patio into a hot tub retreat creates a year-round sanctuary that melts away the stress of the day and provides a romantic setting for stargazing. We love the contrast of the sleek, modern tub against soft, ambient lighting and the privacy afforded by lush greenery. It turns a standard backyard into a private spa experience that feels indulgent, sophisticated, and restorative for both body and mind.
Essential Elements:
- Plug-and-play or hardwired hot tub
- Privacy screens (wood slats or tall planters)
- All-weather outdoor rug
- Towel rack or decorative hooks
- Waterproof Bluetooth speaker
- Scented outdoor candles or essential oil diffuser
How to make it
- Ensure your patio surface is perfectly level and reinforced to handle the significant weight of a water-filled tub; consult a contractor if you have a raised deck.
- Position the tub to take advantage of the best views while maintaining privacy from neighbors, using tall cedar lattice or evergreen shrubs as a screen.
- Install a dedicated GFCI electrical outlet nearby according to local building codes to ensure safe operation of the heating and jet systems.
- Lay down a high-quality outdoor rug around the base of the tub to provide a soft, slip-resistant surface for wet feet.
- Set up a small side table or ‘spa station’ with rolled towels, a tray for drinks, and a waterproof basket for robes.
- Incorporate soft, dimmable lighting—like LED strips under the lip of the tub or lanterns—to create a calming, high-end atmosphere for night soaks.
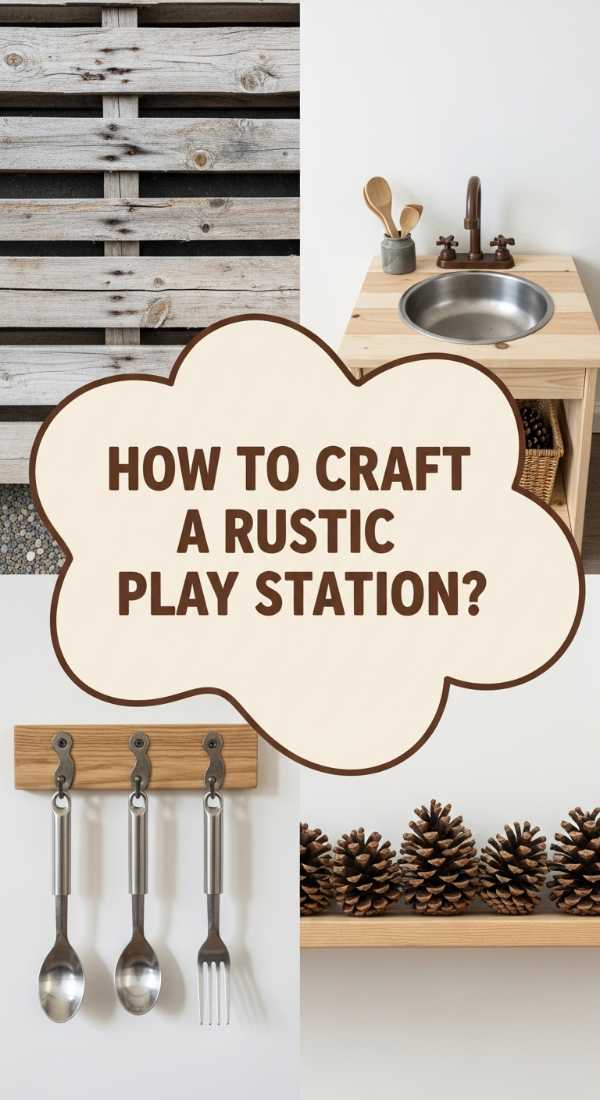
How to Craft a Rustic Play Station for Sustainable Backyard Joy

Why we love this
In a world of plastic toys, a rustic play station made from natural timber and earth-friendly materials feels like a breath of fresh air. It has an organic, ‘forest school’ vibe that encourages children to interact with the environment in a meaningful way. We love the earthy tones of the wood, the texture of the bark, and the way this station blends seamlessly into the landscape rather than clashing with it. It’s a sustainable choice that ages beautifully and invites kids to build, create, and explore the wonders of the natural world.
Essential Elements:
- Tree stumps or log slices of varying heights
- Natural wood planks
- Hemp rope or jute twine
- Smooth river stones and wood cookies
- Natural oil wood finish (like linseed oil)
- Buckets of sand and wood shavings
How to make it
- Source heat-treated, bark-on logs from a local arborist and sand the top surfaces until they are smooth to the touch.
- Arrange the stumps in a cluster to create a multi-level work surface, or line them up to create a balancing beam path.
- Secure a thick wood plank across two stumps to create a rustic workbench, using recessed screws to keep the surface flat and safe.
- Apply a coat of food-safe linseed oil to the wood to protect it from moisture while maintaining its natural, rustic appearance.
- Create ‘nature kits’ in wooden crates containing pinecones, feathers, and sticks to provide building materials for creative play.
- Place the station under a large tree or install a simple canvas sunshade to protect the wood and the children from direct midday sun.
How to Construct a Sensory Water Table for Cooling Summer Activities

Why we love this
The sound of splashing water is the universal soundtrack to summer, and a sensory water table is the centerpiece of that cool, refreshing fun. It provides a fascinating, tactile experience where children can learn about buoyancy, flow, and temperature while staying hydrated and happy. We love the crisp, clean look of a wooden-framed table filled with sparkling clear water and colorful accessories. It’s a magnet for little ones during heatwaves, offering a productive way to burn energy while staying perfectly chilled in the shade.
Essential Elements:
- Wood frame (pressure-treated or cedar)
- Deep plastic storage bins (removable)
- Drain plugs for easy cleaning
- Water pumps, funnels, and tubing
- Floating toys and measuring cups
- Casters (locking wheels) for mobility
How to make it
- Build a sturdy H-frame using 2×4 lumber, ensuring the height is ergonomic for your children (usually 20-24 inches high).
- Design the top frame to precisely fit the lip of your plastic bins so they sit flush and stable when filled with heavy water.
- Install locking casters on the legs so you can easily move the table from the sun to the shade throughout the day.
- Seal the wood with a high-quality waterproof sealant to prevent warping and mold from the constant moisture.
- Add ‘stations’ to the table—one bin for soapy bubbles, one for clear water with ice, and one for ‘ocean’ play with sand and shells.
- Include a variety of tools like turkey basters, sponges, and PVC pipe connectors to encourage scientific exploration of how water moves.
How to Assemble a Living Privacy Wall for a Secluded Backyard Oasis

Why we love this
There is nothing quite as luxury-feeling as a ‘secret garden’ that is completely shielded from the outside world by a wall of vibrant, rustling leaves. A living privacy wall provides more than just a barrier; it acts as a sound dampener, a windbreak, and a vertical habitat for pollinators. We love the way the deep greens and varied textures create a backdrop that makes every other flower in the garden pop. It turns a standard fence line into a lush, immersive environment that feels like a private forest clearing right in the middle of suburbia.
Essential Elements:
- Tall, narrow evergreens (like Emerald Green Arborvitae)
- Trellis panels or cattle fencing
- Climbing vines (Clematis, Honeysuckle, or Star Jasmine)
- Drip irrigation system
- Organic compost and mulch
- Sturdy wooden posts for support
How to make it
- Dig a continuous trench or individual holes twice the width of your plants’ root balls along the desired privacy line.
- If using vines, install a sturdy trellis system at least 6 feet high, anchoring the posts in concrete for long-term stability.
- Space your evergreens or climbing plants according to their mature width to ensure they form a solid wall without overcrowding each other.
- Install a simple drip irrigation line along the base of the wall to ensure even watering, which is crucial for the health of vertical gardens.
- Mix the excavated soil with 40% compost before backfilling, then pack it firmly to remove air pockets around the roots.
- Prune your plants annually to encourage thick, bushy growth from the bottom up, ensuring no gaps appear in your living screen.
How to Install Dreamy Pathway Lighting for an Enchanting Night Walk
[IMAGE_10]
Why we love this
As the sun dips below the horizon, the right lighting can turn a familiar garden path into a magical, starlit journey. There is a romantic, high-end feel to warm light washing over stone pavers and catching the edges of ornamental grasses. We love how pathway lighting guides the eye, highlights your favorite plants, and extends the usability of your outdoor space long into the night. It creates a safe, welcoming glow that makes your backyard feel like a five-star resort, perfect for evening strolls or late-night conversations under the moon.
Essential Elements:
- Low-voltage LED path lights or high-quality solar stakes
- Transformer and landscape wire (for low-voltage)
- Edging spade or narrow shovel
- Outdoor timer or smart plug
- Wire connectors and waterproof tape
- Pea gravel or stepping stones
How to make it
- Sketch your path and determine the placement of each light, spacing them roughly 6-8 feet apart to create ‘pools’ of light rather than a runway look.
- If using low-voltage, run your main wire along the edge of the path, leaving a small loop at each light location for easy connection.
- Use an edging spade to cut a 3-inch deep slit in the turf to bury the wire, protecting it from lawnmowers and foot traffic.
- Attach your light fixtures to the wire using piercing connectors, then push the stakes firmly into the ground, ensuring they are perfectly vertical.
- Connect the wire to a transformer and set the timer to turn on at dusk and off at your preferred bedtime.
- Adjust the ‘aim’ of each light at night to ensure the beam is hitting the path and the surrounding foliage without creating glare in people’s eyes.
The Final Flourish: Your Backyard Revolution
Transforming your backyard doesn’t require a massive renovation budget; it requires the willingness to see the potential in the space you already have. By adding these viral-inspired elements, you aren’t just improving your property value—you are improving your quality of life. Whether you’re soaking in a hot tub under the stars or watching your children explore a mud kitchen, these projects bring a sense of intention and beauty to your daily routine. So, grab your gloves, head to the garden center, and start building the oasis you’ve been dreaming of. Your best summer yet is just a weekend project away!
Outdoor Living Frequently Asked Questions
What is the best wood for outdoor projects? Cedar and Redwood are the gold standards because they contain natural oils that resist rot and insects. Pressure-treated pine is a more budget-friendly option but requires more maintenance to stay looking fresh.
How can I keep my garden looking viral-ready on a budget? Focus on the ‘edges.’ Keeping your lawn edged, your flower beds mulched with a dark color, and your paths clear of weeds makes the biggest visual impact for the least amount of money.
Are solar lights as good as hardwired ones? Modern solar lights have improved significantly, but for a truly ‘high-end’ look with consistent brightness, low-voltage hardwired LED systems are still the better long-term investment.