
Sun-Drenched Style: Aesthetic Garden DIYs You Can Finish This Weekend
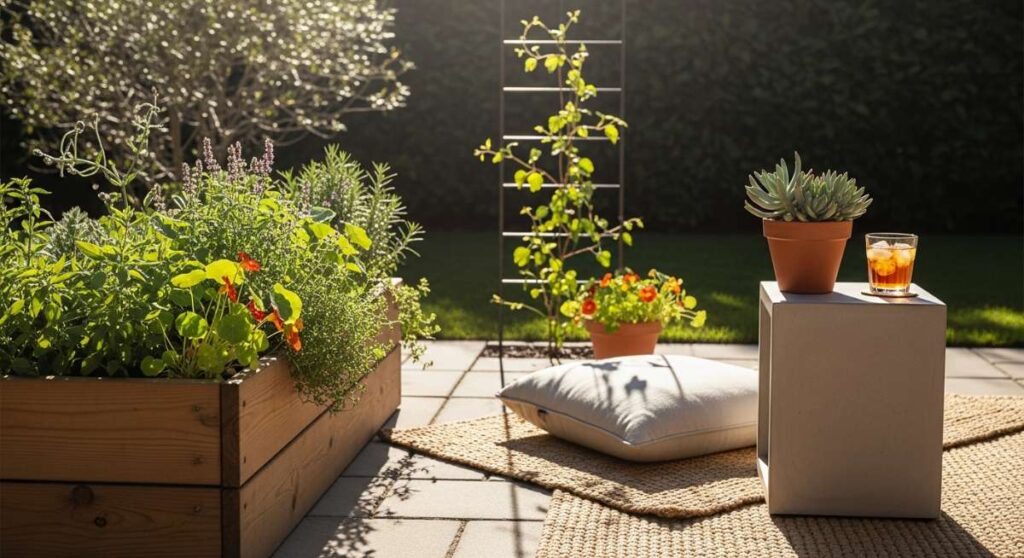
There is a specific kind of magic that happens when the morning sun hits a well-tended garden, turning every dewdrop into a diamond and every leaf into a vibrant piece of art. For many of us, the backyard isn’t just a patch of grass; it’s an extension of our home, a sanctuary where we breathe deeper and move slower. Whether you’re sipping your first cup of coffee amidst the birdsong or hosting a twilight dinner party under the stars, your outdoor space should reflect the same warmth and aesthetic charm as your living room.
We often think that creating a Pinterest-worthy garden requires a professional landscaper and a massive budget, but I’ve discovered that the most soul-satisfying changes come from our own two hands. These DIY projects are designed to be approachable, beautiful, and—most importantly—achievable in a single weekend. They are about more than just ‘curb appeal’; they are about creating moments of joy and tactile experiences that make your home feel like a true retreat.
Let’s roll up our sleeves and transform those sunny corners into something extraordinary. From sustainable play areas for the little ones to serene spa-inspired nooks for the adults, here are ten aesthetic DIYs to elevate your garden today.
How to Craft a Budget Bird Sanctuary for Peaceful Garden Mornings
Why we love this
There is nothing quite as meditative as the soft flutter of wings and the melodic chirping of local birds to start your day. Creating a bird sanctuary adds a layer of kinetic beauty to your garden, inviting nature’s most charming visitors to rest and refuel right outside your window. The texture of weathered wood, the sparkle of fresh water in a stone basin, and the vibrant colors of avian-friendly flora create a sensory experience that grounds you in the present moment. It’s a low-cost way to foster biodiversity while providing a serene soundtrack for your morning reflection.
Essential Elements:
- A shallow stone or ceramic birdbath
- A variety of high-quality bird seeds (sunflower, safflower, or nyjer)
- A wooden hanging feeder or a platform feeder
- Native flowering shrubs for natural cover
- River stones for the birdbath (to give bees a place to land)
How to make it
- Select a location that is visible from your window but offers protection from wind and predators; a spot near a dense shrub or tree is ideal so birds can escape quickly if needed.
- Level the ground where your birdbath will sit by removing any large rocks and tamping down the soil, then place your basin and fill it with no more than 2 inches of clean water.
- Place smooth river stones inside the birdbath, ensuring some break the surface, which allows pollinators like bees and butterflies to drink without the risk of drowning.
- Install your feeders at varying heights—hang some from branches and place others on poles—to attract different species of birds that prefer different feeding elevations.
- Fill the feeders with species-specific seeds, avoiding cheap fillers like red milo, and commit to a weekly cleaning schedule with a mild vinegar solution to keep your sanctuary healthy and disease-free.
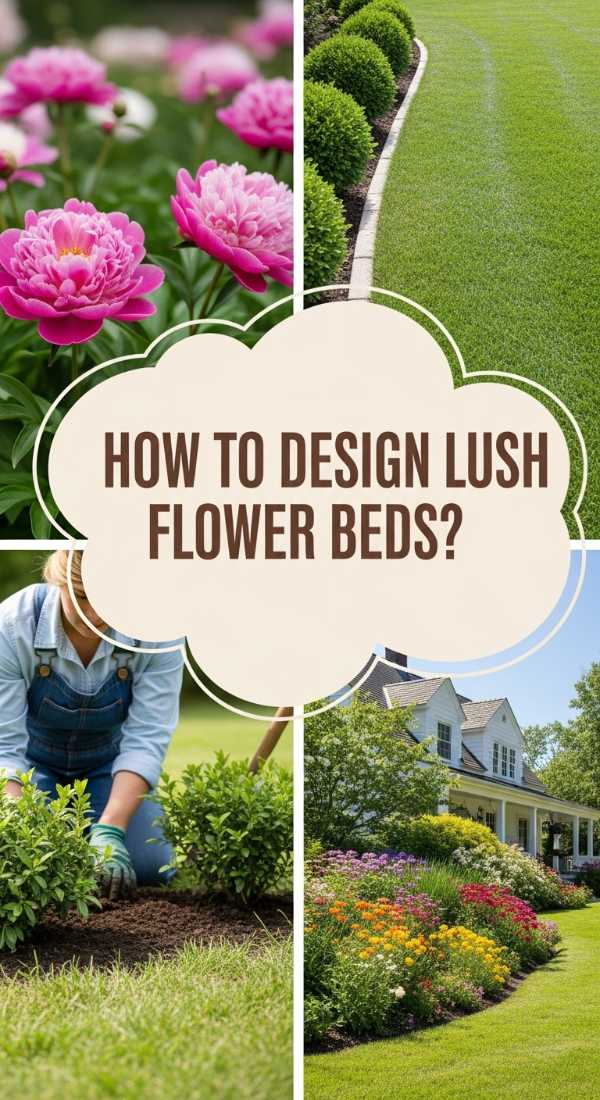
How to Design Lush Flower Beds for Instant Curb Appeal
Why we love this
A well-designed flower bed is like a living tapestry that changes with the seasons, offering a riot of color and fragrance that instantly elevates the personality of your home. We love the way the velvety petals of peonies contrast with the architectural spikes of salvia, creating a visual depth that feels both intentional and wild. The aroma of damp earth mixed with sweet floral notes after a summer rain is a scent that lingers in the memory, making every arrival home feel like a special occasion. It is the ultimate way to express your personal style through the medium of nature.
Essential Elements:
- A mix of perennials (Hostas, Lavender, Echinacea)
- Annuals for seasonal color (Petunias, Zinnias)
- High-quality organic compost and garden soil
- Hardwood mulch (dark brown or black for contrast)
- A sharp garden spade or edging tool
How to make it
- Outline the shape of your bed using a garden hose or spray paint to create fluid, organic curves rather than rigid straight lines, which look more natural and professional.
- Use a sharp spade to cut a clean edge along your outline, removing the grass and weeds entirely to prevent them from encroaching on your new floral display.
- Aerate the soil by digging down at least 8-10 inches, mixing in generous amounts of organic compost to provide the nutrient-dense foundation your plants need to thrive.
- Arrange your plants while they are still in their nursery pots; place the tallest varieties in the back, mid-sized bloomers in the center, and low-growing groundcovers at the front edge.
- Dig holes twice as wide as the root balls, place the plants, and firm the soil around them before applying a 2-inch layer of mulch to retain moisture and suppress weed growth.
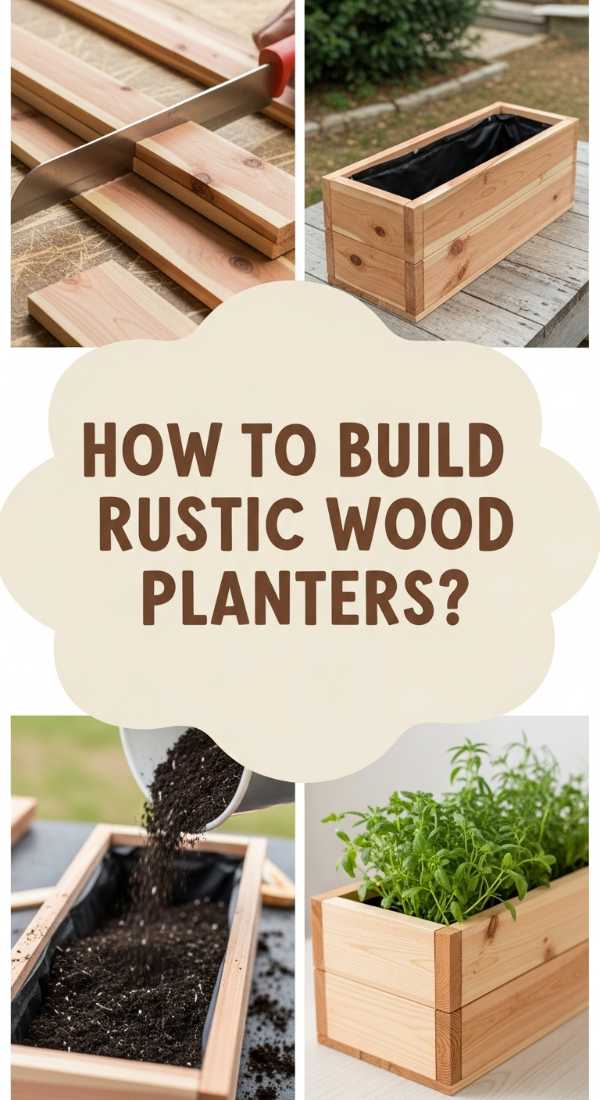
How to Build Rustic Wood Planters for Your Organic Home Garden

Why we love this
There is a profound satisfaction in building something from raw timber and watching it become a home for life. These rustic wood planters bring a warm, tactile element to your porch or patio, with the natural grain of the wood providing a beautiful backdrop for emerald-green herbs or trailing vines. The scent of cedar or pine under the hot sun is intoxicatingly earthy, and the sturdy, handmade feel of these boxes adds an air of craftsmanship to even the simplest balcony. They are the perfect marriage of form and function for the modern organic gardener.
Essential Elements:
- Cedar or pressure-treated pine boards (1×6 or 2×4)
- Galvanized exterior screws
- A cordless drill and drill bits
- Landscaping fabric for lining
- Wood stain or outdoor sealant (optional)
How to make it
- Measure and cut your wood into four side panels and one bottom panel; for a classic square planter, ensure your cuts are precise using a miter saw for clean 90-degree angles.
- Pre-drill pilot holes at the ends of your side panels to prevent the wood from splitting when you drive in the screws.
- Assemble the four sides into a box shape, using a square tool to ensure the corners are perfectly aligned before driving the galvanized screws through the pilot holes.
- Attach the bottom panel, making sure to drill several 1/2-inch drainage holes throughout the base to prevent water from pooling and causing root rot.
- Line the interior with landscaping fabric secured with a staple gun, then fill with a high-quality potting mix and your favorite organic vegetables or flowers.
How to Create a Magical Play Space for Endless Summer Joy
Why we love this
Childhood is defined by the spaces that spark the imagination, and a magical backyard play nook is the setting for a thousand adventures. We love the soft, dappled light filtering through a canvas teepee and the feeling of bare feet on a weatherproof outdoor rug. This isn’t just a place for toys; it’s a sanctuary for storytelling, cloud-watching, and the kind of deep, unplugged play that stays with a child forever. By using natural materials and whimsical decor, you create a space that feels like a fairy tale come to life, nestled right in your own garden.
Essential Elements:
- A weather-resistant canvas teepee or play tent
- Large outdoor floor cushions and rugs
- String of battery-operated fairy lights
- A small wooden crate for books and treasures
- Potted non-toxic plants like snapdragons or lambs-ear
How to make it
- Choose a flat, shaded area of the yard—perhaps under the canopy of a large tree—to keep the play space cool during the peak of the afternoon heat.
- Lay down a durable, easy-to-clean outdoor rug to create a defined ‘floor’ for the space and provide a barrier between little ones and the damp grass.
- Erect the teepee or tent, ensuring it is anchored securely to the ground with stakes to prevent it from tipping over during enthusiastic play or windy spells.
- Layer the interior with plush cushions and soft blankets, weaving fairy lights around the entrance or interior poles for a magical glow that extends play into the twilight.
- Add a ‘nature treasure’ station using a small wooden crate where kids can display rocks, leaves, and flowers they find while exploring the rest of the garden.
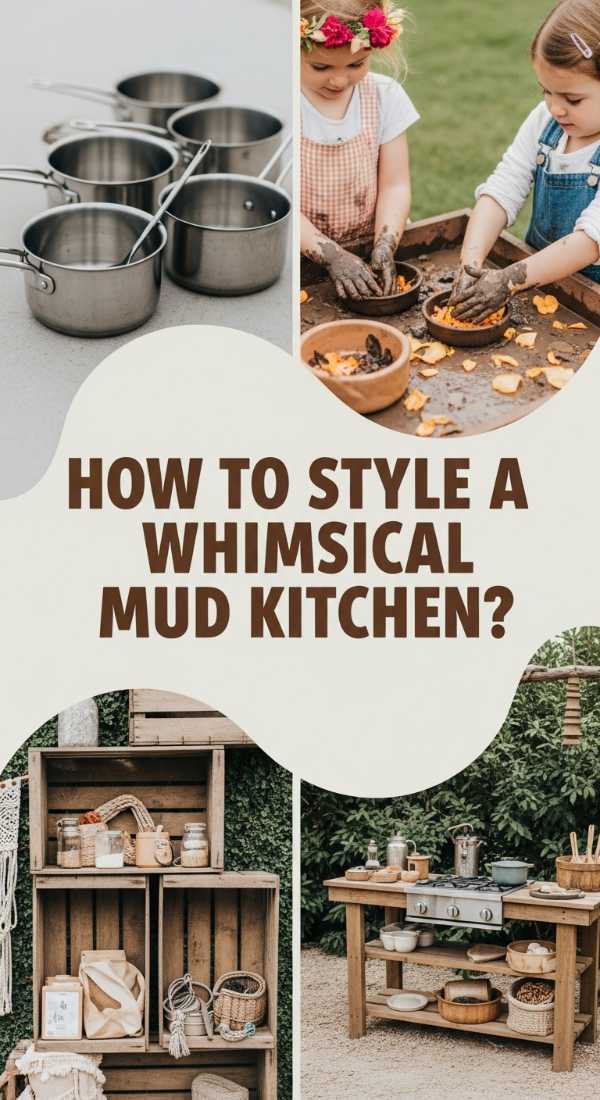
How to Style a Whimsical Mud Kitchen for Creative Sensory Play
Why we love this
The mud kitchen is the heart of sensory exploration, where ‘rose petal soup’ and ‘mud pies’ are the daily specials. We love the tactile squish of mud between fingers and the clinking of old metal ladles against vintage pots—it’s a symphony of creative chaos. This DIY brings a touch of whimsy to the yard, using mismatched kitchenware and natural ‘ingredients’ to engage a child’s senses of touch, sight, and smell. It’s a beautiful, slightly messy reminder that the best kind of learning happens when we get our hands a little dirty.
Essential Elements:
- An old wooden washstand or potting bench
- Stainless steel bowls or an old sink basin
- Vintage wooden spoons, ladles, and whisks
- Chalkboard paint for a ‘menu’
- Jars filled with ‘potions’ (dried lavender, pinecones, pebbles)
How to make it
- Repurpose an old piece of furniture or build a simple frame out of scrap wood to serve as the ‘countertop’ for your sensory kitchen.
- Cut a hole in the countertop that is slightly smaller than the lip of your stainless steel bowl or sink basin, then drop the basin into place to create a ‘wet’ zone.
- Install hooks along the backboard or sides to hang spoons and whisks, keeping the workspace organized and encouraging kids to ‘put things back’ after their shift.
- Apply a small patch of chalkboard paint to the front of the unit, allowing children to write out their daily specials and practice their literacy skills through play.
- Set up a nearby ‘pantry’ shelf with containers of water, sand, and various natural elements like acorns and dried petals for endless recipe combinations.
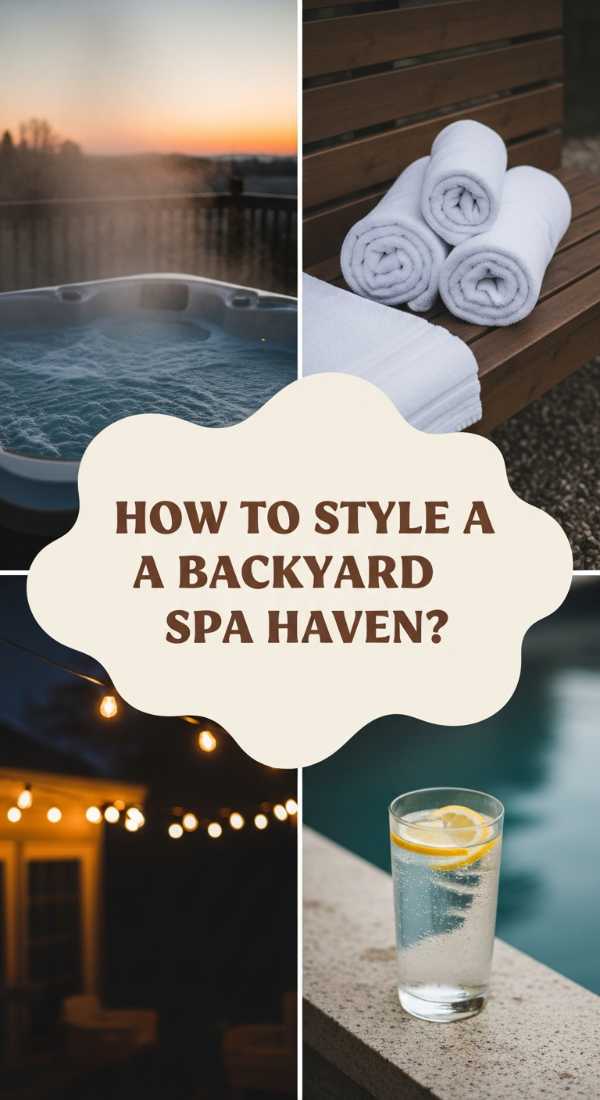
How to Style a Backyard Spa Haven for Ultimate Evening Relaxation
Why we love this
After a long week, there is no greater luxury than retreating to your own private spa haven under the glow of the moon. We love the contrast of the cool night air against the warmth of a soaking tub and the way the scent of eucalyptus oil rises with the steam. The flickering light of candles reflecting off the water creates an atmosphere of pure tranquility, turning your backyard into a five-star resort. It is a space designed for decompression, where the sounds of the neighborhood fade away and you can truly reconnect with your own peace of mind.
Essential Elements:
- A cedar soaking tub or a sleek stock tank
- Outdoor-rated lanterns and flameless candles
- A small side table for towels and tea
- Potted bamboo or palms for privacy
- A waterproof Bluetooth speaker for ambient sounds
How to make it
- Create a level, solid foundation using gravel or pavers to support the weight of a water-filled tub, ensuring the area has proper drainage.
- If using a stock tank, thoroughly clean and seal the interior, and consider adding a small submersible heater or a simple plumbing hookup for warm water.
- Surround the area with tall, potted greenery to create a ‘living screen’ that blocks the view from neighbors and adds to the tropical, secluded vibe.
- Arrange lanterns of varying heights around the perimeter, using warm-toned bulbs to mimic the soothing flicker of real candlelight without the fire hazard.
- Finish the space with a weather-proof bench or side table stocked with rolled white towels, a carafe of cucumber water, and your favorite essential oil diffuser.
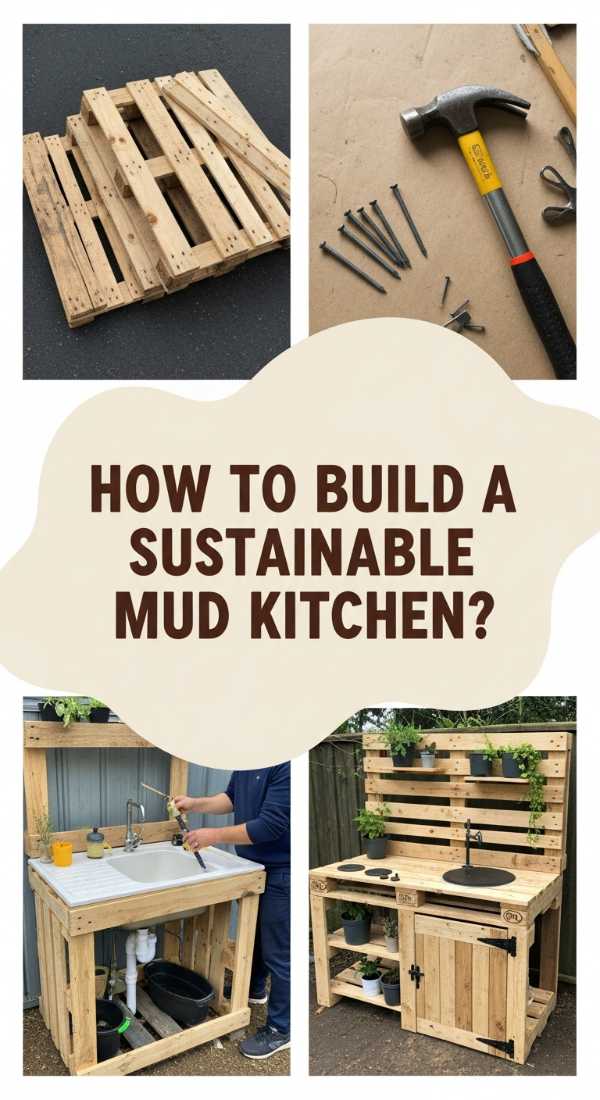
How to Build a Sustainable Mud Kitchen for Backyard Fun
Why we love this
Sustainability and play go hand-in-hand with this eco-friendly project that breathes new life into reclaimed materials. We love the weathered patina of upcycled pallets and the idea that a child’s favorite toy didn’t have to come from a plastic-wrapped box. The sturdy, industrial-chic aesthetic of a pallet-based mud kitchen fits perfectly into a modern garden while teaching the next generation about the beauty of reuse. It’s durable, functional, and carries a story of transformation that makes the backyard feel more meaningful.
Essential Elements:
- Two or three heat-treated (HT) wooden pallets
- Reclaimed wood for the countertop
- Non-toxic outdoor wood sealer
- Upcycled hardware (hinges, old knobs)
- Sandpaper (multiple grits)
How to make it
- Disassemble the pallets carefully using a pry bar, removing all old nails and staples to ensure the wood is safe for little hands to touch.
- Sand every surface thoroughly, starting with a coarse 60-grit and finishing with a smooth 120-grit to eliminate any potential splinters.
- Construct a sturdy base frame using the 2x4s from the pallets, and then attach the slats to create the sides and a bottom shelf for storage.
- Install a solid wood countertop—reclaimed scaffolding boards work beautifully here—and treat the entire structure with a child-safe, non-toxic outdoor sealer.
- Add ‘stove knobs’ using old wine corks or wooden discs held on by screws, and attach an old towel bar to the side for a complete, sustainable kitchen setup.
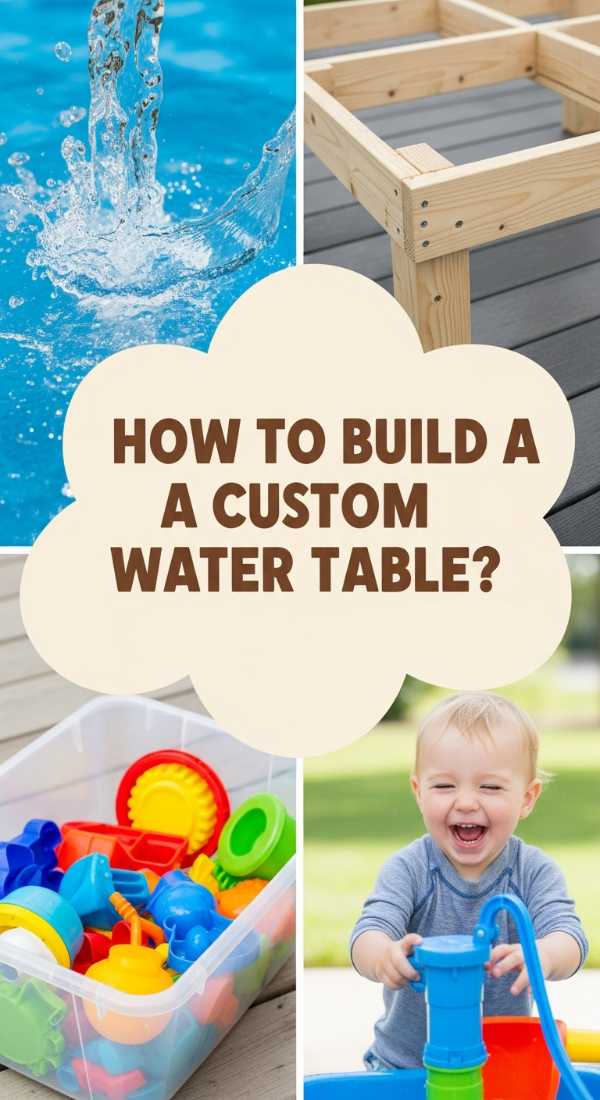
How to Build a Custom Water Table for Cool Backyard Adventures

Why we love this
On those sweltering July afternoons, a custom water table is the ultimate oasis for curious minds and busy hands. We love the gentle splash of water over smooth river rocks and the way sunlight dances through clear plastic bins. It’s a project that combines physics and fun, allowing kids to explore currents, buoyancy, and flow while staying perfectly cool. The clean lines of a wooden frame paired with sparkling water create a refreshing visual element that feels like a mini-waterfall in the corner of your garden.
Essential Elements:
- Pressure-treated lumber for the frame
- Two deep plastic storage bins (removable)
- Exterior-grade wood glue and screws
- A spirit level for perfect installation
- Assorted water toys (funnels, tubes, boats)
How to make it
- Build a rectangular frame at a height comfortable for your child (usually 20-24 inches), ensuring the inner dimensions match the lip of your plastic bins perfectly.
- Add sturdy legs to each corner, using cross-braces between the legs to ensure the table doesn’t wobble when the bins are filled with heavy water.
- Place the plastic bins into the cutouts, ensuring they sit flush; making them removable is key for easy cleaning and winter storage.
- Sand all edges of the wood to a rounded finish to prevent any scrapes during vigorous play, and apply a waterproof deck stain to protect the frame from splashes.
- Fill one bin with water and the other with sand or smooth stones to create a multi-sensory station, and add a small hand pump for an interactive ‘fountain’ effect.
How to Build a Living Privacy Wall for a Secluded Garden Oasis

Why we love this
There is something deeply comforting about being ‘hugged’ by greenery, and a living privacy wall provides that seclusion with breathtaking style. We love the way climbing jasmine or ivy weaves through a trellis, filling the air with a delicate perfume and muffling the noise of the outside world. It’s a soft, organic alternative to harsh fencing that moves and breathes with the wind. Watching your wall grow and fill in over the months provides a sense of quiet accomplishment and a changing backdrop of texture and shade.
Essential Elements:
- Large wooden or metal trellis panels
- Heavy-duty planters or a dedicated garden bed
- Climbing plants (Clematis, Star Jasmine, or Honeysuckle)
- Garden wire or soft ties
- Quality climbing plant fertilizer
How to make it
- Secure your trellis panels to an existing fence or a sturdy free-standing frame, ensuring they are anchored deep in the ground to withstand the weight of mature vines.
- Position your planters at the base of the trellis, ensuring they have excellent drainage and are filled with a nutrient-rich potting mix formulated for climbers.
- Plant your chosen vines at the base, gently teasing the roots before burying them, and space them about 12-18 inches apart for full, even coverage.
- Carefully weave the leading shoots of the plants into the lower rungs of the trellis, securing them loosely with soft garden ties to guide their upward growth.
- Prune the plants regularly during the first growing season to encourage horizontal branching, which will help the ‘wall’ fill in faster and create a denser screen.
How to Use Budget Solar Lights for a Glowing Nighttime Path
[IMAGE_10]
Why we love this
As the sun dips below the horizon, the right lighting can transform a dark garden into a magical, glowing wonderland. We love the soft, amber luminescence of solar lights that guide your feet along a path without the need for complicated wiring or electricity. They create a sense of mystery and depth, highlighting the textures of plants and the curves of the walkway. It is the easiest, most cost-effective way to extend your outdoor living hours and add a touch of professional ‘landscape lighting’ charm to your home.
Essential Elements:
- A set of high-lumen solar path lights
- A rubber mallet
- Solar-powered spotlights for ‘uplighting’ trees
- Rechargeable solar batteries (as backups)
- Glass cleaner for the solar panels
How to make it
- Identify the natural traffic flow of your garden at night and mark the spots where light is most needed for safety, such as near steps or uneven roots.
- Before installing, place all solar lights in direct sunlight for a full 24 hours to ensure the batteries are fully conditioned and ready for long-term use.
- Use a rubber mallet to gently tap the stakes into the ground—avoid using a metal hammer, which can crack the plastic housing—spacing them about 3-5 feet apart.
- Stagger the lights on either side of the path rather than placing them in a straight line; this creates a more ‘enchanted forest’ look and avoids the ‘airport runway’ effect.
- Wipe the solar panels with a damp cloth once a month to remove dust and pollen, ensuring they can absorb the maximum amount of energy during the day for a bright glow at night.
Creating Your Personal Paradise
Transforming your garden doesn’t require a miracle—just a bit of inspiration and a free Saturday. Each of these projects offers a way to inject personality and peace into your outdoor space, making it a place where memories are made and the soul finds rest. Whether you start with a simple bird sanctuary or go all-in on a backyard spa, remember that the best gardens are those that are loved and lived in. Happy DIYing!
Frequently Asked Questions
Q: What is the best wood to use for outdoor planters?
A: Cedar and Redwood are the gold standards because they are naturally rot-resistant and hold up beautifully against the elements. If you’re on a budget, pressure-treated pine is a great alternative, just ensure it is rated for ground contact.
Q: How do I keep my solar lights bright throughout the winter?
A: Keep the solar panels clean of snow and debris! Since the sun is lower in the sky, you may also want to reposition them slightly to catch the maximum amount of direct light available during shorter days.
Q: Are mud kitchens difficult to clean?
A: Not at all! Because they are designed for outdoor use, you can simply hose them down. Using removable stainless steel bowls makes it even easier to dump out old ‘soups’ and start fresh.
Q: Which climbing plants grow the fastest for a privacy wall?
A: Clematis and Honeysuckle are known for their rapid growth. If you want something that stays green all year, Star Jasmine is a fantastic choice that also offers an incredible fragrance.