
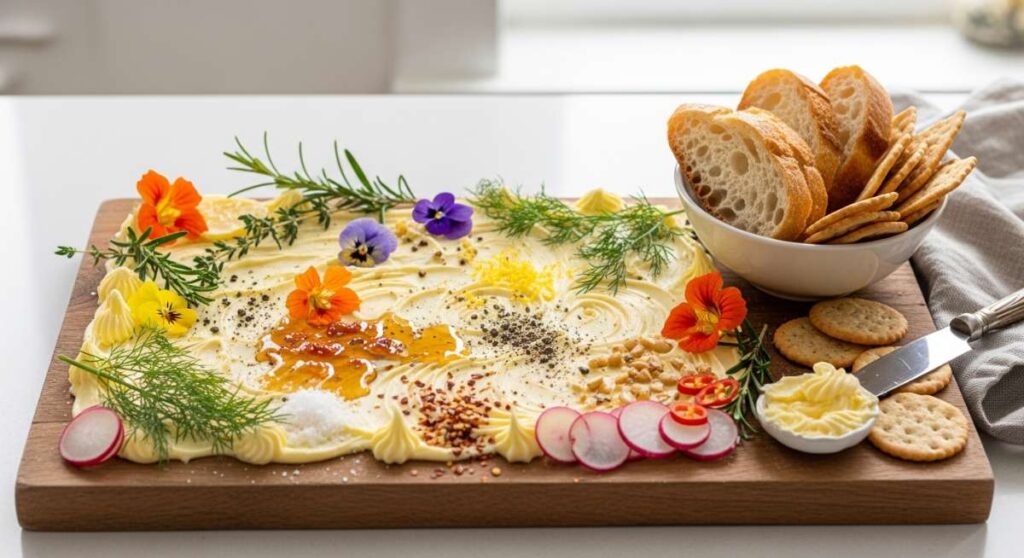
How to Build the Ultimate Viral Butter Board in Minutes
There is something truly magical about the way food can transform a simple gathering into a lifelong memory. I remember the first time I set a butter board down on my farmhouse table; the room went quiet for a split second before everyone started reaching in with crusty bread, laughing and sharing stories. It’s more than just a trend—it’s an invitation to slow down and enjoy the tactile, communal experience of eating together.
In today’s fast-paced world, we often forget the joy found in simple, high-quality ingredients presented with a bit of artistic flair. Whether you are hosting a sun-drenched backyard BBQ or a cozy indoor dinner party, these ideas are designed to make you the star of the show without spending hours locked away in the kitchen. Let’s dive into how we can elevate our summer hosting game with these viral-worthy food boards and seasonal staples.
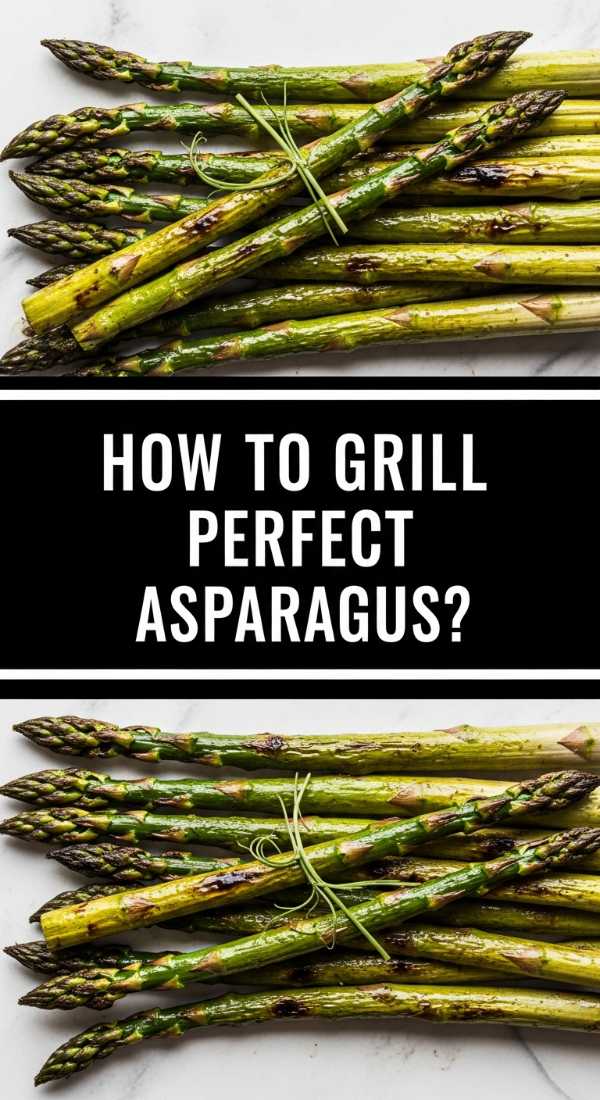
Mastering the art of grilled asparagus
Why we love this
There is nothing quite like the snap of a perfectly grilled asparagus spear to signal that summer has truly arrived. When the stalks hit the hot grates, they undergo a transformation, developing a smoky char that beautifully contrasts with their natural, woodsy sweetness. The aroma of the caramelizing edges mixed with a hint of lemon zest is enough to bring anyone running to the patio, promising a side dish that is both elegant and earthy. It’s that satisfying crunch and the vibrant green hue that makes this a perennial favorite for every outdoor feast.
Ingredients
- 1 pound fresh asparagus (medium thickness is best)
- 2 tablespoons extra-virgin olive oil
- 1 teaspoon flakey sea salt
- 1/2 teaspoon freshly cracked black pepper
- 1 organic lemon (for zesting and juicing)
- Optional: Shaved parmesan cheese
How to make it
- Begin by prepping your asparagus: wash the stalks thoroughly and snap off the woody ends. A professional tip is to hold the asparagus near the bottom and bend it until it snaps naturally—this ensures you only keep the tender portion.
- In a large rimmed baking sheet, toss the spears with the olive oil, salt, and pepper until every inch is lightly coated.
- Preheat your grill to medium-high heat (about 400°F). Ensure the grates are clean and lightly oiled to prevent sticking.
- Place the asparagus spears across the grates, perpendicular to the bars so they don’t fall through. Grill for 3 to 5 minutes.
- Use tongs to roll the spears occasionally. You are looking for distinct grill marks and a vibrant green color; the tips should be slightly charred but the stalks should still have a slight bite (al dente).
- Remove from the heat immediately and squeeze fresh lemon juice over the top. Garnish with lemon zest and parmesan if desired for a salty, bright finish.
The ultimate summer tomato sandwich guide

Why we love this
A true summer tomato sandwich is a masterclass in simplicity, capturing the very essence of a humid July afternoon in a single bite. Imagine thick slices of heirloom tomatoes, still warm from the sun, layered onto bread that’s been slathered with creamy, tangy mayonnaise. As you take a bite, the juices from the tomato mingle with the salt and mayo to create a natural sauce that soaks into the crumb of the bread, releasing an intoxicating scent of fresh basil and vine-ripened fruit. It is messy, indulgent, and absolutely nostalgic.
Ingredients
- 2 thick slices of sourdough or high-quality white bread
- 1 large heirloom tomato (Beefsteak or Cherokee Purple work best)
- 3 tablespoons high-quality mayonnaise (like Duke’s or Kewpie)
- 5-6 fresh basil leaves
- Flaky sea salt and coarse black pepper
- Unsalted butter (for toasting)
How to make it
- Slice your tomato into thick, 1/2-inch rounds. Place the slices on a paper towel and sprinkle generously with sea salt. Let them sit for 5 minutes; this draws out excess moisture and intensifies the flavor.
- While the tomatoes rest, lightly butter one side of each bread slice. Heat a skillet over medium heat and toast the bread until it is just golden brown and slightly crisp on the outside but still soft in the middle.
- Apply a very thick, even layer of mayonnaise to the un-toasted side of both bread slices. Don’t be shy here; the mayo acts as a barrier and a flavor enhancer.
- Layer the tomato slices onto one piece of bread, overlapping them slightly to ensure tomato in every bite. Top with a heavy grinding of black pepper and the fresh basil leaves.
- Close the sandwich and press down gently. Let it sit for one minute before slicing diagonally. This allows the bread to slightly absorb the juices, creating that iconic texture.
Perfecting seasonal summer pasta salad

Why we love this
The perfect pasta salad is the unsung hero of the picnic blanket, offering a refreshing explosion of textures and bright, acidic flavors. We love the way the rotini spirals catch the tangy herb vinaigrette, ensuring that every mouthful is packed with zingy energy. Between the creamy pearls of mozzarella and the snap of fresh cucumbers, it provides a sensory playground that feels both light and incredibly satisfying. It’s the kind of dish that actually tastes better as it sits, making it the ultimate stress-free preparation for a busy host.
Ingredients
- 1 lb Rotini or Fusilli pasta
- 1 pint cherry tomatoes, halved
- 1 English cucumber, diced
- 8 oz fresh mozzarella pearls
- 1/2 red onion, finely minced
- 1/2 cup sliced Kalamata olives
- 1 cup Italian herb vinaigrette (homemade or high-quality store-bought)
- Fresh parsley and oregano for garnish
How to make it
- Bring a large pot of heavily salted water to a rolling boil. Cook the pasta according to the package directions, but aim for ‘al dente’—it should have a firm bite, as it will soften slightly once the dressing is added.
- Drain the pasta and immediately rinse it under cold running water. This stops the cooking process and removes excess starch, preventing the salad from becoming gummy.
- In a large mixing bowl, combine the cooled pasta with the halved tomatoes, cucumbers, mozzarella pearls, red onion, and olives.
- Pour half of the dressing over the mixture and toss gently with large spoons. Ensure every piece of pasta and vegetable is coated.
- Cover the bowl and refrigerate for at least 2 hours. This ‘marinating’ phase is critical for the flavors to meld together.
- Just before serving, toss with the remaining dressing (the pasta will have absorbed the first half) and garnish with fresh chopped herbs for a final burst of fragrance.
Tips for juicy grilled chicken

Why we love this
There is a specific triumph in slicing into a piece of grilled chicken and seeing the steam rise from a perfectly succulent, juicy interior. Far too often, grilled chicken becomes dry and uninspiring, but when done right, it carries a beautiful golden-brown crust infused with the scent of rosemary and charred garlic. It’s a versatile protein that feels like a warm hug on a plate, offering a savory, savory depth that pairs perfectly with almost any summer side dish you can imagine.
Ingredients
- 1.5 lbs chicken breasts or boneless thighs
- 1/4 cup olive oil
- 3 cloves garlic, smashed
- 1 tablespoon fresh rosemary, chopped
- 1 tablespoon honey
- 1 tablespoon Dijon mustard
- Salt and pepper to taste
How to make it
- Prepare the chicken by pounding the breasts to an even thickness (about 3/4 inch). This is the secret to even cooking; it prevents the thin ends from drying out while the thick center finishes.
- Whisk together the olive oil, garlic, rosemary, honey, mustard, salt, and pepper in a zip-top bag. Add the chicken and marinate in the fridge for at least 30 minutes, though 2 hours is ideal.
- Preheat your grill to medium heat. You want a steady heat that sears the meat without burning the honey in the marinade.
- Place the chicken on the grill and leave it undisturbed for 5-7 minutes. If the meat resists when you try to flip it, it’s not ready. It will naturally release from the grates when a proper crust has formed.
- Flip and cook for another 5-7 minutes until the internal temperature reaches 165°F (74°C). Use a meat thermometer to be precise.
- Transfer the chicken to a plate and tent loosely with foil. Let it rest for a full 10 minutes. This allows the juices to redistribute throughout the meat rather than running out on the cutting board.
Classic comforting hamburger casserole

Why we love this
When the sun goes down and a slight chill hits the air, there is nothing quite as soul-warming as a bubbling hamburger casserole. It’s the ultimate comfort food, bringing back memories of family dinners where the center of the table was a dish of gooey cheese and savory ground beef. The aroma of toasted cheddar and sautéed onions filling the kitchen creates an immediate sense of home and safety. It’s a hearty, textured meal that feels like a celebration of simple, honest ingredients coming together in harmony.
Ingredients
- 1 lb lean ground beef
- 1 medium yellow onion, chopped
- 2 cloves garlic, minced
- 1 box (16 oz) elbow macaroni
- 1 jar (24 oz) marinara or tomato sauce
- 2 cups shredded sharp cheddar cheese
- 1 teaspoon dried oregano
- Salt and black pepper
How to make it
- Preheat your oven to 375°F (190°C) and lightly grease a 9×13 inch baking dish.
- In a large skillet over medium-high heat, brown the ground beef with the chopped onions. Cook until the beef is no longer pink and the onions are translucent. Drain off the excess fat carefully.
- Stir in the minced garlic and oregano, cooking for just 1 minute until fragrant. Season with salt and pepper.
- Meanwhile, cook the elbow macaroni in boiling salted water for 2 minutes less than the package instructions suggest. The pasta will finish cooking in the oven and soak up the sauce.
- Combine the beef mixture, the par-boiled pasta, and the tomato sauce in the baking dish. Stir until well combined.
- Top the entire surface with an even layer of shredded cheddar cheese.
- Bake for 20-25 minutes until the sauce is bubbling at the edges and the cheese has melted into a golden, slightly crispy crust.
A guide to savory soup

Why we love this
Soup is a culinary embrace, a slow-simmered labor of love that fills the house with the intoxicating scent of onions, carrots, and celery softening in a rich broth. We love the way the flavors deepen over time, turning humble vegetables into a complex, savory masterpiece. Whether it’s a light vegetable broth or a thick, chunky bean soup, the warmth of the bowl against your palms and the steam rising to your face provides a grounding, meditative eating experience that is hard to find in any other dish.
Ingredients
- 2 tablespoons olive oil
- 1 large onion, diced
- 2 carrots, sliced into rounds
- 2 stalks celery, chopped
- 4 cups vegetable or chicken stock
- 1 can (15 oz) cannellini beans, rinsed
- 1 bunch kale, stems removed and chopped
- 2 sprigs fresh thyme
- Salt and pepper
How to make it
- Heat olive oil in a large heavy-bottomed pot or Dutch oven over medium heat. Add the onion, carrots, and celery (the mirepoix).
- Sauté the vegetables for 8-10 minutes. The goal is to soften them and develop a slight sweetness without browning them too much.
- Add the fresh thyme sprigs and stir for 30 seconds to release the oils.
- Pour in the stock and use a wooden spoon to scrape any browned bits off the bottom of the pot—this is where the deep flavor lives.
- Bring the liquid to a boil, then immediately reduce the heat to low. Cover and simmer for 15-20 minutes until the carrots are tender.
- Stir in the beans and the chopped kale. Let it cook for another 5 minutes until the kale is wilted and vibrant green. Season generously with salt and pepper before removing the thyme stems and serving.
Fluffy and light spring cakes

Why we love this
There is a delicate, cloud-like quality to a spring cake that makes it feel like an absolute luxury. Unlike heavy winter desserts, these cakes are airy and bright, often featuring the zesty punch of citrus or the floral notes of vanilla bean. The texture is so soft it almost melts on the tongue, leaving behind the sweet, refreshing taste of the season. It’s the perfect centerpiece for a garden party, looking as beautiful and ethereal as a spring morning with its light crumb and whipped cream toppings.
Ingredients
- 1 1/2 cups cake flour (sifted)
- 1 1/2 cups granulated sugar
- 6 large egg whites, room temperature
- 1/2 teaspoon cream of tartar
- 1 tablespoon lemon zest
- 1 teaspoon vanilla extract
- 1/2 cup whole milk
How to make it
- Preheat your oven to 325°F (165°C). It is vital to use a lower temperature for these cakes to ensure they rise evenly without forming a tough crust.
- In a clean, dry bowl, beat the egg whites and cream of tartar on medium speed until soft peaks form. Gradually add 1/2 cup of the sugar while continuing to beat until stiff, glossy peaks form.
- In a separate bowl, whisk together the remaining sugar, cake flour, lemon zest, vanilla, and milk until smooth.
- Gently fold one-third of the egg white mixture into the flour mixture using a rubber spatula to lighten it. Then, very carefully fold in the remaining egg whites. Do not overmix, or you will deflate the air bubbles that make the cake fluffy.
- Pour the batter into an ungreased tube pan or cake tin. Bake for 40-45 minutes.
- Once done, invert the pan immediately and let the cake cool completely while upside down. This prevents the delicate structure from collapsing as it cools. Slice with a serrated knife to maintain the airy texture.
Effortless slow cooker summer meals

Why we love this
The slow cooker is the ultimate summer life-hack, allowing you to create deeply flavorful, tender meals without ever turning on the oven and heating up the house. We love the ease of ‘set-and-forget’ cooking, knowing that while we are out enjoying the sunshine or lounging by the pool, a delicious meal is developing rich, complex flavors on the counter. The way pork shoulder becomes so tender it falls apart at the mere suggestion of a fork, infused with citrus and spices, is pure culinary magic.
Ingredients
- 3 lbs pork shoulder (butt), cut into large chunks
- 1/2 cup orange juice
- 1/4 cup lime juice
- 4 cloves garlic, minced
- 1 tablespoon ground cumin
- 1 teaspoon dried oregano
- 1 large onion, sliced
- Salt and pepper
How to make it
- Season the pork chunks generously on all sides with salt, pepper, and cumin.
- Place the sliced onions at the bottom of the slow cooker to act as a flavorful bed for the meat.
- Arrange the pork pieces on top of the onions and add the minced garlic and oregano.
- Pour the orange juice and lime juice over the meat. The acidity in the citrus will help break down the connective tissues in the pork during the long cook time.
- Cover and cook on LOW for 8-10 hours. Resisting the urge to open the lid is crucial, as every time you peek, you lose significant heat and moisture.
- Once the meat is fork-tender, remove it to a tray and shred it. For a professional finish, spread the shredded meat on a baking sheet and broil for 3-5 minutes to get those iconic crispy, caramelized ‘carnitas’ edges.
Refreshing strawberry treats for summer

Why we love this
Nothing says summer quite like the scent of fresh strawberries—floral, sweet, and slightly tart. When these ruby-red gems are paired with chilled, lightly sweetened cream, they create a dessert that is as refreshing as a cool breeze. We love the simplicity of treats that let the fruit be the star, celebrating the peak of the season. Each bite is a burst of sun-drenched flavor, softened by the velvety texture of cream, making it the perfect end to a warm evening on the porch.
Ingredients
- 2 pints fresh strawberries, hulled and sliced
- 3 tablespoons granulated sugar
- 1 cup heavy whipping cream, cold
- 1 teaspoon vanilla paste or extract
- Shortcake biscuits or angel food cake slices
- Fresh mint for garnish
How to make it
- In a medium bowl, toss the sliced strawberries with 2 tablespoons of the sugar. This is called ‘macerating.’ Let them sit at room temperature for at least 30 minutes. The sugar will draw out the juices, creating a beautiful natural syrup.
- In a chilled metal bowl, pour the cold heavy cream, the remaining tablespoon of sugar, and the vanilla.
- Use a hand mixer or whisk to beat the cream until stiff peaks form. Be careful not to over-beat, or it will turn into butter! You want it thick enough to hold its shape but still look smooth.
- To assemble, place a split biscuit or cake slice on a plate. Spoon a generous amount of the strawberries and their syrup over the base.
- Top with a large dollop of the whipped cream and another piece of cake if desired. Garnish with a sprig of fresh mint and serve immediately while the cream is cold and the cake is just beginning to soak up the berry juice.
Mastering the grill for beginners

Why we love this
There is an incredible sense of empowerment that comes with mastering the grill. We love the ritual of it—the crackle of the fire, the distinct lines of char on a steak or vegetable, and the primal satisfaction of cooking over an open flame. It turns cooking into a performance and an outdoor event. For a beginner, the transition from uncertainty to confidence is a journey of sensory cues: the smell of the smoke, the sound of the sizzle, and the visual beauty of a perfectly seared meal shared with friends under the stars.
Ingredients
- 2 Ribeye steaks or thick-cut cauliflower steaks
- High smoke-point oil (like Grapeseed or Avocado oil)
- Coarse Kosher salt
- Freshly cracked black pepper
- 1 tablespoon unsalted butter
How to make it
- Start with a clean grill. Use a wire brush to remove any old residue while the grill is preheating to high. A clean surface is the first step to preventing sticking.
- Lightly coat your food (meat or veg) with a high-smoke point oil. Do not use extra virgin olive oil for high-heat grilling as it will burn and become bitter. Season aggressively with salt and pepper.
- Test the heat: hold your hand about 5 inches above the grates. If you can only keep it there for 2-3 seconds, it’s hot enough.
- Place your food on the grill at a 45-degree angle to the grates. Once it’s down, do not move it! You need direct contact for at least 3-4 minutes to develop a proper sear and those beautiful grill marks.
- Flip only once. Moving the food too much prevents the crust from forming and causes the juices to leak out.
- Use a meat thermometer to check for doneness (135°F for medium-rare beef). For the last minute of cooking, top with a pat of butter for a restaurant-quality finish. Always let your grilled food rest for 5-10 minutes before slicing.
Conclusion
Building a viral-worthy food board or mastering these summer staples isn’t about perfection; it’s about the love and intention you put into the process. From the snap of the asparagus to the sweetness of the macerated strawberries, these recipes are designed to bring people together. So, grab your board, find the freshest tomatoes at the market, and start creating your own delicious memories today!