
Why Simple Food Boards are the Ultimate Party Hack of 2024
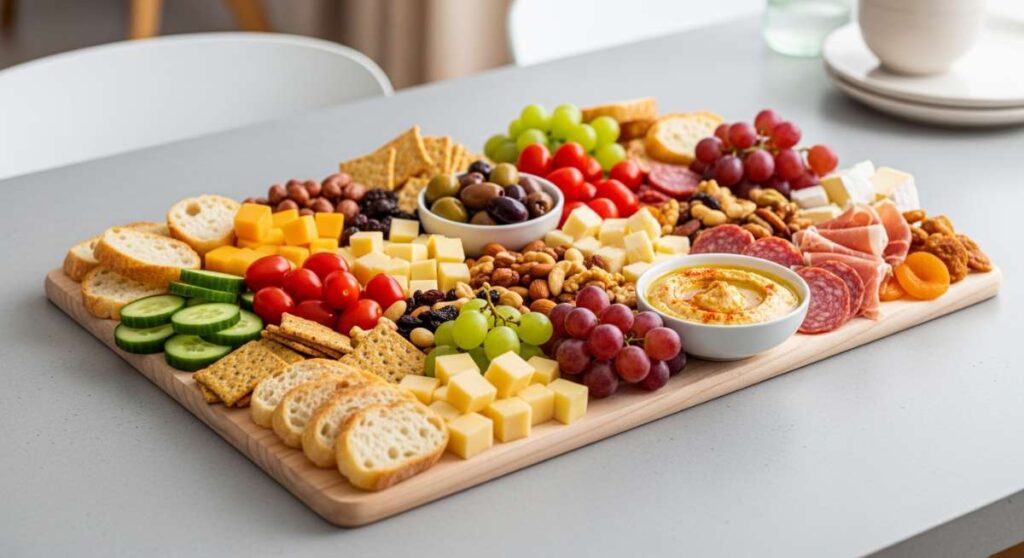
There is something inherently magical about gathering around a table where the food isn’t just served, but displayed as a shared experience. We’ve all seen the intricate charcuterie boards of years past, but 2024 is ushering in a much warmer, more filling trend: the Simple Food Board. It’s moving away from just cold cuts and crackers and into the realm of hearty, home-cooked comfort that invites everyone to dig in without the formality of a plated dinner. It’s about that ‘wow’ factor that doesn’t require you to spend three hours plating individual hors d’oeuvres.
As someone who loves hosting but hates missing out on the conversation because I’m stuck in the kitchen, these boards have been a total game-changer. They create a focal point for the room, acting as both a stunning centerpiece and a delicious buffet. Whether it’s a board piled high with crispy wings or a rustic spread of garlic steak and smashed potatoes, the goal is to make your guests feel pampered and relaxed. Let’s dive into the essential components that will make your next gathering the talk of the neighborhood.
How to make garlic steak
Why we love this
There is nothing quite like the intoxicating aroma of fresh garlic hitting a hot, buttery pan alongside a premium cut of beef. This dish brings a sense of luxury to any food board, offering succulent, bite-sized pieces of protein that are literally dripping with herb-infused flavor. The texture is a beautiful contrast between the caramelized, salty crust on the outside and the tender, pink velvet interior that melts away with every bite. It’s the kind of dish that makes guests linger over the board, reaching for just one more piece as the scent of roasted garlic fills the air, creating a cozy and indulgent atmosphere.
Ingredients
- 2 lbs Ribeye or Sirloin steak, cut into 1-inch cubes
- 4 tablespoons unsalted butter
- 6 cloves garlic, minced
- 2 sprigs fresh rosemary
- 1 tablespoon olive oil
- Kosher salt and cracked black pepper
How to make it
- Begin by patting your steak cubes completely dry with paper towels; moisture is the enemy of a good sear. Season them generously with salt and pepper.
- Heat a large cast-iron skillet over high heat until it is wisps of smoke start to appear. Add the olive oil.
- Place the steak in the pan in a single layer, ensuring you don’t overcrowd it. Let it sear undisturbed for 2 minutes to develop a deep brown crust.
- Turn the heat down to medium-high and add the butter, minced garlic, and rosemary sprigs to the pan.
- As the butter foams, use a spoon to continuously baste the steak with the garlic-infused butter for another 2-3 minutes until it reaches your desired doneness (medium-rare is usually best for boards).
- Remove from heat and let the steak rest for 5 minutes before serving so the juices redistribute.
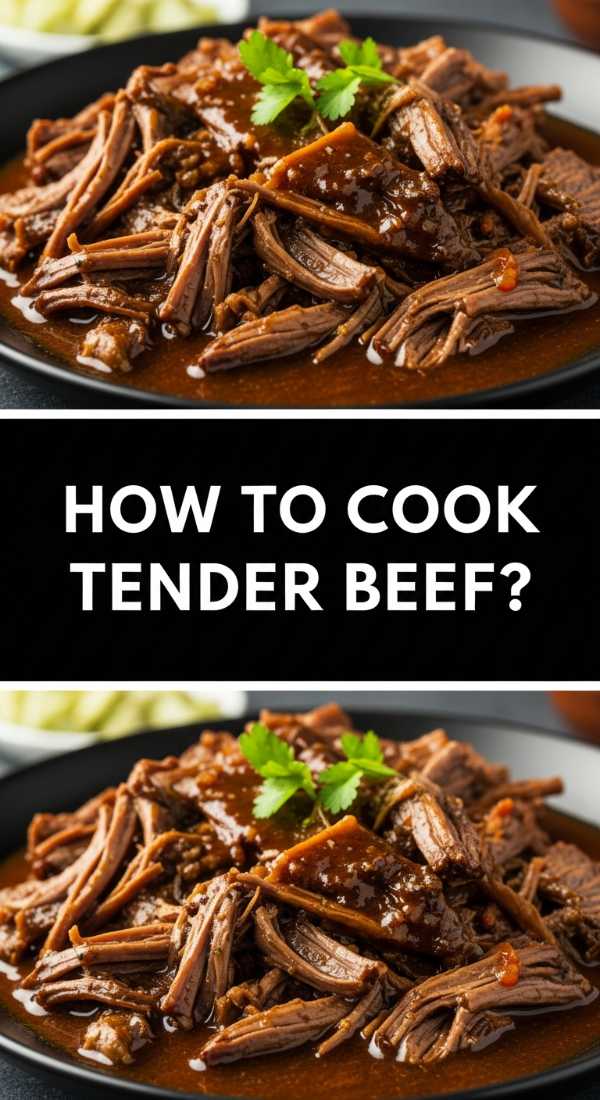
How to cook tender beef

Why we love this
Tender, slow-cooked beef is the ultimate soul-soothing component for a rustic food board, offering a rich depth of flavor that only time and patience can produce. The meat becomes so incredibly soft that it practically falls apart at the touch of a fork, releasing a savory, umami-rich jus that coats everything it touches. The aroma of red wine and aromatics simmering together creates a nostalgic, homey feeling that warms up the entire house. It provides a hearty, substantial element to your spread that feels both sophisticated and deeply comforting, ensuring no guest leaves the table hungry.
Ingredients
- 3 lbs Chuck roast, cut into large chunks
- 2 cups beef bone broth
- 1 cup dry red wine (like Cabernet)
- 2 tablespoons tomato paste
- 3 cloves garlic, smashed
- 2 bay leaves
- Flour for dredging
How to make it
- Preheat your oven to 300°F (150°C). Season the beef chunks with salt and pepper, then dredge them lightly in flour, shaking off the excess.
- In a heavy Dutch oven, heat oil over medium-high heat and sear the beef in batches until a dark, mahogany crust forms on all sides. Remove beef and set aside.
- Add the tomato paste to the pot, stirring for 1 minute to cook out the raw metallic taste. Pour in the red wine to deglaze, scraping up all the brown bits (fond) from the bottom.
- Return the beef to the pot and pour in the beef broth until the meat is about two-thirds submerged. Add the garlic and bay leaves.
- Cover with a tight-fitting lid and transfer to the oven. Braise for 3 to 3.5 hours, or until the beef is fork-tender and yields easily when pressed.
- Skim any excess fat from the surface of the sauce before serving directly on your board.
How to bake loaded potatoes

Why we love this
A loaded potato is essentially a canvas for everything good in the world: melted cheese, smoky bacon, and cool sour cream. When served on a board, they offer a playful, customizable element that guests absolutely adore, especially when the skins are perfectly crisp and salted. The contrast between the fluffy, cloud-like interior and the sharp bite of chives or the crunch of bacon bits is a sensory delight. They bring a vibrant pop of color and a structural element to the board that makes it look abundant and expertly curated while remaining a classic crowd-pleaser.
Ingredients
- 6 medium Russet potatoes
- Olive oil and coarse sea salt
- 1 cup shredded cheddar cheese
- 1/2 cup cooked bacon bits
- Sour cream and sliced chives for topping
How to make it
- Preheat your oven to 425°F (220°C). Scrub the potatoes thoroughly and pat them dry.
- Poke each potato several times with a fork to allow steam to escape. Rub the skins generously with olive oil and roll them in coarse sea salt.
- Place the potatoes directly on the oven rack (with a tray below to catch drips) and bake for 45-60 minutes. They are done when the skin is brittle and a knife slides into the center with no resistance.
- Once slightly cooled, slice a slit down the center and pinch the ends to pop the potato open.
- Immediately fluff the insides with a fork and pile in the cheese while the potato is still steaming hot so it melts into the crevices.
- Top with bacon, a dollop of sour cream, and chives just before placing on the board.
How to make creamy pasta
Why we love this
There is a certain elegance to a swirl of creamy pasta nestled among other savory treats on a board. It provides a smooth, velvety texture that acts as a palate cleanser between bolder, spicier flavors. The scent of simmering cream and nutty Parmesan cheese is universally inviting, signaling a dish that is rich, indulgent, and satisfying. When executed perfectly, the sauce clings to every strand of pasta, creating a glossy, luxurious mouthfeel that feels like a warm hug in food form. It’s the ultimate comfort addition that fills the gaps and keeps the board feeling cohesive.
Ingredients
- 1 lb Fettuccine or Pappardelle
- 2 cups heavy cream
- 1 cup freshly grated Parmesan cheese
- 3 tablespoons butter
- 2 cloves garlic, finely minced
- Pinch of nutmeg and black pepper
How to make it
- Boil a large pot of heavily salted water. Cook the pasta until it is just under al dente (about 1-2 minutes less than the package instructions).
- While the pasta cooks, melt butter in a large skillet over medium heat. Add the garlic and sauté for 30 seconds until fragrant but not browned.
- Pour in the heavy cream and bring to a gentle simmer. Let it reduce for about 3-5 minutes until it slightly thickens.
- Whisk in the Parmesan cheese slowly, stirring constantly to ensure a smooth, emulsified sauce. Add a pinch of nutmeg for depth.
- Using tongs, transfer the pasta directly from the water into the sauce. Add a splash of starchy pasta water (about 1/4 cup) to help the sauce bind.
- Toss vigorously over low heat until the sauce coats the noodles perfectly and looks silky. Serve immediately.
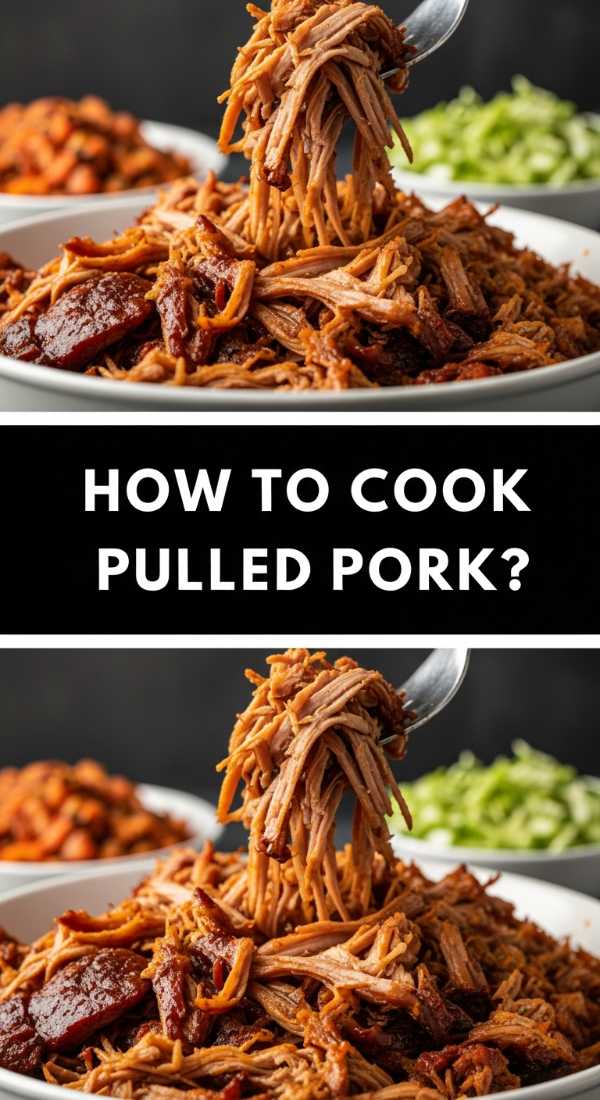
How to cook pulled pork

Why we love this
Pulled pork is the king of low-and-slow cooking, offering a smokey, sweet, and tangy profile that is impossible to resist. The way the meat shreds into long, tender ribbons makes it perfect for a board where guests can pile it onto sliders or eat it straight with a fork. It carries the fragrance of warm spices and vinegar, creating a mouthwatering aroma that draws everyone to the table. The combination of the charred outer ‘bark’ and the juicy, moist interior provides a variety of textures that keep every bite interesting and deeply flavorful.
Ingredients
- 4 lb Pork butt (shoulder)
- 1/4 cup brown sugar
- 1 tablespoon smoked paprika
- 1 teaspoon garlic powder
- 1 cup apple cider vinegar
- 1/2 cup BBQ sauce
How to make it
- Mix the brown sugar, paprika, garlic powder, salt, and pepper to create a dry rub. Massage this mixture into every crevice of the pork.
- Place the pork in a slow cooker or a heavy pot. Pour the apple cider vinegar around the base (not over the top, so you don’t wash off the rub).
- Cook on low for 8-10 hours. You’ll know it’s ready when you can easily insert a fork and twist, and the meat gives way without any effort.
- Remove the pork from the liquid and let it rest for 15 minutes. This is crucial for moisture retention.
- Use two forks to shred the meat into bite-sized pieces, discarding any large chunks of fat.
- Toss the shredded meat with a little bit of the cooking juices and your favorite BBQ sauce to keep it moist for the board display.
How to make crispy wings

Why we love this
Crispy wings are the quintessential party food, and for good reason—that shatter-crisp skin combined with succulent meat is a match made in heaven. On a food board, they provide a structured, easy-to-grab finger food that adds a bit of excitement and crunch. The golden-brown hue and the glistening finish of the skin are visually stunning, promising a satisfying sound with every bite. Whether left plain or tossed in a glaze, they bring a fun, casual energy to the gathering that encourages everyone to roll up their sleeves and dive in.
Ingredients
- 2 lbs Chicken wings (flats and drums)
- 1 tablespoon baking powder (NOT baking soda)
- 1 teaspoon salt
- 1/2 teaspoon black pepper
- Optional: Buffalo or Honey Garlic sauce
How to make it
- The secret to crispiness is dryness. Pat the wings with paper towels until they are bone-dry to the touch.
- In a large bowl, toss the wings with the baking powder, salt, and pepper. The baking powder alters the pH of the skin, allowing it to crisp up like it’s been deep-fried.
- Arrange the wings on a wire rack set over a baking sheet. This allows hot air to circulate around the entire wing.
- Bake at 425°F (220°C) for 45-50 minutes, flipping them halfway through the cooking process.
- Look for a deep golden color and a skin that looks slightly bubbled and firm.
- Once out of the oven, let them stand for 2 minutes to crisp up further before tossing in sauce or serving dry on the board.
How to cook honey salmon

Why we love this
Honey salmon brings a sophisticated, lighter touch to a food board, offering a beautiful balance of sweetness and savory depth. The honey caramelizes under the heat, creating a sticky, glistening glaze that seals in all the natural oils and moisture of the fish. It’s incredibly flaky, with a vibrant pink color that makes the whole board look fresh and upscale. The gentle aroma of citrus and honey is refreshing, making it a perfect centerpiece for a brunch or a more refined evening gathering where you want a healthy yet indulgent option.
Ingredients
- 4 Salmon fillets
- 1/4 cup honey
- 2 tablespoons soy sauce
- 1 tablespoon lemon juice
- 2 cloves garlic, minced
- 1 tablespoon olive oil
How to make it
- Whisk together the honey, soy sauce, lemon juice, and minced garlic in a small bowl to create the glaze.
- Heat olive oil in a non-stick skillet over medium-high heat. Season the salmon fillets with a pinch of salt.
- Place the salmon skin-side up in the pan and sear for 3-4 minutes until a golden crust forms.
- Flip the fillets and pour the honey mixture into the pan.
- As the sauce bubbles and thickens, use a spoon to coat the salmon continuously. Cook for another 3 minutes.
- For an extra charred finish, pop the pan under the broiler for 60 seconds until the honey glaze begins to bubble and darken.
How to make pot roast

Why we love this
Pot roast is the ultimate ‘low effort, high reward’ dish that anchors a board with its rustic charm and deep, developed flavors. It’s a dish that tells a story of slow cooking, with chunks of carrots and onions that have soaked up all the beefy goodness. The meat is tender enough to be pulled apart with a spoon, and the rich, dark gravy that accompanies it provides a perfect dipping sauce for bread. It feels like a celebration of traditional home cooking, making your guests feel truly cared for and nourished.
Ingredients
- 3 lb Chuck roast
- 4 large carrots, cut into chunks
- 1 yellow onion, wedged
- 2 cups beef stock
- 1 tablespoon Worcestershire sauce
- 3 sprigs fresh thyme
How to make it
- Season the roast heavily on all sides with salt and pepper. Sear it in a hot Dutch oven with oil until very dark and crusty on all sides.
- Remove the meat and briefly sauté the onions and carrots in the same pot to pick up the flavor.
- Deglaze the pot with a splash of beef stock, scraping up the bits from the bottom.
- Place the roast back in, add the remaining stock, Worcestershire sauce, and thyme. The liquid should come halfway up the meat.
- Cover and cook at 325°F (165°C) for 3 to 4 hours. Check at the 3-hour mark; the meat should be tender and the vegetables soft.
- Let the roast rest for 20 minutes before breaking it into large chunks to serve on the board, surrounded by the roasted vegetables.
How to bake garlic bread

Why we love this
Garlic bread is the unsung hero of the food board, acting as the perfect vessel for soaking up sauces, juices, and gravies. There is something deeply satisfying about the crunch of a toasted baguette yielding to a soft, butter-soaked center that is heavy on the garlic and herbs. The aroma of baking bread and garlic is one of the most inviting smells in the culinary world, instantly making any space feel like a five-star bistro. It adds a necessary crunch and a golden-yellow hue to your spread that ties all the other elements together.
Ingredients
- 1 large French baguette or Italian loaf
- 1/2 cup softened unsalted butter
- 4 cloves garlic, mashed into a paste
- 2 tablespoons fresh parsley, chopped
- 1/2 cup grated Parmesan (optional)
How to make it
- Preheat your oven to 375°F (190°C). Slice the baguette in half lengthwise.
- In a small bowl, mix the softened butter, garlic paste, and parsley until smooth. The garlic paste ensures no one gets a bitter bite of raw garlic chunk.
- Spread the butter mixture generously from edge to edge on both halves of the bread. Don’t be shy; the butter needs to soak in.
- Place the bread on a baking sheet, butter-side up. If you want it soft, wrap it in foil; if you want it crunchy, leave it open.
- Bake for 10-12 minutes. For the final 2 minutes, turn on the broiler to get those edges perfectly golden brown and bubbly.
- Slice into 2-inch strips while hot so the butter is still melty when it hits the board.
How to make smashed potatoes
[IMAGE_10]
Why we love this
Smashed potatoes are the trendy, sophisticated cousin of the fry, offering a unique texture that is both creamy and incredibly crispy. Because they are boiled and then flattened before roasting, they have a massive surface area that becomes golden and crunchy, while the inside remains like mashed potato. They look rustic and artisanal on a board, especially when garnished with a sprinkle of sea salt and fresh herbs. They are the perfect bite-sized side that pairs beautifully with everything from steak to salmon, making them a versatile staple for any food board enthusiast.
Ingredients
- 1.5 lbs Baby Yukon Gold potatoes
- 3 tablespoons olive oil
- 1 teaspoon garlic powder
- 1 tablespoon fresh rosemary, chopped
- Flaky sea salt
How to make it
- Place the whole potatoes in a pot of cold salted water. Bring to a boil and cook for 15-20 minutes until they are fork-tender but not falling apart.
- Drain the potatoes and let them steam dry for 5 minutes. This removal of moisture is key for crunch.
- Place the potatoes on a parchment-lined baking sheet. Use the bottom of a heavy glass or a potato masher to gently press down until they are about 1/2 inch thick.
- Drizzle generously with olive oil and sprinkle with garlic powder, rosemary, and salt.
- Roast at 425°F (220°C) for 25-30 minutes, turning them over halfway through.
- The goal is a deep golden brown color on both sides with edges that look almost translucent and crispy.
The Final Touch: Assembling Your Board
Once you’ve mastered these individual components, the magic happens in the assembly. Start by placing your largest items—like the pot roast or the salmon—in the center or at opposite corners. Fill in the gaps with the potatoes and bread, and use small ramekins for sauces or gravies to prevent the board from getting soggy. Don’t be afraid to overlap items; a crowded board looks more appetizing and bountiful. The goal of a Simple Food Board is to create a relaxed, ‘help-yourself’ environment where the food is the star and the memories made around it are the focus.