
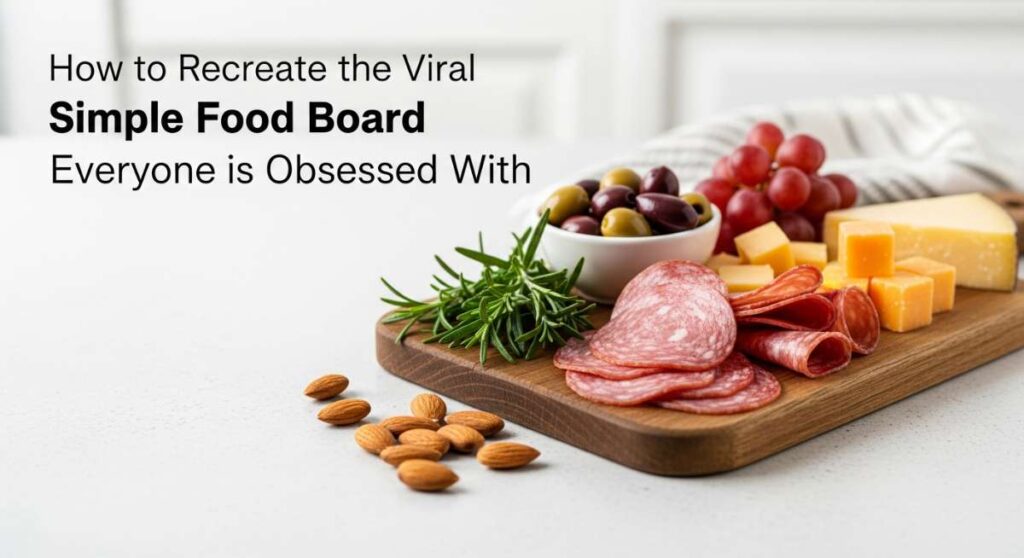
There is something undeniably magical about a table filled with small plates, but the ‘Simple Food Board’ takes it to a whole new level of aesthetic bliss. It’s that effortless, curated look we’ve all been scrolling past on our feeds—a sprawling landscape of textures and colors that somehow feels both sophisticated and incredibly approachable. When I first tried assembling one for a weekend gathering, the room went silent as everyone just admired the vibrant colors before diving in. It’s more than just a meal; it’s a shared experience that invites lingering conversations and second helpings.
The beauty of this board lies in its versatility. You don’t need to be a professional chef to master these elements, but you do need a bit of heart and a focus on fresh, seasonal ingredients. Each component we’re about to dive into offers a unique sensory profile, from the zesty zing of lemon pasta to the rustic crunch of sourdough discard crackers. Whether you’re hosting a summer garden party or a cozy indoor brunch, this guide will help you recreate that viral magic right in your own kitchen.
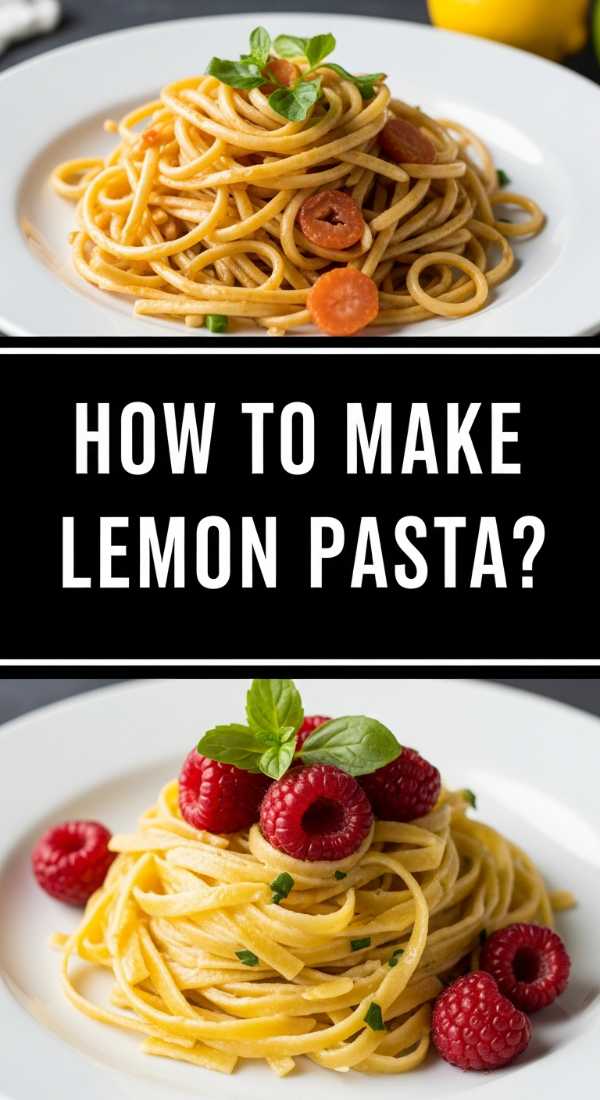
How to make lemon pasta?
Why we love this
Lemon pasta is the culinary equivalent of a bright, sun-drenched afternoon in the Mediterranean. We love it because it manages to be incredibly creamy and rich without feeling heavy, thanks to the sharp, citrusy acidity that cuts through the butter and cheese. As you twirl your fork, the aroma of fresh lemon zest and cracked black pepper fills the air, creating a sensory experience that feels both luxurious and refreshingly simple. The sauce clings to the noodles in a silky glaze, making every bite a velvety explosion of brightness that tastes like pure summer.
Ingredients
- 1 lb Spaghetti or Linguine
- 3 large lemons (zested and juiced)
- 1/2 cup heavy cream
- 1/2 cup unsalted butter
- 1 cup freshly grated Parmesan cheese
- Fresh parsley, finely chopped
- Sea salt and cracked black pepper
How to make it
- Fill a large pot with water and add enough sea salt so it tastes like the ocean. Bring to a rolling boil over high heat. Add the pasta and cook for about 1-2 minutes less than the package directions specify for ‘al dente.’ This is crucial because the pasta will finish cooking in the sauce.
- While the pasta boils, place a large skillet over medium-low heat. Melt the butter slowly, being careful not to let it brown. Once melted, whisk in the heavy cream and the lemon juice. Let the mixture simmer very gently for about 3 minutes until it slightly thickens.
- Just before draining the pasta, scoop out 2 cups of the starchy pasta water. This is your ‘liquid gold’ that will help emulsify the sauce.
- Drain the pasta and add it directly into the skillet with the lemon cream. Increase the heat to medium.
- Add the lemon zest and the grated Parmesan cheese. Using tongs, toss the pasta vigorously while slowly splashing in the reserved pasta water. The cheese and water will emulsify with the butter to create a glossy, thick sauce that coats every strand.
- Continue tossing for 2 minutes until the sauce is creamy and the pasta is perfectly tender. Season generously with black pepper and top with fresh parsley before serving.
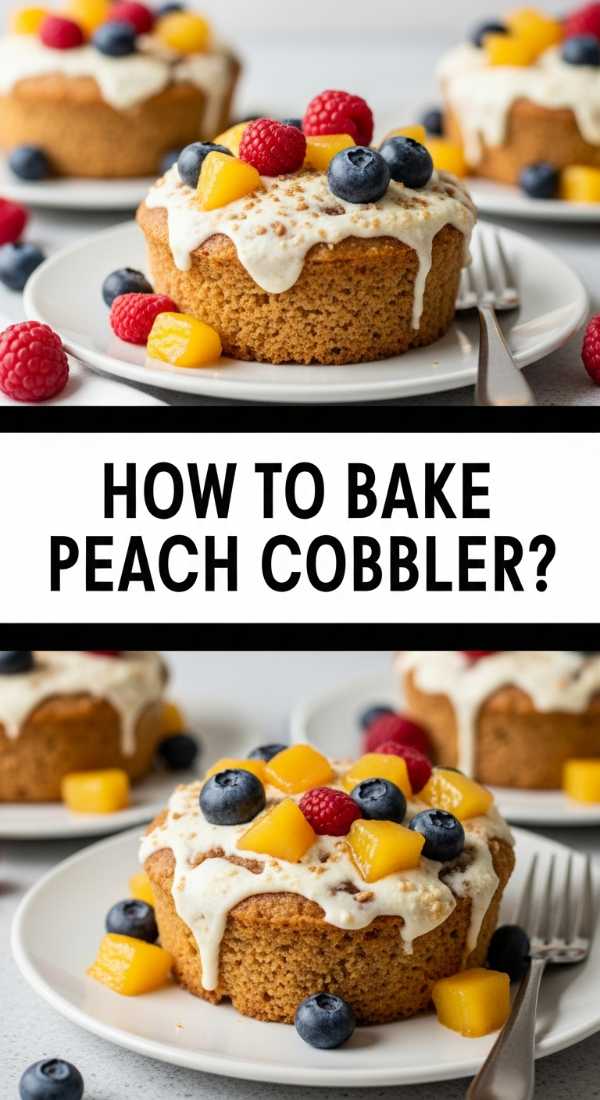
How to bake peach cobbler?
Why we love this
A warm peach cobbler is the ultimate comfort food, evoking memories of backyard barbecues and golden hour sunsets. We love this dish for the way the sweet, juicy peaches transform into a syrupy, jam-like filling beneath a golden, biscuit-like crust that is both crisp on top and soft on the bottom. The aroma of cinnamon and baking fruit wafting through the house is almost as good as the first bite itself. When served warm with a scoop of melting vanilla bean ice cream, it creates a contrast of temperatures and textures that is absolutely addictive.
Ingredients
- 6-8 ripe peaches, sliced
- 1 cup granulated sugar
- 1 cup all-purpose flour
- 1 tbsp baking powder
- 1 tsp ground cinnamon
- 1/2 cup cold unsalted butter, cubed
- 1/2 cup whole milk
- 1 tsp vanilla extract
How to make it
- Preheat your oven to 375°F (190°C). In a large bowl, toss the sliced peaches with 1/2 cup of the sugar and a pinch of cinnamon. Let them sit for 15 minutes to macerate; this draws out the natural juices to create that beautiful syrup.
- In a separate medium bowl, whisk together the flour, the remaining 1/2 cup of sugar, baking powder, and cinnamon.
- Using a pastry cutter or your fingers, work the cold, cubed butter into the flour mixture until it looks like coarse crumbs with some pea-sized pieces of butter still visible. This ensures a flaky, tender topping.
- Stir in the milk and vanilla extract until a thick, shaggy dough forms. Do not overmix, as this will make the cobbler topping tough.
- Pour the peaches and all their juices into a greased 9×13 inch baking dish. Drop spoonfuls of the dough over the top of the peaches, leaving some gaps for the steam to escape.
- Bake for 40-45 minutes. You are looking for the fruit to be bubbling vigorously and the topping to be a deep, golden brown. Let it cool for at least 10 minutes before serving to allow the juices to thicken.
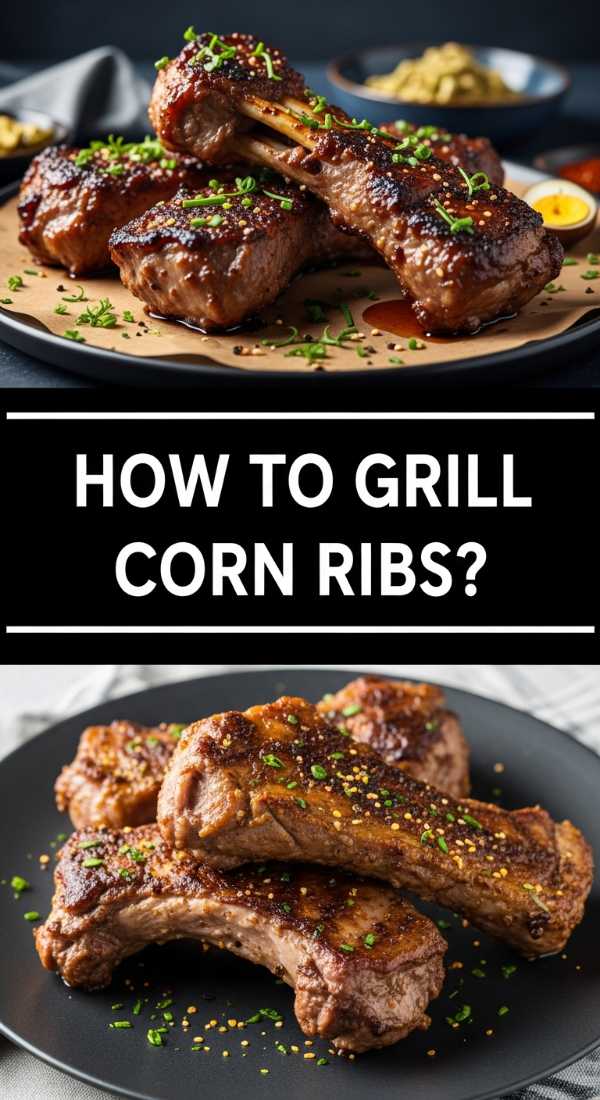
How to grill corn ribs?
Why we love this
Corn ribs are the trendy, snackable stars of any viral food board, offering a playful twist on a summer classic. We love them because the unique ‘rib’ cut creates more surface area for charring, resulting in a smoky, caramelized flavor that is much deeper than standard corn on the cob. The way the corn curls into ‘rib’ shapes when exposed to high heat makes them easy to pick up and eat with your hands. The texture is a perfect balance of crunchy, charred kernels and tender, sweet centers, especially when slathered in a spicy, zesty crema.
Ingredients
- 4 ears of fresh sweet corn, husked
- 3 tbsp olive oil
- 1 tsp smoked paprika
- 1 tsp garlic powder
- 1/2 tsp chili powder
- 1/4 cup cotija cheese, crumbled
- Fresh cilantro and lime wedges
How to make it
- The most important step is the cut. Stand an ear of corn vertically on its flat end on a sturdy cutting board. Using a very sharp chef’s knife, carefully slice the corn in half lengthwise through the center of the cob. Then, slice each half again to create four long strips (ribs). Be very careful and use a rocking motion with the knife.
- In a small bowl, whisk together the olive oil, smoked paprika, garlic powder, chili powder, and salt.
- Brush each corn rib generously with the spiced oil on all sides, ensuring the kernels are well-coated.
- Preheat your grill to medium-high heat (about 400°F). Place the corn ribs on the grates, kernel side down first.
- Grill for about 8-12 minutes, turning occasionally. You want the corn to soften and the cob to curl slightly. Look for deep char marks on the kernels—this is where the flavor lives.
- Remove from the grill and immediately top with crumbled cotija cheese, fresh cilantro, and a squeeze of lime juice while the corn is still piping hot.
How to bake discard crackers?

Why we love this
Sourdough discard crackers are a revelation for anyone who hates food waste and loves a savory, salty crunch. We love these because they possess that characteristic sourdough tang, amplified by dried herbs and sea salt, creating a complex flavor profile that store-bought crackers simply cannot match. They are incredibly thin and shatteringly crisp, providing the perfect structural base for creamy cheeses or dips. Watching them bake into golden-brown squares in the oven is immensely satisfying, especially knowing you’ve turned a kitchen byproduct into a gourmet snack.
Ingredients
- 1 cup sourdough discard (unfed)
- 1 cup all-purpose flour
- 4 tbsp unsalted butter, melted
- 1 tsp sea salt
- 2 tsp dried herbs (like rosemary or ‘Everything Bagel’ seasoning)
- Additional sea salt for topping
How to make it
- In a medium mixing bowl, combine the sourdough discard, flour, melted butter, sea salt, and dried herbs. Mix with a spatula until a smooth, cohesive dough forms. It should feel pliable and slightly oily.
- Divide the dough into two equal portions. Wrap in plastic and chill in the refrigerator for at least 30 minutes. Chilling makes the dough easier to roll out very thin.
- Preheat your oven to 350°F (175°C). Place one portion of dough onto a large sheet of parchment paper.
- Roll the dough out as thin as humanly possible—it should be nearly translucent and cover almost the entire sheet of parchment. If the dough is too thick, the crackers will be chewy instead of crisp.
- Lightly brush the surface with a tiny bit of water or oil and sprinkle with extra sea salt. Use a pizza cutter or a sharp knife to score the dough into 1-inch squares.
- Slide the parchment onto a baking sheet and bake for 15-20 minutes. Rotate the pan halfway through. The crackers are done when they are golden brown all the way to the center. Let them cool completely on the pan to reach maximum crispness.
How to whip garlic butter?
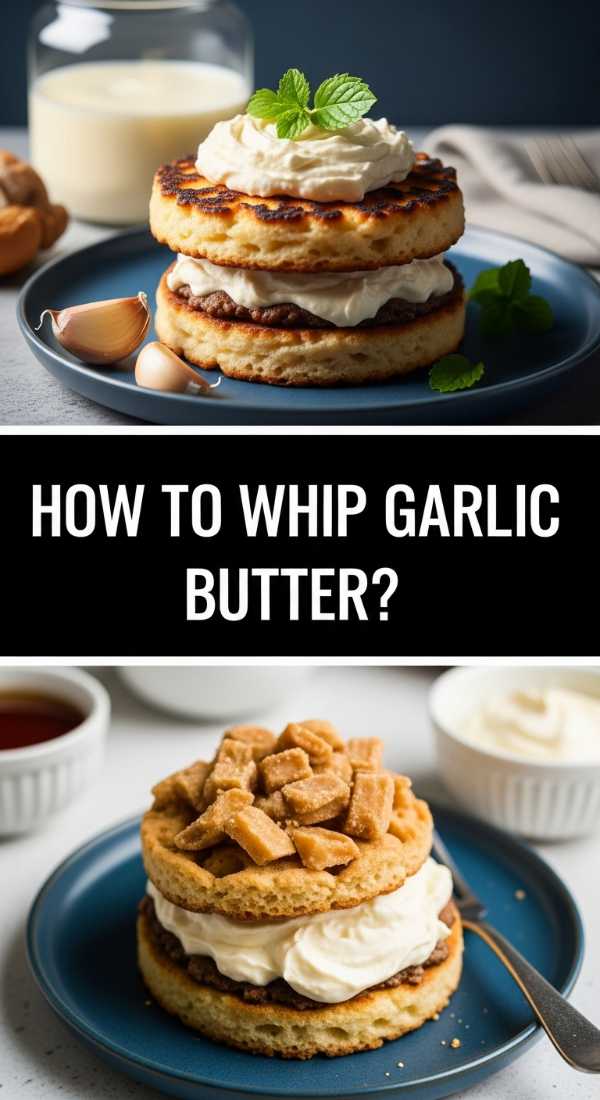
Why we love this
Whipped garlic butter is the unsung hero of the Simple Food Board, acting as the creamy, pungent glue that ties everything together. We love it because the whipping process aerates the butter, giving it a cloud-like, light-as-air texture that melts instantly upon contact with warm bread. The infusion of roasted garlic provides a mellow, sweet depth rather than a harsh bite, making it sophisticated and deeply savory. It looks beautiful swirled into a bowl or spread onto the board, often decorated with microgreens or edible flower petals for that viral aesthetic.
Ingredients
- 1 cup unsalted butter, softened to room temperature
- 1 whole head of garlic
- 1 tbsp olive oil
- 1/2 tsp flaky sea salt
- 1 tbsp fresh chives, minced
How to make it
- Start by roasting the garlic. Preheat your oven to 400°F (200°C). Slice the top off the head of garlic to expose the cloves, drizzle with olive oil, wrap tightly in foil, and bake for 40 minutes until the cloves are golden and soft as paste.
- Squeeze the cooled roasted garlic cloves out of their skins and mash them into a smooth paste using a fork.
- Place the softened butter in the bowl of a stand mixer fitted with the whisk attachment (or use a hand mixer). Whip on medium-high speed for about 3-5 minutes. You are looking for the butter to turn from yellow to a pale ivory color and significantly increase in volume.
- Add the roasted garlic paste and flaky sea salt to the butter.
- Whip for another 1-2 minutes until the garlic is fully incorporated and the mixture is incredibly fluffy.
- Fold in the fresh chives by hand. Transfer to a serving bowl or spread directly onto your food board, finishing with an extra sprinkle of flaky salt.
How to make berry tart?

Why we love this
The berry tart is the crown jewel of any food board, providing a vibrant pop of color and a sophisticated sweet finish. We love the contrast between the crumbly, buttery shortbread crust and the silky, vanilla-flecked pastry cream that hides beneath the fruit. The berries themselves—raspberries, blueberries, and blackberries—provide bursts of fresh, tart juice that balance the sweetness of the custard. It feels like a high-end patisserie dessert, yet it has a rustic charm that invites everyone to break off a piece and enjoy the harvest.
Ingredients
- 1 pre-baked 9-inch tart shell (shortbread style)
- 2 cups whole milk
- 1/2 cup granulated sugar
- 4 egg yolks
- 1/4 cup cornstarch
- 1 tsp vanilla bean paste
- 2 cups mixed fresh berries
- 2 tbsp apricot preserves (for glazing)
How to make it
- To make the pastry cream, whisk the egg yolks, sugar, and cornstarch in a bowl until pale and thick.
- In a saucepan, bring the milk and vanilla bean paste to a bare simmer over medium heat. Slowly pour half of the hot milk into the egg mixture while whisking constantly to ‘temper’ the eggs so they don’t scramble.
- Pour the egg mixture back into the saucepan with the remaining milk. Cook over medium heat, whisking vigorously, until the mixture thickens into a thick pudding. This usually takes 2-3 minutes. Remove from heat and stir in a tablespoon of butter for shine.
- Transfer the cream to a bowl, cover with plastic wrap (touching the surface), and chill for at least 2 hours.
- Once cold, spread the pastry cream evenly into the pre-baked tart shell using an offset spatula.
- Arrange the fresh berries in concentric circles or a rustic heap over the cream. Warm the apricot preserves with a splash of water and lightly brush over the berries to give them a professional, glossy shine.
How to cook pesto pasta?
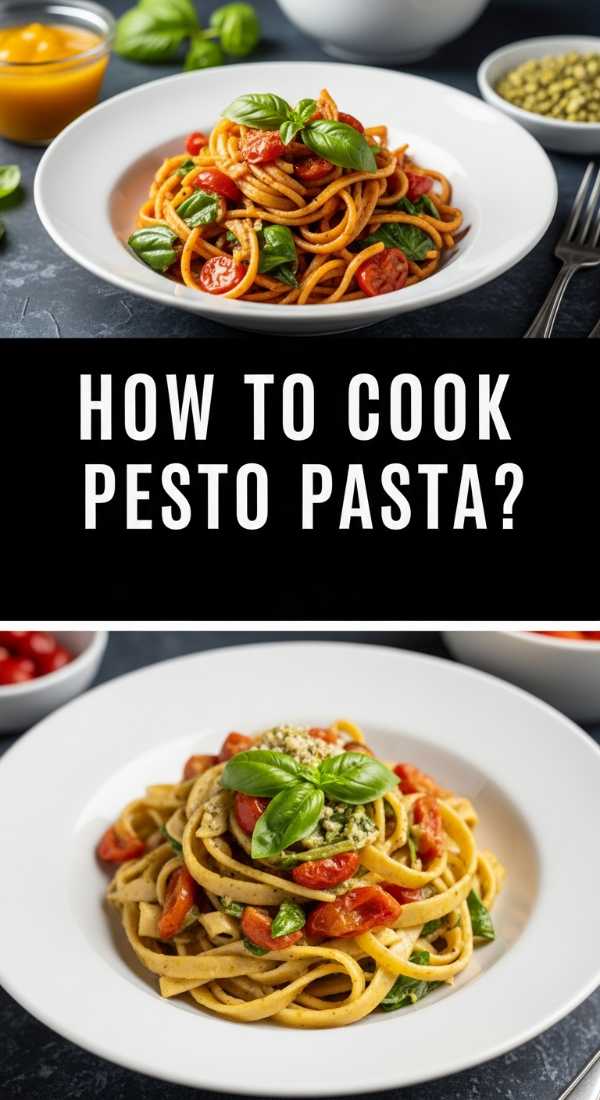
Why we love this
Pesto pasta is a vibrant, herb-forward dish that brings a punch of garden-fresh flavor to the board. We love it for its intense aromatic profile—the smell of fresh basil, toasted pine nuts, and sharp Pecorino Romano is instantly appetizing. The texture is a beautiful mix of the smooth, emulsified oil and the slightly gritty, nutty bits of the pesto that cling to every ridge of the pasta. It’s a dish that feels alive and energetic, providing a bright green visual contrast to the more muted tones of bread and cheeses on the board.
Ingredients
- 1 lb Trofie or Fusilli pasta
- 2 cups fresh basil leaves, packed
- 1/2 cup extra virgin olive oil
- 1/3 cup pine nuts, lightly toasted
- 2 cloves garlic
- 1/2 cup grated Parmesan cheese
- 1/4 cup grated Pecorino Romano
- Salt to taste
How to make it
- Boil your pasta in salted water. For pesto, shapes with twists or ridges like Fusilli or Trofie are best because they ‘trap’ the sauce. Cook until al dente.
- While the pasta cooks, make the pesto. In a food processor, pulse the toasted pine nuts and garlic until finely minced. Add the basil leaves and a pinch of salt.
- Pulse again while slowly drizzling in the olive oil. You want a consistent paste, but try not to over-process, as the heat from the blades can dull the bright green color of the basil.
- Transfer the pesto to a large bowl and stir in the grated cheeses by hand.
- Before draining the pasta, reserve 1/2 cup of the cooking water. Drain the pasta and let it cool for just 60 seconds (adding pesto to screaming hot pasta can cause the basil to turn brown and the cheese to clump).
- Toss the pasta with the pesto, adding a tablespoon of pasta water at a time if needed to loosen the sauce and make it creamy. Serve at room temperature or slightly warm.
How to make potato salad?

Why we love this
This isn’t your grocery store potato salad; this is a bright, textural masterpiece. We love it because it swaps heavy, cloying mayo for a zesty, herb-packed dressing that highlights the natural creaminess of baby potatoes. The addition of crunchy radishes or celery adds a necessary snap, while fresh dill and chives provide an earthy, garden-fresh finish. It’s a hearty, grounding element for the board that feels elevated enough for a fancy lunch but comforting enough for a family picnic.
Ingredients
- 2 lbs baby Yukon Gold potatoes
- 1/4 cup Greek yogurt or high-quality mayo
- 1 tbsp Dijon mustard
- 1 tbsp apple cider vinegar
- 1/2 cup fresh dill, chopped
- 1/4 cup red onion, finely diced
- Salt and cracked black pepper
How to make it
- Place the potatoes in a large pot and cover with cold water by at least an inch. Add a tablespoon of salt. Bring to a boil, then reduce to a simmer. Cook for 10-15 minutes until the potatoes are easily pierced with a fork but not falling apart.
- Drain the potatoes and let them steam-dry in the colander for 5 minutes. While still warm, cut the potatoes into halves or quarters.
- In a small bowl, whisk together the yogurt (or mayo), Dijon mustard, vinegar, salt, and pepper. Adding the dressing while the potatoes are still warm allows them to absorb the flavors more deeply.
- Fold the dressing into the potatoes gently so you don’t mash them.
- Add the chopped dill and red onion.
- Let the salad chill in the refrigerator for at least an hour before serving. This allows the flavors to meld and the starches to set, resulting in a much better texture.
How to bake discard muffins?

Why we love this
Discard muffins are the soft, pillowy answer to your morning sourdough routine. We love these because the sourdough discard adds a subtle tang and incredible moisture that keeps the muffins tender for days. They aren’t overly sweet, making them the perfect vessel for a smear of herb butter or a dollop of berry jam. The tops bake up with a beautiful, craggy dome, and when you pull them apart, the interior is light and airy. They add a wonderful ‘bakery-style’ element to your food board that feels deeply artisanal.
Ingredients
- 1 cup sourdough discard
- 1/2 cup melted butter
- 1 large egg
- 1 tsp vanilla extract
- 2 cups all-purpose flour
- 3/4 cup brown sugar
- 1 tsp baking soda
- 1/2 tsp salt
- 1 cup blueberries or chocolate chips
How to make it
- Preheat your oven to 425°F (220°C). This high initial heat is the secret to getting those tall, ‘mountain-top’ muffin domes.
- In one bowl, whisk together the sourdough discard, melted butter, egg, and vanilla.
- In a larger bowl, sift together the flour, brown sugar, baking soda, and salt.
- Create a well in the center of the dry ingredients and pour in the wet mixture. Fold gently with a spatula just until combined—lumps are okay! Overmixing leads to tough muffins.
- Gently fold in your blueberries or chocolate chips.
- Line a muffin tin and fill the cups all the way to the top. Bake at 425°F for 5 minutes, then, without opening the oven door, lower the temperature to 350°F (175°C) and bake for another 15-18 minutes. This technique creates a professional rise and a moist crumb.
How to make herb butter?
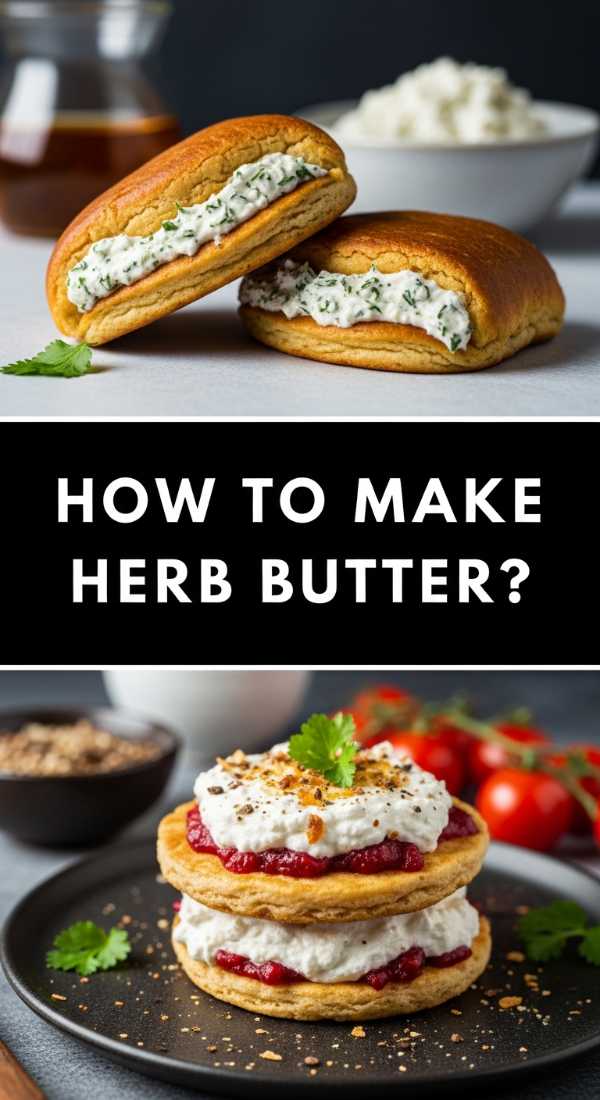
Why we love this
Herb butter is pure elegance in a ramekin. We love it for its simplicity and the way it transforms a basic slice of bread into a gourmet experience. The flecks of green herbs against the rich yellow butter make it look like a piece of art. As it melts over warm muffins or corn ribs, it releases the oils of the thyme, rosemary, and sage, creating a complex, savory aroma that is incredibly inviting. It’s a small detail that makes a massive impact on the overall flavor profile of your Simple Food Board.
Ingredients
- 1 cup high-quality salted butter (European style is best)
- 2 tbsp fresh herbs, finely minced (Parsley, Thyme, and Rosemary)
- 1 tsp lemon zest
- 1/2 tsp flaky sea salt
- A pinch of red pepper flakes (optional)
How to make it
- Ensure your butter is at true room temperature. It should be soft enough that a finger leaves an indentation easily, but it shouldn’t be oily or melting.
- Finely mince your fresh herbs. Removing any woody stems from the thyme and rosemary is essential for a smooth texture.
- In a small bowl, use a sturdy spoon or a flexible spatula to cream the butter until it is smooth and glossy.
- Add the minced herbs, lemon zest, and red pepper flakes. Fold the ingredients into the butter, ensuring the herbs are evenly distributed so every bite is flavorful.
- Place a sheet of plastic wrap or parchment paper on the counter. Spoon the butter onto the paper and roll it into a log shape, twisting the ends like a candy wrapper.
- Refrigerate for at least 2 hours to allow the butter to firm up and the herb flavors to infuse. Slice into clean coins or place the whole log on the board with a dedicated butter knife for a rustic look.
The Art of the Board
Building the Viral Simple Food Board is an exercise in creativity and joy. Once you have prepared these individual components, the fun begins in the assembly. Start with your largest items—the bowls of pasta and the berry tart—and fill in the gaps with the corn ribs, muffins, and crackers. Use the whipped and herb butters as accents, and don’t be afraid to let items touch; the beauty is in the abundance! This board is a celebration of simple ingredients handled with care, and your guests will feel that love in every single bite.
Frequently Asked Questions
Can I make these components in advance? Yes! Most items like the sourdough crackers, herb butter, and potato salad can be made 1-2 days ahead. The pasta and corn ribs are best served fresh, though they can be prepped and cooked just before assembly.
What if I don’t have a sourdough starter for the discard recipes? You can often find sourdough discard at local bakeries, or you can substitute the discard with a mixture of equal parts flour and plain yogurt to mimic the tang and moisture in the muffins and crackers.
How do I keep the board looking fresh for a long party? Keep the berry tart and potato salad in the fridge until the very last moment. If the butter starts to get too soft, you can place the small bowls of butter on a larger plate of ice hidden beneath some decorative linen.