

There is something undeniably magical about a table filled with food that looks just as good as it tastes. We’ve all been there—scrolling through social media, mesmerized by those perfectly curated food boards that seem to tell a story of comfort, celebration, and pure indulgence. But the secret to a truly viral food board isn’t just about the arrangement; it’s about the heart and soul put into every single bite-sized component. It’s about creating a moment where your friends and family lean in, eyes wide, before reaching for that first delicious morsel.
Today, I’m sharing my ultimate guide to creating a food board that will leave your guests speechless and your social feed buzzing. We are moving beyond just cheese and crackers to bring you a collection of warm, savory, and sweet delights that transform a simple board into a full sensory experience. From the sizzle of a perfectly seared salmon to the nostalgic sweetness of homemade peanut butter eggs, these recipes are designed to be the stars of your next gathering. Let’s dive into the kitchen and start crafting some memories!
How to make peanut butter eggs?

Why we love this
These homemade peanut butter eggs are a nostalgic dream come true, offering a much richer and more satisfying experience than anything you’ll find in a store-bought wrapper. Imagine biting through a snap of high-quality dark chocolate to find a dense, creamy, and slightly salty peanut butter center that melts almost instantly on your tongue. The aroma of roasted peanuts combined with the deep, earthy scent of cocoa creates an irresistible fragrance that fills the room, making these the ultimate sweet treat for any festive board or midday craving.
Ingredients
- 1 cup creamy peanut butter
- 1/4 cup salted butter, softened
- 2 cups powdered sugar
- 1 teaspoon vanilla extract
- 2 cups semi-sweet chocolate chips
- 2 tablespoons coconut oil
How to make it
- In a large mixing bowl, combine the softened butter and creamy peanut butter. Use a hand mixer on medium speed for about 2 minutes until the mixture is completely smooth and light in color.
- Gradually sift in the powdered sugar one cup at a time, mixing on low speed to avoid a sugar cloud. Add the vanilla extract and continue mixing until a stiff dough forms. If the dough feels too sticky, add another tablespoon of powdered sugar.
- Line a baking sheet with parchment paper. Take about two tablespoons of dough and shape it into an oval “egg” using your palms. Place the eggs on the sheet and freeze for at least 30 minutes until very firm.
- In a microwave-safe bowl, combine chocolate chips and coconut oil. Heat in 30-second intervals, stirring in between, until the chocolate is silky and glossy.
- Using a fork, dip each chilled peanut butter egg into the chocolate, letting the excess drip off. Return to the parchment paper and refrigerate for 20 minutes until the chocolate shell has completely set with a matte finish.
How to cook perfect garlic salmon?
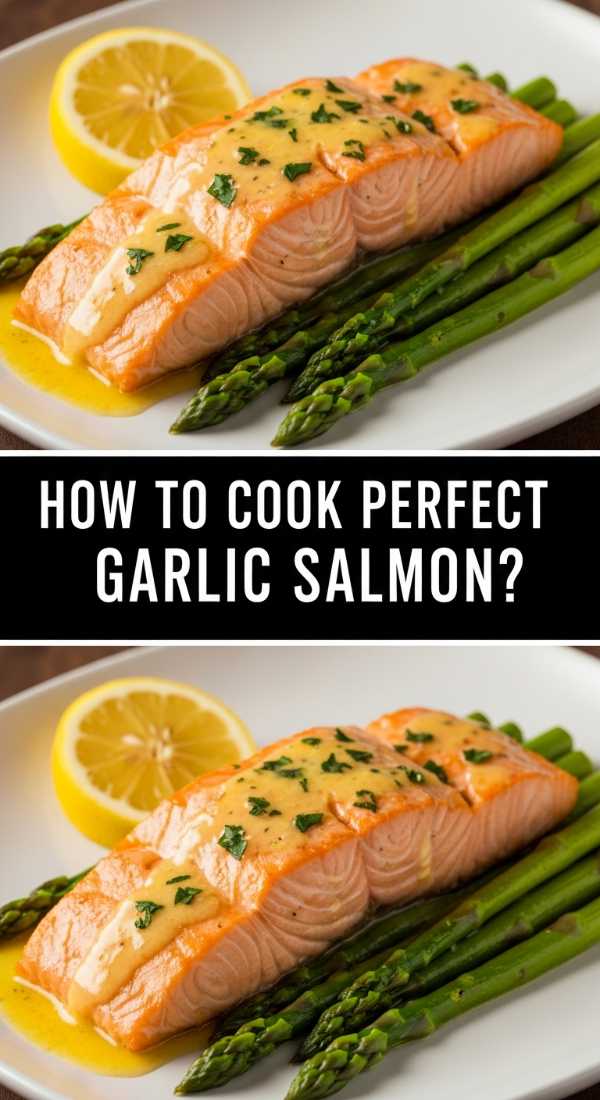
Why we love this
There is nothing quite like the sight of a golden-brown, pan-seared salmon fillet glistening with a garlic-infused butter sauce. This dish brings a sophisticated elegance to your food board, offering a texture that is crisp on the outside while remaining incredibly moist and flaky within. As the garlic toasts in the butter, it releases a savory, pungent aroma that perfectly complements the natural richness of the fish, while a squeeze of fresh lemon adds a bright, citrusy zing that cuts through the fat and awakens your palate.
Ingredients
- 2 large salmon fillets (6 oz each)
- 3 cloves garlic, minced
- 2 tablespoons unsalted butter
- 1 tablespoon olive oil
- Salt and cracked black pepper to taste
- Fresh parsley and lemon wedges
How to make it
- Pat the salmon fillets completely dry with paper towels. This is the most crucial step for achieving a crispy skin and a beautiful sear. Season both sides generously with salt and pepper.
- Heat the olive oil in a non-stick or cast-iron skillet over medium-high heat. You will know the pan is ready when the oil begins to shimmer but isn’t smoking.
- Place the salmon fillets skin-side down (if applicable) or flesh-side down in the hot pan. Press down lightly with a spatula for 10 seconds to ensure even contact. Cook undisturbed for 4-5 minutes until a golden crust forms.
- Carefully flip the fillets. Immediately add the butter and minced garlic to the empty spaces in the pan. As the butter melts and foams, use a spoon to continuously baste the salmon with the garlic butter for another 2-3 minutes.
- Check for doneness by pressing the side of the fish; it should flake easily with a fork and have an internal temperature of 145°F (63°C). Remove from heat, garnish with fresh parsley, and serve with lemon wedges.
How to make savory broccoli stirfry?

Why we love this
A vibrant broccoli stirfry is the perfect way to add a pop of color and a healthy crunch to your viral food board. The broccoli florets act like little sponges, soaking up a complex sauce of soy, ginger, and toasted sesame oil that provides an explosion of umami in every bite. We love the contrast between the tender stalks and the slightly charred, crispy tops of the florets, which carry a faint smoky aroma from the high-heat cooking process. It’s a clean, refreshing, yet deeply savory addition that balances out richer items on the board.
Ingredients
- 1 large head of broccoli, cut into bite-sized florets
- 2 tablespoons soy sauce
- 1 tablespoon sesame oil
- 1 tablespoon minced fresh ginger
- 2 cloves garlic, sliced thin
- 1 teaspoon red pepper flakes (optional)
- Sesame seeds for garnish
How to make it
- Prepare your stirfry sauce by whisking the soy sauce, sesame oil, and red pepper flakes in a small bowl. Set aside so the flavors can meld while you prep the vegetables.
- Heat a large wok or heavy skillet over high heat. Add a splash of neutral oil (like vegetable or grapeseed oil). Once the oil is wispy with smoke, toss in the broccoli florets.
- Stir-fry the broccoli for 3-4 minutes, tossing constantly. You want the edges to char slightly while the color turns a brilliant, deep emerald green. If the pan seems too dry, add a teaspoon of water to create steam.
- Reduce the heat to medium and push the broccoli to the sides. Add the garlic and ginger to the center, stirring for 30 seconds until they become fragrant and golden but not burnt.
- Pour the prepared sauce over the broccoli and toss vigorously for 1 minute to coat every floret. The sauce should thicken slightly and turn glossy. Remove from heat and sprinkle with sesame seeds immediately.
How to cook honey glazed chicken?

Why we love this
Honey glazed chicken is a crowd-pleaser that brings a beautiful, sticky luster and a decadent sweetness to your table. The honey caramelizes over the heat, creating a tacky, amber coating that clings to the juicy chicken, while hints of garlic and soy provide a savory backbone. The aroma is heavenly—a mix of toasted sugar and savory poultry—and the texture offers a delightful pull that makes it perfect for eating with your fingers or a small fork straight from the board.
Ingredients
- 1 lb chicken thighs, cut into bite-sized pieces
- 1/4 cup honey
- 2 tablespoons soy sauce
- 1 tablespoon apple cider vinegar
- 2 cloves garlic, minced
- 1 tablespoon olive oil
- Green onions for garnish
How to make it
- In a bowl, whisk together the honey, soy sauce, apple cider vinegar, and minced garlic to create the glaze.
- Heat the olive oil in a large skillet over medium-high heat. Add the chicken pieces in a single layer, ensuring they aren’t crowded. Sear for 5-6 minutes, turning occasionally, until the chicken is browned on all sides and nearly cooked through.
- Drain any excess fat from the pan, then pour the honey mixture over the chicken. The liquid will immediately begin to bubble and froth.
- Lower the heat to medium and simmer the chicken in the sauce for 3-5 minutes. Stir frequently to ensure the chicken is evenly coated as the sauce reduces into a thick, syrupy glaze that sticks to the meat.
- Once the chicken reaches an internal temperature of 165°F and the glaze is dark and glossy, remove from heat. Garnish with thinly sliced green onions for a fresh bite.
How to make slow cooker stew?
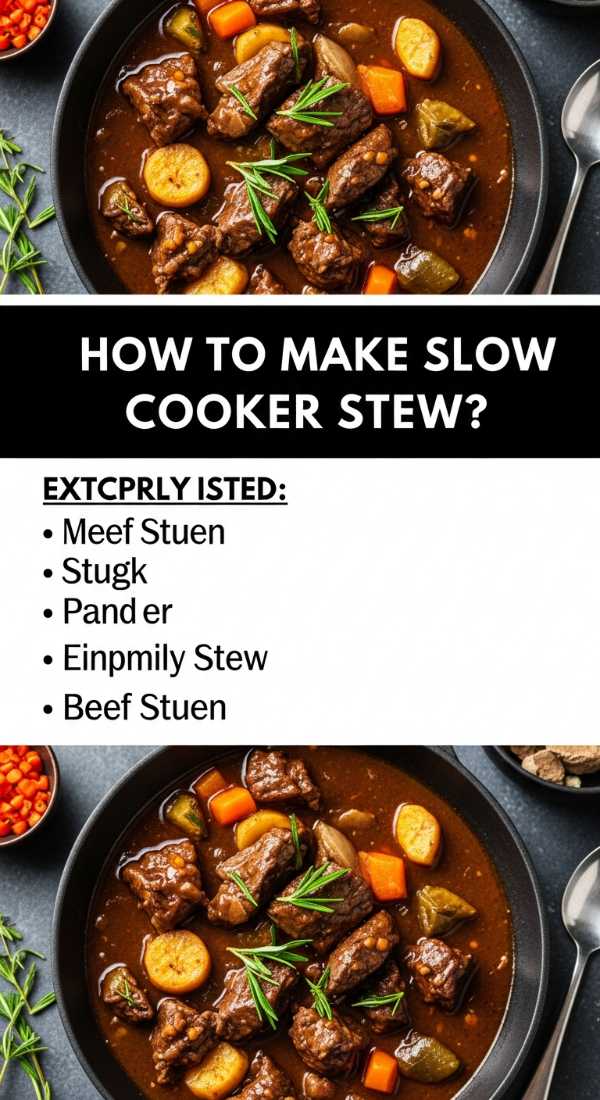
Why we love this
There is nothing more comforting than the deep, earthy aroma of a slow cooker stew that has been simmering for hours. This dish is the epitome of cozy, with melt-in-your-mouth chunks of beef and tender root vegetables bathed in a rich, velvety gravy. The flavors are concentrated and soulful, offering a warmth that radiates from the plate. On a food board, serving small crocks of this stew provides a hearty, rustic element that invites guests to slow down and savor the complex layers of red wine, herbs, and savory broth.
Ingredients
- 2 lbs beef chuck roast, cubed
- 3 carrots, sliced into thick rounds
- 3 potatoes, cubed
- 1 onion, diced
- 2 cups beef broth
- 1/2 cup red wine (optional)
- 2 tablespoons tomato paste
- 2 sprigs fresh rosemary and thyme
How to make it
- For maximum flavor, sear the cubed beef in a hot pan with a little oil before adding it to the slow cooker. Cook until a deep brown crust forms on at least two sides of each piece.
- Place the seared beef, carrots, potatoes, and onion into the slow cooker.
- In a separate bowl, whisk the beef broth, red wine, and tomato paste until smooth. Pour this mixture over the meat and vegetables. The liquid should cover about two-thirds of the ingredients.
- Tuck the fresh herbs into the liquid. Cover and cook on the “Low” setting for 7-8 hours or on “High” for 4-5 hours. You will know it is ready when the beef falls apart easily with the slight pressure of a fork.
- If you prefer a thicker gravy, whisk 1 tablespoon of cornstarch with a little water and stir it into the stew 30 minutes before serving. Discard the woody herb stems before plating.
How to make crispy potato wedges?

Why we love this
Crispy potato wedges are the ultimate comfort food sidekick, offering a satisfying crunch that gives way to a fluffy, cloud-like interior. These wedges are seasoned to perfection with a blend of smoky paprika and savory herbs, creating a golden-red hue that looks stunning against other board components. The scent of roasting potatoes and garlic salt is universally beloved, making these an instant hit. They serve as the perfect vessel for dipping into aiolis or sauces, adding a much-needed structural and salty element to your spread.
Ingredients
- 4 large russet potatoes, cut into wedges
- 3 tablespoons olive oil
- 1 teaspoon smoked paprika
- 1 teaspoon garlic powder
- 1/2 teaspoon onion powder
- 1 teaspoon sea salt
- 1/2 teaspoon black pepper
How to make it
- Preheat your oven to 425°F (220°C). This high temperature is essential for achieving the crispy exterior without overcooking the inside.
- Place the potato wedges in a large bowl of cold water for 10 minutes to remove excess starch. Drain and pat them extremely dry with a clean kitchen towel.
- In a large bowl, toss the dry wedges with olive oil, paprika, garlic powder, onion powder, salt, and pepper. Ensure every wedge is thoroughly and evenly coated in the oil and spices.
- Arrange the wedges on a parchment-lined baking sheet in a single layer, ensuring they do not touch. Space is key to allowing the hot air to circulate and crisp the edges.
- Bake for 30-35 minutes, flipping the wedges halfway through the cooking time. They are done when they are deeply golden brown and the skins appear blistered and crisp.
How to bake soft chocolate cookies?

Why we love this
A soft, chewy chocolate chip cookie is a universal love language. These cookies are the perfect sweet finish for your board, featuring a delicate balance of buttery dough and molten pools of dark chocolate. The edges are just barely crisp, while the centers remain soft and doughy, releasing a warm vanilla and brown sugar aroma that is simply intoxicating. Adding a tiny pinch of flaky sea salt on top elevates the chocolate flavor, making these cookies feel like a high-end bakery treat made right in your own kitchen.
Ingredients
- 1/2 cup softened butter
- 1/2 cup brown sugar, packed
- 1/4 cup white sugar
- 1 large egg
- 1 teaspoon vanilla extract
- 1.5 cups all-purpose flour
- 1/2 teaspoon baking soda
- 1 cup semi-sweet chocolate chips
- Flaky sea salt for topping
How to make it
- Preheat your oven to 350°F (175°C). In a large bowl, cream together the softened butter, brown sugar, and white sugar until the mixture is pale and fluffy, which usually takes about 3 minutes of vigorous mixing.
- Beat in the egg and vanilla extract until fully incorporated and the batter looks smooth.
- In a separate bowl, whisk together the flour and baking soda. Gradually add the dry ingredients to the wet ingredients, mixing just until no streaks of flour remain. Do not overmix, as this will make the cookies tough.
- Fold in the chocolate chips by hand using a spatula. Use a cookie scoop to form balls of dough and place them 2 inches apart on a baking sheet.
- Bake for 9-11 minutes. The key is to remove them when the edges are just starting to turn golden but the centers still look slightly underdone and soft. They will firm up as they cool on the pan. Sprinkle with flaky salt immediately upon removal.
How to make creamy alfredo pasta?

Why we love this
Indulgent and velvety, creamy alfredo pasta is the definition of a luxury comfort dish. The sauce is a masterpiece of simplicity, combining high-quality parmesan cheese and heavy cream into a smooth, pearlescent coating that hugs every strand of pasta. The aroma of melting cheese and hints of nutmeg or garlic creates an inviting atmosphere, while the rich, buttery mouthfeel provides a satisfying contrast to the more acidic or spicy items on your food board. It’s a decadent inclusion that feels both timeless and trendy.
Ingredients
- 8 oz fettuccine pasta
- 1/2 cup unsalted butter
- 1 cup heavy cream
- 1.5 cups freshly grated Parmesan cheese
- 2 cloves garlic, minced
- Salt and pepper to taste
- Pinch of ground nutmeg
How to make it
- Bring a large pot of salted water to a rolling boil. Add the fettuccine and cook according to package directions until “al dente.” Reserve 1/2 cup of the starchy pasta water before draining.
- While the pasta cooks, melt the butter in a large skillet over medium-low heat. Add the minced garlic and sauté for 1 minute until fragrant but not browned.
- Pour in the heavy cream and bring to a very gentle simmer. Do not let it boil vigorously, or the cream may separate. Let it simmer for 3-4 minutes until slightly thickened.
- Whisk in the grated Parmesan cheese one handful at a time, stirring constantly until the cheese is completely melted and the sauce is silk-smooth. Season with salt, pepper, and a pinch of nutmeg.
- Toss the cooked pasta into the sauce. If the sauce is too thick, add a tablespoon of the reserved pasta water at a time until you reach your desired creamy consistency. Serve immediately while hot and glossy.
How to cook juicy smash burgers?

Why we love this
Smash burgers are all about the Maillard reaction—that incredible, savory crust that forms when beef is pressed hard against a searing hot griddle. These burgers are thin, juicy, and packed with an intense beefy flavor that stands up to any topping. The sight of lacey, charred edges and melted cheese cascading down the sides is a visual masterpiece for any food board. Each bite offers a perfect ratio of crisp exterior to tender interior, accompanied by the nostalgic scent of a classic American diner.
Ingredients
- 1 lb ground beef (80/20 fat ratio is best)
- 4 slices American cheese
- 4 brioche buns
- Salt and heavy black pepper
- 1 tablespoon butter
- Thinly sliced onions (optional)
How to make it
- Divide your ground beef into four equal portions and lightly roll them into balls. Do not overwork the meat or pack it tightly; you want it to stay loose.
- Heat a cast-iron skillet or flat-top griddle over high heat until it is screaming hot. Lightly butter the brioche buns and toast them on the griddle until golden, then set aside.
- Place the meat balls onto the hot, dry skillet. Using a heavy-duty spatula (and a second tool to press down if needed), smash the balls down as flat as possible. They should be very thin with jagged edges.
- Season the patties generously with salt and pepper while they sear. Cook for 2 minutes without moving them to develop a deep, dark crust.
- Flip the patties. Immediately place a slice of cheese on each. Cook for only 1 more minute until the cheese is gooey and melted. Stack two patties together for a double smash and place them on your toasted buns.
How to make fresh berry tart?

Why we love this
A fresh berry tart is a stunning centerpiece that brings a bright, fruity finish to your viral food board. The crisp, buttery shortbread crust provides a sturdy base for a light-as-air vanilla pastry cream that is both sweet and sophisticated. Topped with a colorful mosaic of glistening raspberries, blueberries, and strawberries, it looks like a work of art. Each bite is a refreshing explosion of natural sweetness and tartness, making it the perfect palate cleanser after a series of savory treats.
Ingredients
- 1 pre-baked 9-inch tart shell
- 1 cup heavy cream, whipped
- 1 cup vanilla pudding or pastry cream
- 2 cups mixed fresh berries (strawberries, blueberries, raspberries)
- 1/4 cup apricot jam (for glaze)
- Fresh mint for garnish
How to make it
- In a medium bowl, gently fold together the prepared vanilla pastry cream (or thick pudding) and the whipped heavy cream. This creates a “diplomat cream” that is lighter and fluffier than standard custard.
- Spread the cream mixture evenly into the bottom of your cooled, pre-baked tart shell using an offset spatula. Ensure the surface is smooth.
- Arrange your fresh berries on top of the cream. You can create concentric circles or a rustic, piled-high look. For a professional touch, slice the strawberries into thin fans.
- In a small microwave-safe bowl, heat the apricot jam with a teaspoon of water for 20 seconds. Strain the mixture to remove any fruit chunks.
- Using a pastry brush, gently dab the warm jam glaze over the berries. This gives them a beautiful, viral-worthy shine and keeps them looking fresh for hours. Garnish with mint leaves and chill for 1 hour before serving.
Conclusion
Crafting a viral-worthy food board is truly an art form that balances flavor, texture, and visual appeal. By combining these diverse recipes—from the savory crunch of garlic salmon to the sweet decadence of a berry tart—you create a landscape of food that invites exploration and conversation. Remember, the best boards are the ones shared with people you love. So, grab your biggest platter, fire up the stove, and let your creativity run wild!