

Aesthetic Alchemy: Turning Everyday Spaces into DIY Dreams
There is something truly soul-stirring about the way light dances through a freshly styled room or the scent of lavender catching the breeze on a refurbished porch. We often spend our lives waiting for the ‘perfect’ home, not realizing that the magic is already right there, hidden beneath a layer of dust or tucked away in an overlooked corner. Aesthetic alchemy isn’t about expensive renovations; it’s about the intention we pour into our surroundings to make them reflect the softness and beauty of our inner worlds.
In this guide, I’m sharing my favorite ways to transform the mundane into the extraordinary. Whether it’s a tiny balcony or a sprawling backyard, these projects are designed to nourish your creative spirit and turn your home into a sanctuary. Let’s roll up our sleeves and start creating the dream life we deserve, one DIY project at a time.
How to Elevate Your Outdoor Path for Magical Evenings

Why we love this
Imagine walking through your garden as the sun dips below the horizon, guided by the soft, warm glow of a path that feels like a portal to a fairy tale. The tactile crunch of fine pea gravel underfoot, the cool touch of smooth river stones, and the gentle flicker of solar lanterns create a sensory experience that grounds you after a long day. It’s about more than just lighting; it’s about creating a rhythmic journey through your outdoor space that invites you to linger and breathe in the evening air.
Essential Elements:
- Fine pea gravel or crushed limestone
- Natural flagstones or slate tiles
- Low-voltage solar lanterns (warm white)
- Landscaping fabric
- Steel or plastic edging
How to make it
- Mark your path using a garden hose to create organic, flowing curves. Avoid harsh straight lines for a more whimsical feel.
- Excavate the area to a depth of about 3 inches, ensuring the ground is level. Use a hand tamper to pack the soil until it is firm and resists sinking.
- Lay down heavy-duty landscaping fabric to prevent weeds, securing it with U-shaped pins every 12 inches to ensure a taut surface.
- Install your edging along the perimeter to keep your gravel contained. Use a rubber mallet to drive the stakes so you don’t dent the metal.
- Spread a 1-inch layer of leveling sand, then place your flagstones. Walk on them to ‘set’ them into the sand; if they wobble, add more sand beneath the low corners.
- Pour the pea gravel around the stones. Use a metal rake to distribute it evenly, ensuring it sits about half an inch below the top of your flagstones to prevent spillover.
- Space your solar lanterns every 3-4 feet. Pro-tip: Angle the lights slightly toward the path center to minimize light pollution and maximize the ‘glow’ effect.
How to Refresh Your Bedroom for a Floral Spring Feeling

Why we love this
The bedroom should be a soft landing pad, and nothing says ‘renewal’ like a spring floral refresh. The aroma of dried eucalyptus and fresh peonies fills the room with a crisp, botanical energy that instantly boosts your mood upon waking. By mixing textures like breathable linen and smooth sateen with delicate floral prints, you create a visual garden that feels lush and alive, yet remains a quiet, peaceful retreat for the mind.
Essential Elements:
- Linen duvet cover in a neutral tone
- Floral-patterned throw pillows and shams
- Fresh or high-quality silk botanical arrangements
- Aromatherapy diffuser with floral essential oils
- Woven rattan accents
How to make it
- Strip your bed entirely and rotate your mattress to ensure even wear. Use a high-suction vacuum to remove any dust from the surface.
- Launder your linens with a gentle, plant-based detergent. Add a half-cup of baking soda to the wash to brighten the whites without harsh chemicals.
- Layer your bed starting with a crisp fitted sheet. Pull the flat sheet tight and use ‘hospital corners’ for a professional, hotel-like finish.
- Add the linen duvet. For that ‘viral blogger’ fluffiness, use two down-alternative inserts inside a single cover.
- Arrange pillows by size: large euro shams in the back, standard pillows in the middle, and small floral accents in the front.
- Place a vase of fresh tulips or peonies on the nightstand. Trim the stems at a 45-degree angle under running water to ensure maximum hydration and longevity.
- Set your diffuser to a cycle of 30 minutes on/30 minutes off with jasmine and lemon oils to mimic the scent of a spring morning.
How to Design a Dreamy Glamping Spot for Tropical Vibes

Why we love this
You don’t need a plane ticket to find paradise when you can build a tropical escape in your own backyard. This setup is all about the juxtaposition of rugged outdoor life and luxurious comfort. Think the soft rustle of bamboo screens, the swaying of a hammock, and the ambient warmth of string lights reflecting off glass lanterns. It creates an atmosphere of ‘island time’ where the clock disappears and the only thing that matters is the cool breeze and a cold drink.
Essential Elements:
- Bell tent or large canvas canopy
- Jute or seagrass rugs
- Inflatable mattress with a memory foam topper
- Bamboo privacy screens
- Outdoor-rated string lights
How to make it
- Select a level, high-ground spot in your yard to avoid water pooling. Lay a heavy-duty tarp slightly smaller than your tent’s footprint to protect the base.
- Pitch your tent, ensuring the tension on the guy lines is even. If using a canopy, secure it with weighted sandbags hidden in decorative baskets.
- Layer the interior floor with jute rugs. Jute provides a durable, sandy-textured feel that is perfect for the tropical aesthetic.
- Set up your bed using a high-profile air mattress. Cover it with a memory foam topper and bamboo-fiber sheets for temperature regulation.
- Place bamboo screens around the entrance to create a ‘foyer’ feel and provide privacy from neighbors.
- String warm globe lights along the roofline. Use zip ties to keep them taut and prevent them from sagging in the heat.
- Style the ‘deck’ area with a low wooden pallet table, floor cushions, and a large monstera plant in a ceramic pot for that final lush touch.
How to Style a Garden Dinner for Enchanting Gatherings

Why we love this
Dining alfresco under a canopy of trees is the height of aesthetic living. The clink of vintage glassware, the flicker of tapered candles in the twilight, and the abundance of fresh herbs scattered across the table create a sensory feast before the food even arrives. It’s an enchanting way to celebrate the season, turning a simple meal into a choreographed dance of light, shadow, and connection that your guests will talk about for years.
Essential Elements:
- Rustic wooden table or linen-covered folding table
- Taper candles in mismatched brass holders
- Vintage stoneware plates
- Fresh herbs (rosemary, thyme) for garnishing
- Hanging lantern jars
How to make it
- Position your table under a low-hanging branch if possible. This allows you to hang lanterns directly above the diners.
- Lay a sheer cheesecloth runner down the center, allowing it to bunch and drape naturally for a relaxed, ‘lived-in’ texture.
- Place your candle holders at varying heights. Ensure candles are unscented so they don’t compete with the aroma of the food.
- Set the table with stoneware. Tip: Chill your plates in the fridge for 20 minutes before serving if it’s a hot night to keep the appetizers crisp.
- Create ‘living’ centerpieces by placing potted herbs in terracotta pots along the runner. These can be gifted to guests later.
- Light the candles 10 minutes before guests arrive to allow the wax to begin its aesthetic ‘drip’ and the flames to stabilize.
- Use battery-operated tea lights in hanging jars for the branches above to provide a safe, constant source of overhead ‘starlight.’
How to Boost Curb Appeal for a Welcoming Entryway

Why we love this
Your front door is the handshake of your home. A curated entryway says ‘welcome’ before you even open the door, providing a sense of pride every time you pull into the driveway. We love the crisp contrast of a freshly painted door against seasonal greenery and the sophisticated touch of polished brass hardware. It’s a small-scale project that yields high-impact emotional rewards, making your daily homecoming feel like an arrival at a boutique hotel.
Essential Elements:
- High-gloss exterior door paint
- Modern or vintage brass house numbers
- Large matching ceramic planters
- Seasonal wreath
- Sisal welcome mat
How to make it
- Clean the door thoroughly with TSP (trisodium phosphate) to remove all grease and grime. Lightly sand the surface with 220-grit sandpaper for paint adhesion.
- Apply a high-quality exterior primer. Once dry, apply your gloss paint in thin, even coats using a high-density foam roller to avoid brush marks.
- Wait at least 6 hours between coats. Visual cue: The paint should look uniform and no longer feel tacky to the touch before re-coating.
- Swap out old hardware for brass or matte black finishes. Ensure you pre-drill holes for house numbers to prevent the wood from splitting.
- Flank the door with two large planters. Fill them with a ‘thriller, filler, and spiller’ combination: a tall grass, colorful flowers, and trailing ivy.
- Layer a small patterned outdoor rug under your sisal welcome mat to add depth and a ‘designer’ touch to the floor.
- Clean your porch lights and replace bulbs with ‘soft white’ LEDs (2700K) to ensure a warm, inviting glow at night.
How to Create a Backyard Oasis for Ultimate Summer Refreshment
Why we love this
When the summer heat becomes oppressive, having a private oasis is a necessity for the soul. The sound of trickling water, the shade of an umbrella, and the plushness of outdoor loungers transform a standard yard into a luxury spa. We love the feeling of cool water on the skin and the visual serenity of blue and white textiles, which mimic the colors of the ocean and sky, instantly lowering your heart rate and inviting deep relaxation.
Essential Elements:
- Portable stock tank pool or water feature
- Cantilever umbrella
- Striped outdoor lounge cushions
- Outdoor speakers for ambient sound
- Mist cooling system
How to make it
- Clear a flat area for your stock tank. If using a pool, ensure the ground is perfectly level using a 4-foot level tool to prevent uneven water pressure.
- Treat the water with a simple chlorine floater and scrub the interior weekly to maintain that crystal-clear ‘oasis’ look.
- Position a cantilever umbrella to provide shade over the water. Ensure the base is weighted with at least 50 lbs to prevent wind uplift.
- Arrange lounge chairs facing away from the house to create a sense of ‘getting away.’ Use cushions with high-UV resistance ratings.
- Install a DIY misting kit along your fence or umbrella ribs. Connect it to a standard hose; the evaporation will drop the temperature by 15 degrees.
- Conceal any pumps or hoses behind decorative lattice panels or tall potted ferns.
- Set up a dedicated ‘refreshment station’ nearby with an insulated cooler filled with cucumber-infused water and chilled towels.
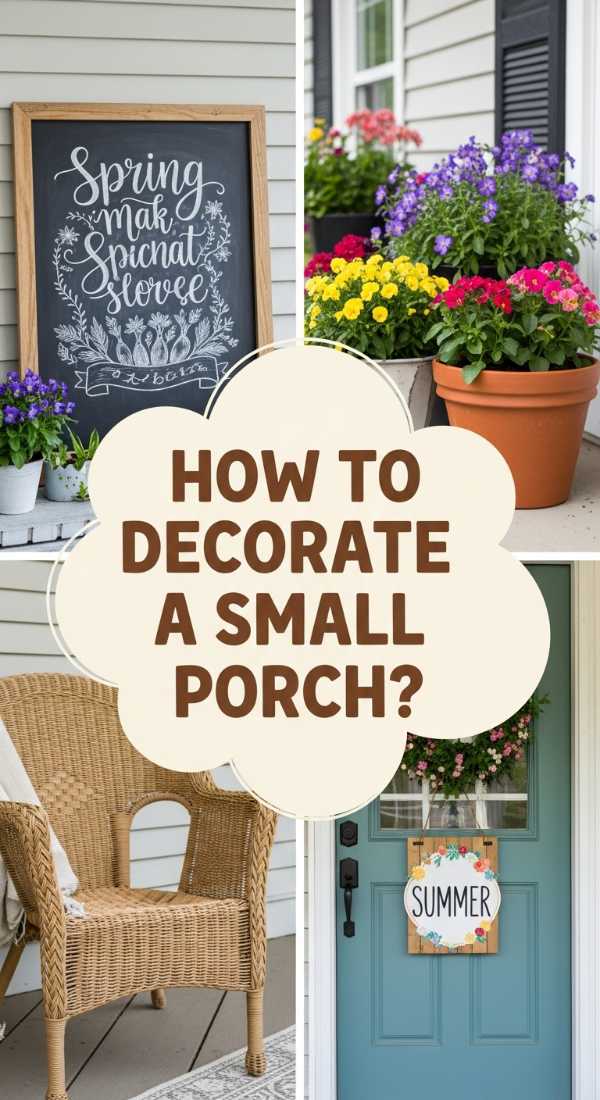
How to Decorate a Small Porch for Seasonal Charm

Why we love this
Small porches are often the most charming because they force you to be intentional with every square inch. By utilizing vertical space and soft layers, you can turn a tiny concrete slab into a cozy nook. The smell of cedar mulch and the softness of a knitted throw over a bistro chair create a cocoon-like feeling. It’s the perfect spot for a morning coffee, watching the world wake up while you stay tucked away in your own little aesthetic bubble.
Essential Elements:
- Folding bistro set (wood or wrought iron)
- Vertical wall planters
- Outdoor string lights (small bulbs)
- All-weather throw blanket
- Small outdoor rug
How to make it
- Start by clearing everything off the porch. Scrub the floor with a stiff brush and soapy water to create a clean slate.
- Lay down a rug that covers most of the floor area. This acts as an ‘anchor’ for your furniture and makes the space feel like an indoor room.
- Choose a folding bistro set; the slim profile is essential for keeping the walkway clear while providing a functional seating area.
- Install vertical planters on the walls. This draws the eye upward, making the small space feel taller and more expansive.
- Wrap string lights around the porch railing rather than hanging them overhead to keep the light at eye level for a cozier atmosphere.
- Add a weather-resistant cushion to the chairs. Tip: Store the throw blanket in a small decorative basket near the door so it stays dry but accessible.
- Place one ‘statement’ pot in the corner with a seasonal plant (like mums for fall or ferns for summer) to provide a focal point.
How to Build a Stylish Farmstead for Happy Garden Pets

Why we love this
The ‘homestead’ aesthetic is all about bringing functionality and beauty together for your feathered or furry friends. A stylish coop or hutch shouldn’t be an eyesore; it should be a miniature version of your own home. We love the sight of happy chickens pecking at fresh herbs in a beautifully painted run, and the rustic charm of galvanized metal accents. It turns pet care into a lifestyle choice that feels wholesome, grounded, and incredibly rewarding.
Essential Elements:
- Pre-built or DIY wooden coop/hutch
- Cedar shingles for roofing
- Non-toxic exterior paint (pastel or farmhouse white)
- Hardware cloth (not chicken wire) for safety
- Window boxes for the coop
How to make it
- Elevate the coop at least 12 inches off the ground using cinder blocks or wooden stilts to prevent moisture and predators.
- Paint the exterior with a low-VOC, animal-safe paint. Choose a color that complements your main house to create a cohesive look.
- Replace standard chicken wire with 1/4-inch hardware cloth. Use a heavy-duty staple gun every 2 inches to ensure it is predator-proof.
- Add a cedar shingle roof. Start from the bottom and overlap each row by 2 inches, securing with galvanized roofing nails.
- Install a small window box under the coop window and plant ‘chicken-safe’ herbs like oregano and marigold, which act as natural pests repellents.
- Inside the nesting boxes, use hemp bedding or pine shavings. Tip: Sprinkle dried lavender in the bedding to keep the area smelling fresh.
- Create a ‘run’ area with a gravel base for easy cleaning, and border it with white picket fencing for that classic farmstead aesthetic.
How to Organize a Serene Home Office for Maximum Focus

Why we love this
A cluttered desk is a cluttered mind. Creating a serene home office is about curating a space that fosters flow and creativity. The cool, smooth surface of a clean desk, the organized rows of linen-covered boxes, and the presence of greenery create a ‘sanctuary of productivity.’ We love how a well-organized office removes the friction from starting your workday, allowing you to dive into your tasks with a sense of calm and clarity that only comes from a balanced environment.
Essential Elements:
- Minimalist desk with cable management
- Ergonomic chair with a soft textile finish
- Desk lamp with adjustable color temperature
- Ceramic cord organizers
- Floating wooden shelves
How to make it
- Clear your desk completely. Only return items that you use daily. Everything else goes into closed storage to minimize visual noise.
- Implement a ‘one-cable’ rule. Use a cable management box under the desk to hide power strips and excess cord lengths.
- Set your desk lamp to a ‘cool white’ (4000K) during work hours to mimic daylight and keep you alert.
- Arrange floating shelves at eye level when standing. Use these for inspiring books and a few choice aesthetic objects, like a small brass clock.
- Add a ‘breath of life’ with a low-maintenance plant like a snake plant or pothos. These improve air quality and provide a visual break for your eyes.
- Use linen or felt storage bins on your shelves to hide unsightly paperwork and office supplies.
- Place an essential oil roller with peppermint or rosemary on your desk for a quick sensory ‘reset’ during intense working blocks.
How to Upgrade Your Patio for the Best Family Cookouts
[IMAGE_10]
Why we love this
The patio is the heart of the home during the summer months. It’s where stories are shared over the grill and laughter echoes late into the night. We love the transformation of a plain concrete pad into a multi-functional ‘outdoor room’ with zones for cooking, dining, and lounging. The warmth of a fire pit, the smell of charred cedar planks, and the comfort of oversized pillows make every family cookout feel like a special event rather than just a meal.
Essential Elements:
- Large outdoor area rug
- Propane or wood-burning fire pit
- Outdoor prep station/rolling cart
- Weatherproof string lights (shatterproof)
- Oversized floor cushions
How to make it
- Define your ‘zones’ using rugs. Place a large rug under the dining table and a smaller, circular one around the fire pit area.
- Set up a rolling prep station near the grill. This prevents the cook from being isolated from the family and keeps all tools within arm’s reach.
- Hang string lights in a ‘zig-zag’ pattern across the entire patio. Use guide wires (stainless steel cable) to prevent the lights from sagging over time.
- Center your seating around the fire pit. Ensure there is at least 3 feet of clearance around the pit for safety and ease of movement.
- Upgrade your grill area with a magnetic tool holder and a dedicated ‘spice rack’ for outdoor-use rubs and sauces.
- Add ‘softness’ to the hard patio surfaces with outdoor-rated floor cushions and several light cotton throws for when the temperature drops.
- Visual cue for the fire pit: If using wood, wait until the flames have died down and the coals are glowing orange before starting to roast marshmallows for the perfect golden-brown finish.
Conclusion
Creating an aesthetic home isn’t about perfection; it’s about the joy of the process. Each of these projects is an opportunity to slow down, work with your hands, and infuse your personality into the spaces where your life unfolds. Remember, the ‘alchemy’ happens when you combine a little bit of effort with a lot of love. I can’t wait to see how you transform your everyday spaces into the DIY dreams you’ve always imagined. Happy creating!