

We’ve all been there—curled up on the sofa, mindlessly scrolling through our feeds, when suddenly a gorgeous backyard transformation or a perfectly styled porch makes us stop dead in our tracks. There is something so deeply satisfying about seeing a space go from ‘meh’ to ‘masterpiece’ with just a bit of elbow grease and a creative spark. It’s not just about the aesthetics; it’s about that rush of pride when you step outside and realize you created a sanctuary with your own two hands.
Lately, my feed has been exploding with these genius DIYs that look like they cost a fortune but are surprisingly doable for us weekend warriors. Whether you have a sprawling lawn or a tiny balcony, these projects are designed to elevate your lifestyle and give your home that ‘viral’ designer edge. I’ve rounded up the best of the best—the ones that are actually worth the effort and will have your neighbors asking for your decorator’s number. Let’s dive into these home and garden projects that are taking social media by storm!
How to Design Dreamy Landscaping Ideas for a High End Garden

Why we love this
There is an undeniable sense of tranquility that comes with a garden that feels intentionally curated and lush. We love this high-end approach because it moves away from the ‘haphazard’ look and embraces the structured elegance of a boutique hotel courtyard. Imagine the scent of boxwood after a light rain, the crisp visual line of perfectly manicured edges, and the soft glow of uplighting against architectural foliage. It creates a multi-sensory retreat where the air feels cooler and the world feels a little bit quieter and more sophisticated.
Essential Elements:
- Evergreen shrubs (Boxwoods or Yews)
- Hardscape materials (Flagstone or Pea gravel)
- Statement lighting (Low-voltage LED path lights)
- Focal point trees (Japanese Maple or Magnolia)
- Professional-grade steel edging
How to make it
- Begin by sketching a site map of your yard to identify natural focal points and sightlines from your windows. A high-end look relies on symmetry and intentional paths that guide the eye.
- Clear all existing weeds and debris, then install professional-grade steel or aluminum edging to create sharp, crisp borders between your planting beds and the lawn. This ‘clean line’ is the hallmark of luxury landscaping.
- Select a limited color palette of plants—stick to 3-4 species—to avoid a cluttered look. Plant in ‘drifts’ or groups of three to five for a more impactful, designer-level visual density.
- Incorporate layers of height by placing taller specimen trees in the back, mid-sized flowering shrubs in the middle, and ground covers or crisp mulch at the front. Ensure the soil is amended with organic compost to give plants that deep, vibrant green glow.
- Install subtle, warm-toned uplighting at the base of your focal trees. Angle the lights at roughly 45 degrees to highlight the texture of the bark and the structure of the branches without creating harsh glares.
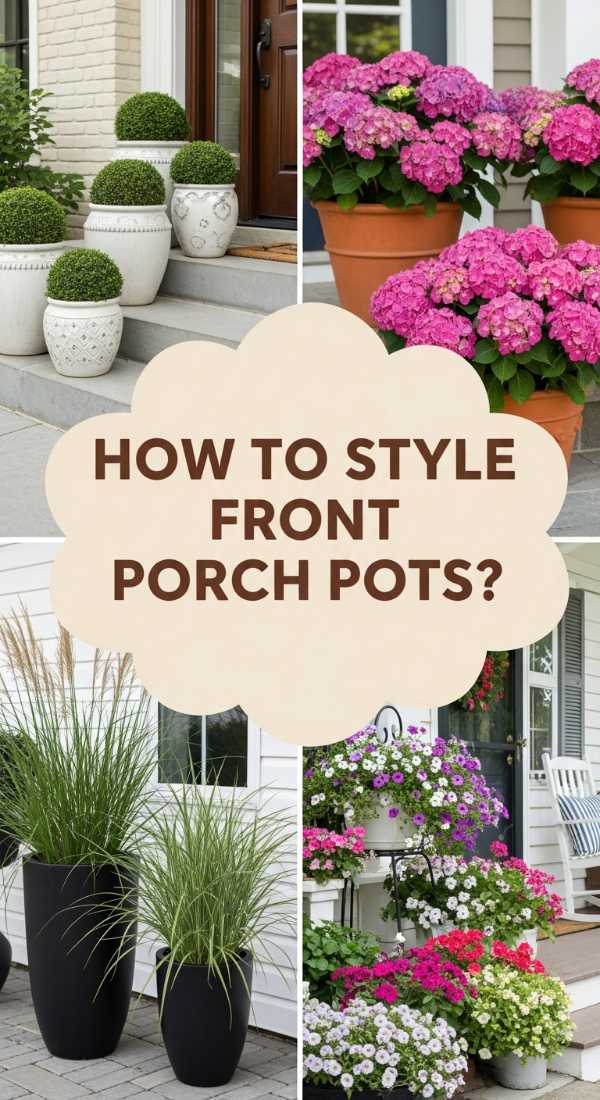
How to Style Front Porch Flower Pots for a Grand Entrance
Why we love this
Your front porch is the ‘handshake’ of your home, and nothing says ‘welcome’ quite like a pair of overflowing, vibrant containers. We adore this DIY because it’s an instant gratification project that adds incredible curb appeal in a single afternoon. The fragrance of petunias and the tactile soft fuzz of dusty miller leaves create a welcoming atmosphere that greets you every time you walk through the door. It’s about creating a lush, living greeting that reflects your personal style before a guest even steps inside.
Essential Elements:
- Large, high-quality planters (ceramic or composite)
- Thriller plants (Dracaena, Canna Lily, or Ornamental Grass)
- Filler plants (Geraniums, Petunias, or Lantana)
- Spiller plants (Sweet Potato Vine or Ivy)
- Slow-release fertilizer beads
How to make it
- Choose oversized pots that are proportional to your front door; small pots often get lost in the architecture. Ensure they have drainage holes, or drill them yourself using a masonry bit.
- Fill the bottom third of large pots with crushed plastic bottles or perlite to keep them lightweight, then fill the remainder with high-quality, well-draining potting mix.
- Apply the ‘Thriller, Filler, Spiller’ technique. Place your ‘Thriller’ (the tallest plant) in the center or back-center of the pot. This creates the vertical drama and focal point.
- Surround the thriller with your ‘Fillers’—rounded, mounding plants that hide the soil and provide the bulk of the color. Pack them in tightly; for a ‘viral’ look, you want the pot to look full from day one.
- Plant your ‘Spillers’ along the very edge of the pot, angling them slightly outward so they can cascade down the sides. Water deeply until liquid runs out the bottom, and top with a layer of moss for a polished, professional finish.
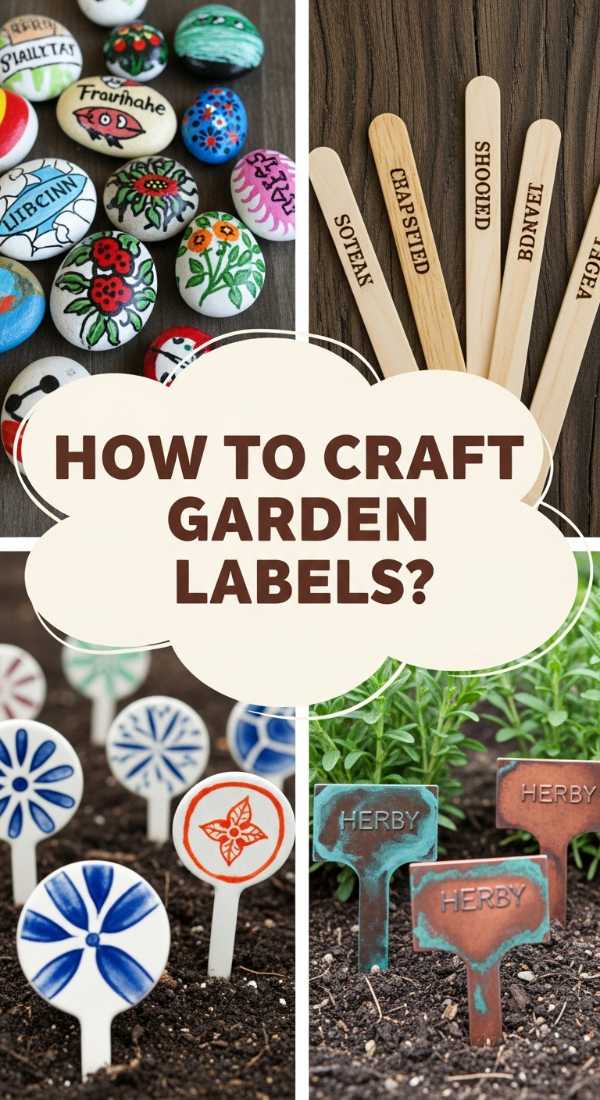
How to Craft Garden Labels DIY for a Perfectly Organized Patch
Why we love this
There is a deep, rustic charm in a garden that is as organized as it is beautiful. These DIY labels add a touch of artisanal ‘cottagecore’ to your vegetable patch or herb garden, turning a functional space into an aesthetic one. We love the tactile experience of smooth stone or cool ceramic under your fingers as you mark your seedlings. It prevents the mid-summer confusion of ‘is this kale or chard?’ while making your garden feel like a curated botanical exhibit that is both smart and soulful.
Essential Elements:
- Smooth river stones or polymer clay
- Outdoor-rated permanent markers or paint pens
- UV-resistant clear sealant spray
- Copper wire or bamboo stakes (optional)
- Small alphabet stamps
How to make it
- If using river stones, wash them thoroughly to remove dirt and oils that might prevent ink from adhering. If using polymer clay, roll it out to 1/4 inch thickness and cut into uniform rectangular or oval shapes.
- For clay labels, use alphabet stamps to press the names of your herbs (Basil, Rosemary, Thyme) into the wet clay. Bake according to the package directions until firm and let cool completely.
- For stone labels, use a fine-tip paint pen to hand-letter the plant names. Let the ink dry for at least 20 minutes to prevent smudging during the sealing process.
- Apply two light coats of UV-resistant clear sealant over your labels. This is crucial for outdoor use, as it prevents the sun from fading your beautiful lettering and the rain from washing away the paint.
- Place the stones at the base of your plants, or if using clay labels, thread copper wire through a pre-punched hole and wrap it around a bamboo stake to elevate the tag above the foliage.
How to Master Concrete Molds DIY for Stunning Custom Walkways

Why we love this
This project is the ultimate ‘fake it till you make it’ DIY that yields incredible, high-end results for a fraction of the cost of professional masonry. We love the raw, industrial texture of the concrete paired with the organic shapes of the stone molds. There is a rhythmic, meditative quality to mixing and pouring, and the final result feels permanent and grounded. Walking over a path you’ve literally poured yourself gives a sense of ownership over your land that a standard sidewalk just can’t match.
Essential Elements:
- Plastic walkway mold (stone or brick pattern)
- 80lb bags of high-strength concrete mix
- Concrete fortifier or liquid colorant (optional)
- Large mixing tub or wheelbarrow
- Flat margin trowel and a stiff brush
How to make it
- Excavate the path area to a depth of 2 inches, removing all grass and roots. Level the ground and compact it firmly with a hand tamper to ensure a stable base that won’t crack over time.
- Mix your concrete in a wheelbarrow, adding water slowly. You are looking for a ‘stiff peanut butter’ consistency; if it’s too runny, the mold won’t hold its shape, and if it’s too dry, it won’t bond properly.
- Place the mold at the starting point of your path. Shovel the concrete into the mold, using your trowel to press it into every corner and crevice to avoid air pockets.
- Level the top with the trowel and let it sit for about 5-10 minutes. Gently lift the mold straight up to reveal the ‘stones.’ If the edges slump, your mix was too wet; wait a bit longer for the next section.
- Once the entire path is dry (usually 48 hours), fill the gaps between the concrete stones with polymeric sand or fine gravel to lock them in place and prevent weed growth.
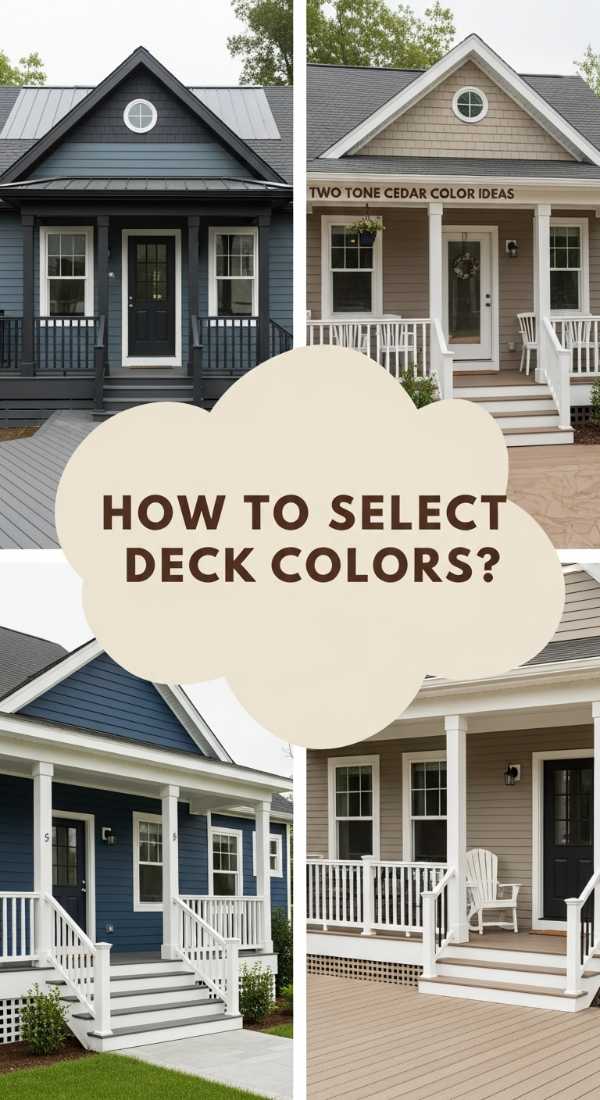
How to Select Deck Paint Colors for a Modern Backyard Retreat
Why we love this
The right deck color can completely redefine the mood of your outdoor space, turning a weathered wooden platform into a sophisticated extension of your living room. We love how a fresh coat of modern pigment—like a deep charcoal or a warm, earthy sage—can mask imperfections while providing a chic backdrop for your outdoor furniture. The visual weight of a darker hue feels grounded and expensive, creating a cozy ‘room’ feel under the open sky that invites you to kick off your shoes and linger long after sunset.
Essential Elements:
- High-quality deck resurfacer or solid stain
- Power washer and stiff scrub brush
- Deck cleaner/brightener solution
- Long-handle paint roller with 3/8″ nap
- Synthetic bristle brush for edges
How to make it
- Thoroughly power wash your deck to remove old flaking paint, dirt, and mildew. Use a deck brightener to open the wood pores, which ensures the new color penetrates deeply for a long-lasting finish.
- Check the weather forecast; you need at least 48 hours of dry, mild weather (between 50-90°F) for the paint to cure correctly. High humidity will cause the paint to bubble and fail.
- Apply the paint or stain to the railings and edges first using a brush. This ‘cutting in’ ensures that hard-to-reach areas are fully saturated and protected from the elements.
- Using a roller on an extension pole, apply the color to the floorboards. Work in sections of 2-3 boards at a time, moving the full length of the deck to avoid ‘lap marks’ where the paint overlaps.
- Apply a second coat after the first has dried completely (usually 4-6 hours). Avoid walking on the surface for at least 24-48 hours to let the coating harden into a durable, weather-resistant shell.
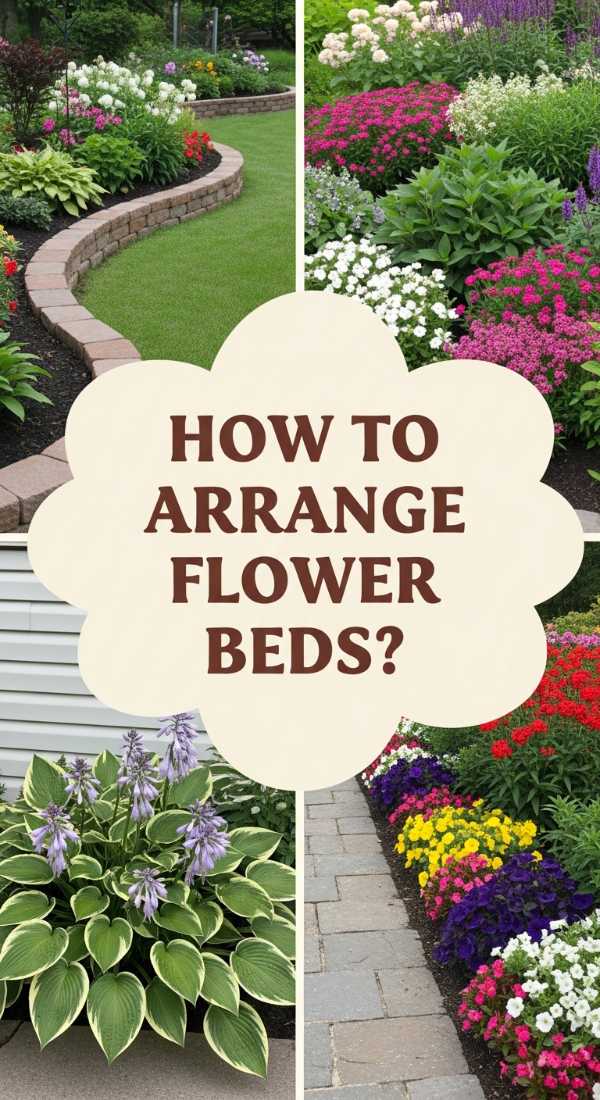
How to Arrange Flower Bed Ideas in Front of House for Instant Beauty
Why we love this
Arranging a flower bed is like painting a living canvas that changes with the seasons. We love this DIY because it allows for total creative expression through color, height, and texture. There is something magical about the contrast between soft, nodding flower heads and the rigid lines of your home’s architecture. A well-arranged bed doesn’t just look good; it smells like jasmine and lavender, hums with the sound of bees, and provides a soft, organic cushion that makes your house feel like a home.
Essential Elements:
- A mix of perennials (Hostas, Peonies, Salvia)
- Annuals for seasonal ‘pop’ (Marigolds, Zinnias)
- High-quality dark bark mulch
- Slow-release organic fertilizer
- Soaker hose for hidden irrigation
How to make it
- Use a garden hose to ‘draw’ the shape of your bed on the ground. Curved, organic lines are more visually pleasing and modern than sharp, harsh angles.
- Prepare the soil by tilling in 3 inches of organic compost. Good soil is the secret to that ‘viral’ lushness; without it, plants will look spindly and stressed.
- Arrange your plants while they are still in their nursery pots. Place the tallest varieties (like Foxgloves or Grasses) in the back, medium-height plants (like Coneflowers) in the middle, and low-growing border plants (like Alyssum) at the very front.
- Space plants according to their ‘mature’ width, not their current size. It will look a bit sparse at first, but this prevents overcrowding and disease later in the season.
- Once planted, install a soaker hose around the base of the plants and cover with 2-3 inches of dark mulch. This suppresses weeds, retains moisture, and provides that ‘finished’ professional look.
How to Implement Drainage Ideas for a Perfectly Dry Garden

Why we love this
While drainage might not seem ‘glamorous,’ the result—a garden that stays pristine even after a torrential downpour—is the ultimate luxury. We love the ‘Dry Creek Bed’ aesthetic because it turns a technical necessity into a beautiful landscape feature. Instead of a muddy swamp, you get a beautiful river-stone feature that adds texture and movement to your yard. It’s the perfect marriage of form and function, protecting your home’s foundation while providing a rugged, natural beauty to your outdoor space.
Essential Elements:
- Perforated drainage pipe (French drain)
- Permeable landscape fabric
- River rocks (various sizes: small pebbles to large boulders)
- Clean gravel or crushed stone
- Shovel and trenching tool
How to make it
- Identify the low spots where water pools and plan a route for the water to travel away from your house toward a lower exit point or rain garden.
- Dig a trench roughly 12 inches wide and 18 inches deep along your planned route. Maintain a downward slope of at least 1 inch for every 10 feet of length to ensure gravity does the work.
- Line the trench with landscape fabric, leaving enough on the sides to fold over the top later. This prevents soil from clogging the gravel and pipe over time.
- Add 2 inches of gravel, lay your perforated pipe (holes facing down!), and fill the rest of the trench with more gravel until it is 2 inches below the surface.
- Fold the fabric over the gravel and top with decorative river stones. Use larger boulders along the edges to create a natural ‘creek bed’ look that disguises the functional drain beneath.
How to Create an Island Theme for a Tropical Summer Vibe

Why we love this
Why wait for a vacation when you can walk into your backyard and feel like you’ve been transported to a lush, tropical oasis? We love the ‘Island Theme’ because it leans into bold, oversized textures and vibrant, saturated colors. The sound of rustling palm fronds, the pops of bright hibiscus pinks, and the cool touch of bamboo furniture create an atmosphere of total relaxation. It’s about escaping the daily grind and embracing a slower, sun-drenched pace of life right at home.
Essential Elements:
- Tropical plants (Hibiscus, Palms, Canna Lilies)
- Bamboo or rattan accents
- Outdoor tiki torches or string lights
- Colorful outdoor rugs with botanical prints
- Natural fiber textiles (linen or jute)
How to make it
- Create a ‘canopy’ feel by using potted palms or fast-growing bananas to add vertical scale and provide dappled shade, which mimics the jungle floor.
- Incorporate ‘hot’ colors—vivid oranges, deep reds, and electric yellows—through flowering plants like Hibiscus or Bird of Paradise. These colors thrive in full sun and enhance the tropical energy.
- Layer in natural textures. Replace plastic furniture with bamboo or teak, and use a large jute rug to define the ‘lounge’ area. Texture is key to making the space feel authentic rather than like a costume.
- Install bamboo fencing or reed screens to block out the ‘real world’ (and the neighbors) to create a secluded, private island feel.
- Add a water feature, even a small tabletop fountain. The sound of trickling water is the final sensory layer that completes the transformation from ‘suburban yard’ to ‘island retreat.’
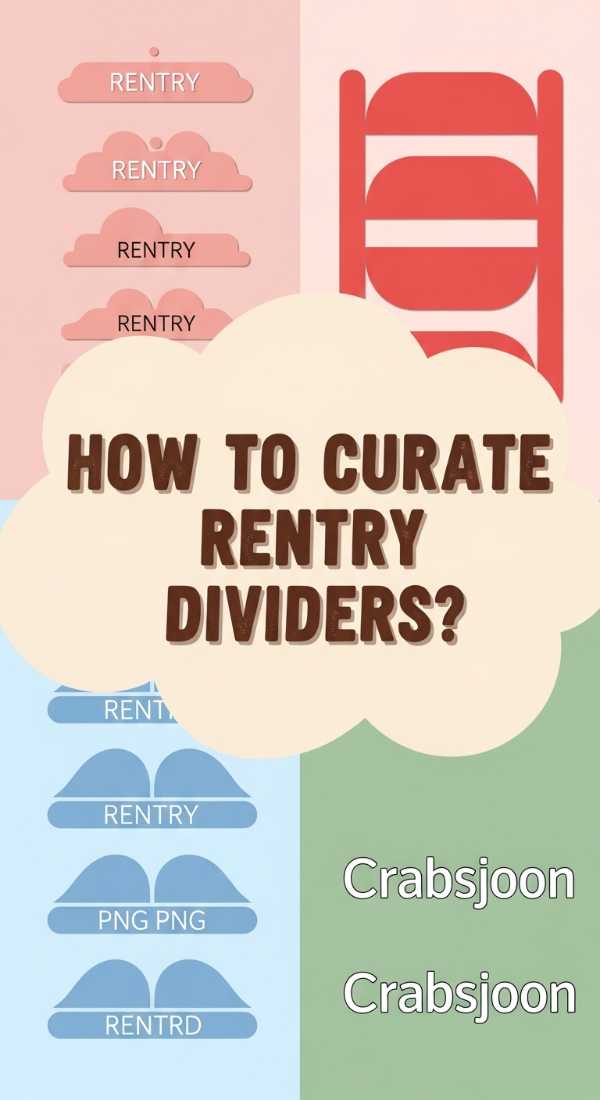
How to Curate a Pink Rentry Divider for a Stylish Digital Profile
Why we love this
In the digital world, your profile layout is your online ‘home,’ and the ‘Pink Rentry’ aesthetic is currently dominating for its soft, nostalgic, and Y2K-inspired charm. We love this DIY because it’s a form of digital interior design. It uses soft pastels, sparkling gifs, and clean dividers to create a space that feels curated and personal. It’s about more than just links; it’s about creating a visual mood board that tells the world exactly who you are with a sweet, rosy-hued lens.
Essential Elements:
- Rentry.co account or similar markdown host
- Hex codes for pastel pink shades (#FFC0CB, #FFD1DC)
- Pixel art or ‘sparkle’ dividers (PNG format)
- Markdown syntax knowledge (headers, columns)
- Curated ‘Aesthetic’ images
How to make it
- Log into your Rentry editor and establish a color palette. For a cohesive look, choose three shades of pink—a very pale ‘whisper’ pink for backgrounds and a deeper ‘rose’ for text and headers.
- Use markdown syntax to create columns. This allows you to have a ‘navigation’ side and a ‘content’ side, making your digital profile look organized and professional.
- Insert custom dividers. Instead of simple lines, use URLs of pixel-art ribbons or sparkling hearts. This adds that ‘viral’ personality that sets your profile apart from standard layouts.
- Curate your images. Choose 2-3 high-quality ‘aesthetic’ photos (like pink sunsets or silk textures) and use CSS styling within Rentry to give them rounded corners or soft borders.
- Test your links and layout on both desktop and mobile. A truly great digital DIY looks seamless on every screen, ensuring your ‘pink’ branding is consistent and beautiful for every visitor.
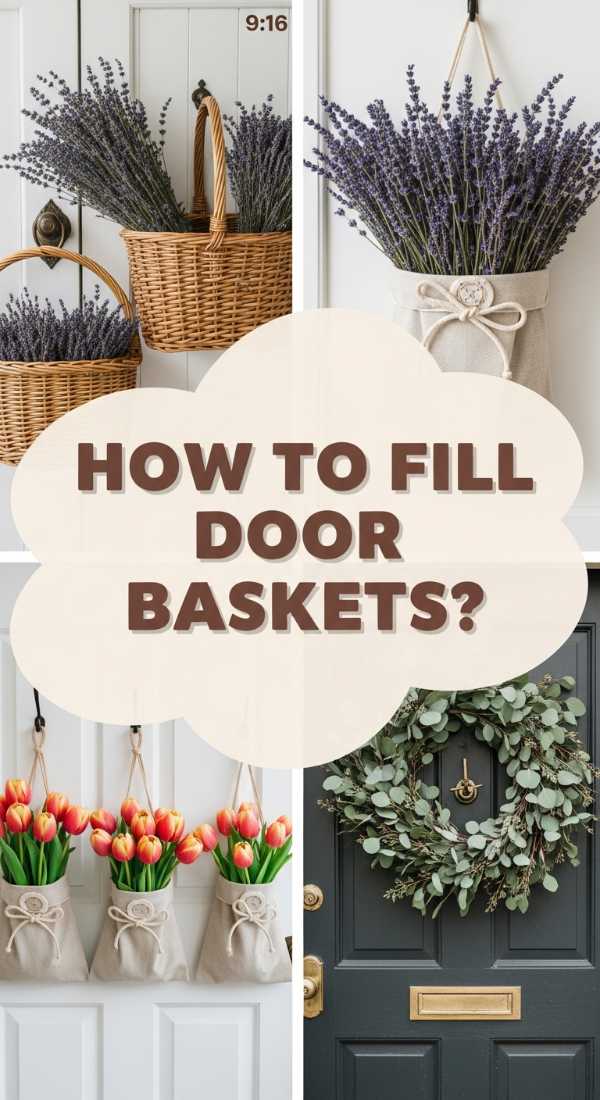
How to Fill Front Door Baskets With Flowers for a Cozy Vibe
Why we love this
There is something so effortlessly chic about a woven basket hanging on a front door, overflowing with seasonal blooms. We love this DIY because it’s a softer, more cottage-inspired alternative to the traditional wreath. The tactile ‘crunch’ of the wicker paired with the delicate, airy petals of baby’s breath or wild roses creates a look that is both humble and sophisticated. It feels like you just stepped out of a wildflower meadow and decided to share a bit of that beauty with anyone who stops by.
Essential Elements:
- Flat-back ‘door basket’ or wicker wall pocket
- Floral foam (dry for faux, wet for real flowers)
- Seasonal blooms (Hydrangeas, Tulips, or Dried Lavender)
- Long ribbon (Silk or Burlap)
- Plastic liner (if using fresh flowers)
How to make it
- Select a basket with a flat back so it sits flush against your door and doesn’t bounce when the door opens and closes. If using fresh flowers, insert a heavy-duty plastic liner to prevent the wicker from rotting.
- Cut your floral foam to fit snugly inside the basket. If using fresh stems, soak the foam in water with floral preservative for at least 30 minutes before inserting.
- Start by ‘greening’ the basket. Insert eucalyptus or ferns around the edges of the foam to create a lush, full base that hides the basket’s rim and the foam itself.
- Add your primary flowers in the center. For a ‘viral’ look, use varying heights—have some stems standing tall while others ‘droop’ naturally over the front edge of the basket for a relaxed, gathered-from-the-garden feel.
- Finish with a long, flowing ribbon tied to the handle. Let the ‘tails’ of the ribbon hang down past the bottom of the basket to add movement and a touch of romantic elegance every time the breeze blows.
Wrapping Up Your Home Transformation
Transforming your home and garden doesn’t require a professional crew or a massive bank account—it just requires a little bit of inspiration and the willingness to get your hands dirty. From the digital curation of your online profile to the physical curb appeal of your front porch, these projects prove that beauty is in the details. Which one are you going to tackle first this weekend? Tag me in your ‘after’ photos—I can’t wait to see your spaces shine!