
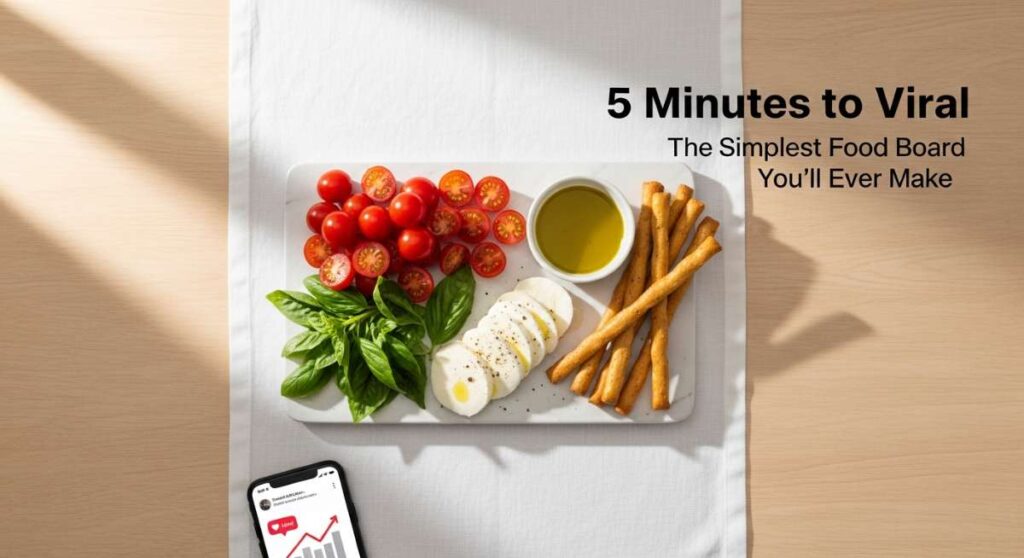
5 Minutes to Viral: The Simplest Food Board You’ll Ever Make
We’ve all been there—the sun is setting, your friends are texting that they’re ten minutes away, and your kitchen counter is looking a little more ‘workday chaos’ than ‘Pinterest dream.’ There is a unique kind of magic in being able to pull together a spread that looks like it took hours of curation but actually only required a handful of minutes and a bit of creative soul. This is about more than just food; it’s about the atmosphere of ease and the joy of sharing something beautiful without the stress of perfection.
In this guide, I’m showing you how to master the art of the ‘simple food board’ and beyond. We are diving into everything from midnight sugar cravings to the most romantic pasta nights you can imagine. The secret to going viral isn’t about being a professional chef; it’s about capturing those sensory details—the dusting of flour, the steam rising from a bowl, and the vibrant colors of fresh herbs—that make people want to reach through the screen and take a bite.
How to Craft Safe Gourmet Sweets for the Ultimate Midnight Snack

Why we love this
There is something inherently rebellious and comforting about a midnight snack that feels truly gourmet. As the house grows quiet, the rich aroma of dark chocolate and toasted sea salt fills the air, creating a private sanctuary of flavor. We love this because it transforms a late-night craving into a ritual of self-care, where the snap of high-quality cocoa meets the velvet softness of a perfectly ripened berry. It’s a sensory experience designed for the stillness of the night, providing a decadent end to your day that feels both indulgent and safe for your evening digestion.
Essential Elements:
- 70% Dark Chocolate chunks
- Organic Almond Butter for dipping
- Freeze-dried Raspberries
- Flaky Sea Salt
- Honey-drizzled Walnuts
How to make it
- Begin by selecting a small, dark wooden board to contrast the vibrant colors of the sweets. Gently melt half of your chocolate chunks over a double boiler on low heat to avoid seizing, ensuring the water never touches the bottom of the bowl.
- Once the chocolate is glossy and smooth, drizzle it in thin, artistic ribbons across the board. This acts as an edible ‘glue’ for your other elements.
- Place small mounds of almond butter in the corners. Use a toothpick to swirl a drop of honey into the surface for a marbled effect.
- Scatter the remaining solid chocolate chunks and walnuts across the board, focusing on building height in the center for a professional look.
- Finally, crush the freeze-dried raspberries between your fingers and sprinkle them from a height of about six inches to ensure an even, vibrant red dusting. Finish with a precise pinch of flaky sea salt over the melted chocolate areas to enhance the flavor profile.
How to Bake Soft Holiday Treats for a Joyful Family Gathering

Why we love this
The holidays are synonymous with the scent of warming spices like cinnamon, nutmeg, and ginger wafting from a busy oven. We love these soft treats because they carry the weight of tradition and the lightness of a perfect crumb, offering a texture that practically melts on the tongue. Imagine the joy of a kitchen filled with laughter as you pull out a tray of golden, pillowy cookies that are soft to the touch and fragrant enough to bring everyone running to the table. These treats aren’t just food; they are memories in the making, providing a cozy edible hug for guests of all ages.
Essential Elements:
- High-fat European butter (softened)
- Freshly grated Nutmeg
- Pure Vanilla Bean paste
- Unbleached All-purpose flour
- Golden Brown Sugar
How to make it
- Preheat your oven to precisely 350°F (175°C) and line two heavy-duty baking sheets with parchment paper to ensure even heat distribution.
- In a large bowl, cream the softened butter and golden brown sugar for at least 5 minutes. You are looking for a pale, fluffy consistency where the sugar granules have mostly dissolved into the fats.
- Incorporate the vanilla bean paste and one room-temperature egg. Whisking at room temperature prevents the batter from curdling, ensuring a silky dough.
- Sift the flour and nutmeg together twice. Sifting is crucial here as it aerates the flour, contributing to that ‘soft as a cloud’ texture we desire.
- Gently fold the dry ingredients into the wet using a silicone spatula. Stop the moment you see no more white streaks; over-mixing will develop gluten and make the treats tough.
- Scoop rounded tablespoons onto the sheets and bake for exactly 8-10 minutes. The edges should be just barely set while the centers still look slightly underbaked—they will firm up perfectly on the hot pan outside the oven.
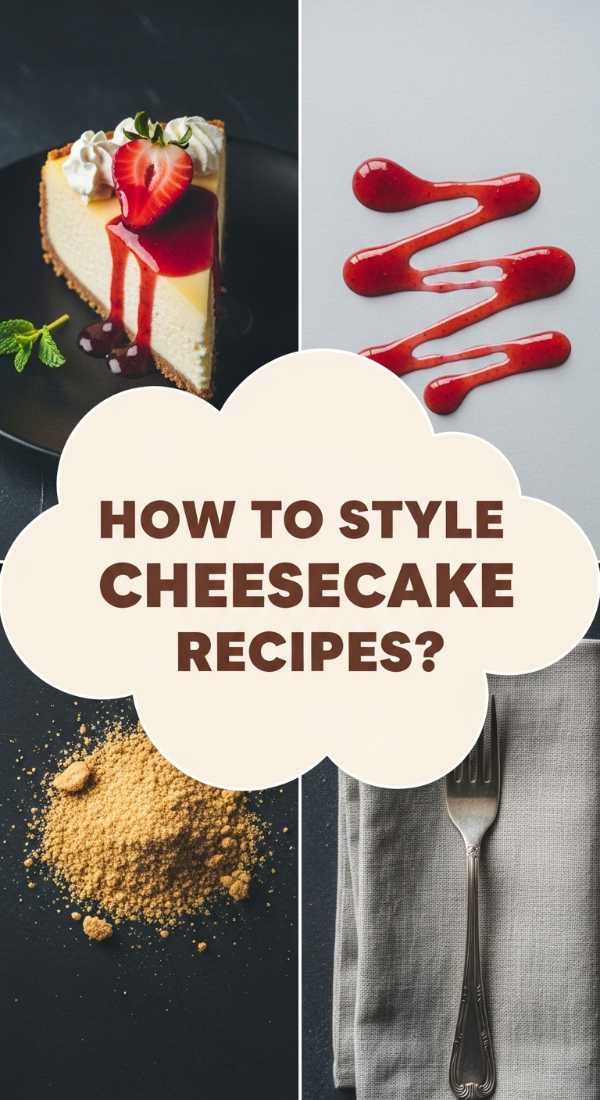
How to Master Creamy Dessert Classics for a Sophisticated Dinner Party
Why we love this
A sophisticated dinner party demands a finale that is as elegant as the conversation, and nothing achieves this quite like a creamy, classic dessert. We love the juxtaposition of a glass-like caramelized topping against a cool, silk-smooth custard that glides across the palate. The aroma is one of sophisticated sweetness—toasted sugar and deep vanilla—evoking the atmosphere of a high-end Parisian bistro. It’s a dish that feels weighty and significant, yet leaves you feeling pampered rather than overstuffed, making it the ultimate power move for any host.
Essential Elements:
- Heavy Cream (at least 36% fat)
- Fresh Egg Yolks
- Caster Sugar
- Whole Vanilla Beans
- Boiling water for a Bain-marie
How to make it
- Split the vanilla bean lengthwise and scrape the seeds into the heavy cream. Heat the cream over medium-low heat until small bubbles form around the edges (scalding), but do not let it reach a rolling boil.
- Whisk the egg yolks and caster sugar in a separate bowl until the mixture becomes pale and forms a ‘ribbon’ when the whisk is lifted.
- Slowly temper the eggs by pouring a tiny stream of hot cream into them while whisking constantly. This prevents the eggs from scrambling.
- Pour the mixture through a fine-mesh sieve into individual ramekins to remove any stray cooked egg or vanilla pod bits, ensuring a perfectly smooth texture.
- Place ramekins in a deep baking dish and fill the dish with boiling water until it reaches halfway up the sides of the ramekins. Bake at 300°F (150°C) for 35-40 minutes until the centers jiggle slightly like jelly.
- Chill for at least 4 hours. Before serving, sprinkle a thin layer of sugar on top and use a kitchen torch to caramelize it into a hard, golden shell.
How to Decorate Elegant Pastries for a Dreamy Garden Tea

Why we love this
Garden tea parties are all about the visual harmony between nature and the plate, and elegant pastries act as the focal point of this aesthetic. We love the delicate, flaky layers of a well-made pastry, kissed with the floral notes of lavender or rose water that mirror the garden surrounding you. There is a tactile joy in the ‘shatter’ of a crisp crust followed by the softness of a fruit-filled center. These pastries aren’t just snacks; they are edible art pieces that invite guests to slow down, sip their tea, and appreciate the intricate beauty of the afternoon.
Essential Elements:
- Puff Pastry dough (chilled)
- Edible Pansies or Violas
- Apricot Glaze
- Whipped Mascarpone
- Fresh Blackberries
How to make it
- Roll out your chilled puff pastry on a floured surface to a 1/4 inch thickness. Use a fluted pastry cutter to create elegant rectangles or circles for a uniform, professional look.
- Score a smaller border inside each shape with a knife, being careful not to cut all the way through; this allows the edges to rise while the center stays flat for toppings.
- Bake at 400°F (200°C) for 12 minutes or until the pastry has puffed into golden, airy layers. Allow them to cool completely on a wire rack to maintain crispness.
- Fill the centers with a dollop of whipped mascarpone. To get that ‘dreamy’ look, use a piping bag with a star tip for a ruffled effect.
- Arrange three blackberries on top, then brush them lightly with warmed apricot glaze to give them a professional, high-gloss shine.
- Carefully place one edible flower on each pastry. Use tweezers for precision, ensuring the petals are open and facing upward to catch the light.
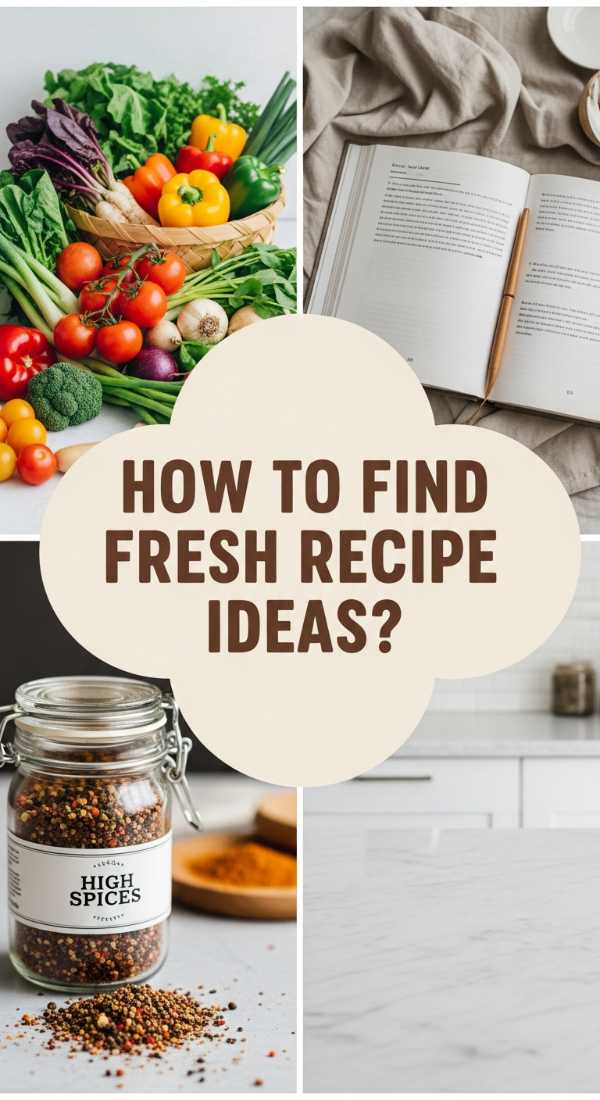
How to Curate Daily Meal Plans for a Balanced Lifestyle
Why we love this
Balance is the ultimate lifestyle goal, and a well-curated meal plan is the roadmap that gets you there without the weekday stress. We love this approach because it replaces the frantic ‘what’s for dinner’ question with a sense of calm and visual vibrance. A balanced plate is a riot of colors—deep leafy greens, bright orange roasted roots, and the clean whites of lean proteins. The aroma of prepped, fresh ingredients creates a sense of readiness in the home, making healthy eating feel like an indulgence rather than a chore. It’s about nourishing your body while keeping your mind clear.
Essential Elements:
- Batch-roasted Seasonal Vegetables
- Pre-cooked Quinoa or Farro
- Lemon-Tahini Dressing
- Hard-boiled Eggs or Chickpeas
- Fresh Microgreens
How to make it
- Dedicate Sunday afternoon to the ‘Prep Phase.’ Roast a large tray of broccoli, sweet potatoes, and bell peppers at 425°F with olive oil and salt until the edges are charred and sweet.
- Cook your grains (quinoa or farro) in vegetable broth instead of water. This simple swap infuses every grain with deep, savory flavor from the start.
- Whisk your lemon-tahini dressing in a mason jar: 1/4 cup tahini, juice of one lemon, a minced garlic clove, and enough warm water to reach a ‘pouring’ consistency. Store this separately to keep greens crisp.
- Assemble ‘Base Bowls’ in glass containers. Layer the grains at the bottom, followed by the roasted vegetables, and top with your protein source.
- Leave the microgreens and dressing in separate containers. When it’s time to eat, heat the base bowl, then add the cold microgreens and dressing last. This contrast in temperatures makes the meal feel freshly cooked rather than a ‘reheated leftover.’
How to Whip Up Fluffy Brunch Staples for a Cozy Sunday Morning

Why we love this
Sunday mornings were made for the slow rise of steam from a coffee mug and the sight of tall, fluffy pancakes stacked high on a plate. We love this because it’s the ultimate comfort food—sweet, airy, and golden-brown. The scent of maple syrup heating up and the sizzle of batter hitting a buttered griddle creates an atmosphere of total relaxation. It’s a dish that encourages lingering at the table, sharing stories, and enjoying the soft morning light. The texture, like a warm sponge soaking up butter and syrup, is pure culinary bliss.
Essential Elements:
- Buttermilk (the secret to lift)
- Melted Butter
- Baking Powder and Baking Soda
- Maple Syrup
- Fresh Blueberries
How to make it
- Whisk your dry ingredients (flour, sugar, baking powder, soda, and salt) in a large bowl. Creating a ‘well’ in the center helps integrate the wet ingredients without over-mixing.
- Combine buttermilk, one egg, and melted butter. The buttermilk’s acidity reacts with the baking soda to create those signature bubbles that result in a fluffy interior.
- Pour the wet into the dry and fold gently. The batter should be lumpy—if it’s smooth, you’ve over-mixed it, and the pancakes will be tough. Let the batter rest for 10 minutes; this allows the flour to hydrate and the bubbles to expand.
- Heat a non-stick griddle over medium heat. Test the heat by dropping a bead of water; if it dances, it’s ready. Grease lightly with a small amount of butter.
- Pour 1/4 cup of batter per pancake. Wait until bubbles form on the surface and the edges look matte and set. This is your cue to flip.
- Cook for another 1-2 minutes until golden. Serve immediately with a knob of butter and a generous pour of warm maple syrup for the ultimate Sunday experience.
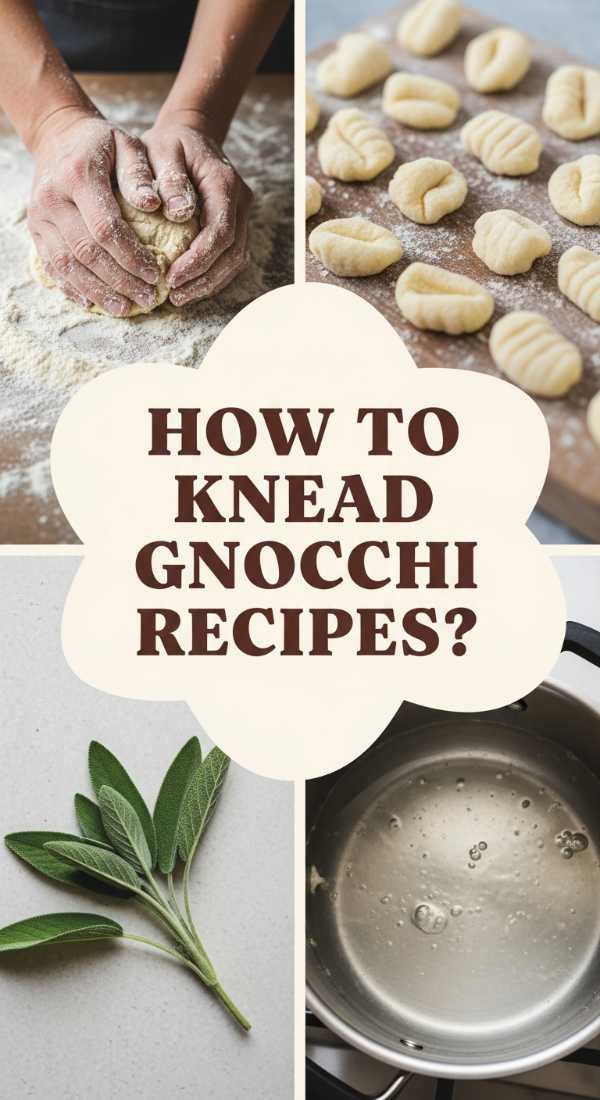
How to Prepare Pillowy Italian Pasta for a Romantic Date Night
Why we love this
Nothing says ‘I love you’ quite like the effort of handmade, pillowy pasta served under the glow of candlelight. We love this because of the tactile nature of the dough and the incredibly tender texture of the finished noodle, which far surpasses any boxed variety. The aroma of simmering garlic and high-quality olive oil sets a romantic stage, while the pasta itself acts as a soft, silky canvas for the sauce. It’s an intimate cooking experience that turns a simple meal into an event, focusing on the quality of ingredients and the grace of Italian tradition.
Essential Elements:
- ’00’ Flour (for a silkier texture)
- Fresh Farm Eggs
- Semolina Flour for dusting
- Pinch of Sea Salt
- Extra Virgin Olive Oil
How to make it
- Mound your ’00’ flour on a clean wooden board and create a deep wide well in the middle. Crack your eggs into the well and add a splash of olive oil.
- Using a fork, slowly whisk the eggs, gradually bringing in flour from the inner walls of the well. Be careful not to break the ‘wall’ too early, or the eggs will escape.
- Once a shaggy dough forms, begin kneading by hand. This requires a firm ‘push and fold’ motion for at least 10 minutes. You are looking for the dough to become smooth, elastic, and bounce back when poked.
- Wrap the dough in plastic and let it rest at room temperature for 30 minutes. This relaxes the gluten, making it possible to roll it out into paper-thin sheets.
- Roll the dough through a pasta machine or with a heavy rolling pin until you can see the grain of the wood through the sheet. Cut into wide ribbons (pappardelle) or thin strands.
- Boil in heavily salted water for only 2-3 minutes. Fresh pasta cooks incredibly fast—as soon as it floats to the surface, it’s ‘al dente’ and ready to be tossed directly into your sauce.
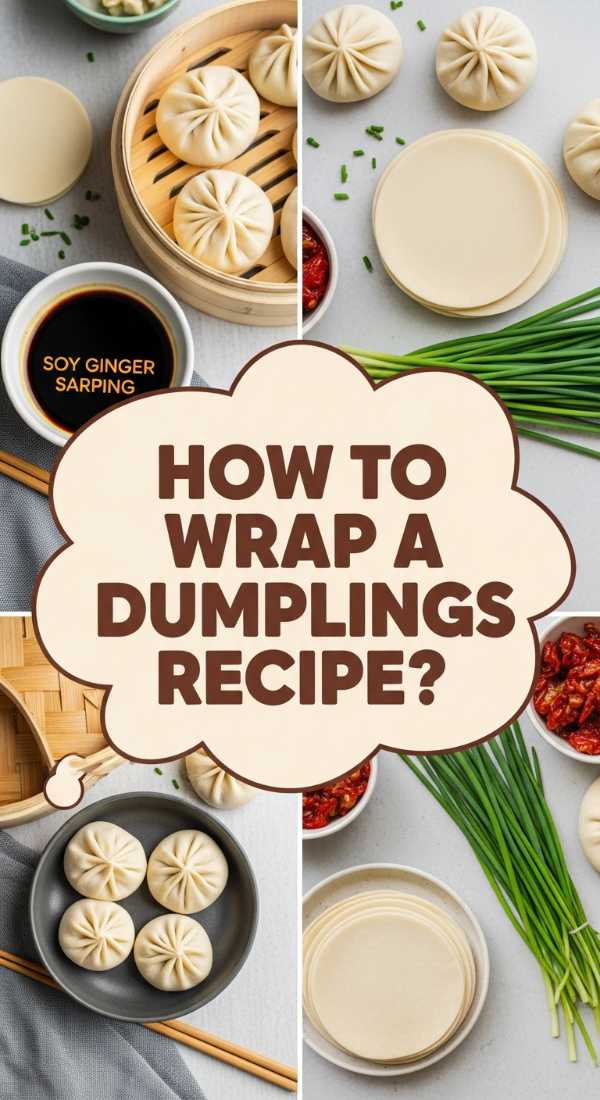
How to Fold Authentic Comfort Food for a Soulful Hearty Meal
Why we love this
Authentic comfort food, particularly when it involves the art of folding—like dumplings or savory pies—offers a soulful connection to heritage and home. We love the rhythmic, meditative process of preparing these meals, where each fold represents a moment of care. The aroma is deep and savory, usually involving slow-cooked meats or earthy vegetables and a hint of toasted grain. The texture is all about the contrast between a sturdy, golden exterior and a succulent, steaming interior. It’s the kind of meal that warms you from the inside out, providing a sense of security and fullness that lingers long after the plates are cleared.
Essential Elements:
- Hand-made Dough Wrappers
- Ground Pork or Minced Mushrooms
- Ginger and Scallions
- Toasted Sesame Oil
- Soy-Ginger Dipping Sauce
How to make it
- Prepare your filling by mixing your protein (pork or mushrooms) with finely grated ginger, chopped scallions, and a teaspoon of toasted sesame oil. Mix vigorously in one direction to create a cohesive, bouncy texture.
- Place a circular wrapper in your non-dominant hand and spoon exactly one teaspoon of filling into the center. Do not overfill, or the dough will tear during the folding process.
- Lightly dampen the edges of the wrapper with water. This acts as the sealant for your comfort parcels.
- Begin the fold: pleat the front side of the wrapper while keeping the back side flat. Press the pleats firmly against the back to create a crescent shape that can stand upright.
- Heat a tablespoon of oil in a flat-bottomed skillet over medium-high heat. Place the dumplings in the pan and fry for 2 minutes until the bottoms are deep golden brown.
- Pour in 1/4 cup of water and immediately cover with a tight lid. The steam will cook the filling and soften the top of the dough. After 5 minutes, remove the lid and let the remaining water evaporate to re-crisp the bottoms.
How to Create Thick and Chewy Cookies for the Ultimate Treat

Why we love this
The quest for the perfect cookie ends with the ‘thick and chewy’ variety—a masterpiece of baking science and pure indulgence. We love the way the edges offer a slight, buttery crunch while the center remains dense, soft, and almost fudge-like. The aroma of browned butter and caramelized sugar is intoxicating, promising a treat that satisfies every possible craving. These aren’t just cookies; they are a textural journey that demands a cold glass of milk and a few minutes of pure, uninterrupted bliss. They represent the pinnacle of home baking, where simple ingredients are transformed into something extraordinary.
Essential Elements:
- Browned Butter (Beurre Noisette)
- Extra Egg Yolk
- Dark Brown Sugar
- Bittersweet Chocolate Discs
- Cornstarch (the secret for chewiness)
How to make it
- Start by browning your butter in a saucepan over medium heat. Swirl it constantly until the milk solids turn a toasted amber color and it smells nutty. Let it cool slightly but stay liquid.
- Mix the browned butter with dark brown sugar. Using dark brown sugar instead of light provides more molasses, which is essential for that chewy, moisture-rich texture.
- Add one whole egg and one extra egg yolk. The extra yolk adds fat and protein without the extra water found in egg whites, leading to a denser, richer cookie.
- Whisk in your dry ingredients, including a teaspoon of cornstarch. Cornstarch softens the proteins in the flour, ensuring the cookie is tender rather than crumbly.
- Fold in high-quality chocolate discs rather than chips; discs create beautiful ‘pools’ of melted chocolate that look stunning in photos and taste superior.
- Chill the dough for at least 24 hours. This ‘aging’ process allows the flavors to deepen and prevents the cookies from spreading too thin in the oven. Bake at 350°F for 11 minutes and let them cool on the pan.
How to Infuse Fresh Herbs into Pasta for a Zesty Summer Lunch

Why we love this
Summer lunches should feel as bright and zesty as the season itself, and infusing fresh herbs into your pasta is the quickest way to achieve that garden-fresh vibe. We love this because it’s light, aromatic, and incredibly vibrant—think the smell of bruised basil, lemon zest, and pungent parsley hitting a warm pan. The texture is clean and refreshing, with the herbs providing little ‘pops’ of flavor against the smooth surface of the pasta. It’s a dish that feels like sunshine on a plate, perfect for eating outdoors on a warm afternoon with a crisp glass of white wine.
Essential Elements:
- Fresh Basil, Parsley, and Mint
- Organic Lemon Zest
- Toasted Pine Nuts
- Pecorino Romano cheese
- Garlic-infused Olive Oil
How to make it
- Boil a pot of spaghetti in heavily salted water. While the pasta cooks, finely mince your fresh herbs—basil, parsley, and a touch of mint—just before using to prevent them from oxidizing and turning brown.
- In a wide skillet, heat garlic-infused olive oil over low heat. You want to gently warm the oil to release the aroma without browning the garlic bits, which can turn bitter.
- Add the lemon zest to the oil. The heat will help the essential oils in the zest bloom, creating a deeply citrusy base for your lunch.
- Reserve 1/2 cup of starchy pasta water before draining the noodles. This liquid gold is the key to creating a sauce that actually clings to the pasta.
- Toss the pasta into the skillet with the oil and zest. Pour in the pasta water and a handful of grated Pecorino Romano, tossing vigorously until a light, creamy emulsion forms.
- Turn off the heat and fold in the fresh herbs and toasted pine nuts last. Keeping the herbs away from high heat preserves their bright green color and zesty, raw flavor. Serve immediately with an extra grating of lemon zest on top.
Conclusion
Creating a viral-worthy food board or meal isn’t about being perfect; it’s about the intention and the sensory details you bring to the table. Whether you’re folding dumplings for a cozy night in or rolling out fresh pasta for a romantic date, these moments of culinary creation are what make a lifestyle feel truly rich and inspired. Now, grab your board, pick your favorite section, and start creating something beautiful today!