

From Messy to Minimalist: How I Reclaimed My Home and My Life
For years, I felt like I was drowning in my own home. Every surface was a landing pad for clutter, every closet was a ticking time bomb of forgotten purchases, and my backyard was a patch of weeds that mocked my desire for peace. I realized that the chaos around me was a direct reflection of the chaos inside my head; I couldn’t find my keys, but I also couldn’t find my sense of calm. The journey from messy to minimalist wasn’t just about throwing things away; it was about curating a life that finally felt like mine.
The transformation started small—one shelf, one flower bed, one project at a time. I learned that by intentionally designing my spaces, I wasn’t just ‘decorating’; I was reclaiming my time and energy. Now, when I walk through my front door or step out onto the deck, I don’t see a to-do list; I see a sanctuary. I want to share the specific projects that helped me turn my home into a viral-worthy retreat where every corner serves a purpose and brings me joy.
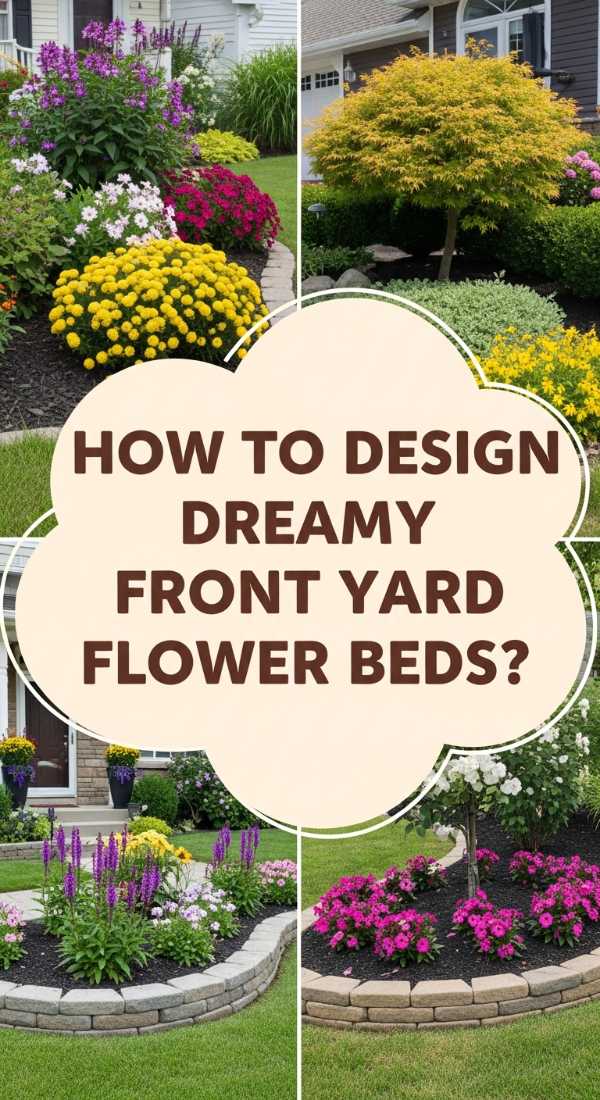
How to Design Dreamy Front Yard Flower Beds for Instant Curb Appeal
Why we love this
There is nothing quite like the sensory explosion of a well-manicured flower bed greeting you after a long day. Imagine the sweet, heavy scent of jasmine mingling with the earthy, damp aroma of fresh cedar mulch. The textures of velvety lamb’s ear against the waxy sheen of hostas create a visual depth that makes your home feel established and loved. It’s about that feeling of pride when the sun hits the petals just right, casting a soft glow that makes your entire neighborhood feel like a high-end botanical garden.
Essential Elements:
- High-quality topsoil and organic compost blend
- Natural cedar or hemlock mulch
- A mix of perennials (Lavender, Hydrangeas) and annuals (Petunias, Marigolds)
- Steel or stone edging for clean borders
- Landscape fabric for weed suppression
How to make it
- Begin by outlining your bed shape using a garden hose or spray paint to ensure soft, organic curves rather than rigid lines.
- Excavate the area to a depth of 6 inches, removing all grass and stubborn weeds. Ensure the ground is leveled to prevent water pooling near the foundation.
- Mix your topsoil with compost at a 2:1 ratio. This ‘prep’ phase is crucial; the soil should feel crumbly and rich, like chocolate cake, indicating high nutrient content.
- Layout your plants while still in their pots to check spacing. Place taller shrubs in the back and smaller groundcovers in the front to create a ‘stadium seating’ effect.
- Dig holes twice as wide as the root ball. Tease the roots gently before placing them in the ground. Firm the soil around the base to remove air pockets.
- Apply a 3-inch layer of mulch. ‘Doneness’ is achieved when the soil is completely covered but the mulch is not touching the stems of the plants (which can cause rot).
- Water deeply until the soil is saturated but not muddy. This initial soak settles the roots and activates the soil nutrients.
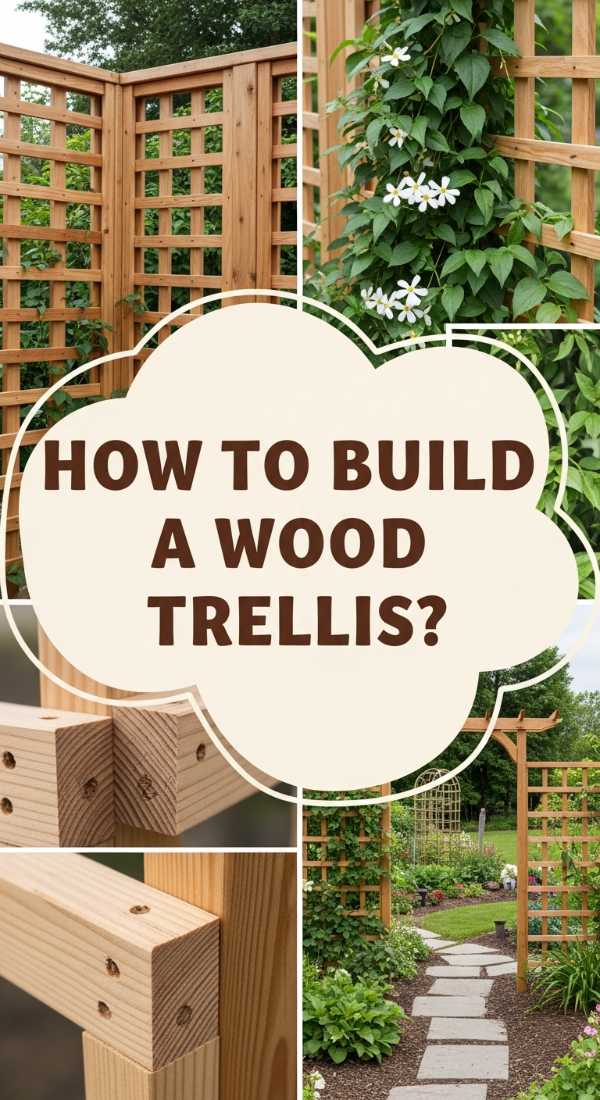
How to Build a Custom Wood Trellis for a Lush Garden Sanctuary
Why we love this
A custom trellis adds immediate vertical interest and a sense of architectural Sophistication to any backyard. The raw, woody scent of freshly cut cedar is intoxicating, providing a rustic yet refined backdrop for climbing vines. As the greenery begins to weave through the slats, the wood takes on a weathered silver patina that feels timeless. Sitting nearby, you can almost hear the gentle rustle of leaves against the timber, creating a private, walled-garden vibe that blocks out the rest of the world.
Essential Elements:
- Pressure-treated or Cedar 2x4s and 1×2 slats
- Exterior grade wood screws
- Wood stain or sealant (Transparent or semi-transparent)
- Post-hole digger and quick-set concrete
- Level and miter saw
How to make it
- Measure your space and cut your 2×4 vertical supports to the desired height plus 2 feet for ground burial.
- Lay the vertical supports on a flat surface and use a spacer block to ensure even intervals for your horizontal 1×2 slats.
- Pre-drill holes to prevent the wood from splitting—a professional tip that ensures a clean, ‘high-end’ finish.
- Secure the slats using exterior screws. Check for squareness after every three slats using a framing square; if it’s slightly off, the final product will look ‘done’ but crooked.
- Apply a weather-resistant stain. The ‘visual cue’ for a perfect coat is a uniform sheen without drips or ‘dry spots’ where the wood looks thirsty.
- Dig holes 24 inches deep, insert the trellis, and pour quick-set concrete. Use a level to ensure it is perfectly vertical while the concrete cures.
- Once the concrete is ‘rock hard’ (usually 30-60 minutes), backfill with dirt and plant your climbers like Clematis or Wisteria at the base.
How to Style a Relaxing Hot Tub Area for Ultimate Backyard Bliss

Why we love this
Transforming a standard hot tub into a luxury spa experience is all about the atmosphere. Think of the contrast between the crisp evening air and the rising steam that smells faintly of eucalyptus and clean water. Soft, plush Turkish towels hanging nearby and the warm, amber glow of Edison bulbs overhead create a cocoon of comfort. It’s the ultimate way to decompress, where the bubbling water massages away the day’s stress and the surrounding greenery makes you feel hidden away in a Five-star resort.
Essential Elements:
- Weatherproof outdoor rug
- String lights or solar lanterns
- Towel rack or decorative hooks
- Potted palms or tall grasses for privacy
- A small side table for drinks and candles
How to make it
- Start with the ‘foundation’ by placing a large, textured outdoor rug under the front half of the tub to define the zone and provide a soft landing for bare feet.
- Install vertical privacy screens or tall potted plants (like bamboo or arborvitae) to create a ‘walled-in’ feeling. The goal is to obscure the line of sight from neighbors.
- Hang string lights in a ‘zig-zag’ pattern above the area. Use a dimmer switch so you can adjust the heat level of the lighting from ‘bright task’ to ‘romantic glow’.
- Set up a dedicated ‘refreshment station’ with a waterproof side table. Place a tray here to hold candles and glass-free drinkware.
- Mount a heavy-duty towel rack within arm’s reach of the tub. The ‘visual cue’ for a styled look is using rolled, monochromatic towels that look like a spa display.
- Add a waterproof Bluetooth speaker hidden among the plants to provide low-frequency ambient sounds.
- Finish by checking the water chemistry; the ‘perfect finish’ is crystal clear water with a balanced pH that feels soft on the skin.
How to Create Realistic Pantry Organization for a Stress Free Kitchen

Why we love this
Walking into an organized pantry is like taking a deep breath for your brain. The sight of uniform glass jars filled with colorful grains, pastas, and spices creates a visual harmony that makes meal prep feel like an art form rather than a chore. There’s a satisfying ‘thwack’ of a bamboo lid sealing shut and the smooth glide of a turntable spinning to reveal exactly what you need. It eliminates the ‘pantry panic’ and replaces it with a sense of abundant, curated order that looks as good as it functions.
Essential Elements:
- Airtight glass or BPA-free plastic canisters
- Woven baskets for bulky items
- Lazy Susans for oils and vinegars
- Custom labels (minimalist or handwritten style)
- Tiered shelving for canned goods
How to make it
- Empty the entire pantry. This ‘prep’ phase is non-negotiable; you must see the empty space to visualize the new layout.
- Sort items by category: baking, snacks, dinner prep, and breakfast. Discard anything expired—a ‘visual cue’ for freshness is vibrant color and intact packaging.
- Decant dry goods like flour, sugar, and pasta into uniform airtight containers. This isn’t just for looks; it keeps food fresh longer and prevents pests.
- Label every container. Position labels at the exact same height on every jar to create a professional, ‘magazine-ready’ line.
- Use Lazy Susans in corners or for ‘liquid’ items like oils. The technique here is to group by height so nothing gets lost in the ‘dead zone’ at the back.
- Place kid-friendly snacks in low, open baskets so they are accessible, while keeping ‘adult’ treats or heavy appliances on higher shelves.
- The final ‘doneness’ check is a 5-second scan: if you can’t find an item in 5 seconds, the system needs adjustment.
How to Style a Nostalgic Teen Room for a Cozy Retro Vibe

Why we love this
This style is a warm hug of nostalgia, blending the neon energy of the 80s with the cozy, lived-in feel of the 90s. We love the tactile mix of faux-fur throws, velvet floor pillows, and the cool touch of vintage vinyl records. The air smells like vanilla candles and old books, and the lighting is always soft and moody. It’s a space that feels deeply personal, where every poster and trinket tells a story, making it the ultimate sanctuary for dreaming, creating, and relaxing.
Essential Elements:
- LED neon signs and fairy lights
- Gallery wall of vinyl covers or retro prints
- Macramé wall hangings or beaded curtains
- Lava lamps or sunset projectors
- Mismatched vintage furniture pieces
How to make it
- Select a ‘base’ color palette of muted pastels or deep jewel tones to prevent the retro look from feeling cluttered.
- Create a focal point with a gallery wall. Use command strips to arrange vinyl records in a grid. The ‘visual cue’ for success is balanced spacing—usually 2 inches between frames.
- Layer the lighting. Combine a primary warm-toned overhead light with ‘accent’ heat levels like a sunset lamp in the corner and a neon sign above the bed.
- Incorporate ‘texture’ by adding a shaggy rug and velvet pillows. The room is ‘done’ when there are at least three different tactile surfaces to interact with.
- Set up a ‘tech-free’ zone with a record player or a Polaroid photo wall to encourage a slower, more intentional pace of life.
- Organize desk accessories in acrylic bins to keep the ‘retro’ vibe from becoming ‘messy.’
- The final touch is scent; use a reed diffuser with ‘nostalgic’ notes like sandalwood or cotton to seal the atmosphere.
How to Install Rock Flower Beds for a Modern Home Exterior

Why we love this
Rock beds offer a clean, architectural aesthetic that provides a stunning contrast against dark mulch or bright green turf. The smooth, cool touch of river rocks or the sharp, crystalline glitter of crushed white quartz adds a sophisticated ‘sculptural’ element to your landscape. There’s a satisfying crunch underfoot and a feeling of permanent, low-maintenance beauty. Rainwater makes the stones glisten, revealing deep greys, tans, and blues that give your home a high-end, modern edge that never wilts or fades.
Essential Elements:
- Heavy-duty landscape fabric
- Galvanized steel edging
- River rocks, lava rocks, or pea gravel
- Drought-tolerant plants (Agave, Yucca, or Ornamental Grasses)
- Base layer of sand or fine gravel
How to make it
- Clear the area of all debris and level the soil. Apply a layer of sand to create a smooth ‘prep’ surface that prevents rocks from sinking over time.
- Lay down the highest grade landscape fabric available. Secure it with staples every 12 inches—this ‘searing’ of the ground is what prevents future weed growth.
- Install your edging. For a modern look, use straight lines or sharp angles rather than the curves used in traditional beds.
- Cut ‘X’ shapes in the fabric to plant your greenery. Focus on structural plants that won’t drop excessive leaves, which are hard to clean out of rock.
- Pour your chosen stone. Start at the edges and work toward the center. The ‘visual cue’ for enough coverage is a 2-3 inch depth where no fabric is visible.
- Rake the rocks flat to ensure a uniform ‘finish.’
- Hose down the rocks once installed to wash off ‘quarry dust’ and reveal their true, vibrant colors.
How to Arrange Faux Flower Pots for Everlasting Porch Beauty

Why we love this
The beauty of high-quality faux florals is the ability to have a ‘perfect bloom’ all year long without the heartbreak of wilting or the stress of daily watering. These modern ‘real-touch’ stems feel amazingly life-like, with petals that have a slight dewy moisture to them and stems that bend with organic grace. They offer a burst of vibrant color—vivid pinks, crisp whites, and lush greens—that stays consistent regardless of the sun or shade, giving your porch a welcoming, ‘always-ready’ look that boosts your mood every time you walk through the door.
Essential Elements:
- UV-resistant ‘real-touch’ faux flowers
- Large ceramic or resin planters
- Floral foam or dry sand for weight
- Preserved moss or decorative stones for top dressing
- Wire cutters for stem adjustment
How to make it
- Select a pot that matches your home’s exterior. Fill the bottom third with heavy rocks or sand to prevent the ‘prep’ from blowing over in the wind.
- Insert a block of floral foam, securing it with hot glue if necessary. This acts as your ‘anchor’ for the arrangement.
- Start with your ‘thriller’—a tall, central piece like a faux palm or a large hydrangea head.
- Add your ‘fillers’—medium-height flowers like roses or peonies. The technique here is to ‘fluff’ every leaf and petal to remove the ‘factory-flat’ look.
- Incorporate ‘spillers’—vines or trailing ivy that hang over the edge of the pot. This creates a realistic, overflowing ‘visual cue’ of life.
- Cover the floral foam completely with preserved green moss. The ‘doneness’ check is ensuring no foam or plastic stems are visible from any angle.
- Mist the flowers with a UV-protectant spray once a month to prevent the sun from ‘cooking’ the color out of the fabric.
How to Build a Budget Friendly Grill Station for Summer Cookouts

Why we love this
There is nothing that says ‘home’ quite like the sizzle of a grill and the aroma of charred wood and spices filling the backyard air. A dedicated grill station elevates the cooking process from a solo chore to a social event. We love the rugged feel of stained wood countertops and the convenience of having everything—tongs, spices, and cold drinks—right at your fingertips. It creates a hub for laughter and storytelling, where the warmth of the grill is matched only by the warmth of the company, all without breaking the bank.
Essential Elements:
- Pre-cut lumber (Cedar or pressure-treated pine)
- Concrete pavers or a heat-resistant mat
- Stainless steel hooks for utensils
- Outdoor-rated wood glue and deck screws
- Countertop sealant (food-safe if prepping directly on wood)
How to make it
- Design a simple ‘H-frame’ structure using 4×4 posts for legs and 2x4s for the shelving frame.
- Assemble the frame using pocket-hole joinery for a ‘professional’ look that hides the screws.
- For the countertop, use 1×6 boards spaced 1/8 inch apart to allow for wood expansion. Sand the surface until it is ‘smooth as silk’ to avoid splinters.
- Apply a dark, weather-resistant stain. The ‘visual cue’ for a good seal is when water beads up on the surface rather than soaking in.
- Install a heat-resistant barrier (like a large concrete paver) on the area where the grill will sit to prevent ‘cooking’ the wood underneath.
- Add ‘finishing touches’ like a magnetic strip for knives and a bottle opener mounted to the side post.
- Level the station on your patio using shims if necessary. The ‘doneness’ cue is a perfectly level surface that doesn’t wobble when you flip a burger.
How to Display Whimsical Glass Yard Art for a Magical Garden

Why we love this
Glass yard art adds a layer of ethereal magic to your garden, catching the sunlight and shattering it into a thousand tiny rainbows across your lawn. The smooth, cool surface of hand-blown glass or recycled bottles provides a stunning contrast to the soft, organic textures of your plants. It’s like finding hidden treasure among the leaves. We love how these pieces change throughout the day; a deep cobalt blue orb might glow like a sapphire in the morning light and then turn into a mysterious, dark silhouette as the sun sets, giving your garden a ‘fairytale’ personality.
Essential Elements:
- Colored glass bottles, globes, or ‘garden stakes’
- Copper or steel rods for mounting
- Clear outdoor adhesive (silicone-based)
- Solar-powered fairy lights (to insert into glass)
- Decorative gravel or glass beads for the base
How to make it
- Collect various glass pieces. Using ‘found’ objects like vintage wine bottles or mismatched glassware adds a ‘curated’ rather than ‘store-bought’ feel.
- Clean the glass thoroughly with a vinegar solution to ensure the ‘prep’ is free of streaks so the sun can pass through perfectly.
- For bottle trees: Secure a sturdy wooden post or use a specialized metal frame. Slide the bottles over the ‘branches.’
- For ‘glass towers’: Stack bowls and vases, securing them with a bead of clear silicone. The ‘visual cue’ for a strong bond is when the glue turns from cloudy to clear.
- Position the art in an area that gets ‘peak’ sunlight. The technique is to place them where they will cast reflections onto a neutral surface like a fence or a light-colored wall.
- Insert solar string lights into hollow pieces so they ‘glow from within’ at night.
- The project is ‘done’ when the garden feels balanced—art should be an ‘accent,’ not the main event.
How to Construct a Floating Deck for a Perfect Outdoor Lounge

Why we love this
A floating deck is the ultimate ‘minimalist’ luxury for a backyard, providing a level, clean surface that feels like an extension of your indoor living room. The scent of sun-warmed wood and the sound of footsteps on a solid timber platform create an immediate sense of ‘place.’ It’s the perfect spot for a morning coffee or an evening glass of wine, where you’re elevated just enough to see the garden from a new perspective. It’s about creating a defined zone for relaxation that feels both grounded and incredibly airy.
Essential Elements:
- Deck blocks (concrete)
- 2×6 pressure-treated joists
- 5/4×6 deck boards
- Hidden deck fasteners or color-matched screws
- Landscaping fabric and gravel (for underneath)
How to make it
- Clear the ground and lay landscape fabric topped with gravel. This ‘prep’ is vital to prevent weeds and moisture from ‘cooking’ the wood from below.
- Place concrete deck blocks at the corners and every 4 feet along the perimeter. Use a long level to ensure every block is ‘dead center’ level with the others.
- Construct the outer frame and then install internal joists every 16 inches. This ‘sturdy’ phase is the ‘visual cue’ that your deck won’t bounce or sag.
- Check the frame for square by measuring the diagonals; they must be identical for a ‘perfect finish.’
- Lay the deck boards. Use a spacer tool to ensure a consistent gap—this allows for drainage and airflow.
- Secure the boards. If using screws, ‘sink’ them just below the surface for a clean, ‘high-end’ look.
- Sand the edges and apply a high-quality sealant. The deck is ‘done’ when the wood grain is accentuated and the surface feels smooth to the touch.
Final Thoughts on Reclaiming Your Space
Becoming a minimalist isn’t about owning nothing; it’s about making sure everything you own has a purpose or brings you profound joy. From the way your pantry functions to the way your garden glows at sunset, these DIY projects are the building blocks of a life reclaimed. I hope these steps inspire you to pick up a shovel, a drill, or a label maker and start crafting the sanctuary you deserve. Your home is your story—make sure it’s one you love to tell.