
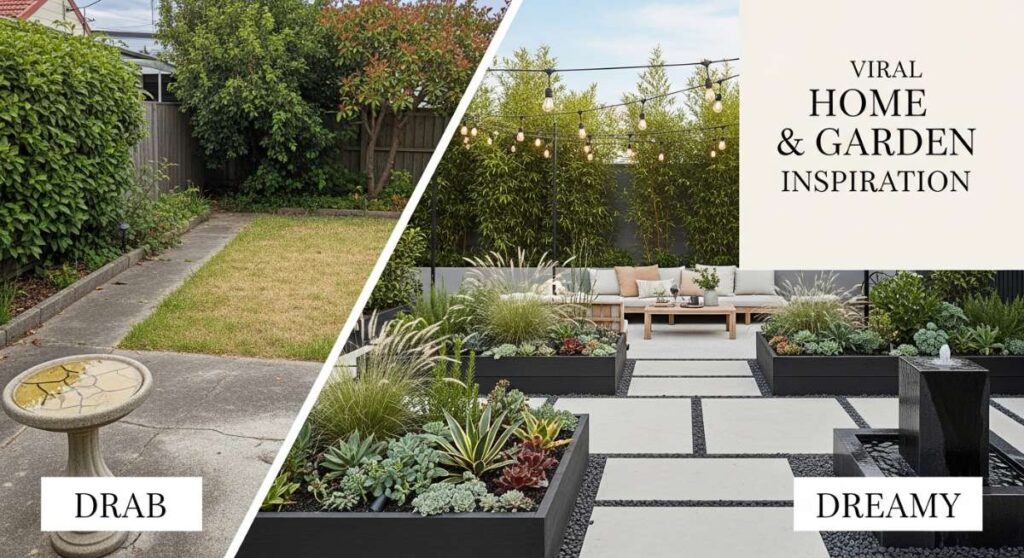
Do you ever look out your back window and feel… uninspired? We’ve all been there—staring at a patch of grass that feels more like a chore than a retreat. But here is the thing: your outdoor space is essentially an extra room of your house, just waiting for a little bit of magic to bring it to life. Lately, I’ve been obsessed with how social media has turned gardening from a ‘retirement hobby’ into a vibrant, creative outlet for everyone.
Transforming your yard doesn’t require a professional landscaping crew or a massive budget. It’s about choosing projects that pack a visual punch while actually making your life easier. From the soothing sound of water to the aromatic scent of cedar, these viral trends are all about creating a sensory experience that draws you outside. Today, I’m sharing the top five ways to turn that ‘drab’ patch of dirt into the dreamy sanctuary you’ve been scrolling past on your feed.
Whether you’re a seasoned DIYer or someone who just bought their first pair of gardening gloves, these projects are designed to be approachable and high-impact. We are focusing on textures that pop, layouts that invite relaxation, and functional beauty that lasts through every season. Let’s dive into the trends that are currently breaking the internet and will soon be the talk of your neighborhood.
How to Design a Low Maintenance Flower Bed for Ultimate Curb Appeal

Why we love this
There is something profoundly soothing about a garden that doesn’t demand your every waking hour. This trend focuses on the lush, layered look of an English cottage garden but utilizes hardy perennials that thrive with minimal intervention. Imagine walking up to your front door greeted by the soft, silvery foliage of lavender and the sturdy, vibrant heads of coneflowers, all dancing in the breeze. The aroma is grounding, and the visual texture of different heights creates a professional, designer feel that instantly boosts your home’s value and your daily mood.
Essential Elements:
- Hardy Perennial Plants (Lavender, Salvia, Sedum)
- Professional Grade Weed Barrier Fabric
- Organic Cedar Mulch or Pine Bark
- Garden Edging (Stone or Metal)
- Slow-release Fertilizer Granules
How to make it
- Measure and Outline: Use a garden hose or spray paint to mark a fluid, curved shape for your bed. Curves feel more organic and high-end than stiff straight lines.
- Soil Preparation: Remove existing grass and weeds. Till the soil to a depth of 8 inches, mixing in compost to ensure your plants have the nutrients they need to establish deep roots.
- Lay the Barrier: Roll out your weed barrier fabric, overlapping the edges by at least 3 inches. Secure it with landscape staples every 12 inches to prevent shifting.
- Strategic Planting: Cut ‘X’ shapes in the fabric for your plants. Place taller species in the back and shorter, mounded plants in the front. This creates a ‘stadium seating’ effect for your flowers.
- Mulching for Success: Apply a thick, 3-inch layer of mulch over the fabric. This retains moisture, regulates soil temperature, and provides that clean, finished look.
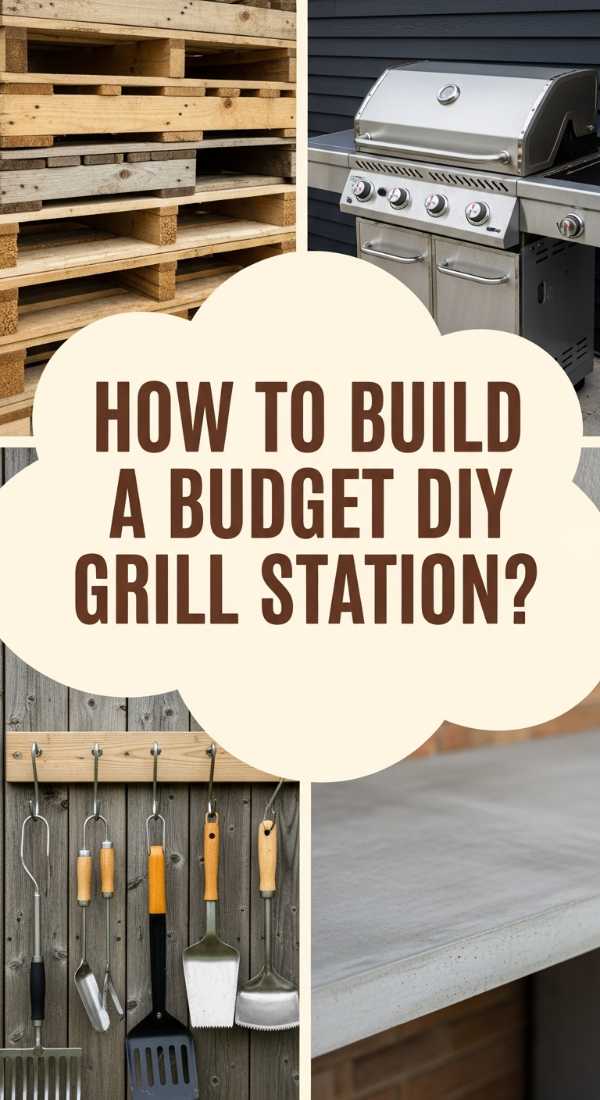
How to Build a DIY Grill Station for Summer Cookouts
Why we love this
Nothing says ‘lifestyle’ quite like an outdoor kitchen, but the DIY grill station is the accessible version that has taken the internet by storm. It transforms the solitary act of grilling into a social event. Picture the textured grain of stained wood paired with a smooth, cool stone countertop, where the scent of charcoal meets the freshness of a cold drink. It provides a dedicated space for prep and serving, meaning you won’t be running back and forth to the kitchen while your guests enjoy the sunshine.
Essential Elements:
- Pressure-treated 4×4 posts and 2×4 framing
- Exterior-grade Plywood or Cedar Slats
- Stone or Concrete Countertop Slab
- Stainless Steel Hooks and Magnetic Tool Strip
- Weatherproof Wood Stain or Sealant
How to make it
- Design the Frame: Build a sturdy rectangular box frame using 4×4 posts for the corners and 2x4s for the horizontal supports. Ensure the height is comfortable for prep work (usually 36 inches).
- Install Shelving: Add horizontal 2×4 supports within the frame to hold a middle shelf. This is perfect for storing charcoal bags or extra platters.
- Exterior Siding: Nail cedar slats or exterior-grade plywood to the sides. Leave the back open for airflow if you’re storing a propane tank inside.
- The Countertop: Measure and fit your stone or concrete slab on top. Secure it with construction adhesive designed for masonry and wood.
- Finishing Touches: Sand all wooden surfaces until smooth to the touch. Apply two coats of exterior sealant. Finish by screwing in hooks for your tongs and a bottle opener for ultimate convenience.
How to Style a Hot Tub Area for a Backyard Sanctuary

Why we love this
The viral ‘Sanctuary’ trend is all about turning a functional hot tub into a high-end spa experience. It’s about the contrast between the warm, bubbling water and the cool, crisp evening air. We love the way soft, ambient lighting reflects off the steam, creating a misty, magical atmosphere. By surrounding the tub with natural textures like bamboo, smooth river stones, and oversized tropical plants, you create a private cocoon that feels miles away from the stresses of daily life, right in your own backyard.
Essential Elements:
- Privacy Screens (Bamboo or Wood Lattice)
- Weatherproof String Lights or Lanterns
- Outdoor Rug (Natural Fiber Aesthetic)
- Side Table for Drinks and Towels
- Potted Palms or Tall Grasses
How to make it
- Establish Privacy: Install privacy screens on at least two sides of the hot tub. This creates an intimate ‘room’ feel and blocks out neighbors’ views.
- Soft Flooring: Lay down an outdoor rug at the entry point of the tub. This provides a soft, non-slip surface for wet feet and adds a layer of indoor-inspired comfort.
- Layered Lighting: String Edison-style bulbs overhead, but keep them on a dimmer. Add solar-powered floor lanterns around the perimeter to guide the way safely at night.
- Greenery for Vibe: Place large planters filled with tall grasses or hardy palms around the corners. The rustling of the leaves adds a soothing auditory element to your soak.
- Accessory Station: Place a weather-resistant side table within arm’s reach of the tub for your phone, water, or a candle, completing the spa-like functionality.
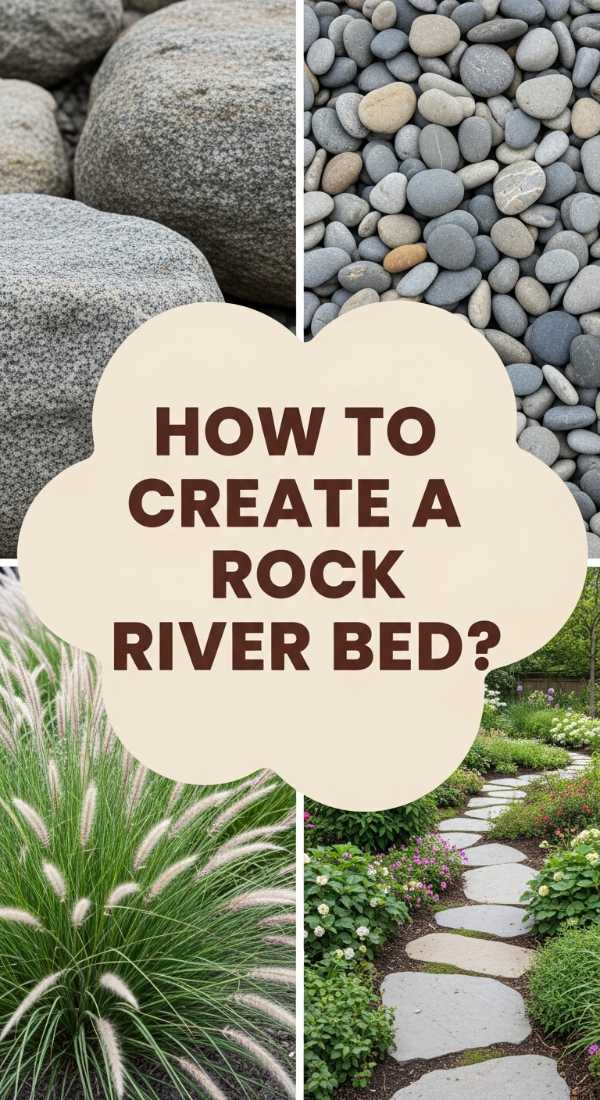
How to Create a Rock River Bed for Better Garden Drainage
Why we love this
This is where engineering meets art. A rock river bed (or dry creek bed) is a viral sensation because it solves the ‘soggy yard’ problem while looking like a deliberate piece of landscape art. When it rains, the water flows through the smooth, rounded stones, creating a temporary, glistening stream. In the dry sun, the varied colors of the rocks—from slate greys to earthy tans—provide a rugged, natural texture that breaks up the monotony of green grass. It feels ancient, permanent, and incredibly intentional.
Essential Elements:
- Varied Sizes of River Rocks and Boulders
- Heavy-duty Landscape Fabric
- Shovel and Pickaxe
- Fine Gravel or Crushed Stone
- Drought-tolerant ornamental grasses
How to make it
- Trace the Path: Identify where water naturally pools and mark a meandering, ‘S’ shaped path leading to a lower point in the yard or a drainage grate.
- Excavation: Dig a trench about 12-18 inches wide and 6-10 inches deep. Ensure the center is the deepest point to channel the water effectively.
- Base Layer: Line the entire trench with heavy-duty landscape fabric to prevent weeds from poking through your ‘river.’
- Rock Placement: Place larger boulders along the ‘banks’ to anchor the look. Fill the center with medium-sized river rocks, and use fine gravel to fill in the gaps between the larger stones.
- Landscaping the Edges: Plant clumps of ornamental grasses or creeping thyme along the edges. This softens the transition between the rock and the lawn, making it look like a natural feature.
How to Start Building a Floating Deck for an Outdoor Oasis

Why we love this
Floating decks are the ultimate DIY flex because they don’t require digging deep post holes or attaching to the house. The result is a modern, low-profile platform that defines a space for lounging or dining. We love the feeling of being slightly elevated off the ground, the scent of fresh wood in the sun, and the clean, architectural lines it adds to a garden. It creates a ‘destination’ in the yard, making even a small corner feel like a high-end resort patio.
Essential Elements:
- Concrete Deck Blocks
- Pressure-treated 2×6 Joists
- Composite or Cedar Decking Boards
- Hidden Deck Fasteners or Wood Screws
- Level and Landscape Fabric
How to make it
- Site Prep: Clear the area and lay down landscape fabric topped with a thin layer of gravel to prevent vegetation from growing under the deck.
- Block Layout: Place concrete deck blocks in a grid pattern. Use a long straight board and a level to ensure every block is perfectly even with its neighbors; this is the most critical step for a stable deck.
- The Outer Frame: Set your 2×6 joists into the slots of the deck blocks to create the outer perimeter. Check for square by measuring diagonally from corner to corner.
- Internal Joists: Install internal joists every 16 inches on center. Secure them using joist hangers and galvanized nails for maximum structural integrity.
- Decking Boards: Lay your decking boards across the joists. Use spacers to maintain a consistent 1/8-inch gap for drainage. Screw them down using hidden fasteners for a sleek, viral-worthy finish.
Transforming Your Space One Project at a Time
There you have it—five viral-inspired ways to take your garden from ‘just a yard’ to a true extension of your home. Whether you start with a simple low-maintenance flower bed or go big with a floating deck, the key is to enjoy the process and the fresh air. Your garden is a living thing, and as you pour your creativity into it, you’ll find it gives back in the form of peace, beauty, and the perfect backdrop for a lifetime of memories. Happy gardening!