
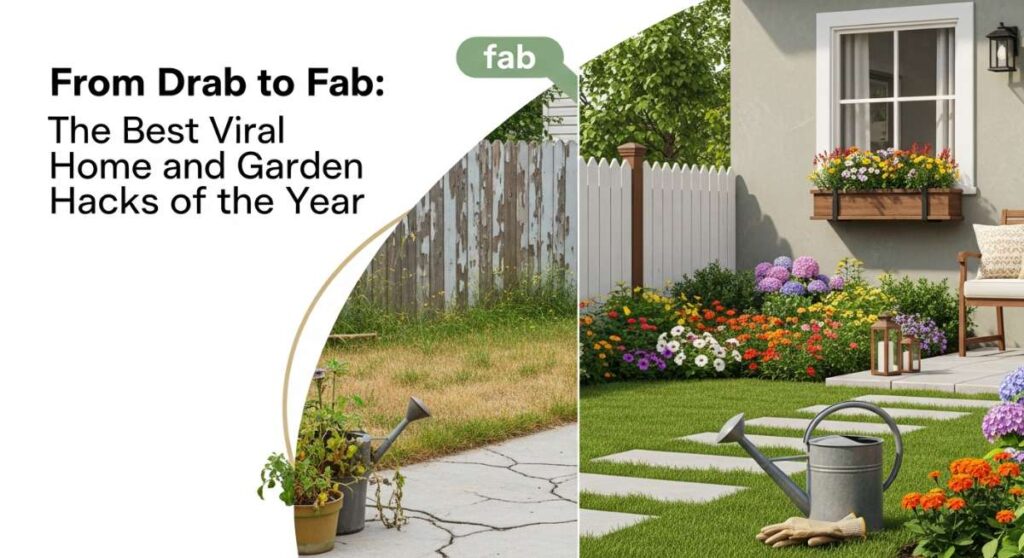
From Drab to Fab: The Best Viral Home and Garden Hacks of the Year
We’ve all been there—standing in the middle of a room or staring out at a patch of grass, feeling like something is just… missing. Our homes are meant to be our sanctuaries, yet life often leaves them feeling a bit tired or uninspired. I spent years scrolling past those ‘perfect’ Pinterest boards, convinced that beauty was reserved for professional designers or those with a bottomless bank account, but this year changed everything for me. I discovered that the most viral hacks aren’t just about aesthetics; they are about reclaiming the joy of your own space.
This year, the internet exploded with creative, soulful ways to breathe life back into our surroundings. From the gentle quack of backyard ducks to the satisfying click of a perfectly labeled pantry jar, these trends are about creating a lifestyle that feels as good as it looks. I’ve rounded up the absolute best of the best—the hacks that actually work, the projects that spark genuine delight, and the transformations that will make you fall in love with your home all over again. Grab a cup of coffee, and let’s get inspired!
How to Style Eternal Blooms for Year Round Curb Appeal
Why we love this
There is something undeniably magical about a home that looks like it’s in perpetual springtime, regardless of the frost on the windows or the heat of mid-August. We adore eternal blooms because they provide a constant, unwavering pop of color that softens the edges of your home’s exterior, inviting a sense of permanent cheer. Imagine the silky texture of high-quality UV-resistant petals that never wilt, and the way a vibrant fuchsia or a soft cream can brighten a gloomy afternoon. It’s the ultimate low-maintenance luxury that ensures your home always feels welcoming and meticulously cared for without the stress of a watering schedule.
Essential Elements:
- High-quality UV-rated artificial silk flowers (Peonies, Geraniums, or Lavender work best).
- Weighted window boxes or heavy ceramic planters.
- Dry floral foam blocks.
- Spanish moss or decorative river stones for top dressing.
- Wire cutters and floral tape.
How to make it
- Begin by selecting flowers that are specifically labeled ‘UV-resistant’ to prevent the sun from bleaching their vibrant hues within weeks; look for petals that have a slight waxy coating for the most realistic appearance.
- Prepare your containers by filling them tightly with dry floral foam blocks, ensuring there is no wiggle room; if your planters are deep, use recycled plastic bottles at the bottom to save on foam.
- Use your wire cutters to trim the flower stems to varying heights; this is the secret to a natural, ‘grown-in’ look rather than a flat, artificial line.
- Start with your ‘thriller’—the tallest, most vibrant blooms—and place them in the center of the arrangement, pushing the wire stems deep into the foam for stability.
- Surround the center with ‘fillers’ like faux eucalyptus or baby’s breath, angling them slightly outward to create volume and hide the floral foam.
- Finish the edges with ‘spillers’ like artificial ivy or trailing jasmine that drape over the side of the pot, softening the hard lines of the container.
- Cover any visible foam with a thick layer of Spanish moss or pebbles, securing them with floral pins to ensure the wind doesn’t blow your ‘soil’ away.
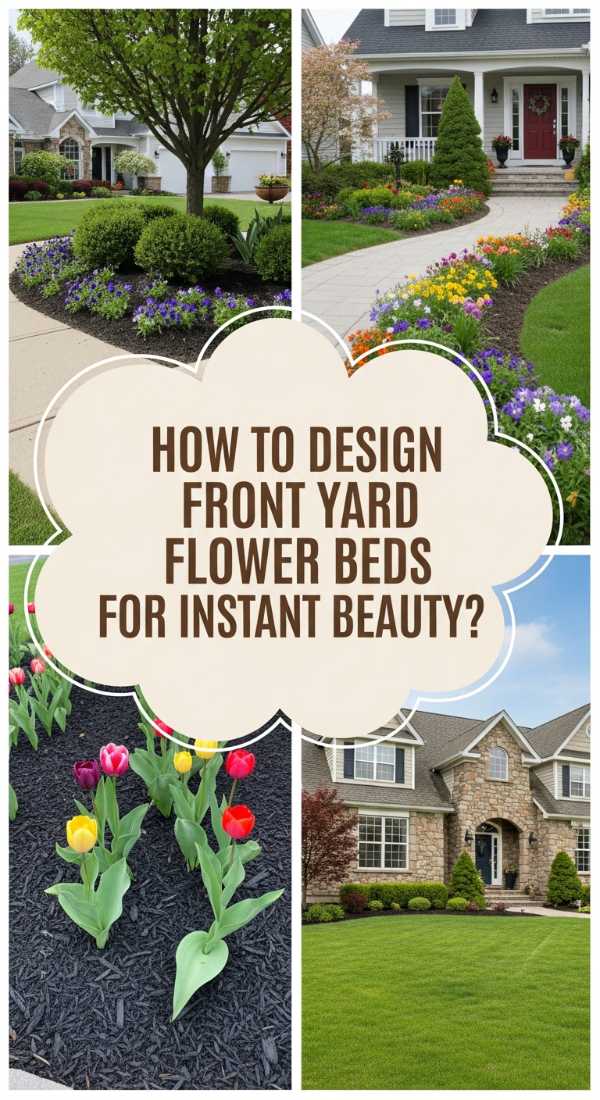
How to Design Front Yard Flower Beds for Instant Beauty
Why we love this
A well-designed flower bed is like a warm hug for your house; it bridges the gap between the architecture of the building and the wildness of nature. We love this approach because it uses layering to create a visual symphony of textures, from the feathery fronds of ferns to the velvety leaves of lamb’s ear. When the breeze catches these layers, the movement creates a dynamic, living portrait right outside your window. The scent of damp earth and fresh mulch combined with the sight of structured greenery provides an instant sense of tranquility and high-end curb appeal that makes every arrival feel like a special occasion.
Essential Elements:
- A mix of perennials (Hostas, Coneflowers) and annuals (Petunias, Marigolds).
- Evergreen shrubs for year-round structure (Boxwoods or Dwarf Alberta Spruce).
- High-quality organic mulch (dark brown or black for contrast).
- Steel or stone landscape edging.
- Slow-release granular fertilizer.
How to make it
- Mark out your bed using a garden hose to create soft, organic curves; straight lines often feel too rigid, while curves add a professional, landscaped flow.
- Remove all grass and weeds from the marked area using a sharp spade, ensuring you dig deep enough to remove the root systems to prevent regrowth.
- Amend the soil with organic compost, tilling it in to at least a 6-inch depth to create a nutrient-rich environment for your new plants.
- Place your plants while they are still in their nursery pots to test the layout; put the tallest shrubs in the back, medium-height perennials in the middle, and low-growing annuals at the very front.
- When planting, tease the roots of each plant gently if they are root-bound, and dig a hole twice as wide as the pot but no deeper.
- Water each plant thoroughly immediately after planting to settle the soil around the roots and eliminate air pockets.
- Apply a 3-inch layer of mulch over the entire bed, keeping it an inch away from the base of the plant stems to prevent rot, and finish by installing your edging for a crisp, clean border.
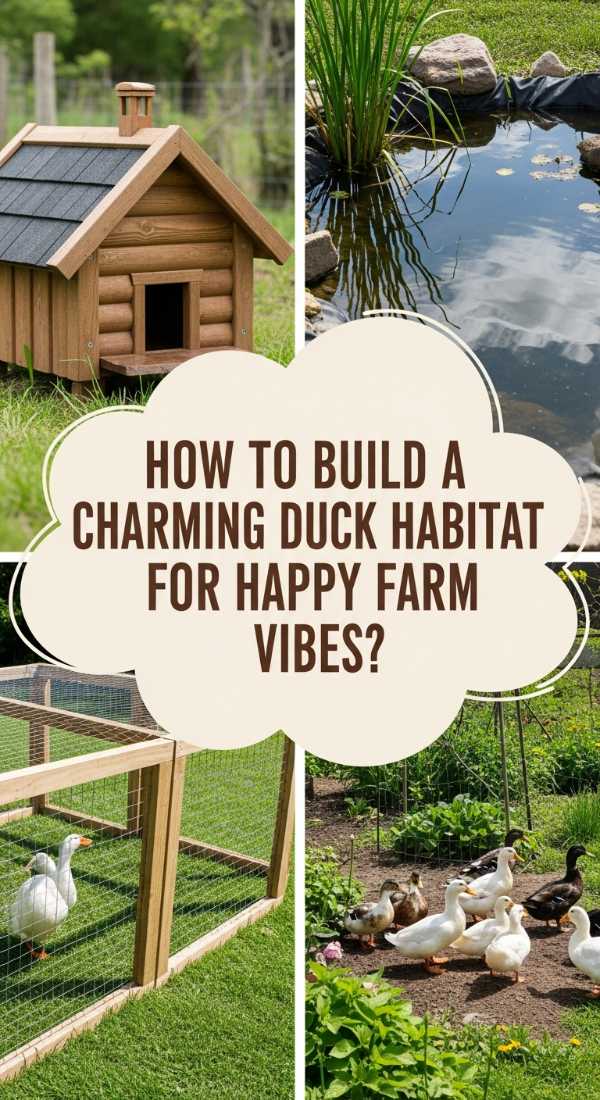
How to Build a Charming Duck Habitat for Happy Farm Vibes
Why we love this
There is nothing quite as soul-soothing as the gentle, rhythmic ‘quack’ of ducks and the sight of them splashing in clean water. Creating a dedicated duck habitat brings an immediate ‘cottagecore’ or farm-sanctuary vibe to your backyard, transforming a mundane corner into a center of life and movement. We love the tactile nature of this project—the smoothness of the pond stones, the smell of fresh straw, and the joy of watching these feathered friends forage through the grass. It’s an invitation to slow down, connect with animals, and enjoy the simple, rustic pleasures of outdoor living.
Essential Elements:
- A predator-proof duck house or coop with ventilation.
- A heavy-duty preformed pond liner or a large galvanized stock tank.
- Hardware cloth (1/2 inch) for fencing to keep out predators.
- Solar-powered pond pump and filter system.
- Pea gravel and large flat stepping stones.
- Nesting straw or wood shavings.
How to make it
- Select a level area in your yard that offers both sun and shade; ducks need to dry off in the sun but can easily overheat without a cool place to retreat.
- Excavate a hole for your pond liner, ensuring it is slightly larger than the liner itself, and level the bottom with an inch of sand to prevent punctures.
- Set the pond liner in place, fill the gaps around the edges with soil, and ring the perimeter with large stones to hide the plastic edge and provide a sturdy entry point for the ducks.
- Install a solar pump; ducks are messy, and moving water stays cleaner longer and prevents mosquito breeding.
- Construct a secure enclosure using pressure-treated lumber and hardware cloth, burying the wire at least 6 inches into the ground to deter burrowing predators like foxes or raccoons.
- Inside the coop, provide a thick layer of pine shavings for bedding, making sure the floor is slip-resistant as ducks have sensitive feet.
- Create a ‘mud-free’ zone around the pond using pea gravel, which allows water to drain away and keeps the ducks’ living area from becoming a swamp.
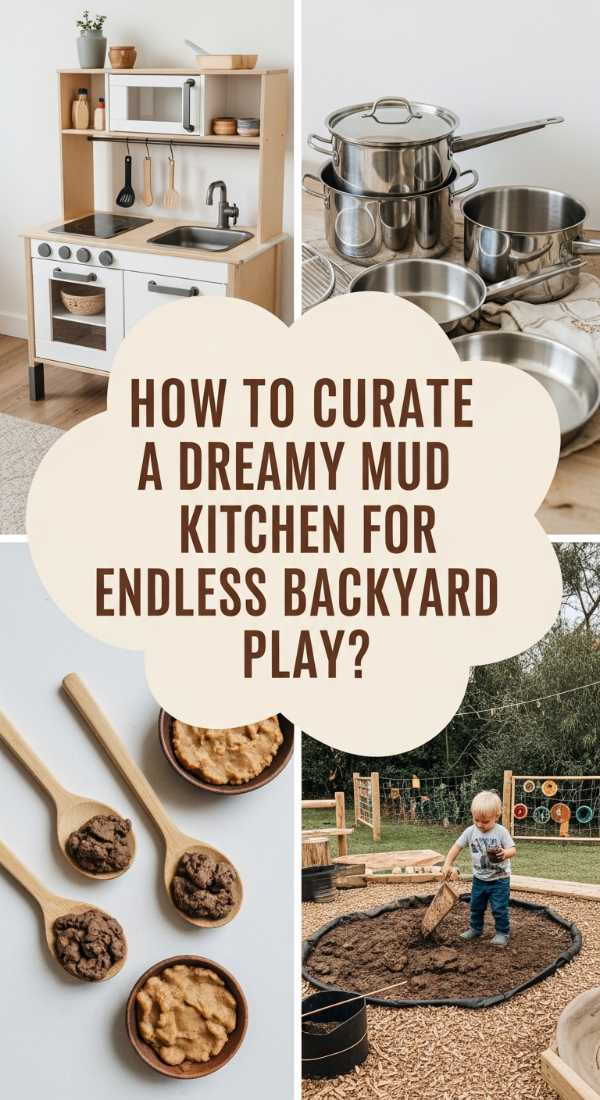
How to Curate a Dreamy Mud Kitchen for Endless Backyard Play
Why we love this
The mud kitchen is the ultimate tribute to childhood wonder, where dirt becomes chocolate cake and flower petals are transformed into gourmet soup. We love this hack because it encourages sensory play that is both messy and magnificent, pulling kids away from screens and into the fresh air. The tactile experience of squishing cool mud between fingers, the clink of old metal spoons against wooden bowls, and the earthy aroma of wet garden soil create memories that last a lifetime. It’s a beautiful, rustic addition to any garden that celebrates the wild imagination of the little ones we love.
Essential Elements:
- An upcycled wooden pallet or a small potting bench.
- Stainless steel mixing bowls (to act as sinks).
- Old pots, pans, and wooden spoons.
- A functional outdoor tap connection or a large water dispenser.
- Hooks for hanging utensils.
- A chalkboard for ‘daily specials.’
How to make it
- Sand your wooden base (pallet or bench) thoroughly to remove any splinters; safety is paramount for little hands exploring this space.
- Cut two circular holes in the countertop using a jigsaw, sized slightly smaller than the lip of your stainless steel bowls, so they sit flush like sinks.
- Apply a non-toxic, weather-resistant sealant to the wood to protect it from the constant exposure to water and mud.
- Attach a backboard to the bench and install sturdy hooks for hanging colanders, whisks, and measuring cups, keeping everything within reach.
- Install a simple gravity-fed water dispenser or a hand pump to give the children a ‘running water’ experience, which adds a whole new layer of realism to their play.
- Create a ‘pantry’ shelf stocked with natural materials: pinecones, dried lavender, pebbles, and sand, all stored in weather-proof containers.
- Add a personalized chalkboard sign above the kitchen and a small stool, allowing the little chefs to display their creations with pride.
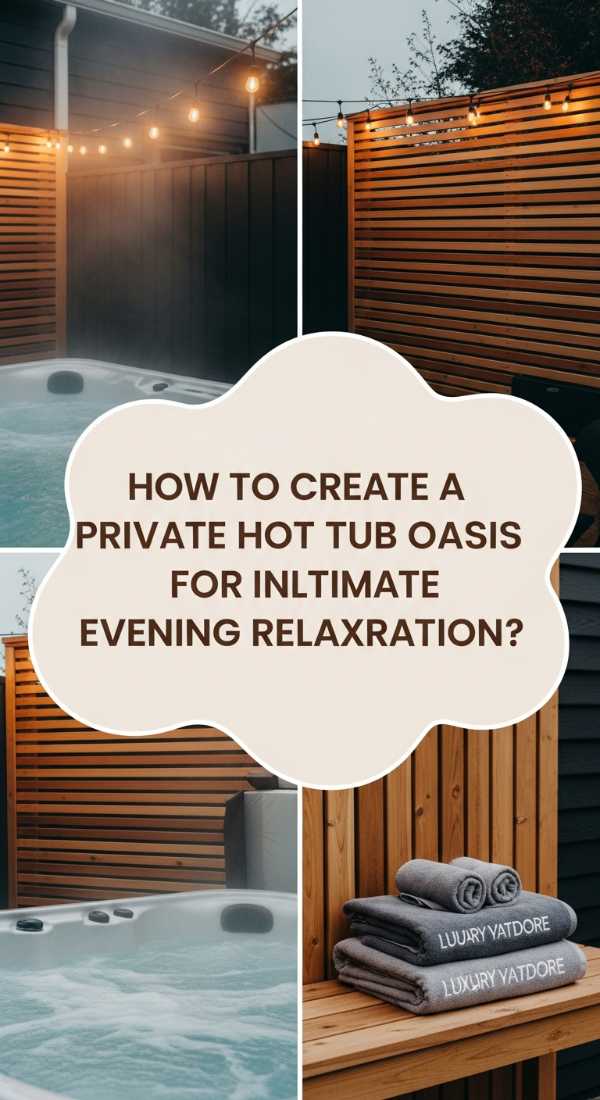
How to Create a Private Hot Tub Oasis for Ultimate Evening Relaxation
Why we love this
Imagine stepping out into your backyard as the sun sets, the air turning crisp, only to be met by the steam rising from a bubbling tub surrounded by soft, glowing lights. We love this oasis concept because it turns a standard hot tub into a secluded sanctuary that feels like a five-star spa. The contrast of the hot water against the cool night air, the scent of cedar wood, and the visual privacy provided by lush greenery create a sensory escape from the world. It’s the perfect place to decompress, star-gaze, and let the stresses of the day melt away in total seclusion.
Essential Elements:
- A portable or permanent hot tub.
- Tall cedar lattice panels or outdoor privacy screens.
- Strand of warm-white Edison bulbs.
- Large potted plants (Bamboos or tall grasses work well for screening).
- All-weather outdoor rug.
- A small side table for towels and drinks.
How to make it
- Position your hot tub on a reinforced, level surface (concrete pad or heavy-duty deck) that can handle the weight of the water and occupants.
- Install privacy screens or lattice panels on at least two sides of the tub to block views from neighbors’ windows and create an intimate ‘room’ feel.
- Mount heavy-duty outdoor Command hooks or screws to the screens to drape the Edison bulbs in a zigzag pattern overhead, ensuring they are high enough to be safe from splashes.
- Place large, tall planters filled with fast-growing greenery like clumping bamboo at the corners of the tub to soften the structure and enhance the tropical spa vibe.
- Lay down a high-quality outdoor rug in front of the tub steps to provide a soft, slip-free surface for wet feet and to define the relaxation zone.
- Add a weather-resistant side table within arm’s reach, and stock a nearby basket with plush, rolled-up towels and essential oil diffusers (lavender or eucalyptus) for the full sensory experience.
- Finish the space with a waterproof Bluetooth speaker hidden among the plants to play soft ambient music or nature sounds.
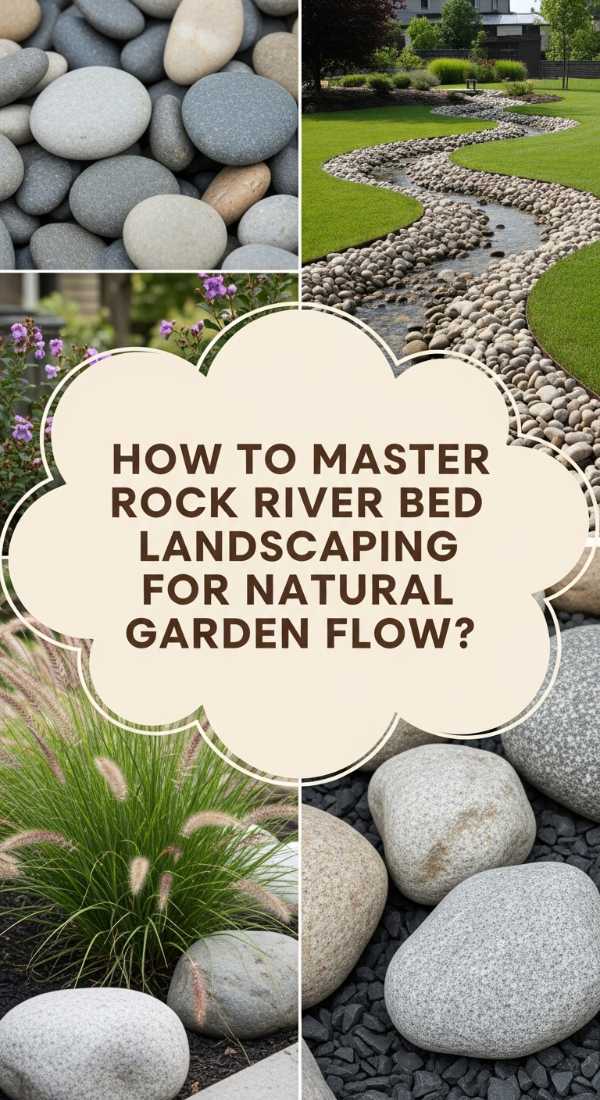
How to Master Rock River Bed Landscaping for Natural Garden Flow

Why we love this
Rock river beds are the unsung heroes of garden design, offering a perfect blend of high-end aesthetics and practical drainage. We love how a dry creek bed mimics the effortless beauty of a mountain stream, drawing the eye across the landscape with its fluid, organic shape. The smooth, cool touch of river rocks and the varying shades of gray, tan, and blue provide a grounding, zen-like quality to the yard. When it rains, the bed comes to life, channeling water away from your home while looking like a deliberate piece of natural art. It’s a sophisticated way to add ‘flow’ to a static garden.
Essential Elements:
- Landscape fabric (heavy-duty weed barrier).
- River rocks in various sizes (from small pebbles to large boulders).
- A spade and a wheelbarrow.
- Small ornamental grasses or ‘creeping’ groundcovers.
- Garden stakes and string.
How to make it
- Use a garden hose or string to map out a meandering, ‘S’ shaped path through your yard, following the natural slope of the land for proper drainage.
- Dig a trench along the path, about 6 to 12 inches deep, making it wider at the ‘bends’ to look more like a natural waterway.
- Line the entire trench with heavy-duty landscape fabric, securing it with landscape staples to prevent weeds from poking through your beautiful stone work.
- Place your largest ‘anchor’ boulders first at the curves or edges of the bed; these should look partially buried to mimic how they would sit in nature.
- Fill in the rest of the trench with medium-sized river rocks, and then use smaller pebbles to fill the gaps and create the ‘streambed’ floor.
- Tuck small, drought-tolerant plants like sedum or blue fescue into the edges of the rocks, letting them spill over slightly to soften the stone borders.
- Rake the rocks occasionally to maintain the flow and ensure no debris builds up, keeping your ‘river’ looking pristine and intentional.
How to Revive a Simple Patio Floor for Budget Friendly Luxury
Why we love this
There is a profound satisfaction in taking a stained, gray concrete slab and turning it into a Mediterranean-inspired masterpiece for just the cost of a few cans of paint. We love this hack because it is the ultimate ‘bang for your buck’ transformation, instantly elevating the entire look of your outdoor dining area. The sight of a crisp, geometric pattern or a soft, faux-stone finish underfoot makes the space feel like a curated outdoor room rather than an afterthought. It feels cool to the touch on a summer day and provides a clean, stylish backdrop for your patio furniture and potted plants.
Essential Elements:
- High-quality porch and floor enamel paint (base color and accent color).
- Large-scale floor stencil (Mandala or Moroccan styles are popular).
- Painter’s tape and a foam roller.
- Concrete cleaner and a stiff scrub brush.
- Concrete sealer (clear, anti-slip finish).
How to make it
- Power wash the concrete surface thoroughly to remove all dirt, oil, and old flakes; the paint will only adhere to a perfectly clean, porous surface.
- Apply two coats of your base color enamel, allowing at least 24 hours of drying time between coats to ensure a durable foundation.
- Position your stencil in a corner and secure it with painter’s tape; using a ‘dry’ foam roller (roll most of the paint off on a paper towel), lightly dab the accent color over the stencil.
- Lift the stencil carefully and move to the next section, overlapping the registration marks to ensure the pattern stays perfectly aligned across the entire patio.
- If you make a mistake, keep a damp cloth handy to wipe away excess paint immediately before it sets on the base coat.
- Once the entire pattern is dry (usually 24 hours), apply two coats of clear, UV-resistant concrete sealer to protect the design from foot traffic and weather.
- Wait at least 72 hours before moving heavy furniture back onto the patio to prevent the paint from peeling or scuffing.
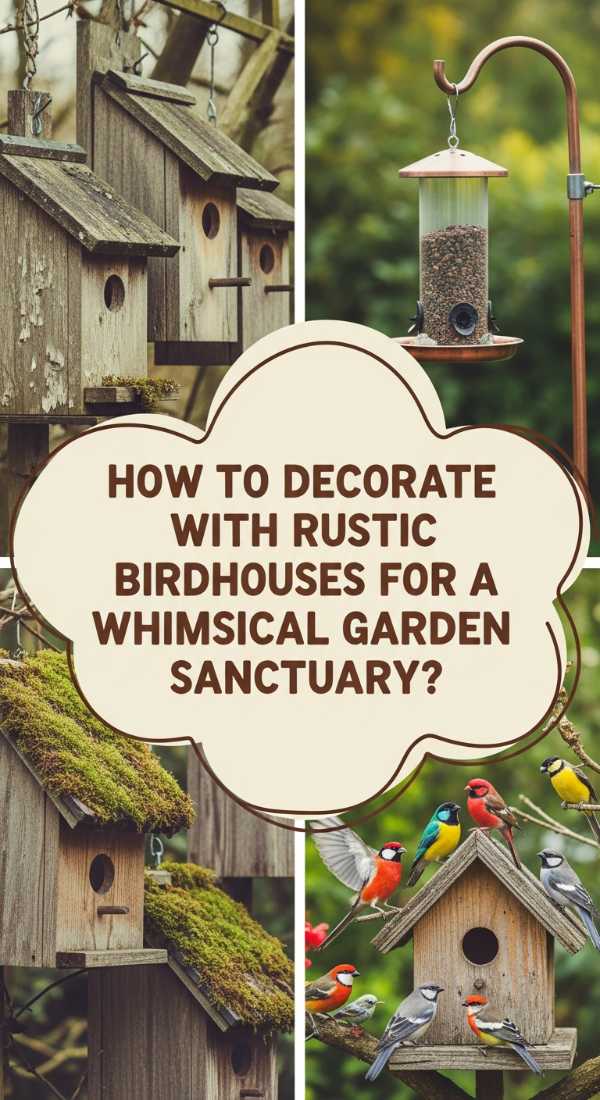
How to Decorate with Rustic Birdhouses for a Whimsical Garden Sanctuary

Why we love this
Rustic birdhouses are like jewelry for your garden; they add charm, height, and a touch of whimsy to every corner. We love how they invite the vibrant energy of songbirds into our daily lives, filling the air with chirps and the flash of wings. There’s something deeply comforting about the sight of a weather-worn wooden birdhouse nestled among the leaves, suggesting a garden that is a safe haven for all creatures. The scent of cedar wood and the visual texture of moss-covered roofs create a storybook atmosphere that makes your backyard feel like a hidden, enchanted forest.
Essential Elements:
- Various wooden birdhouses (different shapes and sizes).
- Exterior wood stain or weathered-look paint.
- Decorative moss and small twigs for ‘nesting’ accents.
- Heavy-duty garden hooks or fence mounts.
- Burlap ribbon or twine.
How to make it
- Choose birdhouses with functional features like clean-out doors and proper ventilation holes, even if you are primarily using them for decor.
- Apply a light layer of tea-stain or watered-down gray paint to new wood to give it an instant ‘antique’ or rustic appearance.
- Hot glue small bits of dried moss or tiny twigs to the peaks of the roofs to give them an organic, ‘settled-in’ look that blends with the garden.
- Group the birdhouses in ‘clusters’ at varying heights; placing three together on a fence line or a sturdy tree branch is more visually impactful than scattering them singly.
- Ensure they are mounted securely to withstand wind, using galvanized screws or heavy-duty outdoor wire wrapped in burlap to protect the tree bark.
- Place a few birdhouses near a water source, like a birdbath, to create a central ‘hub’ for local wildlife.
- Clean them out every autumn to ensure they remain a healthy and inviting home for the birds returning in the spring.
How to Achieve Realistic Pantry Organization for a Functional Dream Kitchen
Why we love this
A perfectly organized pantry is the ultimate ‘reset’ button for a busy household. We love this trend because it replaces the visual noise of mismatched boxes and crinkly plastic bags with the serene, orderly glow of glass jars and woven baskets. There is a deep, tactile satisfaction in the weight of a glass canister and the ‘click’ of a wooden lid, not to mention the delicious aroma of spices that greets you every time you open the door. It turns the chore of cooking into a streamlined, joyful experience where everything has a home and nothing is wasted.
Essential Elements:
- Uniform glass jars with airtight lids (Bamboo or stainless steel).
- Matching woven or wire baskets for bulk items.
- A label maker or custom vinyl decals.
- Tiered ‘stadium’ shelving for cans and spices.
- A large chalkboard or acrylic meal planner for the door.
How to make it
- Empty your entire pantry and discard any expired items; you need a completely blank canvas to see the potential of the space.
- Categorize your items into groups: ‘Baking,’ ‘Breakfast,’ ‘Pasta/Grains,’ ‘Snacks,’ and ‘Backstock.’
- Decant dry goods (flour, sugar, pasta, cereal) into your glass jars; this not only looks better but keeps food fresh significantly longer by preventing air exposure.
- Apply labels to the jars at the same height for a clean, professional look; use a consistent font or handwriting style to maintain visual harmony.
- Place smaller, loose items like granola bars or chip bags into baskets, which hides the ‘clutter’ while keeping items accessible.
- Utilize vertical space by installing tiered shelving for canned goods, so you can see exactly what you have without digging through the back of the shelf.
- Dedicate the lowest shelf to the kids, putting their healthy snacks in easy-to-reach bins to encourage independence.
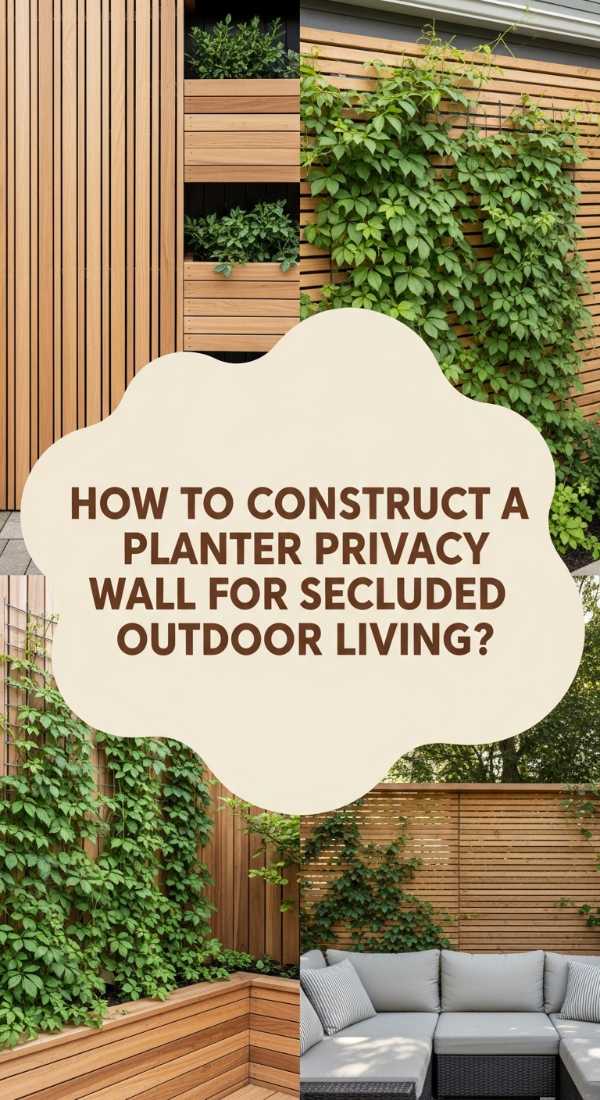
How to Construct a Planter Privacy Wall for Secluded Outdoor Living
[IMAGE_10]
Why we love this
There’s a special kind of peace that comes with sitting in your own garden without the feeling of being watched. We love the planter privacy wall because it’s a ‘living’ solution that provides seclusion while adding a lush, vertical garden to your space. The smell of aromatic herbs or the sight of climbing jasmine vines winding through the slats creates a sensory wall that is both beautiful and functional. It transforms a boundary into a feature, turning a small patio or balcony into a private, green cocoon where you can truly relax and be yourself.
Essential Elements:
- Large, heavy-duty rectangular planters (wood or resin).
- Tall wooden or metal trellis inserts.
- Fast-growing climbing plants (Clematis, Star Jasmine, or Ivy).
- High-quality potting mix with perlite.
- Zip ties or floral wire for training the vines.
How to make it
- Line up your large planters along the perimeter where you need the most privacy, leaving about 2 inches of space between them for airflow.
- Secure your trellis inserts into the back of each planter; if they are top-heavy, screw the trellis directly into the planter box frame for extra stability.
- Fill the planters with a premium, well-draining potting soil, leaving about two inches at the top to prevent overflow during watering.
- Plant your climbers (like Star Jasmine) at the base of the trellis, spacing them about 12 inches apart to ensure full coverage as they grow.
- Gently weave the young vines through the lower slats of the trellis, securing them loosely with floral wire to ‘train’ them to grow upward and outward.
- Add ‘filler’ plants at the base of the climbers—like colorful pansies or trailing petunias—to hide the soil and add a layer of color at eye level.
- Install a simple drip irrigation line through the planters to ensure the vertical wall stays lush and green even during the hottest summer months.
The Final Transformation
Whether you’re building a sanctuary for ducks or finally tackling that pantry project, the real secret to a ‘fab’ home is the love and intention you pour into it. These viral hacks are more than just trends; they are tools to help you curate a life that feels authentic, organized, and beautiful. Remember, your home doesn’t have to be perfect to be a masterpiece—it just has to be yours. Now, go forth and create something wonderful!