

There is something truly magical about the way a home breathes with the seasons. It’s more than just swapping out a throw pillow or hanging a new wreath; it’s about capturing a specific feeling—that fleeting, whimsical essence of a moment in time—and weaving it into the very fabric of your living space. When we curate our homes with intention, we aren’t just decorating; we are creating a backdrop for the memories that define our lives, from the quiet morning coffee on a sun-drenched porch to the boisterous laughter of a summer dinner party.
I’ve always believed that our surroundings are a reflection of our internal joy. As the light shifts and the air changes, our homes should evolve to offer us comfort and inspiration. Whether you’re looking to transform your backyard into a lush tropical escape or seeking the perfect way to celebrate a milestone, whimsical living is all about the little details that make the ordinary feel extraordinary. Let’s dive into how we can make every corner of our lives a bit more dreamy this season.
How to Design a Tropical Pool Deck for Ultimate Summer Vibes

Why we love this
Nothing says summer like the feeling of being whisked away to a private island, and a well-designed tropical pool deck offers that vacation-at-home luxury every single day. We adore this aesthetic because it plays with vibrant textures—think the rough grain of weathered teak against the waxy, deep emerald sheen of oversized monstera leaves. The aroma of salt-air candles and sun-warmed wood creates an atmosphere that is both invigorating and deeply relaxing, turning your backyard into a sensory retreat where the turquoise water beckons under the golden afternoon sun.
Essential Elements:
- Weather-resistant teak or rattan lounge chairs
- Oversized tropical plants like Bird of Paradise or Hibiscus
- Bright, patterned outdoor rugs in turquoise and coral
- Solar-powered tiki torches or brass lanterns
- Outdoor pillows in moisture-wicking linen fabrics
How to make it
- Begin by pressure washing your deck surface to remove any winter grime, ensuring a clean canvas for your tropical transformation.
- Define functional zones by placing your largest furniture pieces first; create a dedicated sunbathing area with lounges facing the water and a shaded conversation nook using a cantilever umbrella.
- Integrate greenery by using large-scale planters of varying heights; place the tallest palms in the corners to create a natural privacy screen and tuck smaller flowering plants like mandevilla around the seating.
- Layer in textiles by adding an outdoor rug that anchors the space, then toss weather-proof pillows onto the chairs to provide a pop of color and extra comfort.
- Install ambient lighting by stringing globe lights overhead and placing lanterns at floor level to ensure the tropical vibe carries into the evening hours.
How to Host a Mother’s Day Brunch for the Best Family Memories

Why we love this
Mother’s Day brunch is a celebration of warmth, gratitude, and the soft elegance of springtime. There is a profound beauty in a table set with heirloom china, the delicate scent of sweet pea and lavender drifting through the air, and the gentle clinking of mimosa glasses. This isn’t just a meal; it’s an experience designed to make the most important women in our lives feel cherished. The combination of buttery pastries, fresh berries, and soft linens creates a cozy, nurturing environment that encourages long conversations and heartfelt moments.
Essential Elements:
- Pressed linen tablecloth and matching napkins
- A seasonal floral centerpiece (peonies, tulips, and eucalyptus)
- Tiered serving stands for pastries and finger foods
- Customized place cards with handwritten notes
- A dedicated mimosa bar with fresh juices and garnishes
How to make it
- Select a color palette two weeks in advance, focusing on soft pastels or vibrant spring florals to guide your decor choices.
- Set the table the evening before to reduce morning-of stress, layering a runner over a crisp white tablecloth and polishing your silver and glassware until they sparkle.
- Prepare a menu that balances savory and sweet; choose dishes like a crustless quiche or overnight French toast that can be prepped early, allowing you to spend time with your guests rather than in the kitchen.
- Create a ‘DIY Mimosa Bar’ by chilling several bottles of sparkling wine and arranging carafes of orange, grapefruit, and peach nectar alongside bowls of fresh raspberries and mint sprigs.
- Personalize the experience by writing a small, heartfelt note to each guest on their place card, acknowledging why they are special to the family.
How to Build a DIY Garden Sanctuary for Peaceful Outdoor Living

Why we love this
In a world that feels increasingly loud, a garden sanctuary is a necessary exhale. We love this project because it prioritizes the soft sounds of nature—the rustle of wind through ornamental grasses and the gentle trickle of a solar fountain. It’s a space where texture reigns supreme, from the cool touch of smooth river stones to the velvet feel of lamb’s ear leaves. This sanctuary becomes a private cathedral of green, offering a serene spot for meditation, reading, or simply watching the bees dance between foxgloves in the twilight.
Essential Elements:
- A comfortable outdoor bench or swinging daybed
- A variety of perennial plants (lavender, sage, and hydrangeas)
- Natural stone pathways or mulch trails
- A small water feature or birdbath
- Wind chimes with a deep, melodic tone
How to make it
- Identify a secluded corner of your yard that receives a mix of sun and shade throughout the day to ensure a comfortable microclimate.
- Clear the area of weeds and debris, then lay down a weed barrier and cover it with cedar mulch or pea gravel to define the sanctuary’s floor.
- Position your primary seating—preferably a sturdy wooden bench or a weather-treated wicker chair—against a backdrop of tall shrubs for a sense of enclosure.
- Plant a perimeter of aromatic herbs like lavender and rosemary; as you brush past them, they will release calming scents into the air.
- Add the finishing touch with a simple solar-powered water fountain, placing it close enough to your seat so that the white noise of the water can drown out any distant street sounds.
How to Personalize a Graduation Cap for Your Big Day

Why we love this
Graduation is a monumental bridge between chapters, and personalizing your cap is a whimsical way to wear your heart on your sleeve—literally. We love this tradition because it transforms a standard polyester square into a sparkling canvas of personal history and future dreams. The tactile process of gluing down silk flowers, shimmering rhinestones, and meaningful quotes allows for a moment of reflection on the hard work that led here. It’s a tiny, wearable masterpiece that stands out in a sea of uniformity, catching the light as you cross the stage.
Essential Elements:
- A graduation cap (standard or velvet)
- Strong adhesive (E6000 or a high-temp glue gun)
- Cardstock or a ‘cap topper’ base
- Decorative elements (silk flowers, glitter, stickers, or paint pens)
- A meaningful quote or your graduation year in gold lettering
How to make it
- Trace the top of your graduation cap onto a piece of sturdy cardstock to create a removable topper, ensuring you leave a hole in the center for the tassel button.
- Sketch your design lightly in pencil first, experimenting with the placement of your quote and decorative elements before any glue is applied.
- Affix your background layer—whether it’s glitter paper or painted cardstock—to the base using a thin, even layer of adhesive to prevent warping.
- Carefully glue your larger elements, such as silk flowers or 3D lettering, working from the center outward to ensure the weight is balanced and the cap remains wearable.
- Once the glue has fully cured (usually 24 hours), attach the cardstock topper to the cap using double-sided mounting tape, ensuring it is secure enough to withstand the wind during the ceremony.
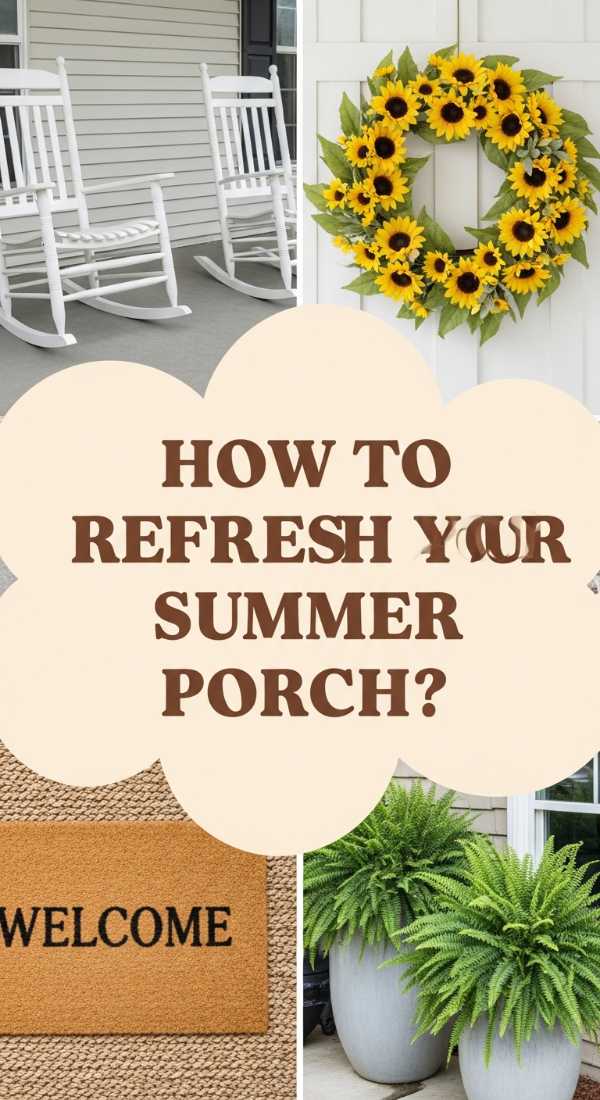
How to Style a Summer Front Porch for the Warmest Welcome
Why we love this
The front porch is the handshake of the home, and styling it for summer is all about channeling that breezy, hospitable energy of a Southern veranda. We love this look because it uses layering to create depth—placing a patterned doormat over a larger jute rug, and flanking the door with oversized ferns that spill over their pots. The porch becomes an outdoor room, a place where the scent of freshly cut grass meets the cool comfort of a ceiling fan, inviting neighbors to stop by and stay for a glass of iced tea while the sun slowly dips below the horizon.
Essential Elements:
- A pair of classic Adirondack or rocking chairs
- Layered doormats (a patterned coir mat over a larger outdoor rug)
- Large planters with lush ferns or geraniums
- Outdoor-rated throw pillows in stripes or florals
- A festive summer wreath (lemons, boxwood, or wildflowers)
How to make it
- Deep clean the porch floor, railings, and front door to remove any pollen or dust, providing a fresh and inviting base for your decor.
- Layer your rugs by placing a 3×5 outdoor rug in a neutral stripe or weave, then centering a standard 18×30 coir doormat with a welcoming greeting on top.
- Arrange your seating to encourage conversation; if space allows, place two chairs angled toward each other with a small garden stool in between to hold drinks.
- Flank the door with symmetrical planters; use high-quality potting soil and choose ‘thriller’ plants like Boston ferns that provide a lush, green frame for the entrance.
- Hang a lightweight summer wreath using a magnetic hook if you have a metal door, or a clear Command hook to keep the focus on the vibrant colors of the foliage.
How to Create DIY Easter Decor for a Festive Spring Home

Why we love this
Easter decor is the ultimate expression of renewal, filled with soft textures and a palette that looks like a watercolor painting come to life. We love this because it brings the outdoors in, using natural materials like moss, speckled eggs, and grapevine to celebrate the return of spring. There is something incredibly charming about a centerpiece that looks like a miniature meadow on your dining table, complete with ceramic bunnies and delicate spring blooms that smell of honey and fresh rain.
Essential Elements:
- Grapevine wreaths or nests
- Wooden or ceramic eggs (to be painted or dyed)
- Preserved sheet moss and dried raffia
- Acrylic paints in pastel shades
- Ribbon in silk or grosgrain textures
How to make it
- Create a ‘living’ centerpiece by filling a shallow wooden crate with preserved sheet moss, tucking in a few silk tulips and sprigs of baby’s breath for a garden feel.
- Paint your eggs using a dry-brush technique; apply a base coat of soft blue or sage, then use a stiff-bristled brush to flick brown paint over the surface to create a natural ‘speckled’ look.
- Construct a rustic wreath by intertwining a grapevine base with faux eucalyptus and securing small decorative nests with floral wire.
- Incorporate height into your mantle display by using glass hurricane vases filled with layers of moss and hand-painted eggs.
- Tie oversized, floppy bows out of silk ribbon around your candlesticks or the necks of ceramic bunnies to add a whimsical, soft finish to the display.
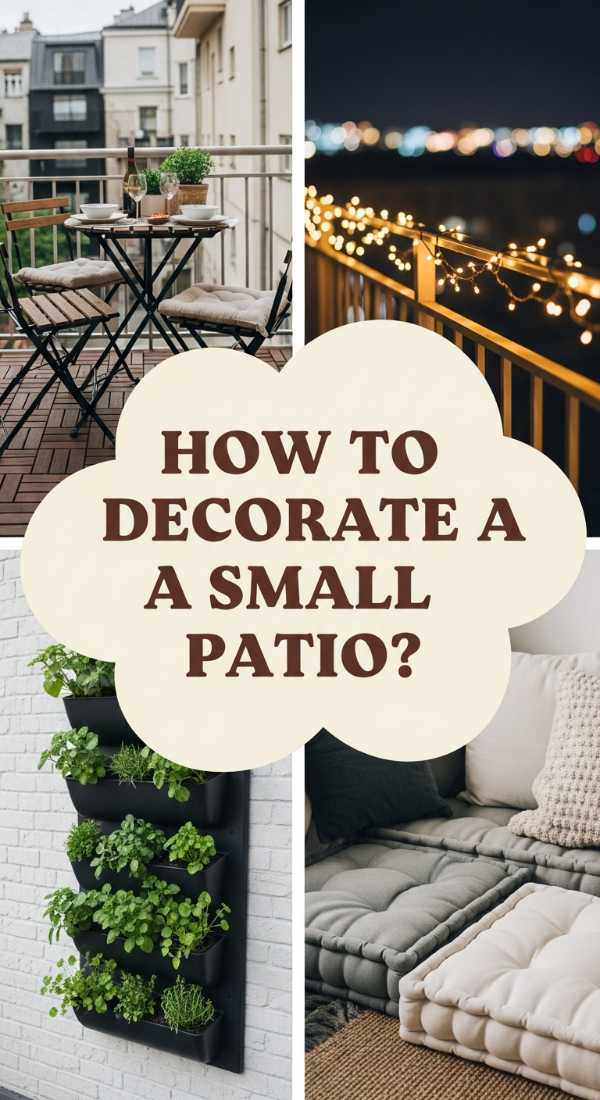
How to Elevate an Apartment Patio for Cozy Sunset Views
Why we love this
Just because a space is small doesn’t mean it can’t be spectacular, and an apartment patio is the perfect place to curate a high-altitude sanctuary. We love the challenge of maximizing vertical space, using string lights to create a ‘ceiling’ of stars and floor cushions to keep things relaxed. The feeling of being tucked away on a balcony as the city lights begin to twinkle is incredibly romantic, especially when you’re wrapped in a soft throw with a view of the orange and purple horizon.
Essential Elements:
- A compact bistro set or folding wooden chairs
- Solar-powered Edison bulb string lights
- Vertical planters or a hanging herb garden
- Weather-proof floor cushions
- Privacy screens (bamboo or lattice)
How to make it
- Maximize your footprint by choosing ‘apartment-sized’ furniture; a slender wrought-iron bistro set provides a place for dinner without blocking the walkway.
- Install vertical interest by hanging planters from the railing or using a tiered ladder shelf to display a collection of succulents and trailing vines like ivy.
- Create a cozy atmosphere by zigzagging string lights across the balcony ceiling, securing them with outdoor-rated clips or zip ties for a clean look.
- Soften the concrete floor with an interlocking deck tile system or a plush outdoor rug that mimics the texture of indoor carpeting.
- Add a sense of seclusion by attaching bamboo privacy fencing to the railing, which blocks the view of neighbors while allowing the sunset breeze to filter through.
How to Set a Lemon Table for Refreshing Summer Parties

Why we love this
A lemon-themed table is the visual equivalent of a tall glass of ice-cold lemonade—crisp, bright, and utterly refreshing. We love this theme because it uses fruit as decor, which is both sustainable and incredibly vibrant against a backdrop of white and blue. The citrusy scent of real lemons combined with the visual pop of sunshine yellow creates an energizing atmosphere that perfectly complements a summer seafood boil or a light garden salad. It’s a classic Mediterranean aesthetic that feels timeless yet playful.
Essential Elements:
- Fresh, whole lemons (with leaves attached if possible)
- Blue and white patterned table runner (Chinoiserie or tile print)
- White ceramic plates and yellow cloth napkins
- Clear glassware and simple silver flatware
- Small sprigs of mint or rosemary for garnish
How to make it
- Lay a blue and white patterned runner down the center of a wooden or white table to act as a high-contrast foundation for the yellow fruit.
- Create a ‘running’ centerpiece by scattering whole lemons directly onto the runner, grouping them in clusters of three and five for an organic, effortless look.
- Incorporate greenery by tucking sprigs of fresh mint or eucalyptus between the lemons to provide a scent that is as invigorating as the visual.
- Set each place with a crisp white plate, topped with a folded yellow napkin and a single lemon tied with a piece of twine and a sprig of rosemary.
- Fill clear glass pitchers with water, sliced lemons, and ice, placing them at both ends of the table to serve as functional decor that keeps guests hydrated.
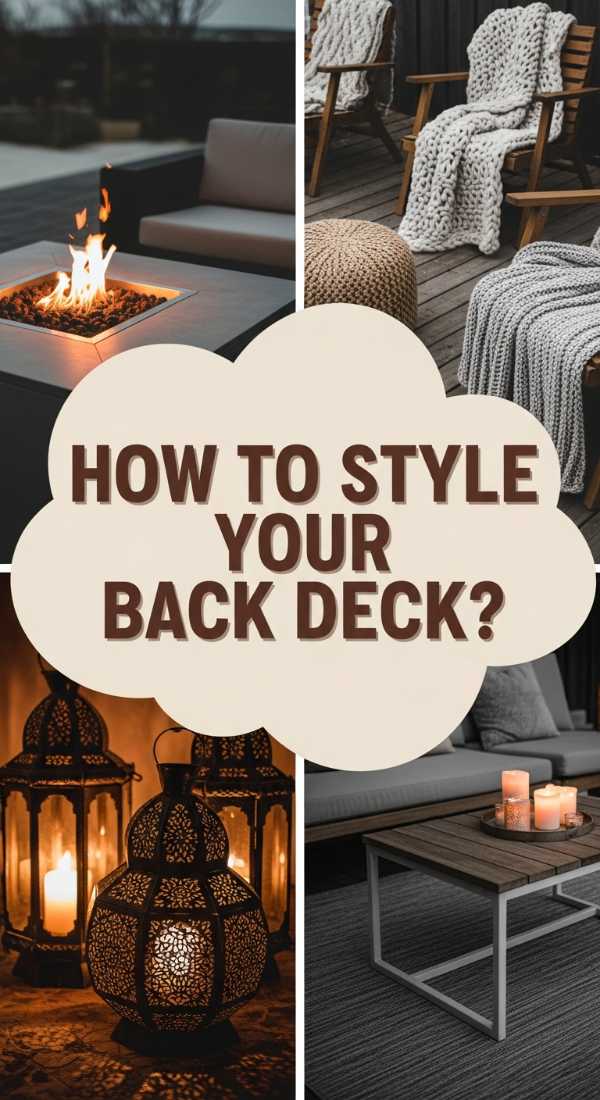
How to Curate a Back Deck for Dreamy Star Gazing Sessions
Why we love this
There is a unique sense of wonder that comes from looking at the stars, and curating your deck for this experience turns your home into a personal observatory. We love this because it’s all about the ‘slow living’ movement—prioritizing comfort and quiet. Imagine sinking into a pile of oversized blankets, the air slightly crisp, with the only light coming from low-glow lanterns that don’t interfere with the night sky. It’s a sensory experience of soft wool, the distant hoot of an owl, and the awe of the infinite universe above.
Essential Elements:
- Low-profile lounge chairs or a waterproof floor mattress
- Warm, heavy-weight wool or fleece throw blankets
- Dimmable lanterns or red-light torches (to preserve night vision)
- A telescope or high-quality binoculars
- A small side table for hot cocoa or wine
How to make it
- Clear a wide area on your deck to ensure there is an unobstructed view of the sky, moving any tall plants or umbrellas to the perimeter.
- Create a ‘nest’ of comfort by laying down an outdoor-safe mattress or several thick yoga mats, then covering them with layers of quilts and outdoor pillows.
- Switch off all exterior house lights and use only low-level, warm-toned lanterns placed at ground level to provide just enough light for safety without washing out the stars.
- Set up a dedicated ‘Viewing Station’ with a small table to hold a constellation map, a telescope, and a thermos of your favorite warm beverage.
- Keep a basket of extra socks and blankets nearby, as temperatures can drop quickly even in the summer once the sun goes down.
How to Plan a Prom Send Off for the Most Stylish Photos

Why we love this
The prom send-off is a high-energy celebration of youth, style, and friendship. We love this event because it’s a flurry of silk, tulle, and tuxedoes, set against a backdrop designed to make everyone look like a movie star. The excitement in the air is palpable, and by creating a dedicated photo zone, you provide the perfect stage for those ‘core memory’ snapshots. It’s about the shimmer of sequins in the evening light and the joyful chaos of a group of friends embarking on one of their biggest nights together.
Essential Elements:
- A decorative backdrop (floral wall, balloon arch, or velvet curtain)
- A designated ‘photo carpet’ or clean walkway
- Professional-style lighting (ring light or softbox)
- Refreshments (sparkling cider and elegant finger foods)
- A playlist of upbeat, celebratory music
How to make it
- Select a location with the best natural light—usually a north-facing wall or a shaded area during the ‘golden hour’ (about an hour before sunset).
- Construct a backdrop using a portable frame; drape it with sheer curtains and weave in battery-operated fairy lights to create a glowing ‘bokeh’ effect in the background of photos.
- Lay down a runner—either a classic red carpet or a neutral seagrass rug—to provide a clean, consistent floor for full-length outfit shots.
- Set up a ‘Refuelling Station’ with bite-sized, non-messy snacks like macarons and fruit skewers, along with chilled beverages served in plastic champagne flutes to avoid spills on expensive formalwear.
- Designate a ‘Photographer’s Zone’ with a tripod and a ring light to ensure that even smartphone photos look crisp, professional, and well-lit.
Creating Your Own Whimsical Haven
As we’ve explored, the secret to a whimsical, dreamy home lies not in the price tag of your decor, but in the heart you put into the details. From the scent of fresh lemons on a summer table to the soft glow of lanterns during a stargazing session, these intentional choices turn a house into a sanctuary. My hope is that these ideas inspire you to look at your space with fresh eyes and a creative spirit. Remember, the seasons are short, but the memories we create within them can last a lifetime. Happy decorating!
Frequently Asked Questions
Find answers to common questions about seasonal home curation and lifestyle styling.