

There is something truly magical about that first sip of coffee in a room where the boundaries between the indoors and outdoors simply melt away. You know the feeling—the soft rustle of leaves just outside the window, the way the golden hour light dances across your hardwood floors, and that crisp, fresh scent of blooming jasmine drifting through a screen door. It is about creating a sanctuary that breathes, a home that feels like a permanent vacation where every corner invites you to slow down and stay a while.
Designing a dreamy indoor-outdoor oasis isn’t just about expensive renovations; it’s about intentionality. It is the art of pulling the textures of nature inside and pushing the comforts of your living room out onto the patio. Whether you have a sprawling backyard or a cozy balcony, the goal is to cultivate a space that nourishes your soul and sparks a bit of everyday wonder. Let’s dive into how we can transform your home into a sun-drenched haven that celebrates the beauty of living in harmony with the elements.
How to Cultivate Vibrant Front Yard Flower Beds for Breathtaking Curb Appeal

Why we love this
A well-curated flower bed is like a warm hug for anyone visiting your home, offering a sensory explosion of color and fragrance that immediately elevates the spirit. Imagine walking up your path greeted by the honeyed scent of alyssum and the velvet textures of deep purple petunias swaying in the breeze. The visual depth created by layering heights and contrasting foliage makes your home feel established and loved, providing a vibrant tapestry that changes with the light of the sun throughout the day.
Essential Elements:
- Nutrient-rich organic compost and topsoil.
- A mix of perennial ‘anchor’ shrubs and seasonal annuals.
- High-quality cedar or pine mulch for moisture retention.
- Landscaping edger or spade for clean borders.
- Slow-release granular fertilizer.
How to make it
- Begin by prepping your canvas; clear all weeds and grass from the area using a sharp spade, ensuring you dig at least 3 inches deep to remove root systems.
- Amend the soil by tilling in 4 inches of organic compost; you are looking for a ‘chocolate cake’ consistency that is dark, crumbly, and moist to the touch.
- Arrange your plants while they are still in their nursery pots to visualize the layout—place taller species in the back and shorter, sprawling varieties at the front edge.
- Dig holes twice as wide as the root ball, sprinkle a teaspoon of fertilizer in each, and gently tease the roots before planting at the same depth as the pot.
- Apply a 2-to-3-inch layer of mulch across the entire bed, keeping it an inch away from the stems to prevent rot, and water deeply for 20 minutes until the soil is saturated but not puddling.
How to Style Mud Kitchen Accessories for Engaging Sensory Play

Why we love this
There is a raw, nostalgic joy in watching children engage with a mud kitchen, where the simple elements of earth and water become a five-star feast for the imagination. We love the tactile experience of cool, gritty mud being whisked in stainless steel bowls and the earthy, rain-like aroma that fills the air as little hands ‘cook’ with nature. It’s a beautifully messy way to connect with the outdoors, turning a corner of the garden into a rustic workshop of creativity and sensory exploration.
Essential Elements:
- A sturdy wooden play kitchen frame (cedar or pressure-treated).
- Stainless steel mixing bowls, whisks, and measuring cups.
- Natural ‘ingredients’ like dried lavender, pinecones, and smooth river stones.
- Hooks for hanging utensils and small chalkboards for menus.
- A dedicated water source or a large glass drink dispenser.
How to make it
- Position your mud kitchen in a shaded, well-drained area of the garden to keep the ‘chef’ cool during the peak heat of the day.
- Install heavy-duty brass hooks along the backsplash of the kitchen to organize utensils; ensure they are at a reachable height for little arms.
- Source vintage-style metal pots and pans from thrift stores; look for pieces with interesting textures and ‘sound’ profiles when tapped with a wooden spoon.
- Create an ‘ingredient station’ using weather-proof jars filled with sand, pebbles, and dried botanicals to encourage complex sensory recipes.
- Maintain the station by regularly scrubbing the stainless steel with a mild soap solution to keep surfaces hygienic and free from stagnant water buildup.
How to Create a Serene Hot Tub Area for Restful Nighttime Retreats

Why we love this
Nothing compares to the feeling of sinking into steaming, bubbling water while the cool night air kisses your shoulders and the stars twinkle overhead. A dedicated hot tub retreat is the ultimate luxury for the mind and body, offering a sanctuary where the only sound is the gentle hum of the jets and the rustle of nearby ornamental grasses. The combination of warm cedar surroundings and soft, dimmable lighting creates a cocoon-like atmosphere that washes away the stresses of the day.
Essential Elements:
- A level, reinforced concrete or deck foundation.
- Privacy screens made of horizontal cedar slats or tall bamboo.
- Weatherproof LED string lights or solar-powered path lights.
- An outdoor towel rack and a waterproof storage bench.
- Potted aromatherapy plants like eucalyptus or night-blooming jasmine.
How to make it
- Ensure your foundation is perfectly level using a 4-foot spirit level; a slight tilt can put uneven pressure on the hot tub’s acrylic shell over time.
- Install privacy screens at least 6 feet high to create an intimate enclosure; opt for a dark charcoal or natural wood stain to blend with the night landscape.
- Set up your lighting by layering soft overhead Edison bulbs with low-level path lights to provide safety without breaking the ‘stargazing’ ambiance.
- Position a side table or storage bench within arm’s reach of the water for towels, robes, and drinks, ensuring the material is mildew-resistant.
- Maintain the water chemistry weekly; check that the pH is between 7.2 and 7.8, and clean the filter every two weeks to keep the water crystal clear and inviting.
How to Implement Rock Landscaping Ideas for a Low Maintenance Garden

Why we love this
Rock landscaping brings a clean, architectural elegance to the garden that feels both modern and timelessly organic. We adore the way sun-bleached river stones contrast against the sharp green of succulents, or how dark Mexican beach pebbles glisten after a light rain. It’s a textural masterpiece that requires almost zero effort to maintain, providing a structured look that stays pristine through every season without the need for constant weeding or watering.
Essential Elements:
- Heavy-duty landscape weed barrier fabric.
- A variety of stones (River rock, pea gravel, or lava rock).
- Large focal boulders for visual weight.
- Metal or plastic landscape edging.
- Landscape staples to secure the fabric.
How to make it
- Excavate the area to a depth of 3 inches and level the soil, removing all debris and large roots that could cause the rocks to shift.
- Roll out the heavy-duty landscape fabric, overlapping the edges by 6 inches, and secure it firmly with landscape staples every 12 inches to prevent shifting.
- Place your large focal boulders first; bury the bottom third of the boulder in the ground to make it look like a natural outcropping rather than an ornament.
- Distribute your smaller rocks or gravel evenly across the area using a metal rake, aiming for a consistent depth of at least 2 inches to fully hide the fabric.
- Rinse the rocks thoroughly with a high-pressure hose to remove the dust from the quarry, which allows the natural colors and textures of the stone to ‘pop’ immediately.
How to Build a Planter Privacy Wall for a Secluded Garden Nook

Why we love this
There is a profound sense of peace found behind a living wall, where the air is cooler and the world feels miles away. We love the way a planter privacy wall acts as a ‘living curtain,’ filtering the sunlight into dappled patterns and providing a lush, green backdrop for your morning tea. It transforms a generic patio into a secret garden nook, offering both seclusion and a vertical canvas for vibrant vines and cascading flowers to thrive.
Essential Elements:
- Extra-tall rectangular wooden or composite planters.
- Sturdy wooden lattice or wire trellis inserts.
- Fast-growing climbing plants (like Clematis, Star Jasmine, or Ivy).
- High-quality potting mix with perlite for drainage.
- Long-lasting wood sealer or exterior paint.
How to make it
- Assemble or purchase tall planters (at least 30 inches high) and apply two coats of exterior sealer; wait 4 hours between coats until the surface is no longer tacky.
- Secure the trellis or lattice to the back of the planters using galvanized screws, ensuring it is perfectly vertical to support the weight of mature vines.
- Fill the bottom third of the planters with lightweight drainage material (like crushed soda cans or empty plastic bottles) before adding the potting soil.
- Plant your climbers at 12-inch intervals and gently weave the initial stems into the lattice using soft garden twine or plant clips.
- Water frequently during the first month; once the vines reach the top of the trellis (usually 8-12 weeks), prune the tips to encourage bushier growth and fuller coverage.
How to Achieve Realistic Pantry Organization for a Functionally Beautiful Kitchen
Why we love this
Walking into a perfectly organized pantry feels like a deep exhale for the home cook; it is the ultimate marriage of form and function. We love the satisfying ‘thwack’ of a wooden lid sealing onto a glass jar and the visual harmony of uniform containers that showcase the natural colors of grains, pastas, and spices. It removes the visual noise of mismatched packaging, making meal prep a serene experience where everything you need is exactly where it should be.
Essential Elements:
- Clear glass or BPA-free plastic airtight canisters.
- Uniform labels (chalkboard, vinyl, or embossed).
- Tiered ‘stadium’ shelving for canned goods.
- Woven or wire baskets for ‘category’ grouping (snacks, baking, etc.).
- A turntable (Lazy Susan) for oils and vinegars.
How to make it
- Empty the entire pantry and group items by category (e.g., breakfast, baking, grains) on your kitchen counter to see exactly how much storage you need.
- Decant dry goods into airtight jars; check the seals by pressing down—the lid should resist slightly, indicating a vacuum seal that keeps ingredients fresh.
- Apply labels at the same height on every jar for a professional, ‘high-end’ look; use a ruler to ensure they are perfectly centered.
- Place tiered shelving at eye level for canned goods so you can see the labels of the back row, preventing the ‘lost can’ syndrome at the back of the shelf.
- Rotate stock by placing new items at the back and older items at the front; once a month, wipe down the shelves with a damp cloth to maintain a pristine environment.
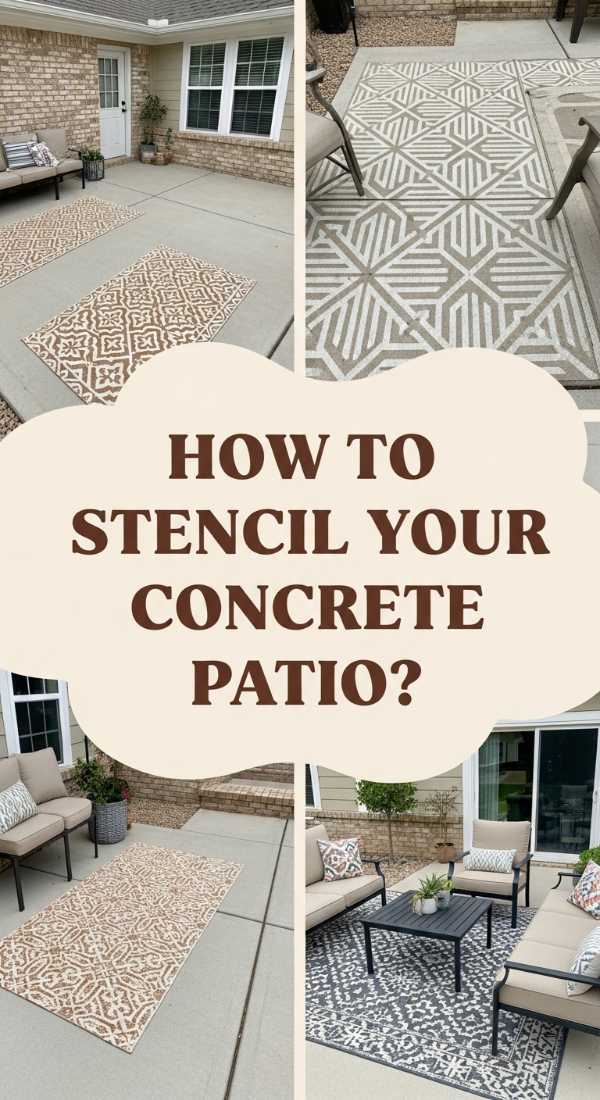
How to Use Concrete Stencils for an Upscale Outdoor Patio Makeover

Why we love this
Concrete stenciling is a total game-changer for boring grey slabs, offering the look of expensive Moroccan tile or artisanal stone for a fraction of the price. We love the way the intricate patterns add a layer of sophistication to an outdoor space, making the patio feel like a finished room rather than an afterthought. The contrast of crisp white paint against a slate grey base creates a stunning focal point that looks incredible under the glow of bistro lights.
Essential Elements:
- Large-scale plastic floor stencil.
- Masonry primer and high-quality porch/patio paint.
- Small foam rollers and stencil brushes.
- Low-tack painter’s tape or stencil adhesive.
- Concrete sealer (slip-resistant).
How to make it
- Power wash the concrete to remove all dirt and oil; allow it to dry for a full 24 hours until the surface is bone-dry and uniform in color.
- Apply a base coat of patio paint using a long-handled roller; let it cure for at least 12 hours until it is hard and not ‘gummy’ underfoot.
- Secure the stencil with adhesive and use a ‘dry’ foam roller (roll most of the paint off onto a paper towel first) to apply the pattern color with light pressure.
- Lift the stencil vertically to avoid smudging and align it with the previous section using the built-in registration marks.
- After the pattern is completely dry (usually 24 hours), apply two coats of slip-resistant clear sealer to protect the design from UV rays and foot traffic.
How to Recreate a Nostalgic Teen Room for Ultimate Creative Vibes

Why we love this
A nostalgic teen room is all about that cozy, eclectic energy where every corner tells a story and every texture invites a creative spark. We love the glow of neon signs reflecting off velvet pillows and the way a wall of polaroids creates a living gallery of memories. It’s a space that feels lived-in and loved, balancing a hint of retro flair with modern comforts to create a sanctuary that is as cool as it is comfortable for late-night dreaming.
Essential Elements:
- A mix of textures: faux fur rugs, velvet cushions, and cotton throws.
- Ambient lighting: LED strips, lava lamps, and neon signs.
- A dedicated ‘creation’ zone (desk or cozy chair for journaling).
- Wall decor: Posters, records, and string lights with clips.
- Pegboards for organizing art supplies or tech accessories.
How to make it
- Define a color palette that feels ‘moody’ yet vibrant; think deep navy or charcoal balanced with pops of hot pink, teal, or sunshine yellow.
- Install LED light strips along the ceiling perimeter or under the bed frame to create a ‘hover’ effect that can change colors via remote.
- Layer your textiles; start with a large area rug and stack pillows of different shapes and fabrics on the bed to create a ‘cloud-like’ lounging area.
- Create a gallery wall using a mix of frameless posters and vinyl records; use Command strips to ensure you don’t damage the walls during redecorating.
- Set up a ‘low-tech’ corner with a record player or a stack of magazines to encourage time away from screens and foster a truly creative headspace.
How to Craft a DIY Bird Bath for a Bird Friendly Garden Sanctuary
Why we love this
There is a gentle, rhythmic beauty in a bird bath, acting as a social hub for the local wildlife and a tranquil focal point for your garden. We love the soft splashing sound of water and the sight of bright feathers catching the light as birds visit for a refreshing dip. A DIY bird bath allows you to customize the height and style to match your landscape, creating a functional piece of art that brings life and movement to your outdoor sanctuary.
Essential Elements:
- A shallow ceramic or terracotta basin (not glazed on the inside).
- A sturdy pedestal (a large flower pot, a tree stump, or stacked stones).
- River stones or marbles for footing.
- Waterproof exterior adhesive (if stacking elements).
- A solar-powered fountain pump (optional but recommended).
How to make it
- Select a location that is in partial shade to prevent the water from getting too hot, and near a shrub for ‘escape’ cover for the birds.
- If using stacked pots for a pedestal, secure them with industrial-strength waterproof adhesive and let them cure for 24 hours in a dry environment.
- Place the basin on top and ensure it is perfectly level so the water depth is consistent; a depth of 1-2 inches is ideal for most small songbirds.
- Add a layer of river stones to the bottom of the basin; these provide essential ‘grip’ for the birds’ feet so they don’t slip in the water.
- Fill with fresh water and change it every 2-3 days to prevent algae growth; scrub the basin with a stiff brush once a week to keep it pristine and healthy.
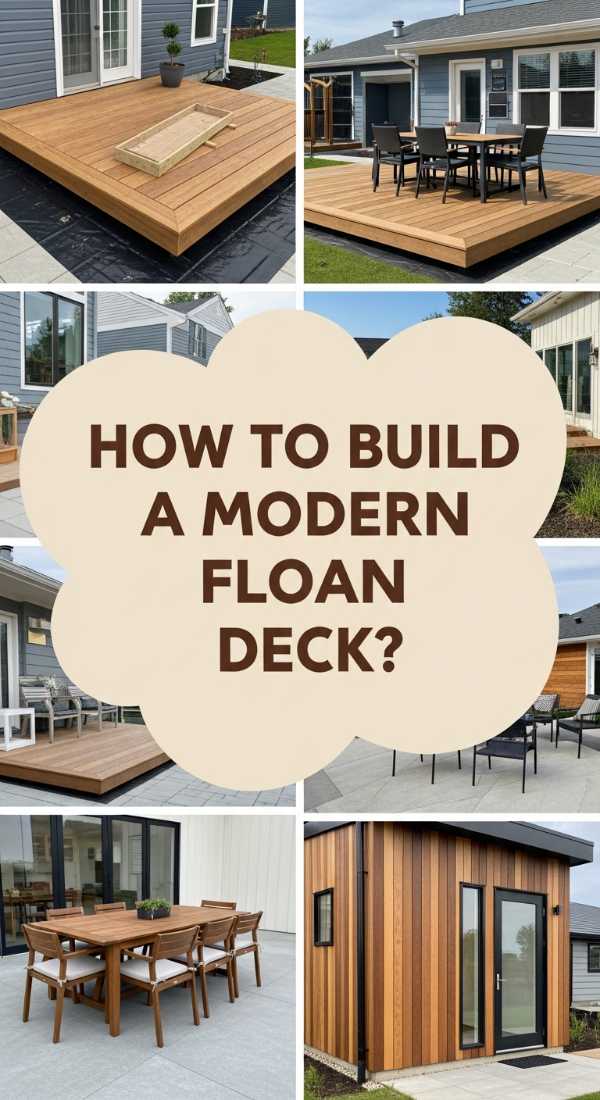
How to Design a Floating Deck for the Ultimate Summer Entertainment Space
[IMAGE_10]
Why we love this
The floating deck is the crown jewel of the modern backyard, providing a designated stage for summer barbecues, sunbathing, and starlit conversations. We love the way the wood stays cool under bare feet even in the midday sun and the ‘floating’ appearance that makes the deck feel light and integrated with the lawn. It is a structural element that defines a space without the need for heavy foundations, offering a warm, organic platform for making memories.
Essential Elements:
- Pressure-treated 2×6 lumber for the frame.
- Decking boards (Cedar, Redwood, or Composite).
- Concrete deck blocks for the ‘floating’ base.
- Galvanized deck screws and joist hangers.
- Landscape fabric and gravel for the sub-base.
How to make it
- Clear the site and lay down landscape fabric topped with gravel to prevent weeds from growing under the deck and to provide excellent drainage.
- Set your concrete deck blocks at the four corners and at 4-foot intervals; use a long straight board and a level to ensure every block is perfectly even.
- Build the outer frame and internal joists (spaced 16 inches apart) using galvanized screws; the wood should look ‘square’ and feel rigid when pushed.
- Lay your decking boards across the frame, using 1/8-inch spacers (or a large nail) between boards to allow for wood expansion and water runoff.
- Apply a high-quality UV-rated stain or sealer once the wood is dry (the ‘water bead test’—if water soaks in, it’s ready); this will protect the grain from greying in the sun.
Embracing the Harmony of Home
Creating an indoor-outdoor oasis isn’t about finishing a checklist; it’s about a lifestyle shift toward noticing the beauty in the transitions. Whether it’s the way your organized pantry makes a Tuesday night dinner feel effortless, or the way the birds flock to your DIY bath as the sun sets, these projects are the threads that weave comfort and nature together. Take your time, enjoy the process of making, and soon your home will be the sun-drenched sanctuary you’ve always dreamed of.