
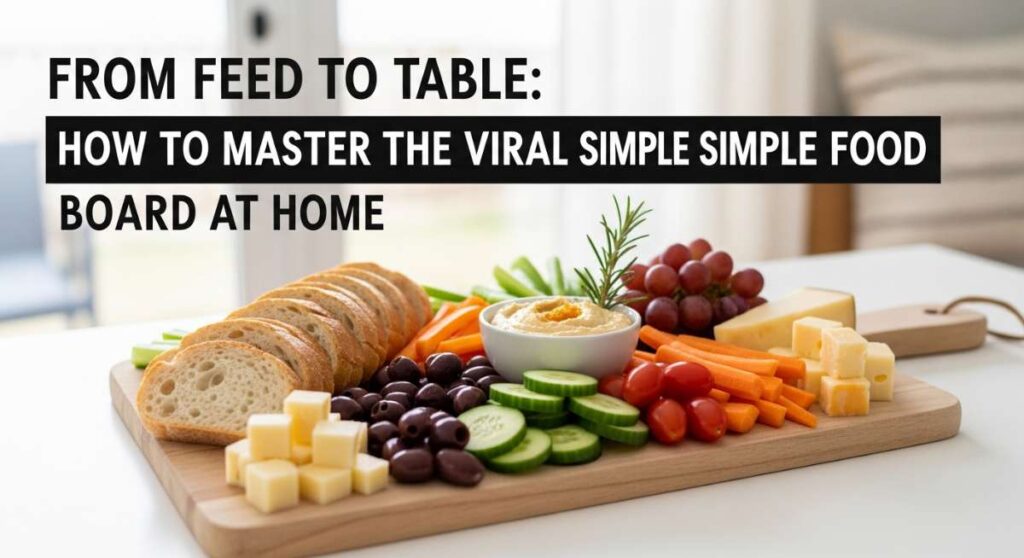
There is something inherently magical about the way a shared platter brings people together. We’ve all seen those mesmerizing videos scrolling through our feeds—the glossy glazes, the steam rising from perfectly charred edges, and that satisfying ‘crunch’ that seems to echo through the screen. For a long time, I thought these ‘viral food boards’ were reserved for professional food stylists or high-end restaurants, but I’ve discovered the secret: it’s all about the balance of ‘swicy’ (sweet and spicy) flavors and the art of the presentation.
Creating a viral-worthy food board at home isn’t just about feeding your guests; it’s about creating an experience that engages all the senses. It’s the aroma of hot honey wafting from the kitchen, the vibrant colors of a sweet chili glaze catching the light, and the communal joy of everyone reaching in for their favorite bite. In this guide, I’m pulling back the curtain on ten of the most coveted recipes that will transform your kitchen into the ultimate gathering spot. Let’s turn those digital cravings into a delicious reality.
How to make hot honey chicken?

Why we love this
This dish is the epitome of comfort meets contemporary flair, offering a sensory journey that starts with the audible crackle of the golden, craggy crust. As you bite through the perfectly seasoned breading, you’re met with succulent, steaming meat that has been infused with a delicate brine. The hot honey drizzle adds a layer of velvety sweetness that quickly gives way to a slow, warming heat on the back of the palate, creating a complex flavor profile that feels both nostalgic and excitingly new. The contrast between the cooling honey and the sharp spice of red pepper flakes makes every bite an addictive balance of textures and temperatures.
Ingredients
- 2 lbs boneless skinless chicken thighs, cut into bite-sized pieces
- 1 cup buttermilk
- 2 cups all-purpose flour
- 1 tbsp smoked paprika, 1 tsp garlic powder, 1 tsp onion powder
- Salt and black pepper to taste
- 1/2 cup honey
- 2 tbsp hot sauce (like Frank’s RedHot)
- 1 tsp red chili flakes
- Vegetable oil for frying
How to make it
- Begin by marinating your chicken pieces in buttermilk seasoned with salt and pepper for at least 30 minutes; this ensures the meat stays incredibly tender during the high-heat frying process.
- In a wide, shallow bowl, whisk together the flour, smoked paprika, garlic powder, and onion powder to create a flavorful dredging station.
- Dredge each piece of chicken thoroughly in the flour mixture, pressing down firmly to ensure the flour adheres to every nook and cranny for maximum crunch.
- Heat about 2 inches of vegetable oil in a heavy-bottomed skillet or Dutch oven to 350°F (175°C); use a candy thermometer to monitor the heat, as consistency is key to a non-greasy finish.
- Fry the chicken in batches to avoid crowding the pan, which lowers the oil temperature; cook for 5-7 minutes until the exterior is a deep mahogany gold and the internal temperature reaches 165°F.
- While the chicken drains on a wire rack, whisk together the honey, hot sauce, and chili flakes in a small saucepan over low heat until the mixture is thin and bubbling.
- Drizzle the warm hot honey generously over the crispy chicken while it’s still hot, allowing the glaze to seep into the crust before serving on your board.
How to glaze sweet chili salmon?
Why we love this
Sweet chili salmon is a masterclass in elegance and simplicity, presenting a stunning visual with its translucent, ruby-red glaze that shimmers under the light. The aroma is a delightful blend of fermented garlic and bright ginger, which perfectly complements the rich, buttery fat of the salmon. As your fork glides through the tender, flaky layers, the sweet and tangy sauce provides a zesty counterpoint to the savory char of the skin. It’s a dish that feels incredibly light yet deeply satisfying, leaving a lingering, gentle tingle of spice that invites you back for just one more forkful.
Ingredients
- 4 salmon fillets (6 oz each)
- 1/2 cup Thai sweet chili sauce
- 2 tbsp soy sauce
- 1 tbsp rice vinegar
- 1 tsp freshly grated ginger
- 2 cloves garlic, minced
- 1 tbsp toasted sesame oil
- Green onions and sesame seeds for garnish
How to make it
- Preheat your oven to 400°F (200°C) and line a baking sheet with parchment paper to prevent the sugars in the glaze from sticking and burning.
- In a small mixing bowl, whisk together the sweet chili sauce, soy sauce, rice vinegar, grated ginger, minced garlic, and sesame oil until the marinade is fully emulsified and fragrant.
- Pat the salmon fillets completely dry with a paper towel; this is a professional secret to ensuring the glaze sticks rather than sliding off during the cooking process.
- Place the fillets on the prepared pan and brush a thick layer of the sauce over the top and sides of each piece, reserving about a third of the sauce for later.
- Bake the salmon for 12-15 minutes; you’ll know it’s done when the meat is opaque and flakes easily with a fork, but still has a slight translucency in the very center.
- Turn the oven to ‘Broil’ for the final 2 minutes of cooking to caramelize the sugars in the glaze until tiny charred bubbles form on the surface.
- Remove from the oven, brush with the remaining fresh sauce for a glossy finish, and garnish with sliced green onions and toasted sesame seeds.
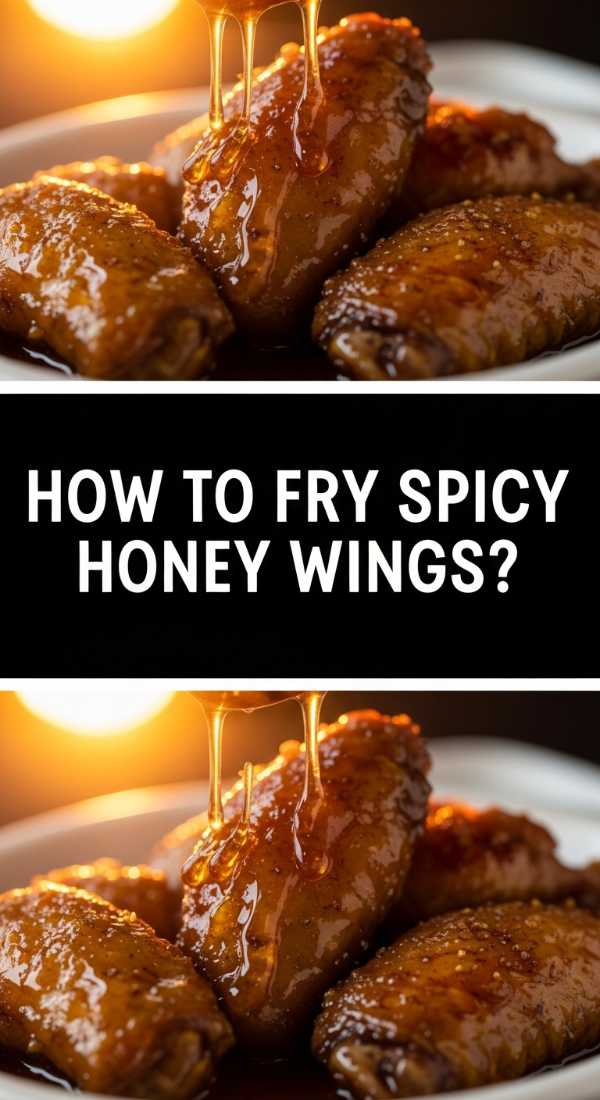
How to fry spicy honey wings?
Why we love this
There is a primal satisfaction in a perfectly fried chicken wing, and this spicy honey version elevates the experience to an art form. The skin is rendered down to a paper-thin, glass-like crispness that shatters upon impact, revealing the succulent, piping-hot meat beneath. The sauce is a luxurious coating that bridges the gap between floral sweetness and sharp, vinegar-based heat, clinging to every crevice of the wing. Each bite is an explosion of savory umami balanced by the syrupy honey, making these wings the undisputed star of any food board they grace.
Ingredients
- 2 lbs chicken wings (flats and drumettes)
- 1 cup cornstarch
- 1 tsp baking powder
- 1 tsp salt
- 1/2 cup honey
- 1/4 cup sriracha or gochujang
- 2 tbsp soy sauce
- 1 tbsp lime juice
- Neutral oil for deep frying
How to make it
- Toss the wings in a mixture of cornstarch, baking powder, and salt; the baking powder is a culinary hack that helps dehydrate the skin, resulting in an extra-crunchy texture.
- Heat your frying oil to 375°F (190°C) in a deep pot, ensuring you have enough oil to fully submerge the wings without the pot overflowing.
- Carefully lower the wings into the hot oil and fry for 10-12 minutes; for the ultimate viral-style crunch, use the ‘double-fry’ method by removing them once, letting them cool for 5 minutes, and frying again for 2 minutes at a higher heat.
- While the wings are frying, combine the honey, sriracha, soy sauce, and lime juice in a large metal bowl, whisking until the sauce is smooth and glossy.
- Immediately transfer the piping hot, crispy wings from the oil into the bowl of sauce; toss vigorously to ensure every wing is fully coated in the sticky, spicy lacquer.
- Let the wings sit for 60 seconds in the sauce to allow the coating to set slightly, which prevents it from dripping off too quickly on your presentation board.
- Serve immediately while the contrast between the hot, crunchy skin and the cool, sweet glaze is at its peak.
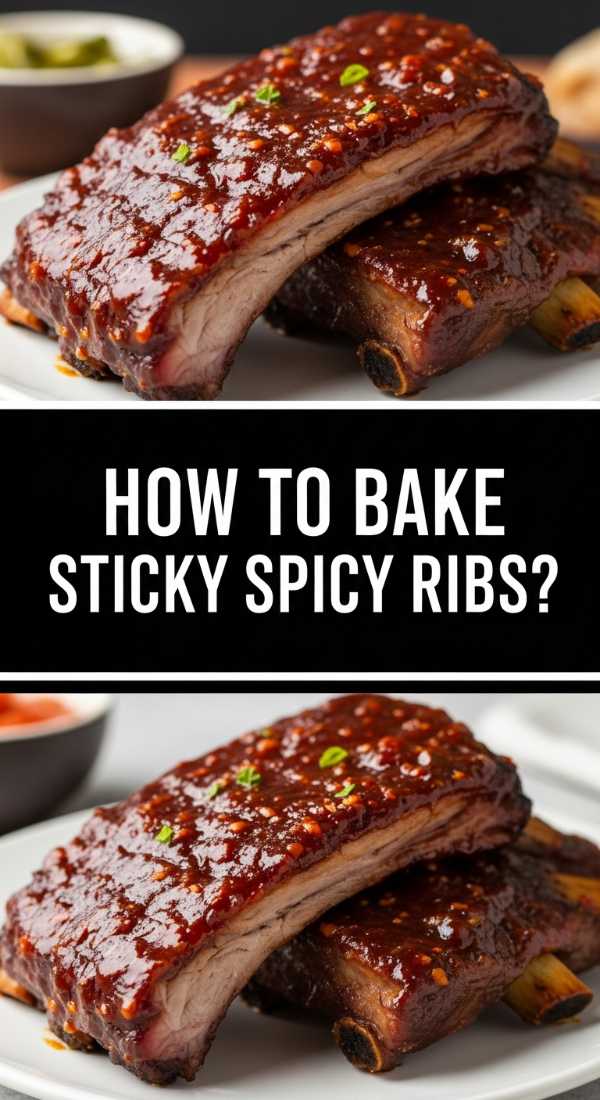
How to bake sticky spicy ribs?
Why we love this
These ribs are the definition of ‘fall-off-the-bone’ perfection, offering a rich, deep mahogany color that promises an intense flavor experience. The aroma is a heady mix of smoked paprika and caramelized sugar, evoking memories of summer cookouts but with a sophisticated, spicy twist. As you pull the meat away from the bone, you experience a texture that is simultaneously tender and chewy, coated in a thick, tacky sauce that is sweet at first but finishes with a bold, peppery kick. It is a messy, indulgent, and deeply rewarding addition to your board that guests will be talking about for weeks.
Ingredients
- 1 rack baby back ribs (about 2-3 lbs)
- Dry Rub: 1/4 cup brown sugar, 1 tbsp chili powder, 1 tsp cayenne, 1 tsp garlic powder, 1 tsp salt
- Sauce: 1/2 cup BBQ sauce, 2 tbsp honey, 1 tbsp apple cider vinegar, 1 tsp red pepper flakes
- Fresh cilantro for garnish
How to make it
- Remove the thin, silvery membrane from the back of the ribs by loosening it with a knife and pulling it off with a paper towel; this allows the flavors to penetrate the meat and ensures a tender bite.
- Generously coat both sides of the ribs with the dry rub, massaging the spices into the meat to create a flavorful crust.
- Wrap the ribs tightly in heavy-duty aluminum foil, creating a sealed packet that will trap steam and break down the tough connective tissues.
- Bake the ribs in a low oven at 300°F (150°C) for 2.5 to 3 hours; the low and slow approach is non-negotiable for achieving that signature melt-in-the-mouth texture.
- While the ribs bake, whisk together the BBQ sauce, honey, vinegar, and red pepper flakes to create your finishing glaze.
- Carefully open the foil (watch out for the hot steam!), brush the ribs liberally with the sauce, and place them under the broiler for 3-5 minutes until the sauce is bubbling and tacky.
- Let the rack rest for 10 minutes before slicing into individual ribs to keep the juices locked inside, then pile them high on your board.
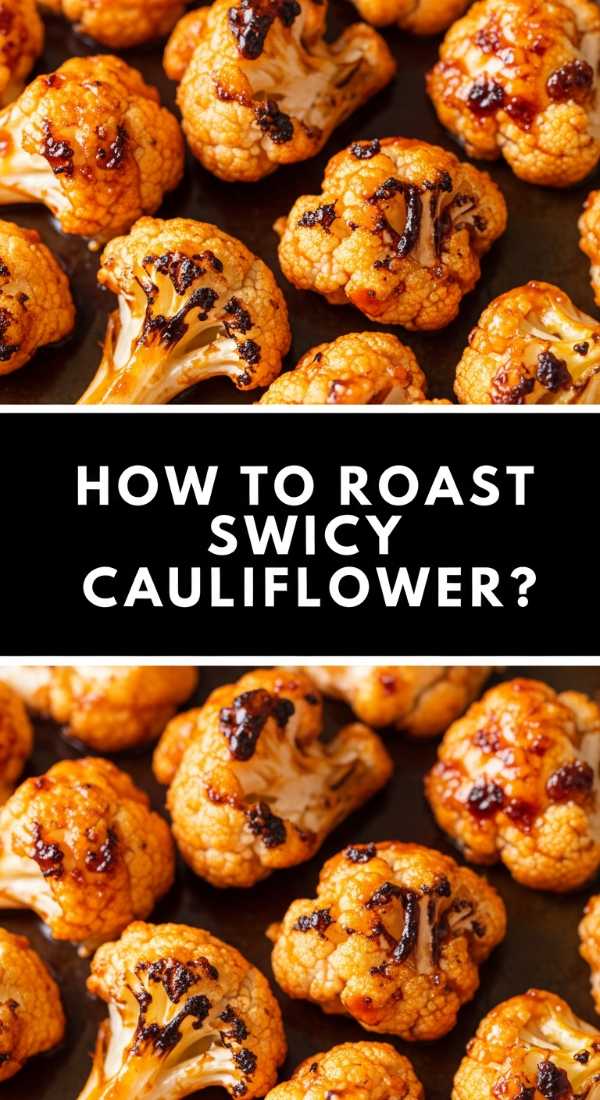
How to roast swicy cauliflower?
Why we love this
Roasting cauliflower transforms this humble vegetable into a caramelized masterpiece that rivals any meat dish for the spotlight. The high heat of the oven coaxes out the natural sugars, creating dark, crispy edges that provide a smoky depth of flavor. The ‘swicy’ glaze—a marriage of sweetness and heat—seeps into the crevices of each floret, ensuring that every bite is bursting with a savory-sweet intensity. It’s a vibrant, colorful addition to the board that offers a satisfyingly tender-crisp texture and an aroma that is earthy, spicy, and completely irresistible.
Ingredients
- 1 large head of cauliflower, cut into medium florets
- 3 tbsp olive oil
- 1/2 tsp salt
- 1/4 cup honey or maple syrup
- 2 tbsp sriracha
- 1 tbsp soy sauce
- 1 tsp lime zest
How to make it
- Preheat your oven to 425°F (220°C); a high temperature is essential to get those coveted charred edges without overcooking the interior into mush.
- In a large bowl, toss the cauliflower florets with olive oil and salt until every piece is evenly coated, which aids in heat conduction and browning.
- Spread the florets in a single layer on a large rimmed baking sheet, ensuring they aren’t touching to allow for proper air circulation and roasting rather than steaming.
- Roast for 20-25 minutes, tossing halfway through, until the edges are dark brown and the cauliflower is fork-tender.
- While the cauliflower roasts, whisk together the honey, sriracha, soy sauce, and lime zest in a small bowl to create the signature swicy glaze.
- Once the cauliflower is done, remove it from the oven and immediately toss the hot florets with the glaze while they are still on the pan or in a clean bowl.
- Return the tray to the oven for an additional 2-3 minutes to allow the glaze to tighten and become ‘sticky’ before transferring to your board.
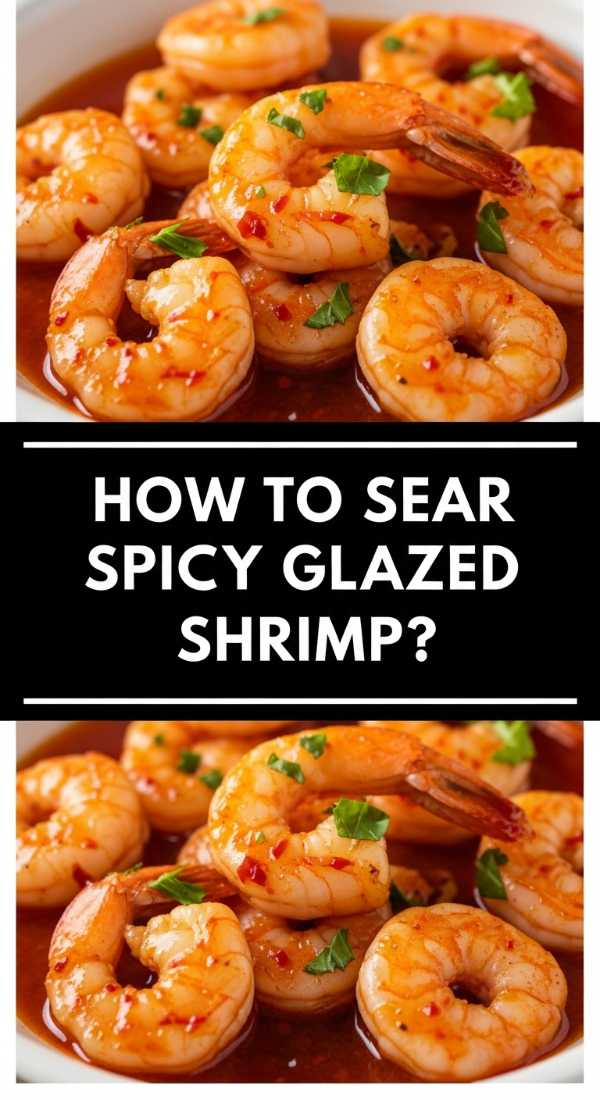
How to sear spicy glazed shrimp?

Why we love this
Spicy glazed shrimp are the ultimate ‘quick-win’ for a food board, offering an elegant aesthetic and a flavor profile that leans into bright, coastal vibes. The shrimp cook in a matter of minutes, turning a beautiful opaque pink while picking up a deep, golden sear from the hot pan. The glaze is a vibrant mixture that coats the succulent shellfish in a thin, spicy-sweet veil that accentuates their natural sweetness. With a finish of fresh citrus and a sprinkle of herbs, these bites provide a refreshing but fiery pop of flavor that keeps the palate excited and ready for the next course.
Ingredients
- 1 lb large shrimp, peeled and deveined (tail-on for aesthetics)
- 2 tbsp olive oil
- 1/4 cup honey
- 1 tbsp chili garlic sauce (like Huy Fong)
- 1 tbsp lime juice
- 1/2 tsp smoked paprika
- Pinch of salt
How to make it
- Pat the shrimp extremely dry with paper towels; moisture is the enemy of a good sear, and you want that golden-brown crust.
- In a small bowl, prepare your glaze by whisking the honey, chili garlic sauce, lime juice, and smoked paprika until smooth.
- Heat the olive oil in a large cast-iron or stainless steel skillet over medium-high heat until the oil is shimmering and just starting to smoke.
- Add the shrimp in a single layer, ensuring they don’t overlap; cook undisturbed for 1-2 minutes until a golden crust forms on the bottom.
- Flip the shrimp and immediately pour the glaze into the pan; the sauce will bubble and reduce rapidly, coating the shrimp as they finish cooking.
- Toss the shrimp constantly for the final 60 seconds of cooking to ensure they are evenly lacquered and the sauce has thickened to a syrupy consistency.
- Remove from heat the second the shrimp are opaque to avoid a rubbery texture, and arrange them neatly on your food board while still glistening.
How to cook sweet heat meatballs?
Why we love this
There is something deeply comforting about a glazed meatball, and these ‘Sweet Heat’ versions are designed to be the ultimate crowd-pleaser. The meatballs themselves are tender and juicy, packed with savory aromatics that provide a sturdy base for the bold sauce. The glaze is a thick, crimson coating that offers a nostalgic sweetness reminiscent of classic appetizers but with a sophisticated, lingering burn from the peppers. When served on a board, they are the perfect bite-sized vessels for flavor, offering a satisfying chew and a rich, savory finish that leaves everyone reaching for seconds.
Ingredients
- 1 lb ground beef or turkey
- 1/2 cup panko breadcrumbs
- 1 egg, lightly beaten
- 2 cloves garlic, minced
- 1 tsp onion powder
- Sauce: 1/2 cup grape jelly, 1/2 cup chili sauce, 1 tsp cayenne pepper
How to make it
- In a large bowl, combine the ground meat, panko, egg, garlic, and onion powder; mix gently with your hands just until combined to prevent the meatballs from becoming tough.
- Roll the mixture into small, uniform balls (about 1 inch in diameter), which ensures they all cook at the same rate and look consistent on the board.
- Brown the meatballs in a large skillet over medium heat for about 5-7 minutes, turning frequently so they maintain their round shape and develop a crust on all sides.
- In a separate small saucepan, whisk together the grape jelly, chili sauce, and cayenne over medium heat until the jelly melts and the sauce is a smooth, vibrant red.
- Pour the sauce over the meatballs in the skillet, reducing the heat to low, and cover the pan.
- Simmer for 10-15 minutes, allowing the meatballs to finish cooking through while the sauce reduces into a thick, sticky glaze that clings to the meat.
- Serve with toothpicks directly on the board, ensuring you drizzle any extra sauce from the pan over the top for that viral, high-gloss look.
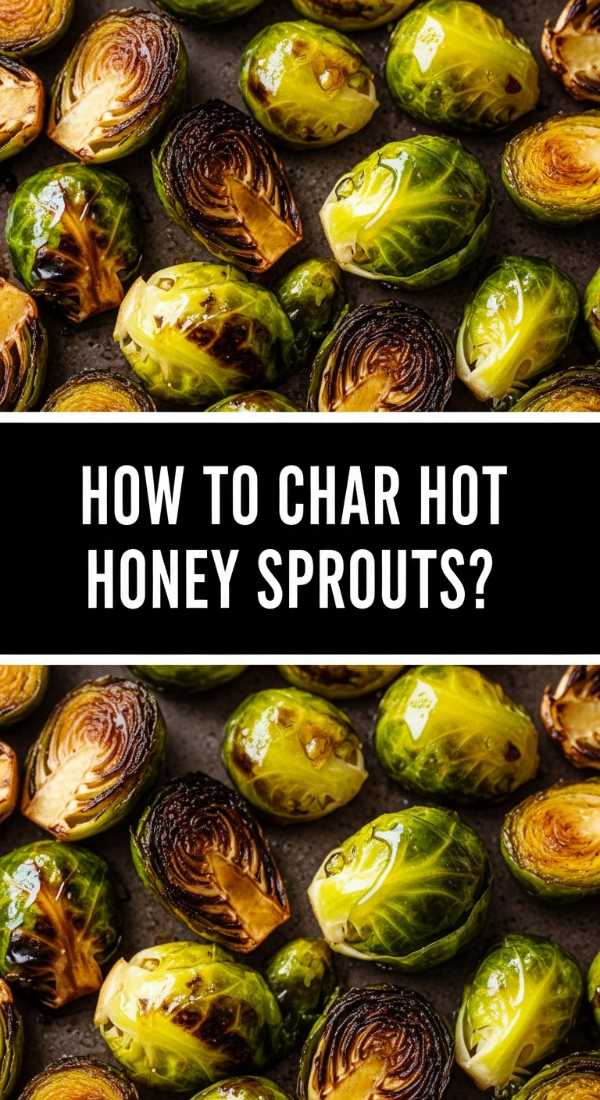
How to char hot honey sprouts?
Why we love this
Brussels sprouts have undergone a massive glow-up, and this charred hot honey version is the gold standard for the ‘board’ aesthetic. The outer leaves become incredibly crispy—almost like vegetable chips—while the centers remain tender and nutty. The addition of hot honey creates a beautiful caramelization that highlights the natural sweetness of the sprouts while cutting through their earthy bitterness with a sharp, spicy edge. It’s a textural playground of crunch and softness, finished with a drizzle of honey that makes these greens feel as indulgent as any decadent side dish.
Ingredients
- 1 lb Brussels sprouts, trimmed and halved
- 2 tbsp olive oil
- 1/2 tsp kosher salt
- 1/4 cup hot honey (store-bought or homemade)
- 1/4 cup toasted walnuts or pecans (optional)
- Balsamic glaze for drizzling
How to make it
- Place a large rimmed baking sheet in the oven and preheat to 450°F (230°C); preheating the pan is a professional trick to get an instant char the moment the sprouts touch the metal.
- In a bowl, toss the halved sprouts with olive oil and salt, making sure the cut sides are well-coated.
- Carefully spread the sprouts onto the hot baking sheet, placing as many as possible cut-side down; this maximizes the surface area for browning.
- Roast for 15-20 minutes without stirring; you want the bottom to be a deep, dark brown, which provides that signature smoky flavor.
- Once charred, remove the pan from the oven and immediately drizzle the hot honey over the sprouts while they are still sizzling.
- Toss the sprouts on the pan with the toasted nuts, allowing the honey to melt and coat everything in a thin, spicy-sweet film.
- Transfer to your board and finish with a light zigzag of balsamic glaze for extra acidity and a professional, ‘viral’ visual appeal.
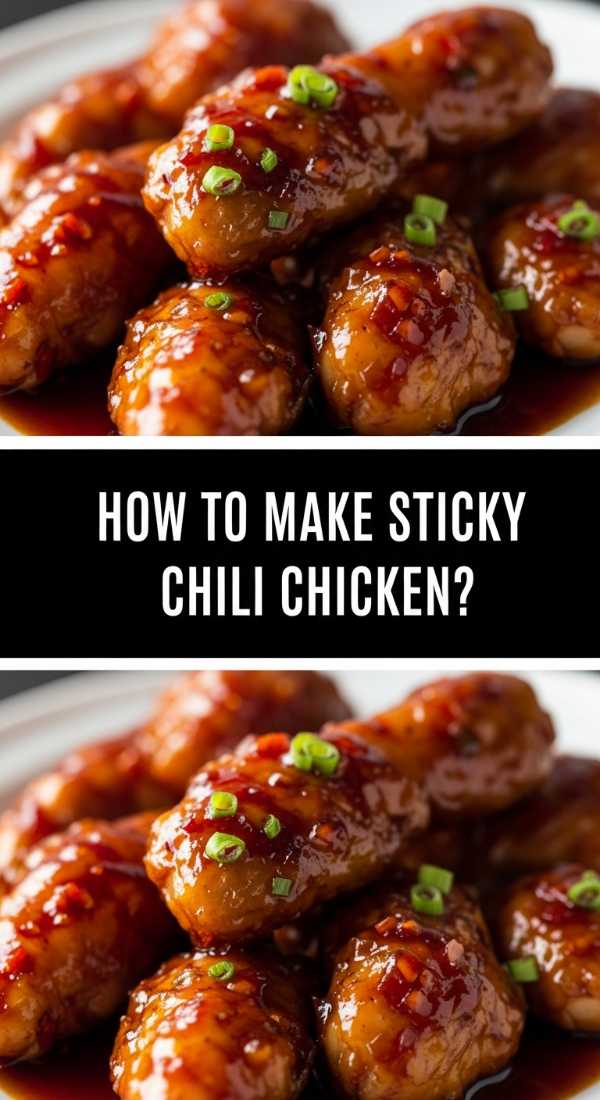
How to make sticky chili chicken?

Why we love this
Sticky chili chicken is all about that deep, soulful flavor that comes from slowly reducing a complex, aromatic sauce around tender morsels of poultry. The sauce is thick and lacquer-like, boasting a dark amber hue that hints at the richness of soy, ginger, and garlic within. As you eat, the sauce coats your palate in a savory-sweet embrace, followed by a bright, clean heat that comes from fresh chilies. It’s a dish that demands to be eaten with your hands, offering a tactile and flavorful experience that perfectly captures the ‘feed to table’ philosophy of communal dining.
Ingredients
- 1.5 lbs chicken breast or thighs, cut into cubes
- 1/4 cup cornstarch
- 3 tbsp vegetable oil
- 1/3 cup sweet chili sauce
- 2 tbsp soy sauce
- 1 tbsp hoisin sauce
- 1 tsp grated ginger
- Sliced red chilies for extra heat
How to make it
- Toss the chicken cubes in cornstarch until lightly coated; this creates a thin barrier that will soak up the sauce later and provides a slight crunch.
- Heat the oil in a wok or large skillet over high heat until it reaches its smoke point.
- Add the chicken in a single layer and sear for 3-4 minutes on each side until golden and cooked through, then remove the chicken and set aside.
- In the same pan (keep the flavored oil!), add the ginger and fresh chilies, sautéing for 30 seconds until the kitchen smells incredible.
- Whisk together the sweet chili sauce, soy sauce, and hoisin, then pour it into the hot pan; it will bubble up immediately as the sugars begin to caramelize.
- Add the chicken back into the pan and toss vigorously for 2 minutes over high heat until the sauce has reduced to a thick, sticky glaze that fully coats the meat.
- Serve in a mound on your board, garnished with extra fresh chilies to signal the heat level to your guests.
How to crisp spicy glazed tofu?
[IMAGE_10]
Why we love this
For the vegetarians and plant-forward eaters, this spicy glazed tofu is a revelation of texture and taste. By pressing the tofu, we achieve a dense, satisfying ‘meatiness’ that stands up perfectly to the high heat of the pan. The exterior becomes a delicate, golden-brown shell that shatters when bitten, leading into a soft, creamy center. The spicy glaze provides a punchy, vibrant finish that elevates the neutral flavor of the tofu into something truly extraordinary. It’s proof that plant-based options can be just as indulgent and visually stunning as any other item on your food board.
Ingredients
- 1 block extra-firm tofu
- 2 tbsp cornstarch
- 1/2 tsp salt
- 2 tbsp neutral oil
- 1/4 cup sriracha or gochujang-based sauce
- 2 tbsp maple syrup
- 1 tbsp rice vinegar
How to make it
- Drain the tofu and wrap it in a clean kitchen towel; place a heavy object (like a cast-iron skillet) on top for at least 20 minutes to press out all excess moisture.
- Cut the pressed tofu into uniform 1-inch cubes and toss them in a mixture of cornstarch and salt until lightly and evenly coated.
- Heat the oil in a non-stick skillet over medium-high heat; once hot, add the tofu cubes in a single layer.
- Pan-fry the cubes for 2-3 minutes per side, being patient as they develop a deep golden, crispy exterior on all six sides.
- While the tofu fries, whisk together the sriracha, maple syrup, and rice vinegar in a small bowl.
- Once the tofu is crispy, turn the heat down to medium and pour the sauce over the cubes; the cornstarch on the tofu will help thicken the sauce instantly.
- Toss the tofu gently for 1 minute until every cube is beautifully glazed and the sauce is sticky, then serve immediately to maintain that vital crunch.
The Art of the Final Board
Once you’ve mastered these individual components, the real fun begins in the assembly. A truly viral food board is about more than just the recipes; it’s about the flow. I like to start by placing my larger items—like the ribs or the cauliflower—as anchor points, then filling in the gaps with the smaller items like the meatballs and shrimp. Add some fresh elements like sliced cucumbers, radishes, or sprigs of cilantro to provide color contrast and a palate cleanser between the spicy bites. Remember, there are no rules here—only the goal of creating something that looks as good as it tastes. Your guests won’t just be eating; they’ll be experiencing a labor of love that started right on your digital feed.