

The Beginner’s Guide to Creating a Viral Food Board
There is something undeniably magical about a kitchen filled with the soft bubbling of fermentation jars and the vibrant colors of preserved vegetables. It’s more than just a culinary trend; it’s a return to our roots, a slow dance with nature that rewards patience with incredible depth of flavor. Whenever I set out a board filled with these tangy, crunchy, and probiotic-rich delights, it’s not just a meal—it’s a conversation starter. The colors pop, the aromas are tantalizingly complex, and every bite feels like a gift to your body.
Creating a viral-worthy food board is about balance: the crunch of a fermented carrot against the soft funk of a well-aged kimchi, or the bright zing of pickled red onions cutting through something rich. It’s an aesthetic masterpiece that tastes even better than it looks. In this guide, I’m sharing my favorite fermentation secrets so you can build a board that captures hearts (and likes!) while nourishing your gut and soul.
How to make homemade kimchi?
Why we love this
Homemade kimchi is a sensory explosion that wakes up every taste bud. The texture is a perfect interplay between the sturdy crunch of the cabbage hearts and the tender, sauce-slicked leaves. As it ferments, it develops a signature effervescence and a deep, savory funk that smells of toasted garlic and ginger. Eating it is an experience of warmth and vitality, leaving a lingering, pleasant heat on the palate that makes you reach for just one more forkful.
Ingredients
- 2 lbs Napa cabbage
- 1/4 cup sea salt
- 1/2 cup water
- 1 tbsp glutinous rice flour
- 1/4 cup fish sauce (or vegan alternative)
- 1/2 cup Gochugaru (Korean red chili flakes)
- 1 tbsp minced ginger
- 4 cloves minced garlic
- 1 bunch green onions, chopped
- 1 cup julienned daikon radish
How to make it
- Quarter the Napa cabbage lengthwise and remove the cores. Slice into 2-inch pieces. Place in a large bowl and massage with sea salt until the cabbage begins to soften. Let it sit for 2 hours, tossing every 30 minutes to ensure even wilting.
- Rinse the cabbage thoroughly under cold water three times to remove excess salt. Drain in a colander for 20 minutes to ensure it’s not too watery.
- In a small saucepan, whisk water and rice flour over medium heat until it bubbles and thickens into a paste. Remove from heat and stir in the Gochugaru, fish sauce, ginger, and garlic. Let this paste cool completely.
- In a large bowl, combine the drained cabbage, daikon, green onions, and the chili paste. Using gloves, massage the paste into every leaf until well-coated.
- Pack the mixture tightly into a sterilized glass jar, pressing down firmly to remove air bubbles. Leave at least 2 inches of headspace. Let it sit at room temperature for 2-5 days, ‘burping’ the jar daily, then move to the fridge once the desired tanginess is achieved.
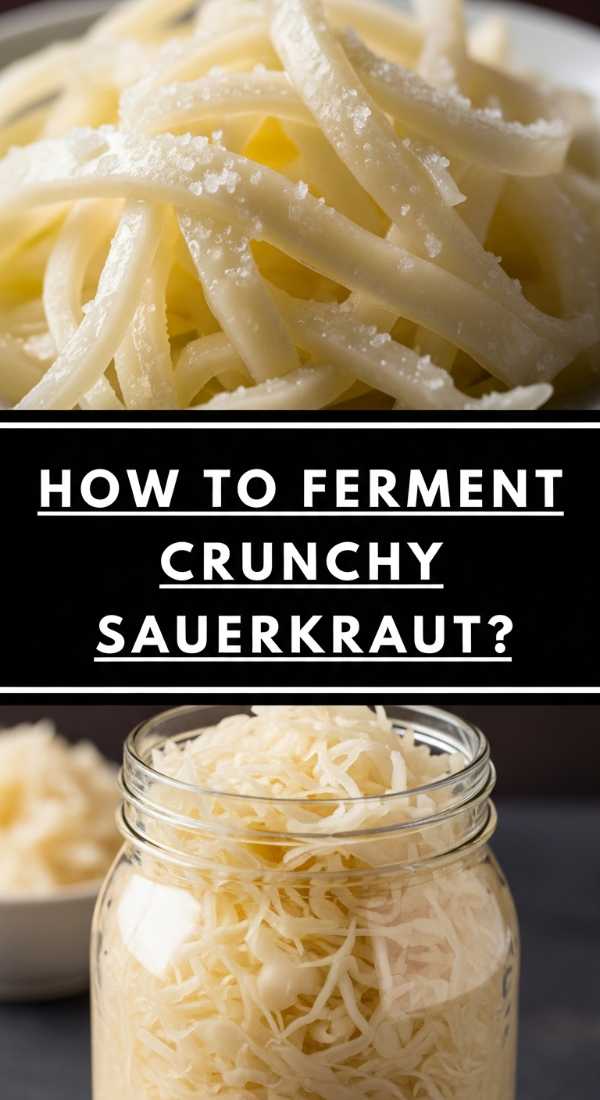
How to ferment crunchy sauerkraut?

Why we love this
Traditional sauerkraut is the ultimate comfort food for the gut. There is a rustic, clean simplicity to its aroma—salty, sour, and earthy all at once. When made correctly, it maintains a satisfying, audible snap that contrasts beautifully with the juicy, brine-soaked strands. It feels like a crisp autumn morning in a jar, providing a bright, acidic punch that cleanses the palate and elevates even the simplest sourdough toast or roasted meats.
Ingredients
- 1 medium head of green cabbage (about 3 lbs)
- 1.5 – 2 tbsp sea salt
- 1 tsp caraway seeds (optional)
- Filtered water (only if needed)
How to make it
- Remove the outer leaves of the cabbage and set one large leaf aside. Core the cabbage and shred it very finely using a sharp knife or a mandoline.
- Place the shredded cabbage in a massive bowl and sprinkle the salt over the top. Using clean hands, massage and squeeze the cabbage vigorously for 10-15 minutes. You are looking for the cabbage to release enough liquid (brine) to completely submerge itself.
- Once a puddle of brine has formed at the bottom of the bowl, mix in the caraway seeds for that classic earthy flavor.
- Transfer the cabbage into a wide-mouth mason jar, packing it down with a tamper or your fist as hard as possible. The brine should rise above the level of the cabbage.
- Fold the reserved outer cabbage leaf and place it on top of the shredded cabbage to keep bits from floating. Use a glass fermentation weight to hold everything under the brine. Seal with a lid and let ferment in a cool, dark spot for 2 to 4 weeks. Taste weekly until it reaches your preferred level of sourness.
How to pickle red onions?

Why we love this
Pickled red onions are the ‘crown jewels’ of any food board. Their transformation from a pungent, sharp raw onion to a vibrant, neon-pink sliver of sweetness and tang is nothing short of miraculous. They offer a delicate crunch and a floral, vinegary brightness that cuts through fat like a dream. The aroma is sweet and herbaceous, making them the perfect aesthetic and flavorful topper for everything from tacos to avocado toast.
Ingredients
- 1 large red onion, very thinly sliced
- 1/2 cup apple cider vinegar
- 1/2 cup warm water
- 1.5 tsp sea salt
- 1 tbsp maple syrup or honey
- 1 clove garlic (optional)
- 1/2 tsp black peppercorns
How to make it
- Thinly slice the red onion using a mandoline to ensure uniform, paper-thin rings. Pack the onions into a clean pint-sized glass jar.
- In a measuring cup, whisk together the warm water, apple cider vinegar, salt, and maple syrup until the salt and sweetener are fully dissolved.
- Add the garlic clove and peppercorns to the jar with the onions.
- Pour the liquid over the onions until they are completely submerged. Use a spoon to press them down and release any trapped air bubbles.
- Let the jar sit at room temperature for about 30 to 60 minutes. You will see them turn a bright pink color almost immediately. Once cooled, seal the lid and store in the refrigerator. They are ready to eat in 1 hour but taste best after 24 hours.
How to make probiotic vegetables?
Why we love this
A medley of probiotic vegetables is like a garden party in a jar. The combination of cauliflower, radishes, and peppers creates a complex flavor profile where the natural sweetness of the veggies is enhanced by the lactic acid fermentation. The aroma is fresh and slightly yeasty, while the texture remains incredibly firm and snappy. It’s a rainbow of nutrition that feels alive, offering a refreshing and cooling counterpoint to spicier items on your board.
Ingredients
- 2 cups mixed chopped veggies (cauliflower florets, sliced radishes, bell peppers)
- 2 cups filtered water
- 1.5 tbsp sea salt
- 2 cloves garlic, smashed
- 1 sprig fresh dill
How to make it
- Prepare your brine by mixing the filtered water and sea salt in a pitcher until the salt is completely dissolved. This creates a standard 2-3% brine solution.
- Clean and chop your vegetables into bite-sized pieces, ensuring they are uniform in size so they ferment at the same rate.
- Place the garlic and dill at the bottom of a clean quart jar, then pack the mixed vegetables tightly on top, leaving about an inch of space at the top.
- Pour the brine over the vegetables until they are completely covered. If the vegetables float, use a fermentation weight to keep them submerged; exposure to air can cause mold.
- Cover with a lid or a cloth and rubber band. Let sit at room temperature out of direct sunlight for 3 to 7 days. Once the brine looks slightly cloudy and the vegetables taste tangy, move them to the fridge.
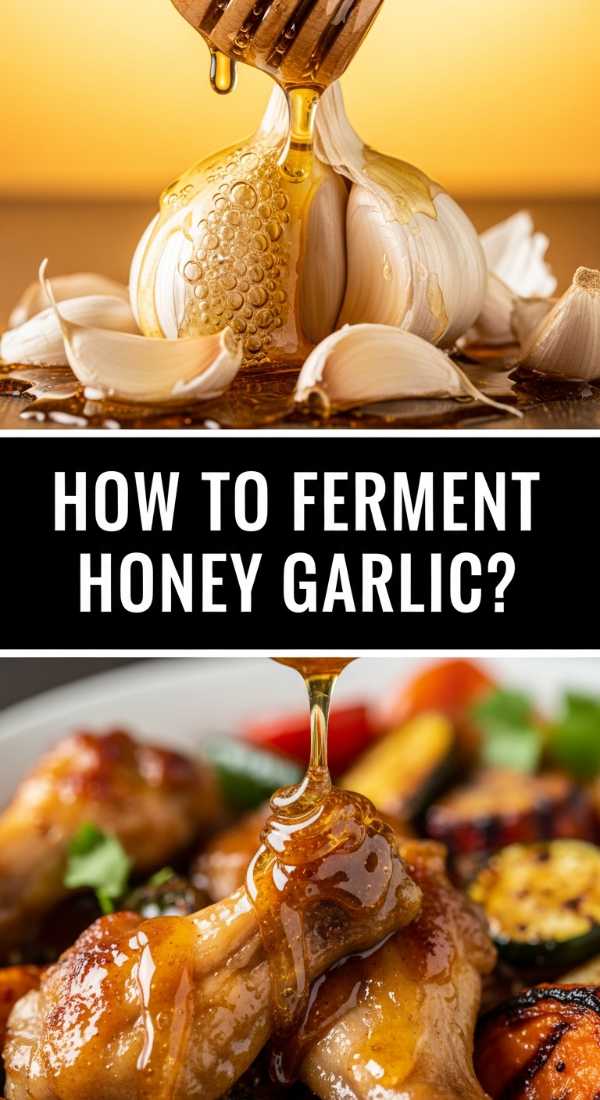
How to ferment honey garlic?
Why we love this
Honey garlic is the ultimate medicinal treat. Over time, the garlic cloves lose their sharp bite and become mellow, almost buttery, while the honey turns into a thin, pourable amber nectar infused with savory notes. The aroma is intoxicating—a blend of floral sweetness and roasted garlic depth. It’s a sticky, golden addition to a board that pairs exquisitely with sharp cheeses or can be drizzled over roasted roots for a viral flavor moment.
Ingredients
- 1 cup raw, unpasteurized honey
- 1/2 cup peeled garlic cloves
- 1 sprig of thyme (optional)
How to make it
- Peel the garlic cloves, removing the woody ends. Lightly crush each clove with the side of a knife to release the juices, but keep the cloves mostly whole.
- Place the garlic cloves (and thyme, if using) into a clean glass jar.
- Pour the raw honey over the garlic. It is crucial to use raw honey as it contains the wild yeast and bacteria necessary for fermentation.
- Ensure the garlic is fully submerged. The garlic will eventually float; this is normal. Close the lid loosely or flip the jar over once a day to ensure the garlic stays coated in honey.
- Let it ferment in a dark cupboard for at least 2 weeks. The honey will become much runnier and may bubble slightly. This can be aged for months—the longer it sits, the darker and more delicious it becomes.
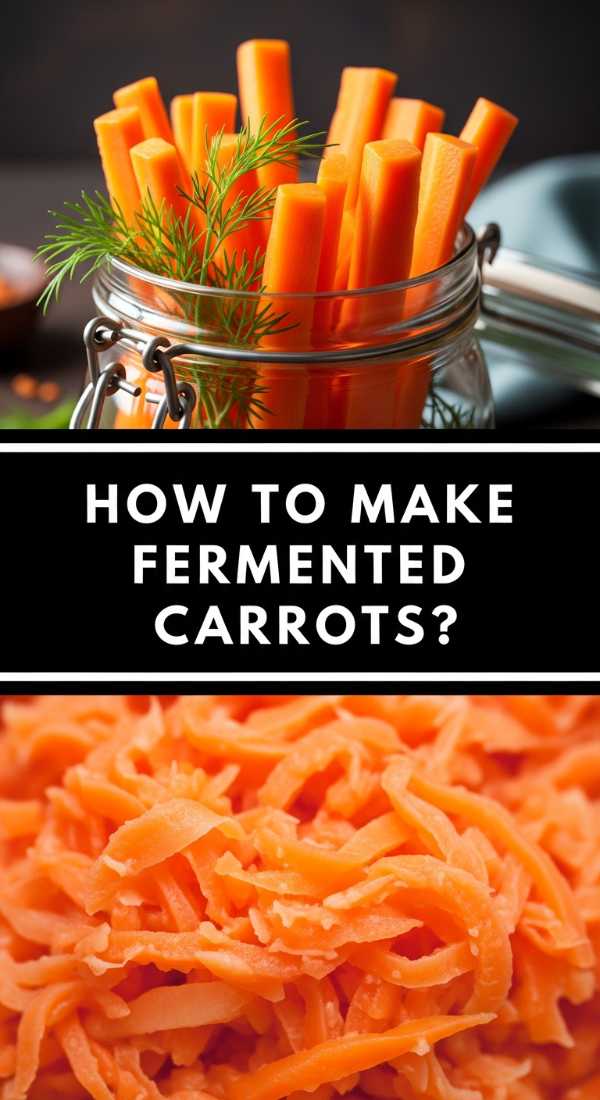
How to make fermented carrots?

Why we love this
Fermented carrots are the perfect snack for those who love a clean, sharp crunch. When infused with ginger or turmeric, they take on a bright, sunny disposition that is both refreshing and earthy. The natural sugars in the carrots ferment into a mild tang that highlights the vegetable’s inherent sweetness. They are visually stunning—glowing orange sticks that provide a structural element to your food board while offering a massive dose of vitamin A and probiotics.
Ingredients
- 1 lb carrots, peeled and cut into sticks
- 2 cups filtered water
- 1.5 tbsp sea salt
- 1 inch fresh ginger, sliced
- 1/2 tsp coriander seeds
How to make it
- Wash and peel the carrots, then slice them into sticks that are roughly the same height, ensuring they will fit vertically in your jar with an inch of headspace.
- Dissolve the salt in the filtered water to create your brine.
- Place the ginger slices and coriander seeds at the bottom of a sterilized jar.
- Pack the carrot sticks into the jar vertically. Pack them as tightly as possible so they wedge each other in and don’t float.
- Pour the brine over the carrots until covered. Use a weight if necessary. Cover with a breathable lid or airlock and let sit at room temperature for 5-10 days. Taste on day 5; they should be tangy but still very crunchy. Move to the fridge once perfect.
How to prepare spicy kimchi?

Why we love this
This is for the heat-seekers who want their food board to pack a punch. Spicy kimchi is deeper and more intense than its mild counterpart, with layers of chili heat that build slowly on the tongue. The aroma is bold and pungent, dominated by the smoky notes of Gochugaru and the sharpness of extra ginger. It’s a vibrant red masterpiece that adds drama and excitement to any spread, pairing perfectly with creamy cheeses or fatty meats to balance the fire.
Ingredients
- All ingredients from the standard Kimchi recipe
- Double the Gochugaru (1 cup)
- 3-4 Thai bird’s eye chilies, minced
- 1 tbsp extra red pepper flakes
How to make it
- Follow the brining and rinsing steps for the Napa cabbage as detailed in the first kimchi recipe, ensuring the cabbage is well-drained.
- When making the rice flour paste, incorporate the extra Gochugaru and the minced Thai chilies into the cooling mixture. The paste should be thick and dark red.
- Wear double gloves for this version to protect your skin from the increased capsaicin. Thoroughly rub the spicy paste into every nook and cranny of the cabbage.
- Pack the mixture extremely tightly into jars, using a wooden spoon to press out all air pockets. The absence of air is vital for a clean fermentation.
- Ferment at room temperature for 3-6 days. The extra heat can sometimes slow down the visible bubbling, so taste it regularly to monitor the fermentation progress. Store in the fridge for up to 6 months.
How to ferment green beans?
Why we love this
Known as ‘Dilly Beans,’ these fermented green beans are a nostalgic favorite with a healthy twist. They possess a snappy, firm texture that pops when you bite into them, releasing a geyser of garlicky, dill-infused brine. The aroma is reminiscent of a classic New York deli pickle—sharp, herbal, and savory. They stand up beautifully on a board, adding height and a lovely deep green hue that suggests freshness and vitality.
Ingredients
- 1/2 lb fresh green beans, trimmed
- 2 cups water
- 1.5 tbsp salt
- 2 cloves garlic, smashed
- 1 tsp red pepper flakes
- 2 heads of fresh dill
How to make it
- Trim the stem ends of the green beans so they are uniform in length and fit comfortably in your jar.
- In a small jar, combine the salt and water, stirring until clear.
- Place the garlic, dill, and red pepper flakes in the bottom of a clean pint jar.
- Tip the jar on its side and slide the green beans in. This makes it easier to pack them tightly and vertically. Stand the jar upright and wedge in any remaining beans.
- Pour the brine over the beans, ensuring they are fully submerged. Use a fermentation weight to keep the tips from poking out of the liquid. Cover and let sit for 4-7 days. The brine will turn cloudy, which is a sign of healthy probiotic activity. Move to the fridge once they have a pleasant ‘pickle’ tang.
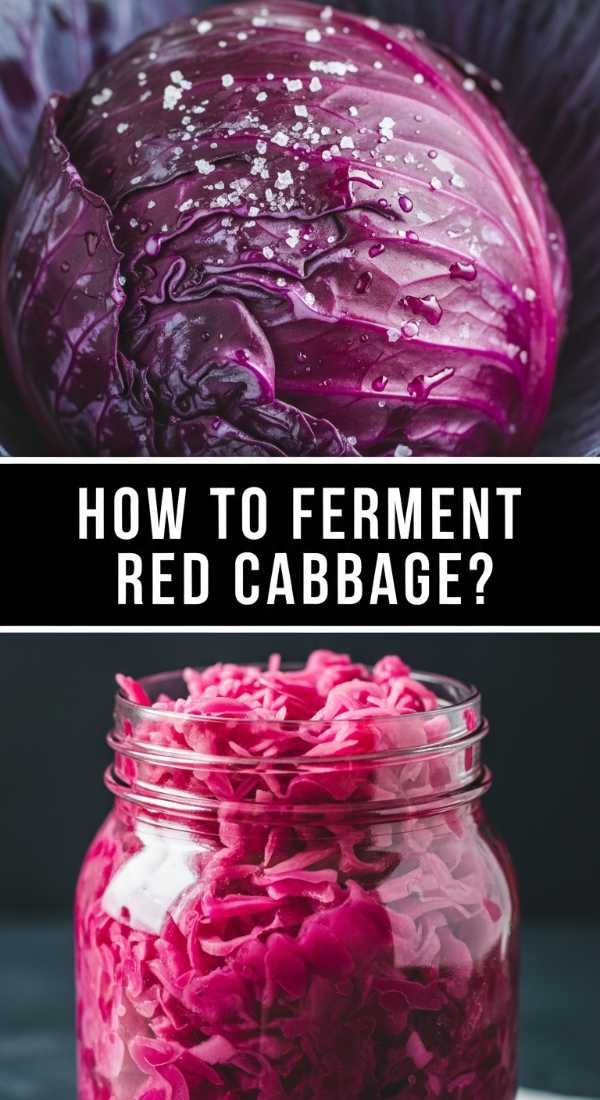
How to ferment red cabbage?
Why we love this
Fermented red cabbage is perhaps the most visually stunning item you can add to a viral board. As it ferments, it turns a deep, iridescent magenta that looks like edible jewelry. The flavor is slightly more robust and peppery than green cabbage, with a dense, satisfying crunch. The aroma is bright and zingy. It provides a striking color contrast to other foods, making it a centerpiece that draws the eye and the appetite simultaneously.
Ingredients
- 1 head of red cabbage (2-3 lbs)
- 2 tbsp sea salt
- 1/2 tsp juniper berries (optional for a gin-like note)
- 1 bay leaf
How to make it
- Remove and save an outer leaf. Shred the red cabbage thinly, either by hand or with a food processor. Be aware that red cabbage juice can stain wooden boards and hands!
- In a large non-reactive bowl, toss the cabbage with the salt. Let it rest for 15 minutes to allow the salt to start drawing out the moisture.
- Massage the cabbage firmly for 10 minutes. Red cabbage is tougher than green, so you may need to use more pressure to break down the cell walls and create enough brine.
- Add the juniper berries and bay leaf, then pack the mixture into a jar. Press down until the purple brine rises above the cabbage.
- Place the reserved leaf and a weight on top. Seal and ferment in a cool, dark place for 3-5 weeks. The color will intensify as the pH drops. Store in the fridge once it reaches a savory, sour perfection.
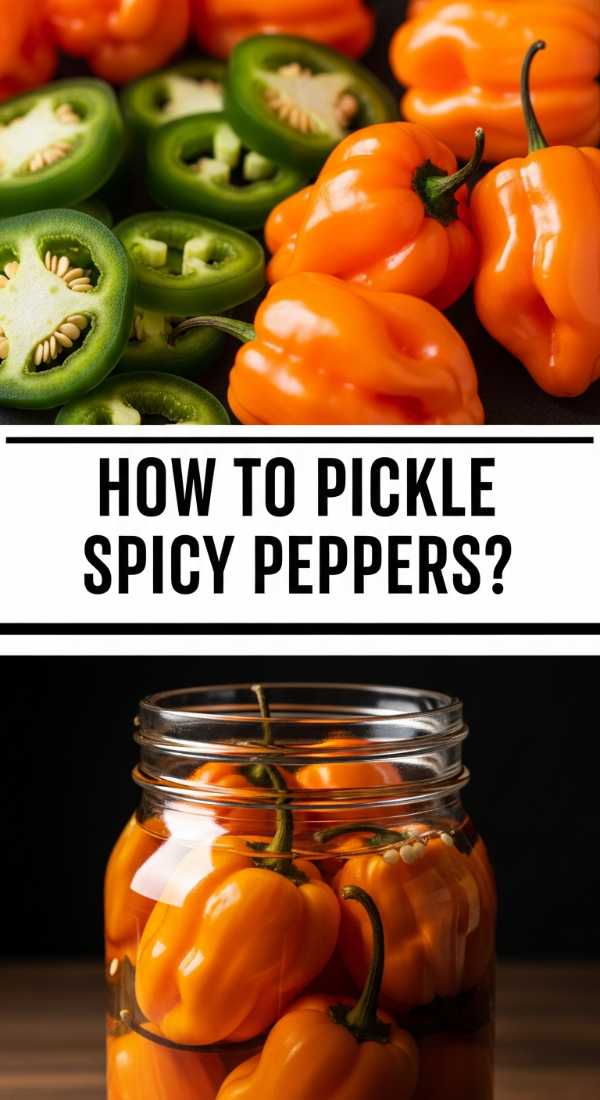
How to pickle spicy peppers?
[IMAGE_10]
Why we love this
Pickled spicy peppers are the ‘zing’ that every food board needs. Whether you use jalapeños, habaneros, or serranos, the pickling process tempers the raw heat and replaces it with a complex, vinegary brightness. They have a slick, glossy texture and a sharp, spicy aroma that clears the sinuses and excites the senses. They are the perfect accompaniment to soft cheeses or crackers, providing a focused burst of flavor that lingers beautifully.
Ingredients
- 1 lb mixed hot peppers, sliced into rings
- 1 cup white vinegar
- 1 cup water
- 1 tbsp sea salt
- 1 tbsp sugar
- 2 cloves garlic, sliced
How to make it
- Slice the peppers into uniform rings. You can leave the seeds in for maximum heat or remove them for a milder pickle.
- In a medium saucepan, combine the vinegar, water, salt, sugar, and garlic. Bring to a rolling boil, stirring until the solids are dissolved.
- Place the pepper rings into clean glass jars.
- Pour the hot brine over the peppers, leaving 1/2 inch of headspace. Tap the jar on the counter to release any trapped air bubbles.
- Let the jars cool to room temperature on the counter. Once cool, tighten the lids and refrigerate. They are ready to eat in 24 hours and will stay crunchy and delicious for several weeks in the fridge.
Mastering the Art of the Fermented Board
Building a viral food board is about more than just aesthetics; it’s about the love and time you put into every jar. These fermented and pickled delights offer a journey of flavors—from the spicy heights of kimchi to the earthy depths of sauerkraut. As you arrange these jars on your board, remember that you are serving ‘living’ food that is as good for your gut as it is for your Instagram feed. Happy fermenting!