
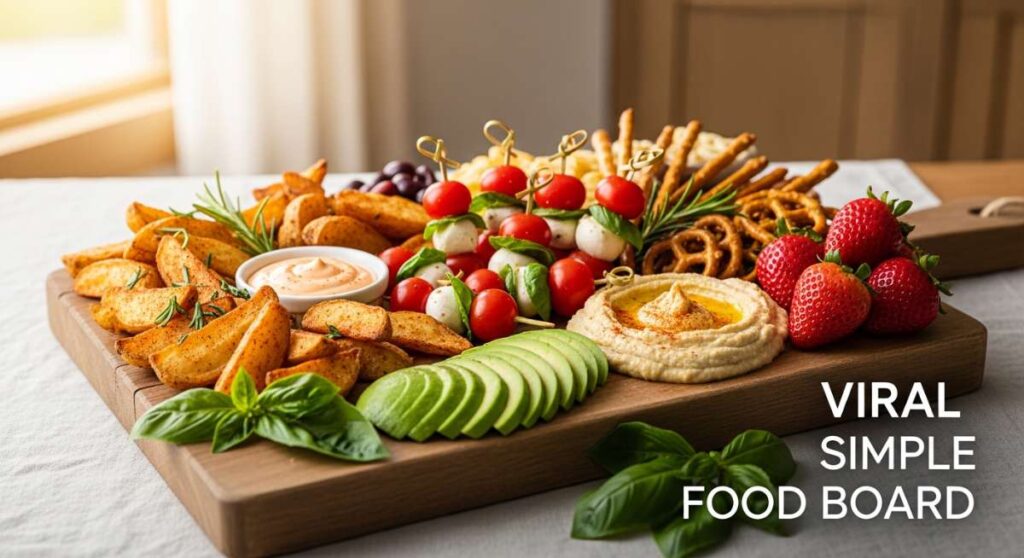
The Easy Viral Food Board That’s Taking Over the Internet
I’ve always believed that the best memories aren’t made at stiff, formal dinner tables, but rather around a messy, vibrant spread where everyone can dig in and help themselves. There’s something so magical about a ‘food board’—it’s a visual feast that screams hospitality without the stress of a five-course meal. Lately, my kitchen has been a revolving door of seasonal flavors, and I’ve curated a collection of recipes that transform any ordinary afternoon into a viral-worthy celebration of summer and spring.
This isn’t just about food; it’s about the aesthetic of a life well-lived. Whether you are watching hummingbirds dart through your garden or hosting the ultimate backyard cookout, these dishes are designed to be shared, photographed, and savored. From the zesty zing of lemon cookies to the smoky char of street corn, we are diving into the textures and aromas that make this season truly unforgettable. Let’s build your dream food board together!
How to make hummingbird nectar?

Why we love this
There is nothing quite as serene as sitting on the porch with a cold glass of iced tea, watching tiny, iridescent hummingbirds flutter around a feeder. Making your own nectar is a small act of love for nature that rewards you with hours of backyard entertainment. This clear, sweet liquid mimics the natural floral nectar these birds crave, providing them with the high-energy fuel they need to keep their wings beating at incredible speeds. The simple clarity of the sugar-water mixture looks beautiful in a glass feeder, catching the afternoon sun like a liquid diamond.
Ingredients
- 1 cup granulated white sugar
- 4 cups filtered water
- Large glass pitcher
- Small saucepan
How to make it
- Start by measuring out your filtered water and pouring it into a medium saucepan; using filtered water ensures no harsh chemicals like chlorine disturb the birds’ delicate systems.
- Place the pan over medium-high heat and bring the water to a gentle rolling boil; this step is crucial for dissolving the sugar completely and killing any bacteria or fungi present in the water.
- Once the water is boiling, stir in the granulated white sugar gradually, whisking constantly until the liquid is perfectly clear and no grains remain visible at the bottom of the pan.
- Remove the saucepan from the heat immediately to avoid over-evaporation, which could alter the sugar-to-water ratio and potentially dehydrate the hummingbirds.
- Allow the nectar to cool completely to room temperature before filling your feeders; pouring hot liquid can damage plastic feeders and harm the birds.
- Store any leftover nectar in a clean, airtight container in the refrigerator for up to one week, ensuring you clean your feeders every few days to keep your feathered friends healthy.
How to bake spring cookies?

Why we love this
Spring cookies are like a bite-sized celebration of a garden in bloom, offering a delicate crumble that melts on the tongue with hints of vanilla and almond. They possess a soft, pillowy texture that contrasts beautifully with a light dusting of powdered sugar or a smear of pastel-colored icing. The aroma of butter and sugar baking in the oven fills the house with a sense of renewal and warmth, reminding us that the cold winter months are finally behind us. These cookies are the perfect addition to a tea party board, looking elegant alongside fresh strawberries and sprigs of mint.
Ingredients
- 2 1/2 cups all-purpose flour
- 1 cup unsalted butter, softened
- 1 cup granulated sugar
- 1 large egg
- 1 tsp vanilla extract
- 1/2 tsp almond extract
- 1/2 tsp baking powder
- Pinch of salt
How to make it
- In a large mixing bowl, cream together the softened unsalted butter and granulated sugar using an electric mixer on medium-high speed until the mixture is light, fluffy, and pale yellow.
- Add the egg, vanilla extract, and almond extract to the butter mixture, beating well until fully incorporated and the batter looks smooth and glossy.
- In a separate bowl, whisk together the flour, baking powder, and salt to ensure even distribution of the leavening agent.
- Gradually add the dry ingredients to the wet ingredients on low speed, mixing only until just combined; over-mixing at this stage will result in tough cookies rather than tender ones.
- Wrap the dough in plastic wrap and chill in the refrigerator for at least 30 minutes; this firms up the butter and prevents the cookies from spreading too much in the oven.
- Preheat your oven to 350°F (175°C) and line a baking sheet with parchment paper to prevent sticking and ensure even browning.
- Roll the dough into small balls or use a cookie cutter for floral shapes, and bake for 10-12 minutes or until the edges are just barely golden but the centers remain soft.
How to make summer pasta?

Why we love this
Summer pasta is the epitome of ‘less is more,’ relying on the vibrant, sun-drenched flavors of peak-season produce to do all the heavy lifting. Imagine silky strands of noodles coated in a light, garlicky oil, tossed with tomatoes so ripe they practically burst upon impact. The fragrance of fresh basil leaves being torn by hand releases an intoxicating herbal aroma that signals the height of July. It’s a dish that feels sophisticated yet effortless, perfect for an outdoor dinner where the golden hour glow makes every ingredient sparkle on the plate.
Ingredients
- 1 lb spaghetti or linguine
- 2 cups cherry tomatoes, halved
- 3 cloves garlic, thinly sliced
- 1/2 cup extra virgin olive oil
- 1/2 cup fresh basil leaves, torn
- 1/4 tsp red pepper flakes
- Freshly grated Parmesan cheese
- Salt and pepper to taste
How to make it
- Bring a large pot of heavily salted water to a boil; the water should ‘taste like the sea’ to properly season the pasta from the inside out.
- Cook your choice of pasta according to the package instructions, but aim for ‘al dente’—about 1-2 minutes less than the box suggests—so it maintains a bite.
- While the pasta cooks, heat the extra virgin olive oil in a large skillet over medium-low heat; add the sliced garlic and red pepper flakes, sautéing gently until the garlic is fragrant and translucent but not browned.
- Add the halved cherry tomatoes to the skillet and turn the heat up to medium; cook for 5-7 minutes, stirring occasionally, until the tomatoes begin to soften and release their juices into the oil.
- Reserve about 1/2 cup of the starchy pasta water before draining the noodles, then add the pasta directly into the skillet with the tomatoes.
- Toss the pasta vigorously with the tomato-garlic oil, adding a splash of the reserved pasta water to create a silky, emulsified sauce that clings to every strand.
- Remove from heat, fold in the fresh basil and a generous handful of Parmesan cheese, and serve immediately with a final drizzle of high-quality olive oil.
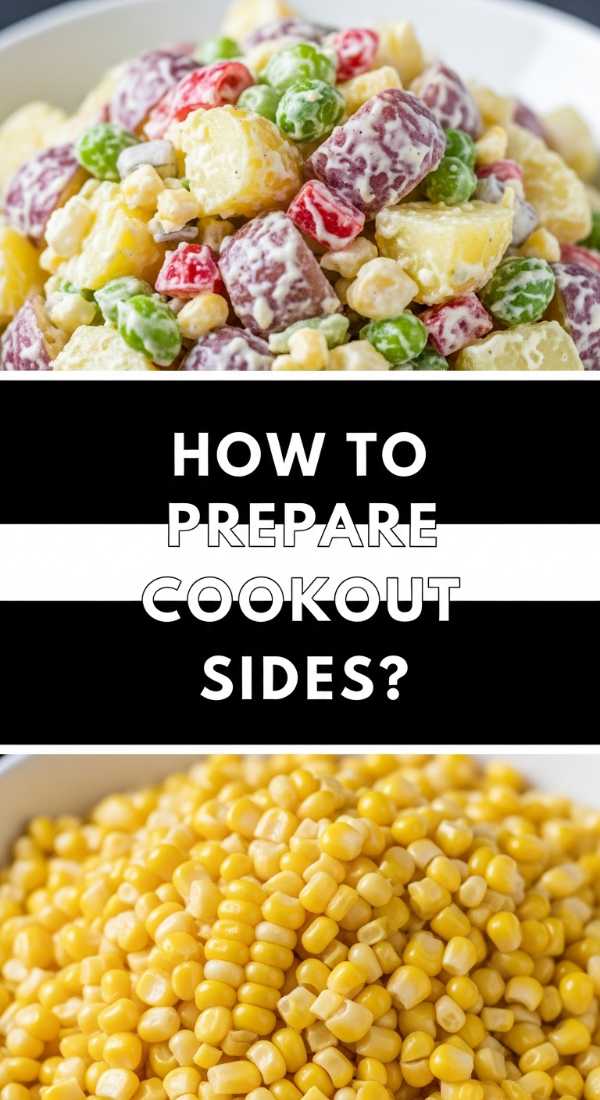
How to prepare cookout sides?
Why we love this
No summer board is complete without the supporting cast of classic cookout sides that provide the perfect crunchy, creamy, and tangy balance to grilled proteins. We love the way a chilled, vinegar-based slaw cuts through the richness of BBQ ribs, or how a herb-flecked potato salad offers a comforting, earthy foundation to the meal. These sides are the workhorses of the picnic table, often tasting even better the next day as the flavors meld and deepen in the fridge. They bring a sense of nostalgia and communal joy, reminding us of family reunions and sun-soaked holiday weekends.
Ingredients
- For the Slaw: 1 head shredded cabbage, 1/2 cup mayo, 2 tbsp apple cider vinegar, 1 tbsp honey.
- For the Potato Salad: 2 lbs Yukon Gold potatoes, 3 hard-boiled eggs, 1/4 cup chopped celery, 1/4 cup red onion, 1/2 cup mayo, 1 tbsp Dijon mustard.
- Salt, black pepper, and fresh dill for garnish.
How to make it
- To prepare the potato salad, peel and cube the potatoes into uniform 1-inch pieces; place them in a pot of cold salted water and bring to a boil, simmering until fork-tender but not mushy (usually 10-12 minutes).
- Drain the potatoes and let them cool slightly before tossing them with a tablespoon of vinegar while still warm; this allows the acid to penetrate the potato for better flavor.
- In a small bowl, whisk together the mayo, mustard, chopped celery, and red onion, then gently fold this mixture into the cooled potatoes along with chopped hard-boiled eggs.
- For the slaw, combine the shredded cabbage (a mix of red and green is most visually appealing) in a large bowl and sprinkle with a teaspoon of salt, letting it sit for 10 minutes to soften.
- Whisk the mayo, apple cider vinegar, and honey in a separate bowl until smooth, then pour over the cabbage and toss thoroughly to coat every strand.
- Chill both sides in the refrigerator for at least two hours before serving; this is a non-negotiable step for achieving the perfect temperature and flavor profile.
- Just before serving on your board, garnish with fresh dill or a sprinkle of paprika to give the dishes a professional, vibrant finish.
How to make summer desserts?

Why we love this
Summer desserts should feel like a cool breeze on a humid night—refreshing, light, and bursting with the natural sweetness of berries and stone fruits. There is something deeply satisfying about a dessert that doesn’t require a heavy oven presence, like a macerated berry trifle or a chilled fruit tart. The textures are a playground of crisp shortbread, velvety whipped cream, and the explosive pop of fresh blueberries or raspberries. These sweets are meant to be eaten with abandon, perhaps with a bit of cream dripping down the side of the bowl as the sun sets.
Ingredients
- 2 cups fresh strawberries, sliced
- 1 cup blueberries
- 1/4 cup granulated sugar
- 1 tbsp lemon juice
- 2 cups heavy whipping cream
- 1/4 cup powdered sugar
- 1 tsp vanilla bean paste
- Shortcake biscuits or pound cake slices
How to make it
- Begin by ‘macerating’ the fruit: combine the sliced strawberries and blueberries in a bowl with the granulated sugar and lemon juice, stirring gently to coat.
- Let the fruit sit at room temperature for at least 30 minutes; the sugar will draw out the natural juices, creating a luscious, bright red syrup that serves as a built-in sauce.
- While the fruit rests, chill a large metal mixing bowl and whisk attachment in the freezer for 10 minutes; cold equipment is the secret to achieving maximum volume in your whipped cream.
- Pour the heavy whipping cream into the chilled bowl and begin whisking on medium-low speed, gradually increasing to medium-high as the cream begins to thicken.
- Slowly sift in the powdered sugar and add the vanilla bean paste, continuing to whisk until ‘stiff peaks’ form—meaning the cream stands straight up when the whisk is lifted.
- To assemble, place a thick slice of pound cake or a split shortcake biscuit on your serving board and spoon a generous amount of the macerated fruit and syrup over the top.
- Finish with a massive dollop of the homemade whipped cream and a few sprigs of mint for a dessert that looks like it came straight from a gourmet bakery.
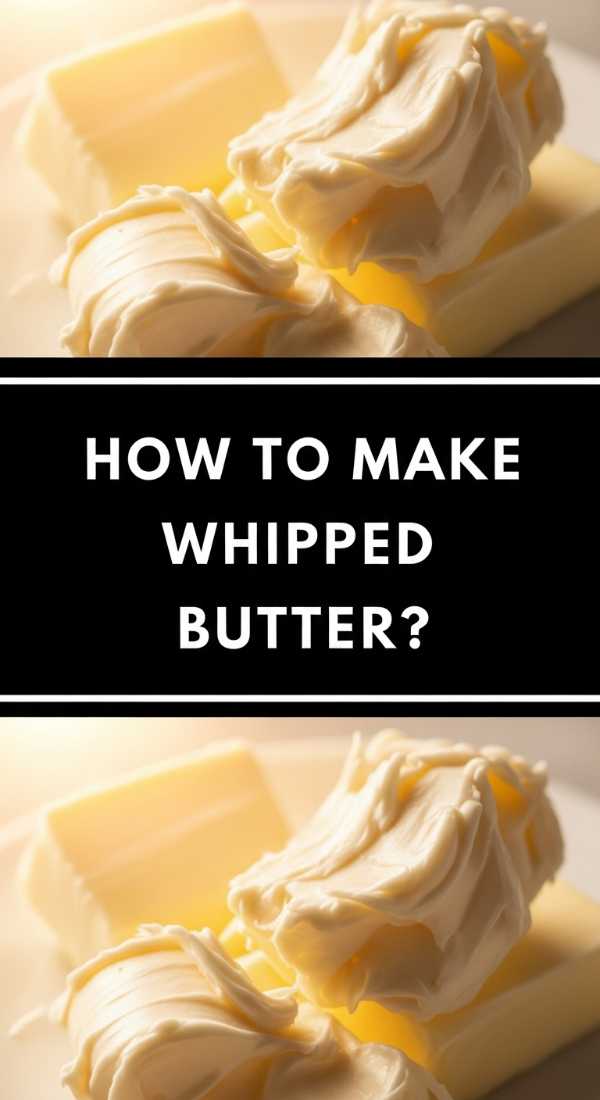
How to make whipped butter?
Why we love this
Whipped butter is the ultimate ‘low effort, high reward’ addition to any food board, transforming a basic staple into a luxurious, cloud-like spread. When you whip air into high-quality butter, it becomes incredibly soft and easy to spread, preventing that frustrating experience of tearing fresh bread with a hard butter pat. The mouthfeel is ethereal—it literally melts the moment it touches a warm roll, releasing a rich, salty aroma that elevates the entire dining experience. It’s the kind of detail that makes guests feel like they’re at a high-end bistro rather than just a casual backyard gathering.
Ingredients
- 1 cup (2 sticks) high-quality salted butter, softened to room temperature
- 2 tbsp heavy cream (optional, for extra fluffiness)
- 1/2 tsp flaky sea salt
- Optional mix-ins: honey, minced herbs, or roasted garlic
How to make it
- Ensure your butter is perfectly softened; it should be pliable and hold a thumbprint, but it shouldn’t be oily or melting, as this will prevent air from being trapped.
- Place the butter in the bowl of a stand mixer fitted with the whisk attachment, or use a hand mixer in a deep bowl to prevent splattering.
- Start whipping on low speed to break up the butter, then gradually increase the speed to high; beat the butter for a full 5-7 minutes.
- Midway through whipping, scrape down the sides of the bowl with a rubber spatula to ensure every bit of butter is being aerated.
- If you want an even lighter, ‘mousse-like’ consistency, drizzle in the two tablespoons of heavy cream while the mixer is running on high speed.
- Continue whipping until the butter has noticeably lightened in color—becoming almost white—and has roughly doubled in volume.
- Transfer the whipped butter to a small ramekin or pipe it onto your board in decorative swirls, finishing with a sprinkle of flaky sea salt for texture and a pop of flavor.
How to boil bird nectar?

Why we love this
Understanding the science of boiling bird nectar is about more than just cooking; it’s about safety and conservation for the delicate ecosystem of your garden. This process ensures that the sugar and water are fully integrated into a stable solution that won’t crystallize or spoil rapidly in the summer heat. The gentle steam rising from the pot carries a faint, sweet scent, marking a ritual of care for the tiny creatures that grace our outdoor spaces. It’s a rhythmic, calming task that connects us to the seasons and the cycle of life happening just outside our windows.
Ingredients
- 1 part white granulated sugar
- 4 parts tap or filtered water
- Deep stainless steel pot
- Clean glass jar for storage
How to make it
- Combine your water and sugar in a deep pot before turning on the heat; using a 1:4 ratio is the standard recommendation by ornithologists to safely mimic natural nectar.
- Place the pot on the stove and turn the heat to high, stirring occasionally to prevent the sugar from settling at the bottom and scorching.
- Bring the mixture to a full, rolling boil—this means the bubbles cannot be ‘stirred away’—and let it boil for exactly two minutes.
- The two-minute boil time is the ‘sweet spot’ for sterilization; it’s long enough to kill impurities but short enough that it won’t significantly change the concentration of the sugar.
- Remove the pot from the heat and cover it with a lid to prevent any dust or insects from falling into the hot liquid while it cools.
- Allow the nectar to cool completely in the pot for several hours; never put warm nectar into a feeder as it can promote the growth of black mold.
- Once stone-cold, transfer to a sterilized glass jar and store in the fridge, or fill your feeders immediately to welcome your garden guests.
How to make lemon cookies?

Why we love this
Lemon cookies are the quintessential palate cleanser of the dessert world, offering a bright, citrusy punch that cuts through the heat of a summer afternoon. Each bite starts with a crisp, sugar-crusted exterior that gives way to a soft, zesty center, releasing the essential oils of the lemon zest in a burst of sunshine. The aroma is incredibly uplifting—clean, sharp, and sweet all at once—making these cookies a favorite for those who prefer tart flavors over chocolate. They look stunning on a food board, especially when garnished with extra curls of lemon peel or a sprig of yellow-flowered herbs.
Ingredients
- 1/2 cup unsalted butter, softened
- 1 cup granulated sugar
- 1 large egg
- 1 tbsp lemon zest (about 2 lemons)
- 2 tbsp fresh lemon juice
- 1/2 tsp baking soda
- 1 1/2 cups all-purpose flour
- Powdered sugar for rolling
How to make it
- Preheat your oven to 350°F and prepare your baking sheets with non-stick silicone mats or parchment paper for the best heat distribution.
- Cream the softened butter and sugar in a large bowl until the mixture is exceptionally fluffy, which usually takes about 3-4 minutes of high-speed mixing.
- Add the egg, lemon zest, and fresh lemon juice; the zest is where the true ‘punch’ of flavor comes from, so don’t be afraid to be generous with your grating.
- In a small bowl, whisk the flour and baking soda together, then slowly incorporate them into the wet ingredients until a soft, slightly sticky dough forms.
- Scoop rounded tablespoons of dough and roll them into balls, then roll each ball in a bowl of powdered sugar until heavily coated—this creates the classic ‘crackle’ effect.
- Place the balls on the baking sheet about 2 inches apart and bake for 9-11 minutes; the cookies should be set and puffed but not browned.
- Let the cookies cool on the pan for 5 minutes to firm up before transferring to a wire rack; this ensures the delicate, soft center doesn’t collapse.
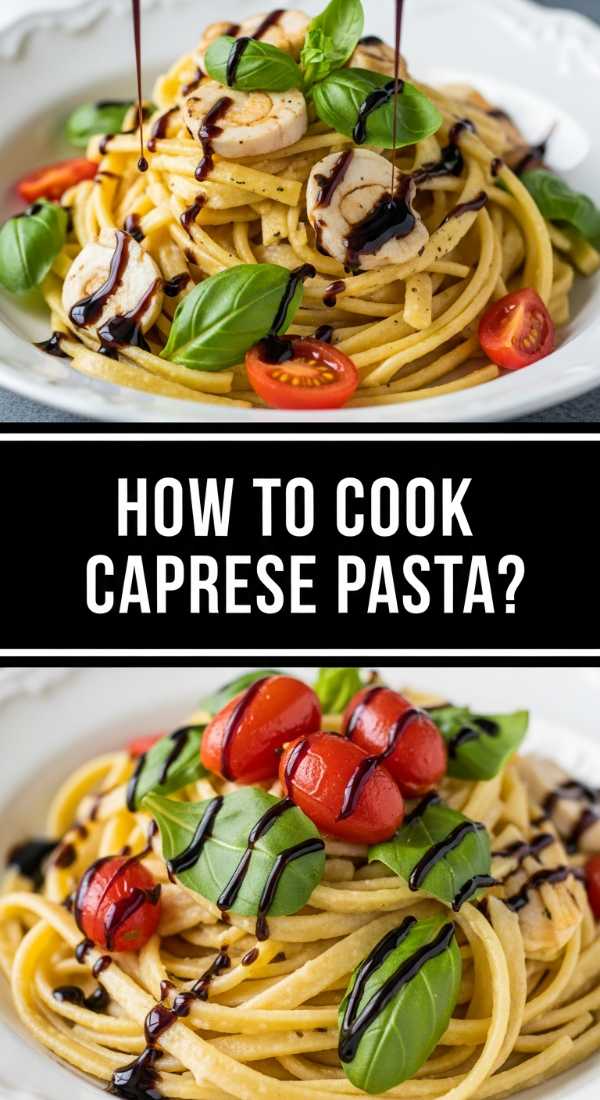
How to cook caprese pasta?
Why we love this
Caprese pasta takes the world’s most famous salad and transforms it into a hearty, comforting main that still feels light enough for a garden party. The magic lies in the contrast: the warmth of the pasta gently softens the mozzarella pearls until they are gooey and elastic, while the cold balsamic glaze provides a sharp, acidic snap. The fragrance of freshly sliced tomatoes and torn basil creates a Mediterranean atmosphere that feels like a vacation on a plate. It’s a beautiful, colorful mess of reds, whites, and greens that anchors a summer food board with rustic elegance.
Ingredients
- 1 lb penne or fusilli pasta
- 1 pint cherry tomatoes, halved
- 8 oz fresh mozzarella pearls
- 1/2 cup fresh basil, julienned
- 1/4 cup balsamic glaze
- 1/4 cup extra virgin olive oil
- 2 cloves garlic, minced
- Salt and pepper
How to make it
- Cook the pasta in a large pot of salted water until al dente; choose a shape like fusilli or penne because the ridges are perfect for catching the oil and juices.
- While the pasta boils, prepare a large mixing bowl with the olive oil, minced garlic, halved cherry tomatoes, and a generous pinch of salt and pepper.
- Drain the pasta and immediately toss it into the bowl with the oil and tomatoes; the heat from the pasta will ‘flash-cook’ the garlic and start to soften the tomatoes.
- Wait about two minutes for the pasta to cool slightly before adding the mozzarella pearls; you want them to get soft and slightly melty, but not completely liquified.
- Add the julienned basil leaves last to ensure they stay bright green and don’t turn black from the heat of the noodles.
- Transfer the mixture to a large platter or directly onto your food board, spreading it out to show off the fresh ingredients.
- Just before serving, drizzle the thick, syrupy balsamic glaze in a decorative zig-zag pattern over the top and finish with a crack of fresh black pepper.
How to grill street corn?

Why we love this
Grilling street corn, or Elote, is a sensory experience that defines the outdoor cooking season with its smoky, charred, and creamy layers. The sound of the corn kernels popping over an open flame is the ultimate summer soundtrack, while the aroma of toasted chili powder and tangy lime juice makes everyone’s mouth water instantly. Every bite is an explosion of textures: the snap of the juicy corn, the velvety richness of the cotija-mayo sauce, and the sharp crunch of fresh cilantro. It’s a messy, hands-on dish that encourages guests to let loose and truly enjoy the flavors of the grill.
Ingredients
- 6 ears of corn, husks removed
- 1/4 cup mayonnaise
- 1/4 cup sour cream or Mexican crema
- 1/2 cup crumbled cotija cheese
- 1 tsp chili powder or smoked paprika
- 1/2 cup chopped fresh cilantro
- 2 limes, cut into wedges
How to make it
- Preheat your grill to medium-high heat (about 400°F) and ensure the grates are clean and lightly oiled to prevent the corn from sticking.
- Place the shucked ears of corn directly onto the grill grates; do not use foil, as you want the direct flame to create those beautiful, blackened char marks.
- Grill the corn for 10-12 minutes, turning frequently with tongs so that the kernels are evenly toasted and golden-brown on all sides.
- In a small bowl, whisk together the mayonnaise and sour cream (or crema) until smooth; this will be the ‘glue’ for all your delicious toppings.
- Once the corn is done, remove it from the grill and immediately brush each ear with a generous layer of the mayo mixture while the corn is still steaming hot.
- Sprinkle the crumbled cotija cheese over the corn, rotating it to ensure an even coating, then dust with chili powder or smoked paprika for heat.
- Garnish with a heavy handful of fresh cilantro and serve with lime wedges on the side for squeezing, which provides the essential hit of acid to balance the creamy cheese.
Conclusion
Creating a viral-worthy food board isn’t about perfection; it’s about the abundance of flavors and the joy of sharing. By combining these seasonal staples—from the sweet nectar for your garden visitors to the smoky, savory delight of street corn—you create an experience that engages all the senses. So, grab your biggest platter, gather your favorite people, and let these recipes turn your next gathering into a celebration of the simple, beautiful life. Happy hosting!