
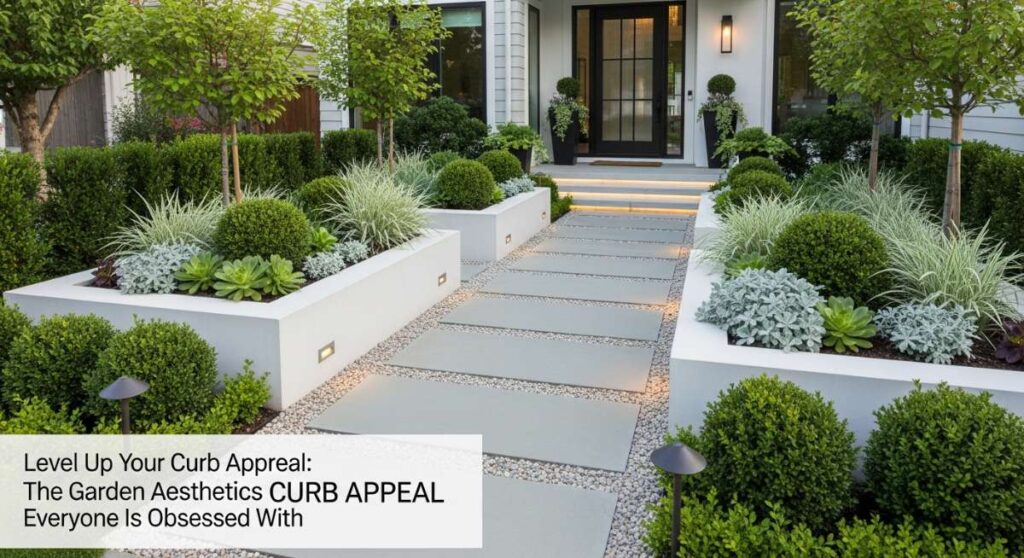
Level Up Your Curb Appeal: The Garden Aesthetics Everyone is Obsessed With
We’ve all had that moment—driving through a neighborhood and suddenly slowing down to admire a home that looks like it belongs on the cover of a magazine. It’s not just about the architecture; it’s that intangible magic we call curb appeal. Our homes are more than just four walls; they are a sanctuary where we shed the weight of the world, and the journey to that peace starts the moment we pull into the driveway. Transforming your exterior isn’t just about property value; it’s about creating a daily greeting that says, ‘You’re home now, and it’s beautiful.’
Lately, the internet has been ablaze with garden aesthetics that go beyond simple lawn mowing. We are seeing a shift toward curated, sensory-driven spaces that feel lived-in yet luxurious. Whether you have a sprawling backyard or a compact studio terrace, these trends are designed to evoke emotion. Today, I’m diving deep into the exact styles that are currently going viral, showing you how to recreate these high-end looks with your own hands. Let’s turn your living space into the aesthetic dream you’ve been scrolling through on your feed.
How to Design a Lush Entrance for Maximum Curb Appeal
Why we love this
There is nothing quite like the intoxicating scent of star jasmine or the soft rustle of fountain grass as you walk toward your front door. A lush entrance provides a sensory transition from the frantic pace of the outside world into the serenity of your private life. We love this look because it uses layers of green—from deep forest hues to bright lime accents—to create a visual depth that feels both welcoming and sophisticated. The texture of velvet-leafed hostas paired with the structured elegance of boxwoods creates a tactile experience that makes every arrival feel like a special occasion.
Essential Elements:
- Layered perennial shrubbery.
- Fragrant climbing vines (Jasmine or Honeysuckle).
- Symmetry-breaking ornamental grasses.
- Warm LED path lighting.
- A statement front door color in a matte finish.
How to make it
- Begin by clearing a 3-foot wide perimeter along your walkway, ensuring you remove all weeds and old mulch to expose the bare soil.
- Amend the soil with high-quality organic compost and a handful of slow-release fertilizer, tilling it to a depth of 12 inches to ensure young roots can penetrate easily.
- Place your tallest ‘thriller’ plants (like columnar yews or tall grasses) at the back, closest to the house wall, ensuring they are spaced at least 2 feet apart.
- Add ‘filler’ plants like hostas or ferns in the middle row, staggering them to create a zig-zag pattern that fills visual gaps.
- Install your ‘spiller’ plants or groundcovers along the very edge of the path, allowing them to slightly overgrow the walkway for a soft, romantic look.
- Deeply water the entire area for 20 minutes, observing the drainage; if puddles form, add more organic matter to improve the soil structure.
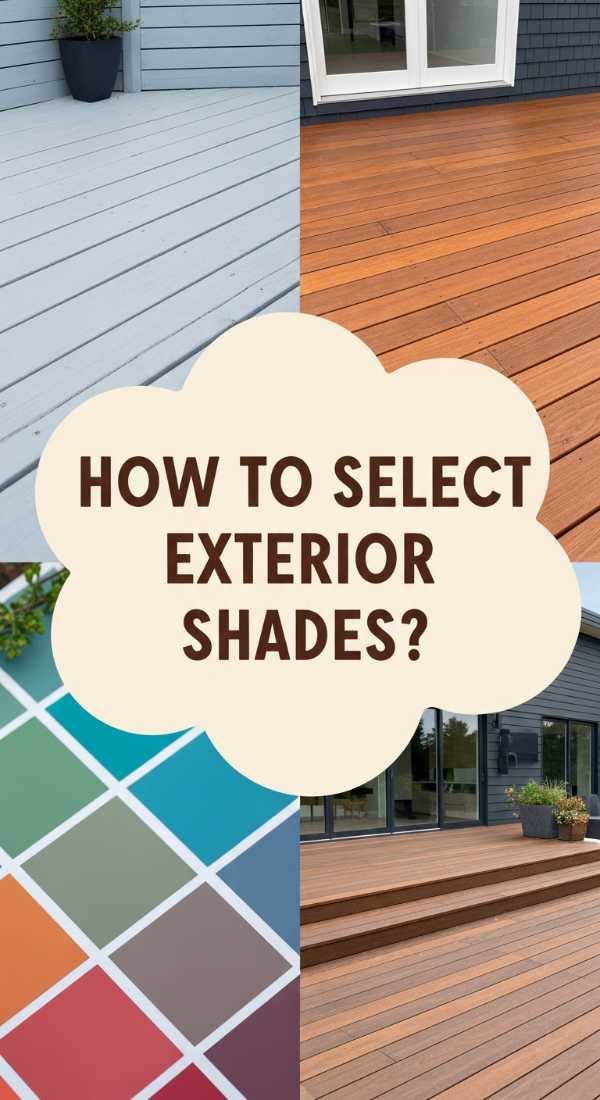
How to Select Exterior Shades for a Sophisticated Terrace

Why we love this
Exterior shades do more than just block the sun; they transform a standard terrace into a private, high-end cabana. There is a specific romance in the way light filters through a high-quality weave, casting soft, dappled shadows across your outdoor furniture. This aesthetic is all about that ‘resort-at-home’ vibe, where the boundaries between indoors and outdoors blur. We love how the right shade can cool a space by ten degrees while adding a vertical element of fabric that softens the hard lines of brick or stone, making the air feel still and protected.
Essential Elements:
- UV-resistant canvas or HDPE solar fabric.
- Stainless steel tension hardware.
- A neutral color palette (Sand, Oatmeal, or Slate).
- Cordless manual or motorized rolling mechanisms.
- Weighted bottom bars to prevent flapping in the wind.
How to make it
- Measure the height and width of your terrace opening twice, subtracting one inch from the total width to allow for mounting brackets.
- Choose a fabric with a ‘95% UV block’ rating; this provides the perfect balance of sun protection while still allowing some ambient light to glow through.
- Mark your pilot holes on the upper beam or ceiling, using a spirit level to ensure the shade will hang perfectly straight—even a 1/8-inch tilt will cause the fabric to bunch.
- Drill the holes and secure the heavy-duty mounting brackets using galvanized screws that won’t rust in the morning dew.
- Snap the roller tube into the brackets, listening for the ‘click’ that indicates the safety lock has engaged.
- Slowly lower the shade to its full length to calibrate the tension; if the fabric waves, adjust the side-track alignment until the surface is as smooth as a drum.
How to Use Earthy Partitions for a Cozy Studio Flow

Why we love this
In a compact studio, the goal is to create ‘rooms’ without building walls, and earthy partitions are the ultimate solution for a cozy, organic flow. Imagine the warmth of toasted rattan or the vertical rhythm of bamboo slats catching the golden hour light. We love these partitions because they provide a visual ‘hug,’ cordoning off a sleeping nook or a workspace while maintaining an airy, breathable atmosphere. They bring the outdoors in, grounding a modern apartment with natural textures that smell faintly of dried grass and wood, instantly lowering the room’s collective pulse.
Essential Elements:
- Woven rattan or wicker folding screens.
- Vertical wood slat panels (Oak or Walnut).
- Potted tall plants (Fiddle Leaf Fig or Snake Plants).
- Low-profile mounting hardware or weighted floor stands.
- Integrated shelving for small trailing succulents.
How to make it
- Identify the ‘anchor point’ of your room where the flow naturally breaks—usually between the bed and the living area—and mark a line on the floor with painter’s tape.
- Select a partition that stands at least 6 feet tall; this height is crucial for creating a psychological sense of a separate room.
- If using a folding screen, angle the panels at 45 degrees to ensure stability; for fixed slats, screw the top track into a ceiling joist for maximum safety.
- Lightly sand any rough wood edges with 220-grit sandpaper and apply a coat of matte beeswax to enhance the natural grain and ‘earthy’ scent.
- Position a large floor plant at the base of the partition to ‘soften’ the transition between the floor and the vertical element.
- Step back and check the light; the partition should block the direct view of the bed but allow light from the windows to spill over the top.
How to Style Azure Screens for a Serene Living Room
Why we love this
Azure screens are the secret weapon for anyone craving a Mediterranean or coastal escape within their own home. There is something deeply psychological about the color blue—it mimics the sky and the sea, immediately signaling the brain to decompress. We love how these screens act as a focal point, providing a pop of cool color that feels sophisticated rather than overwhelming. The way the blue interacts with white walls and linen furniture creates a crisp, clean aesthetic that feels like a permanent summer vacation, even in the middle of winter.
Essential Elements:
- Deep azure or cerulean painted wood frames.
- Laser-cut Moroccan or geometric patterns.
- Sheer blue-tinted glass inserts (optional).
- Brass or gold hardware accents.
- Backlighting with warm LED strips.
How to make it
- Choose a screen with an intricate laser-cut pattern; the ‘negative space’ in the design is what allows the azure color to pop without darkening the room.
- Apply a high-gloss azure paint; the gloss finish reflects light, giving the screen a watery, shimmering quality that matte paint lacks.
- Mount the screen 2 inches away from the wall using standoff spacers; this creates a shadow gap that makes the screen appear to float.
- Install a slim LED light strip behind the frame’s perimeter, set to a warm 2700K temperature to contrast beautifully with the cool blue.
- Style the area in front of the screen with a white bouclé chair or a glass side table to keep the visual weight light.
- Clean the screen weekly with a microfiber duster to ensure the azure remains vibrant and free of light-dulling dust.
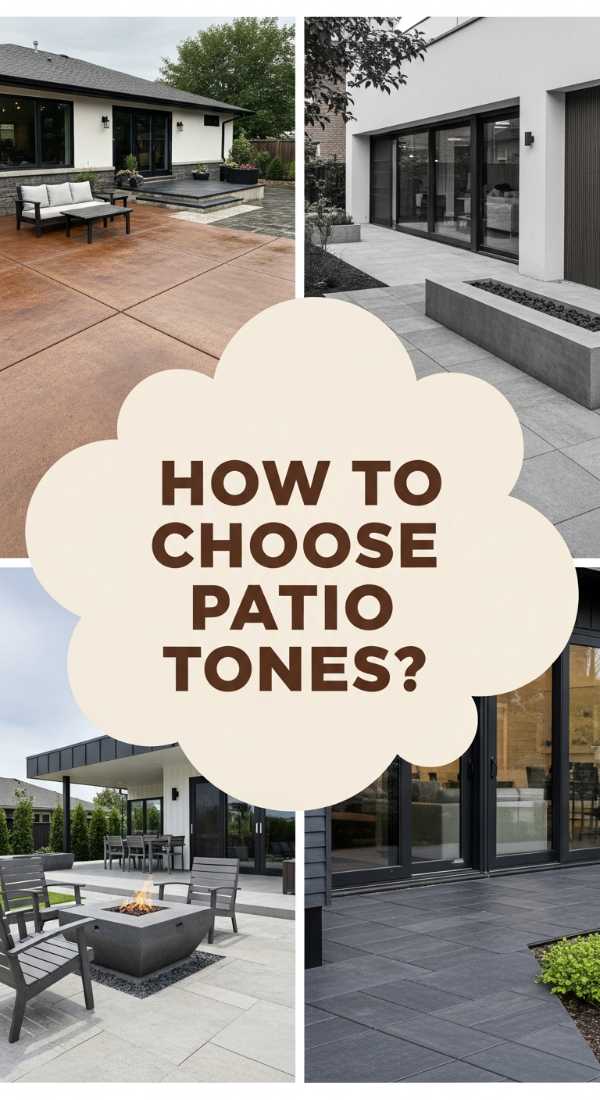
How to Choose Patio Tones for an Industrial Garden Look

Why we love this
The industrial garden look is all about the ‘perfectly imperfect’ marriage of raw materials and soft foliage. We love the moody, grounded feeling of charcoal pavers against the rusted orange of Corten steel planters. It feels modern, edgy, and incredibly high-end. This aesthetic celebrates the strength of concrete and metal, but when softened by the lime-green leaves of Japanese Maples or the silver of Lavender, it creates a sanctuary that feels tucked away in an urban loft garden. It’s a sophisticated play on contrast that feels both rugged and refined.
Essential Elements:
- Charcoal or dark grey large-format pavers.
- Corten steel (weathered) planters.
- Black matte metal furniture.
- Exposed Edison bulb string lighting.
- Gravel or river rock infill in ‘Basalt’ grey.
How to make it
- Expose the sub-base of your patio area, digging down 6 inches and filling it with 4 inches of compacted crushed stone to prevent shifting.
- Lay your large-format pavers with a 1-inch gap between them; this ‘wide joint’ is a signature of the industrial look.
- Fill the gaps between the pavers with a dark basalt pea gravel, which provides excellent drainage and a sharp color contrast.
- Select planters made of raw steel and spray them with a mixture of water, vinegar, and salt to accelerate the ‘rusting’ patina process.
- Position your furniture in a geometric layout—industrial style thrives on straight lines and right angles rather than curves.
- Check the ‘industrial’ vibe at night; use only warm-toned bulbs to prevent the dark grey tones from feeling cold or clinical.
How to Create Perennial Borders for Eternal Garden Beauty

Why we love this
There is a poetic rhythm to a perennial border—the way it sleeps in winter and explodes into a riot of color every spring without you having to lift a finger. We love the lush, overgrown ‘English Cottage’ feel that a well-designed border provides, filled with the hum of bees and the swaying of tall delphiniums. The textures change with the seasons: the soft wooly leaves of Lamb’s Ear in the spring, the bold petals of Echinacea in the summer, and the skeletal beauty of dried seed heads in the autumn. It’s a living painting that only gets better with time.
Essential Elements:
- A mix of ‘early, mid, and late’ season bloomers.
- Height variation (Step-over plants to tall stalks).
- Organic cedar mulch for moisture retention.
- Drip irrigation system for consistent hydration.
- Evergreen ‘structural’ plants for winter interest.
How to make it
- Map out your border with a garden hose to create a soft, natural curve; straight lines can feel too rigid for this romantic aesthetic.
- Edge the border using a sharp spade, cutting 4 inches deep to create a clean ‘moat’ that prevents grass from creeping into your flowers.
- Plant in ‘drifts’ rather than singles; group at least 3 to 5 of the same plant together to create a high-impact wash of color.
- Place taller plants like Foxgloves or Hollyhocks in the ‘back third’ of the bed, ensuring they don’t shade out the smaller sun-lovers.
- Apply a 3-inch layer of dark wood mulch, keeping it an inch away from the plant stems to prevent rot while locking in cool moisture for the roots.
- Deadhead (remove) spent blooms throughout the summer; this signals the plant to put its energy into more flowers rather than seeds.
How to Apply Soft Neutrals for a Relaxing Sun Deck
Why we love this
A neutral sun deck is the ultimate ‘Zen’ zone. When you strip away loud colors, you are left with the pure tactile joy of the materials: the smoothness of sanded cedar, the softness of cream-colored outdoor rugs, and the warmth of the sun hitting a beige stone surface. We love this look because it mimics the serenity of a high-end spa. It creates a ‘quiet’ visual environment that allows the greenery of your garden to truly pop, making the entire space feel larger, brighter, and infinitely more relaxing for a Sunday afternoon nap.
Essential Elements:
- Composite decking in ‘Sand’ or ‘Light Oak’.
- Cream, taupe, and ivory weather-resistant textiles.
- Bleached wood or white-washed teak furniture.
- Large white ceramic planters.
- Cream-colored cantilever umbrellas for shade.
How to make it
- Clean your deck surface thoroughly with a pressure washer, removing all graying fibers to reveal the original wood tone.
- Apply a semi-transparent ‘Pickled White’ or ‘Light Oak’ stain; this protects the wood while keeping the color light and airy.
- Anchor the seating area with a large, neutral outdoor rug that extends at least 12 inches beyond the furniture legs to ground the space.
- Select cushions with ‘Sunbrella’ fabric in an oatmeal shade; this ensures the light colors won’t fade or yellow in direct sunlight.
- Group white ceramic pots in odd numbers (3 or 5) and fill them with silver-foliage plants like Artemisia to maintain the monochromatic theme.
- Evaluate the ‘glow’ at sunset; neutral decks reflect the pink and orange of the sky beautifully, so keep obstructions to a minimum.
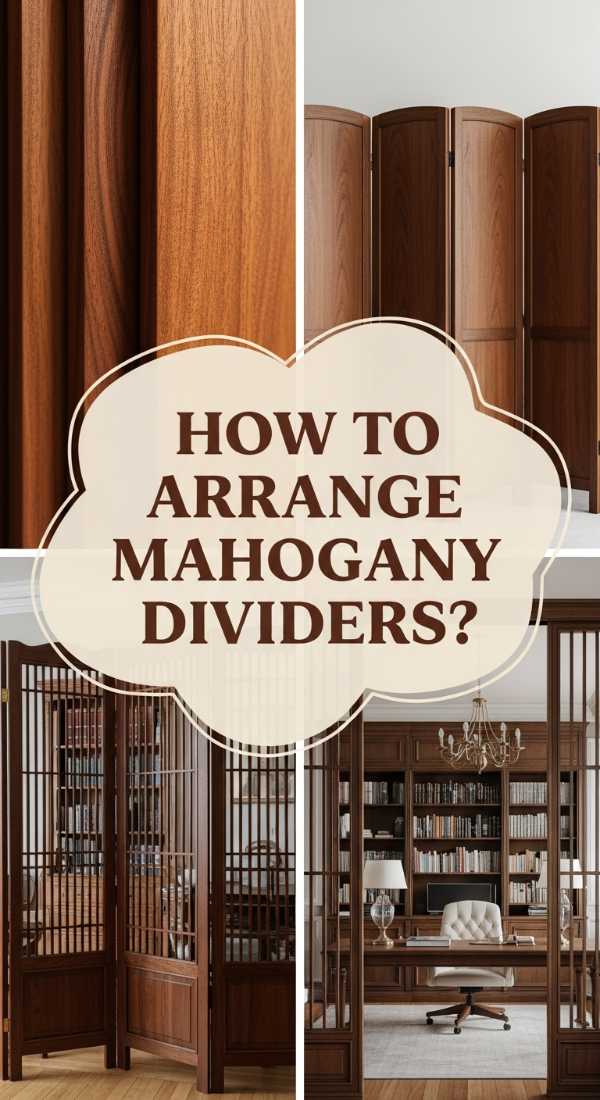
How to Arrange Mahogany Dividers for Elegant Privacy

Why we love this
Mahogany is the gold standard for outdoor luxury. Its deep, reddish-brown hue carries a weight and presence that lighter woods simply can’t match. We love mahogany dividers because they turn a simple privacy screen into a piece of fine furniture for your backyard. The wood feels dense and cool to the touch, and when it catches the sunlight, it has a natural luster that looks incredibly expensive. Using these to wall off a hot tub or a dining area creates an intimate ‘secret garden’ vibe that feels exclusive and deeply private.
Essential Elements:
- Horizontal mahogany slats with 1/2 inch spacing.
- Marine-grade clear sealant for UV protection.
- Black powder-coated steel posts.
- Hidden fasteners for a clean, screw-free look.
- Built-in planter boxes at the base.
How to make it
- Set your vertical steel posts in concrete at a depth of at least 2 feet to handle the significant weight of the mahogany.
- Pre-drill every mahogany board; because the wood is so dense, it will split if you attempt to drive screws directly into it.
- Use 1/2-inch spacers between the slats as you install them to ensure a perfectly uniform ‘shadow line’ across the entire divider.
- Apply two coats of a high-quality UV-blocking oil; mahogany will turn silver-grey quickly if not treated, so look for a ‘Penetrating Oil’ finish.
- Buff the wood with a soft cloth between coats to pull out the natural oils and create that ‘signature’ mahogany sheen.
- Incorporate a trailing vine like Clematis at the base, allowing it to weave through the slats for a ‘living wall’ effect.
How to Incorporate Navy Panels for Bold Interior Flow
Why we love this
Navy is the ‘new neutral’ for a reason—it’s bold enough to make a statement but deep enough to act as a sophisticated backdrop for art and furniture. We love how navy panels can ‘anchor’ a room that feels too scattered, drawing the eye and providing a sense of architectural permanence. The color evokes the depth of the ocean at midnight, bringing a sense of mystery and calm to an interior flow. When used in a hallway or as a feature wall, it creates a ‘tunnel’ of color that makes the brighter rooms at either end feel even more luminous.
Essential Elements:
- Wainscoting or ‘Picture Frame’ molding.
- Eggshell or Satin finish navy paint (e.g., ‘Hale Navy’).
- Brass or aged copper wall sconces.
- Light-colored artwork to provide contrast.
- Natural wood flooring (Oak or Pine) to warm the blue.
How to make it
- Apply your molding to the wall using a construction adhesive and a brad nailer, ensuring all rectangles are perfectly level and centered.
- Caulk every seam and fill nail holes with wood putty; for navy paint, any tiny gap will show up as a white line, so be meticulous.
- Prime the molding and the wall with a ‘grey-tinted’ primer; this helps the deep navy pigment cover in two coats rather than four.
- Use a high-quality 2-inch angled brush for the molding edges and a ‘Nap’ roller for the flat surfaces to ensure a smooth, orange-peel-free finish.
- Install your brass sconces at eye level (approx. 60 inches from the floor) to create a warm, golden glow against the dark blue.
- Allow the paint to cure for at least 48 hours before hanging heavy mirrors or art, as deep pigments stay ‘soft’ longer than light ones.
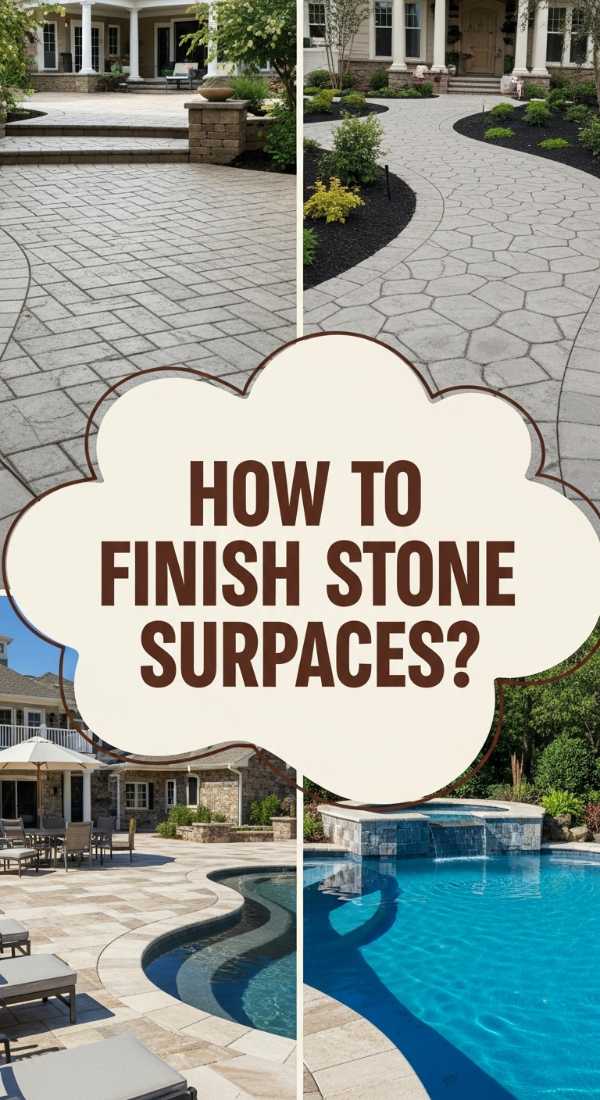
How to Finish Stone Surfaces for a Luxury Backyard
[IMAGE_10]
Why we love this
There is a timeless, permanent quality to stone that no other material can replicate. A luxury backyard is often defined by the ‘clink’ of a glass on a cold stone countertop or the feeling of smooth flagstone under bare feet. We love how stone bridges the gap between the earth and the home, feeling like it has been there for centuries. Whether it’s the rugged texture of a stacked stone fireplace or the sleek, polished surface of a granite outdoor kitchen, stone provides a sense of ‘legacy’ and indestructible beauty that only improves as it weathers.
Essential Elements:
- Natural Flagstone or Slate pavers.
- Stacked stone veneers for vertical surfaces.
- Wet-look or matte stone sealer.
- Polymeric sand for stable, weed-free joints.
- Integrated stone seating ‘walls’.
How to make it
- Choose stone that is local to your area; this ensures the color palette naturally matches the surrounding soil and light.
- Lay your stones in a ‘dry run’ before Mortaring; it’s like a giant puzzle, and you want to ensure the shapes flow together naturally.
- If building a vertical surface, apply a ‘scratch coat’ of mortar to the wall first, allowing it to dry slightly so the stones have something to grip.
- Once the stones are set, scrub them with a stiff brush and a mixture of water and white vinegar to remove any ‘efflorescence’ (white salt deposits).
- Apply a ‘breathable’ stone sealer using a long-nap roller; choose a ‘wet look’ if you want the colors to be vibrant, or ‘matte’ for a natural look.
- Fill the joints with polymeric sand and mist with water; this sand hardens like concrete, preventing ants and weeds from ruining your luxury finish.
Wrapping Up Your Aesthetic Journey
Transforming your home’s curb appeal and garden aesthetics isn’t just a weekend project—it’s an investment in your daily happiness. By focusing on these viral trends, from the lushness of a well-planted entrance to the sophisticated drama of navy panels, you’re creating a space that reflects your personality and offers a true sanctuary. Remember, the best designs are the ones that make you feel something every time you step through the door. So, grab your shovel, pick your palette, and start building the dream home you deserve.