
There is something about the first light of spring that makes me want to clear every surface in my home and start fresh. Last week, while sipping my morning matcha, I stumbled upon a minimalist food board that stopped my scroll entirely. It wasn’t just the food; it was the intentionality—the way three simple ingredients looked like a piece of high-end art. It felt like a deep breath for the soul, and clearly, I wasn’t the only one who felt that way because it has officially broken the internet.
We are all craving a return to simplicity, aren’t we? This trend isn’t about over-the-top charcuterie or expensive delicacies; it’s about the raw beauty of seasonal ingredients and the quiet joy of a well-plated snack. In today’s post, we’re diving into the heart of this minimalist movement and exploring how you can bring that viral, fresh energy into every meal of your day.
How to Bake Spring Cakes?

Why we love this
There is a specific, ethereal magic in the way a spring cake fills the kitchen with the scent of sugared citrus and blooming lavender. When you slice into it, the crumb should be as light as a cloud, yielding softly to the fork with a texture that feels both indulgent and weightless. It’s the kind of treat that calls for a quiet afternoon by a sunlit window, where the aroma of vanilla bean and fresh lemon zest lingers in the air like a sweet promise of the warmer days ahead.
Ingredients
- 2 cups cake flour
- 1.5 cups granulated sugar
- 1 tablespoon baking powder
- 1/2 cup unsalted butter, softened
- 1 cup whole milk at room temperature
- 3 large egg whites
- 1 tablespoon fresh lemon zest
- 1 teaspoon culinary-grade dried lavender
How to make it
- Preheat your oven to 350°F (175°C) and carefully grease two 8-inch round cake pans, lining the bottoms with parchment paper to ensure an effortless release later.
- In a medium bowl, whisk together the cake flour and baking powder until perfectly aerated; this is the secret to that signature springy, light-as-air texture.
- In a large stand mixer, cream the softened butter and sugar on medium-high speed for at least 5 minutes until the mixture looks pale, fluffy, and almost doubled in volume.
- Slowly incorporate the egg whites one at a time, beating well after each addition to maintain the emulsion, then stir in the lemon zest and lavender buds gently.
- Alternately add the dry ingredients and the milk to the butter mixture, starting and ending with the flour; mix only until just combined to avoid overworking the gluten.
- Divide the batter evenly between the pans and bake for 25-30 minutes, or until a wooden skewer inserted into the center comes out clean with just a few moist crumbs attached.
How to Cook Spring Dinner?

Why we love this
A true spring dinner is a celebration of texture—the snap of a crisp-tender asparagus spear against the buttery, flaky silkiness of a perfectly seared piece of salmon. As the heat hits the pan, the air fills with the sharp, herbaceous scent of fresh dill and the bright, acidic punch of charred lemon. It feels nourishing and vibrant, a clean departure from the heavy, salt-laden stews of winter, leaving you feeling energized rather than weighed down after the very last bite.
Ingredients
- 2 salmon fillets (6 oz each)
- 1 bunch thin asparagus, woody ends trimmed
- 2 tablespoons extra virgin olive oil
- 1 lemon, sliced into rounds
- Small handful of fresh dill, chopped
- Flaky sea salt and cracked black pepper
How to make it
- Pat the salmon fillets completely dry with a paper towel; moisture is the enemy of a golden, crispy skin, so take your time with this step.
- Season the fillets generously with salt and pepper on both sides, then heat olive oil in a heavy stainless steel or cast-iron skillet over medium-high heat until it shimmers.
- Place the salmon skin-side down in the pan and press gently with a spatula for 10 seconds to prevent curling; let it sear undisturbed for 4-5 minutes until the skin is mahogany and crisp.
- Carefully flip the fish and add the asparagus spears and lemon slices to the empty spaces in the pan, tossing the veggies lightly in the residual hot oil.
- Cook for another 2-3 minutes, just until the salmon is opaque and the asparagus is bright green with slight char marks on the tips.
- Remove from heat immediately, garnish with a mountain of fresh dill, and serve while the lemon slices are still sizzling.
How to Make Spring Soup?

Why we love this
This soup is like liquid gold, or rather, liquid emerald—a vibrant, pulsing green that looks as fresh as a dew-covered meadow in April. The texture is velvety and thick without being heavy, carrying the sweetness of young peas and the subtle, oniony depth of sautéed leeks. With every spoonful, you get a cooling hint of mint that dances on the palate, making it a sophisticated yet comforting dish that bridges the gap between chilly mornings and warm afternoons.
Ingredients
- 4 cups shelled peas (fresh or frozen)
- 2 large leeks, white and light green parts only, sliced
- 4 cups high-quality vegetable stock
- 1/2 cup heavy cream or coconut milk
- 1/4 cup fresh mint leaves
- 2 tablespoons butter
How to make it
- Melt the butter in a large pot over medium heat and add the sliced leeks, sautéing them slowly for about 8 minutes until they are soft and translucent but not browned.
- Pour in the vegetable stock and bring the liquid to a gentle boil, then turn the heat down to a simmer.
- Add the peas to the pot and cook for just 3-5 minutes; you want them tender but still vibrantly green—overcooking will turn the soup a dull olive color.
- Stir in the fresh mint leaves at the very last second, then remove the pot from the heat to preserve the herb’s bright, volatile oils.
- Using a high-speed immersion blender, process the soup until it is completely smooth and aerated, which gives it a luxurious, frothy mouthfeel.
- Stir in the cream, season with salt to taste, and pour through a fine-mesh sieve if you want a truly professional, restaurant-quality silky finish.
How to Craft Glitter Dumplings?

Why we love this
There is a whimsical, almost ethereal joy in serving something as unexpectedly beautiful as glitter dumplings. The delicate translucent skins catch the light, revealing glimpses of savory pork and ginger inside, while the dusting of edible gold or silver creates a centerpiece that feels like a celebration. It’s a sensory experience that combines the earthy, grounded flavors of a traditional dumpling with a touch of modern, sparkling fantasy that delights both adults and children alike.
Ingredients
- 1 pack round dumpling wrappers
- 1/2 lb ground pork or finely minced mushrooms
- 1 tablespoon grated ginger
- 2 cloves garlic, minced
- 1 teaspoon edible gold or silver glitter dust
- Soy sauce for dipping
How to make it
- In a bowl, mix your protein (pork or mushrooms) with ginger, garlic, and a splash of soy sauce, stirring in one direction until the mixture becomes sticky and cohesive.
- Place a small teaspoon of filling in the center of a wrapper, moisten the edges with water, and fold into your desired shape, ensuring the seals are tight and airtight.
- Arrange the dumplings in a bamboo steamer lined with parchment paper, making sure they aren’t touching to prevent them from sticking together.
- Steam over boiling water for 8-10 minutes; you will know they are done when the wrappers look translucent and slightly wrinkled.
- Once slightly cooled but still damp, use a soft food-safe brush to gently dab the edible glitter onto the tops and folds of the dumplings.
- Serve immediately on a dark ceramic plate to make the glitter pop, accompanied by a clear dipping sauce so as not to overshadow the sparkle.
How to Use Spring Crockpot?

Why we love this
Using a crockpot in the spring is all about the ‘set it and forget it’ lifestyle, allowing you to spend your afternoons outside in the garden while dinner hums away in the kitchen. This isn’t for heavy roasts, but for lighter, aromatic braises like white beans with rosemary or lemon-infused chicken that falls apart at the touch of a fork. The slow heat coaxes out a deep, complex sweetness from spring garlic and onions that you just can’t achieve with a quick sear, creating a meal that feels soulful and home-cooked.
Ingredients
- 1 lb dried cannellini beans, soaked overnight
- 1 head of garlic, top sliced off
- 2 sprigs fresh rosemary
- 1 lemon, zested in thick strips
- 4 cups water or light chicken broth
How to make it
- Rinse your soaked beans thoroughly and place them in the slow cooker; do not add salt at this stage as it can toughen the skins during a long cook.
- Nestle the head of garlic, the rosemary sprigs, and the lemon zest strips into the beans, then pour over the liquid until the beans are covered by at least two inches.
- Set the crockpot to the “Low” setting and let it cook for 6-8 hours; the low temperature is crucial for ensuring the beans become creamy rather than mushy.
- Check the beans periodically after the 6-hour mark; they are done when they are tender all the way through but still hold their shape beautifully.
- Once cooked, remove the rosemary stems and the garlic head (you can squeeze the softened garlic cloves back into the beans for extra richness).
- Season generously with salt, pepper, and a final squeeze of fresh lemon juice just before serving in deep, rustic bowls.
How to Prep Spring Salad?

Why we love this
A spring salad should feel like a crunch-filled explosion of life on a plate, featuring the very best of the season’s early bounty. We love the contrast between the peppery bite of baby arugula, the snap of chilled radishes, and the creamy, salty crumbles of a good feta cheese. It’s all tied together with a vinaigrette that tastes like liquid sunshine—bright lemon and sweet honey—making every forkful feel like a refreshing palate cleanser that celebrates the return of garden-fresh produce.
Ingredients
- 4 cups baby arugula or spring mix
- 4 radishes, thinly sliced on a mandoline
- 1/2 cup fresh snap peas, sliced diagonally
- 1/4 cup crumbled feta cheese
- 3 tablespoons olive oil
- 1 tablespoon honey
- Juice of half a lemon
How to make it
- Place your salad greens in a large bowl and toss them with a tiny pinch of salt to help wake up the natural flavors of the leaves.
- Using a mandoline on the thinnest setting, shave the radishes into paper-thin rounds and drop them into a bowl of ice water for 5 minutes to make them extra crisp.
- Whisk the olive oil, honey, and lemon juice in a small jar until the dressing is emulsified and thickened slightly.
- Drain the radishes and pat them dry, then add them to the greens along with the snap peas and half of the feta cheese.
- Drizzle the dressing over the salad and use your hands or large tongs to toss very gently, ensuring every leaf is lightly coated without being weighed down.
- Transfer to a chilled serving platter and top with the remaining feta and a crack of black pepper for a final touch of visual and flavor contrast.
How to Design Spring Cakes?

Why we love this
Designing a spring cake is an exercise in restraint and natural beauty, moving away from heavy fondant towards the ‘naked cake’ aesthetic that feels so organic. There is something deeply satisfying about seeing the golden layers of cake peeking through a sheer veil of buttercream, adorned only with a few perfectly placed edible pansies or sprigs of thyme. It’s a design style that celebrates imperfection and looks like it was plucked straight from a wildflower meadow, making it the ultimate viral-worthy centerpiece.
Ingredients
- A pre-baked and cooled layer cake
- 3 cups vanilla swiss meringue buttercream
- Selection of edible flowers (pansies, violas, or lavender)
- A flat palette knife or bench scraper
How to make it
- Start by placing your bottom cake layer on a turntable and applying a thick layer of buttercream, smoothing it to the edges with your palette knife.
- Stack the second layer and apply a very thin ‘crumb coat’ of frosting over the entire exterior of the cake to trap any loose crumbs.
- Chill the cake for 20 minutes until the crumb coat is firm to the touch; this provides a stable base for the final minimalist design.
- Apply another thin layer of frosting, but this time, use your bench scraper to wipe most of it away from the sides, leaving just a translucent ‘scraped’ look.
- Select your edible flowers carefully, ensuring they are dry; press them gently into the frosting in a cascading pattern or a simple crescent shape on top.
- Finish the design by lightly dusting the edges of the cake with a bit of powdered sugar to mimic the look of morning mist on a garden.
How to Roast Spring Veggies?

Why we love this
Roasting spring vegetables is all about capturing that elusive balance between caramel-sweet char and garden-fresh tenderness. When baby carrots and tender ramps hit a hot sheet pan with balsamic glaze, they transform into something deeply savory that smells like a smoky, sun-drenched garden. The tips of the carrots become chewy and concentrated in flavor, while the hearts stay succulent, providing a complex side dish that is far more than the sum of its humble parts.
Ingredients
- 1 lb baby carrots, tops trimmed to one inch
- 1 bunch ramps or spring onions
- 2 tablespoons balsamic glaze
- 1 tablespoon honey
- 3 tablespoons avocado oil (high smoke point)
How to make it
- Preheat your oven to a high heat of 425°F (220°C); a hot oven is essential for getting that beautiful caramelization without overcooking the delicate interiors.
- Toss the carrots on a large rimmed baking sheet with the oil, salt, and pepper, ensuring they are spread out in a single layer with plenty of space between them.
- Roast the carrots for 15 minutes first, as they take longer than the tender spring ramps to soften and brown.
- Pull the tray out and add the ramps, tossing them quickly with the carrots and drizzling the honey and balsamic glaze over everything.
- Return to the oven for another 7-10 minutes, watching closely until the ramp leaves are crispy and the balsamic has bubbled into a sticky, glossy coating.
- Serve immediately while the glaze is tacky and the vegetables are at their peak of concentrated sweetness.
How to Stew Spring Chicken?

Why we love this
This isn’t your winter’s heavy chicken stew; it’s a light, brothy affair that highlights the aromatic power of fresh tarragon and dry white wine. The chicken thighs are simmered just long enough to become impossibly tender, soaking up the bright, anise-like scent of the herbs and the subtle sweetness of young carrots. It feels like a warm hug in a bowl, perfect for those transition evenings when the sun has gone down and there’s still a lingering chill in the spring air.
Ingredients
- 1.5 lbs boneless, skinless chicken thighs
- 1 cup dry white wine (like Sauvignon Blanc)
- 2 cups chicken bone broth
- 3 sprigs fresh tarragon
- 1 cup sliced baby carrots
- 1 shallot, minced
How to make it
- Season the chicken thighs with salt and pepper and sear them in a heavy-bottomed pot over medium-high heat until golden brown on both sides.
- Remove the chicken and set aside; in the same pot, sauté the minced shallot and baby carrots for 3 minutes until the shallot is fragrant and soft.
- Deglaze the pan with the white wine, using a wooden spoon to scrape up all the flavorful brown bits (fond) from the bottom of the pot.
- Pour in the chicken broth and return the chicken to the pot, along with the fresh tarragon sprigs, bringing the liquid to a very gentle simmer.
- Cover and cook on low heat for 25-30 minutes; the low temperature ensures the chicken fibers remain tender rather than seizing up and becoming tough.
- Discard the tarragon stems before serving, and finish with a handful of freshly chopped tarragon leaves to provide a final burst of green flavor.
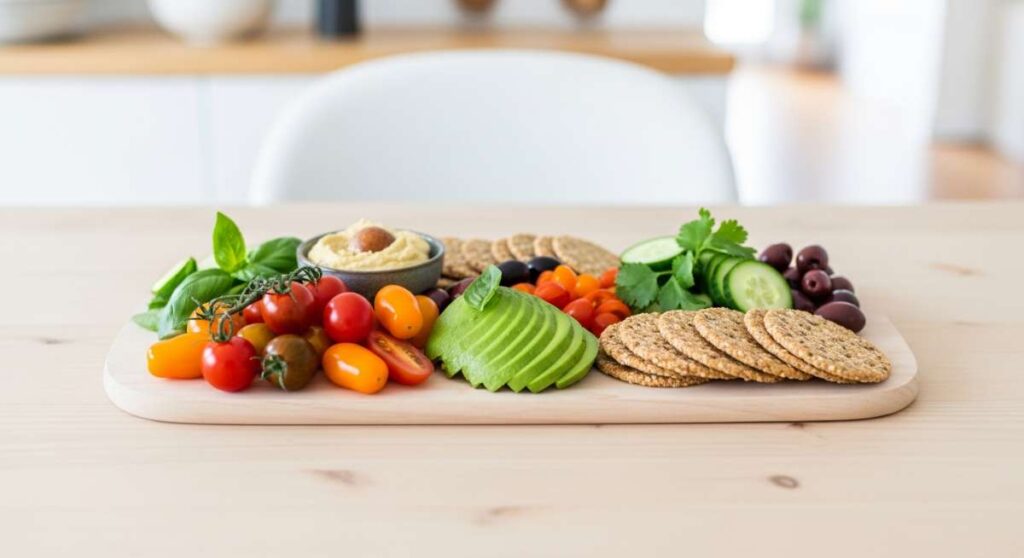
How to Eat Healthy Spring?
[IMAGE_10]
Why we love this
Eating healthy in the spring feels less like a chore and more like a natural instinct as our bodies crave the vibrant energy of the season. We love building bowls that are a riot of color—deep green sprouts, creamy avocado, and golden quinoa—that provide a satisfying variety of textures from crunchy to velvety. It’s about nourishing your body with high-vibration foods that leave you feeling light, clear-headed, and ready to embrace the outdoor activities that come with the return of the sun.
Ingredients
- 1 cup cooked quinoa
- 1/2 avocado, sliced
- 1/2 cup radish sprouts or microgreens
- 1 tablespoon toasted pumpkin seeds
- Drizzle of lemon-tahini dressing
How to make it
- Begin with a base of warm, fluffy quinoa, which provides a nutty foundation and a healthy dose of plant-based protein.
- Arrange the sliced avocado in a fan shape on one side of the bowl, seasoning it immediately with a pinch of flaky salt to enhance its richness.
- Pile a generous mound of fresh sprouts or microgreens in the center; these are nutritional powerhouses that add a delicate, spicy crunch.
- Scatter the toasted pumpkin seeds over the top to add a layer of earthy flavor and a satisfying snap to every mouthful.
- Whisk together tahini, lemon juice, and a splash of warm water until smooth, then drizzle it in a zigzag pattern across the entire bowl.
- Mix the components as you eat to ensure you get a bit of creamy, crunchy, and savory in every single bite.
The Joy of Seasonal Simplicity
As we wrap up this journey through the flavors of spring, it’s clear why that minimalist board went viral. It reminds us that beauty doesn’t have to be complicated, and the best meals are often those that let the ingredients speak for themselves. Whether you are baking a lavender-scented cake or tossing a crisp radish salad, I hope you find a moment of peace and presence in your kitchen this season.