
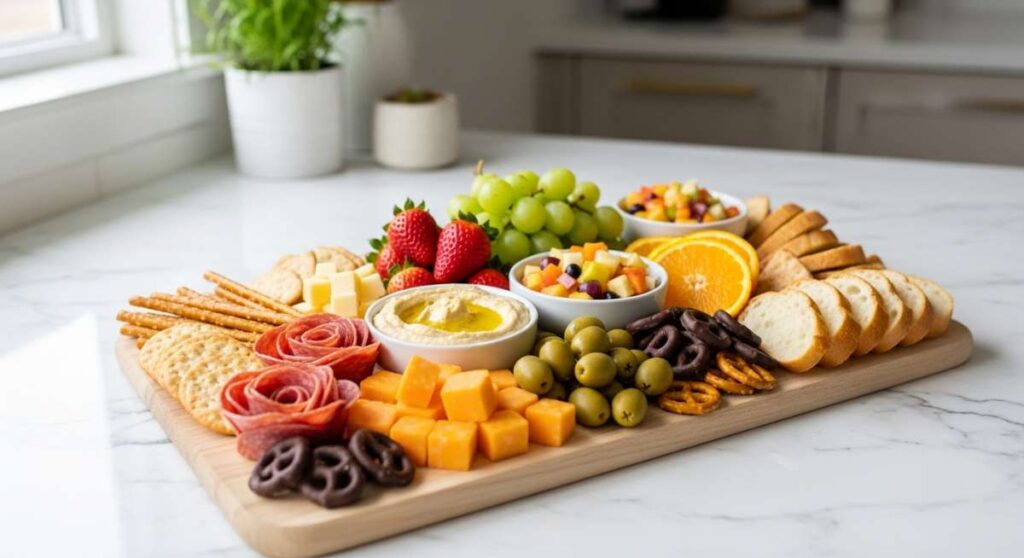
Lazy Girl’s Guide to the Perfect Viral Food Board
We’ve all been there—scrolling through TikTok at 11 PM, mesmerized by those aesthetic food boards that look like they were styled by a professional chef, only to look at our own kitchen and sigh. The secret that the internet won’t tell you is that you don’t need a culinary degree or a five-hour window to create something that stops the scroll. You just need the right mix of cozy, high-impact dishes that look expensive but feel like a warm hug.
This guide is for my fellow ‘lazy girls’ who want the maximalist aesthetic with minimalist effort. We are talking about textures that pop, colors that vibrate, and aromas that will have your neighbors knocking on your door. Whether you’re hosting a wine night or just want to treat yourself to a solo feast, these ten viral components will turn a simple wooden board into a masterpiece of comfort food.
How to make creamy tomato soup

Why we love this
There is something incredibly nostalgic and deeply healing about a bowl of soup that looks like liquid gold and feels like velvet on the tongue. This isn’t your average canned variety; it’s a rich, sun-ripened infusion of roasted tomatoes and heavy cream that creates a vibrant orange hue perfect for any board. The aroma of simmering basil and garlic fills the room, promising a savory sweetness that balances the acidity of the fruit, making every spoonful a silky, comforting experience that pairs perfectly with crusty bread.
Ingredients
- 2 lbs vine-ripened tomatoes, halved
- 1 head of garlic, top sliced off
- 1 large white onion, quartered
- 2 cups vegetable broth
- 1/2 cup heavy cream
- Fresh basil leaves
- Olive oil, salt, and black pepper
How to make it
- Preheat your oven to 400°F (200°C). Arrange the tomatoes, onion, and garlic (wrapped in foil with oil) on a baking sheet. Drizzle generously with olive oil and sprinkle with salt.
- Roast for 45 minutes until the tomato skins are charred and the onions are translucent. This caramelization is key for a deep, smoky flavor.
- Squeeze the roasted garlic cloves out of their skins into a high-speed blender. Add the roasted vegetables and all the juices from the pan.
- Add fresh basil and vegetable broth. Blend on high until the mixture is completely smooth and aerated.
- Transfer the mixture to a pot over medium-low heat. Stir in the heavy cream slowly, watching the color transform into a creamy pastel orange. Simmer for 10 minutes to let the flavors meld.
How to roast garlic chicken

Why we love this
Roast garlic chicken is the undisputed queen of the dinner table, offering a sensory explosion of crispy, golden skin and succulent, tender meat that falls off the bone. The scent of roasted garlic cloves turning into sweet, buttery spreadables is enough to make anyone weak in the knees. It’s a rustic, visual powerhouse that anchors a food board with its burnished amber tones and the earthy fragrance of rosemary and thyme, providing a hearty protein that feels both fancy and home-cooked.
Ingredients
- 1 whole chicken (approx. 4 lbs)
- 3 heads of garlic, halved crosswise
- 1/2 cup unsalted butter, softened
- 2 tablespoons fresh rosemary, chopped
- 1 lemon, sliced into rounds
- Kosher salt and cracked pepper
How to make it
- Remove the chicken from the fridge 30 minutes before cooking to bring it to room temperature; this ensures even cooking. Pat the skin bone-dry with paper towels to achieve maximum crispiness.
- Mix the softened butter with rosemary, salt, and pepper. Gently lift the skin over the breast and thighs, spreading the herb butter directly onto the meat.
- Stuff the cavity with lemon slices and one head of garlic. Place the chicken in a roasting pan and surround it with the remaining garlic halves, cut-side down.
- Roast at 425°F (220°C) for the first 15 minutes to sear the skin, then drop the temperature to 375°F (190°C).
- Baste the chicken with its own juices every 20 minutes. Cook until the internal temperature reaches 165°F (74°C) at the thickest part of the thigh. Let it rest for 15 minutes before carving to keep the juices inside.
How to cook lemon pasta
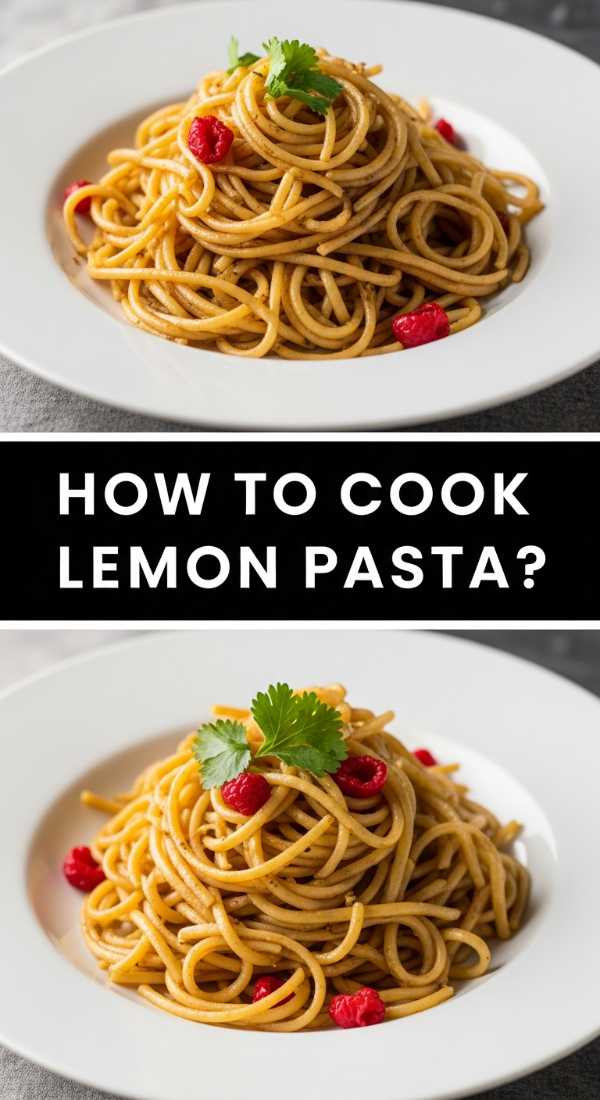
Why we love this
Lemon pasta is the bright, zesty breath of fresh air that every heavy food board needs to stay balanced. The texture is a dream—al dente noodles coated in a glossy, emulsified sauce that shimmers under the light. As you toss the pasta, the heat releases the essential oils from the lemon zest, creating a citrusy perfume that cuts through the richness of cheeses and meats. It’s light, elegant, and looks absolutely stunning when topped with a sprinkle of emerald-green parsley and a dusting of white parmesan.
Ingredients
- 1 lb spaghetti or linguine
- 2 large lemons (zest and juice)
- 1/2 cup extra virgin olive oil
- 1 cup grated Parmesan cheese
- 1/2 cup pasta water (reserved)
- Fresh parsley and red pepper flakes
How to make it
- Boil a large pot of heavily salted water—it should taste like the sea. Cook the pasta for 1 minute less than the package instructions to ensure it stays ‘al dente’.
- While the pasta cooks, whisk the lemon juice, zest, and olive oil in a large bowl until the mixture looks slightly thickened.
- CRITICAL STEP: Before draining the pasta, scoop out a cup of the starchy cooking water. This is the secret to a smooth, non-clumping sauce.
- Add the hot pasta directly into the lemon-oil mixture. Add the Parmesan cheese and 1/4 cup of the reserved pasta water.
- Toss vigorously with tongs. The starch in the water and the cheese will create a creamy, golden emulsion. If it looks dry, add more pasta water a tablespoon at a time until the noodles are perfectly coated and glossy.
How to sear juicy steak
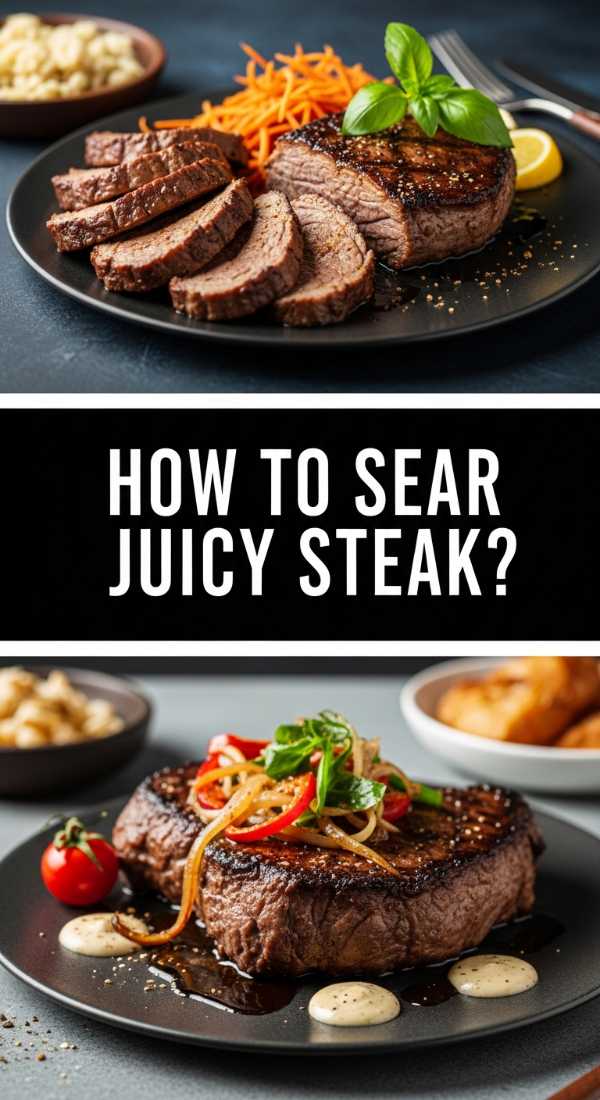
Why we love this
A perfectly seared steak is all about the Maillard reaction—that dark, crusty, savory exterior that hides a tender, rosy-pink center. The sound of the steak hitting a hot cast-iron skillet is the ultimate kitchen anthem, followed by the intoxicating aroma of browning butter and aromatic thyme. When sliced against the grain, the steak reveals its juicy interior, adding a luxury element to your board that is deeply satisfying and visually striking with its contrast of charred edges and tender center.
Ingredients
- 2 Ribeye or New York Strip steaks (1.5 inches thick)
- 3 tablespoons high-smoke point oil (avocado or grapeseed)
- 4 tablespoons unsalted butter
- 4 cloves garlic, smashed
- Fresh thyme and rosemary sprigs
- Flaky sea salt
How to make it
- Season your steaks generously with salt and pepper at least 45 minutes before cooking. This allows the salt to penetrate the fibers. Pat the exterior dry one last time before searing.
- Heat a cast-iron skillet over high heat until it is wisps of smoke begin to rise. Add the oil and swirl to coat.
- Lay the steaks away from you in the pan. Do not move them for 3 minutes to allow a hard crust to form. Flip once.
- Add the butter, garlic, and herbs to the pan. Once the butter foams, tilt the pan and use a large spoon to continuously pour the hot, flavored butter over the steaks for 2-3 minutes.
- Remove the steak when the internal temperature hits 130°F (54°C) for medium-rare. Rest the meat on a warm plate for at least 10 minutes; this allows the fibers to relax and reabsorb the juices.
How to make spicy shrimp

Why we love this
Spicy shrimp are the ultimate ‘pop-able’ snack for a viral board, offering a snappy texture and a heat that builds beautifully with every bite. Coated in a vibrant red chili glaze, they glisten under the light and provide a seafood element that feels sophisticated yet effortless. The combination of charred edges, succulent meat, and a hit of lime juice creates a flavor profile that is bright, fiery, and completely addictive, making them the first thing to disappear at any gathering.
Ingredients
- 1 lb large shrimp, peeled and deveined
- 2 tablespoons honey
- 1 tablespoon Sriracha or chili paste
- 3 cloves garlic, minced
- 1 teaspoon smoked paprika
- Lime wedges for serving
How to make it
- In a medium bowl, whisk together the honey, chili paste, garlic, paprika, and a pinch of salt. Toss the shrimp in this marinade and let them sit for 15 minutes.
- Heat a large skillet over medium-high heat with a splash of oil. Ensure the pan is hot enough that the shrimp sizzle immediately upon contact.
- Arrange the shrimp in a single layer. Cook for exactly 2 minutes per side. You are looking for a ‘C’ shape; if they curl into an ‘O’, they are overcooked.
- The sugars in the honey will caramelize quickly, creating dark, flavorful spots on the shrimp. Watch closely so they don’t burn.
- Garnish immediately with a heavy squeeze of lime juice while the pan is still hot to deglaze the flavors back onto the shrimp.
How to cook garlic pasta
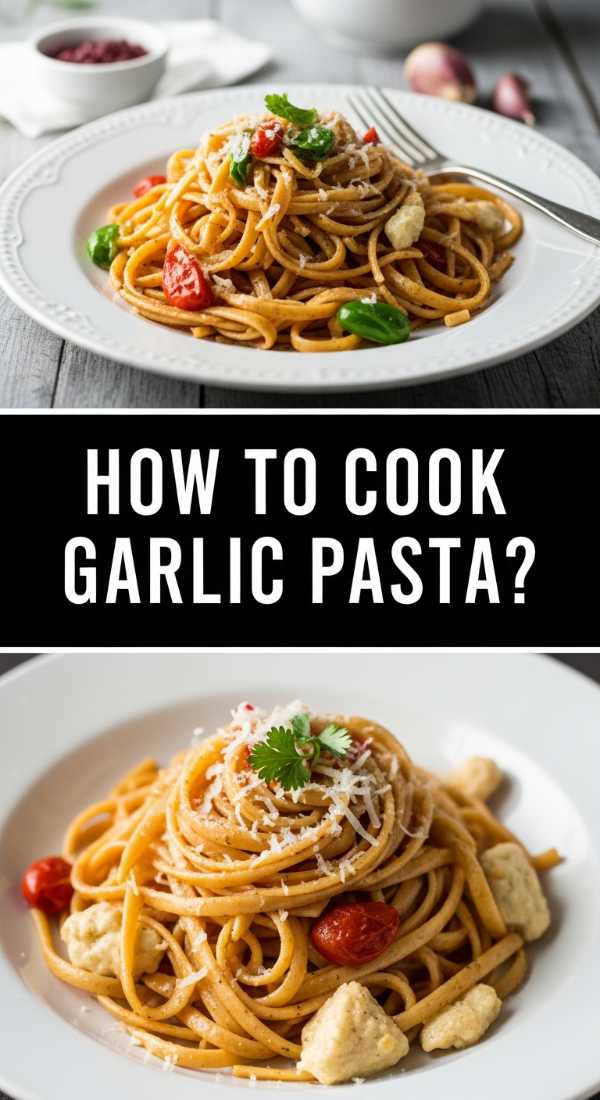
Why we love this
Garlic pasta, or Pasta al Limone’s moodier cousin, is the ultimate comfort food for those who believe there is no such thing as too much garlic. The dish is defined by the slow infusion of sliced garlic into golden olive oil, creating a nutty, mellow base that isn’t sharp or biting. The aroma is intoxicating—pure Mediterranean bliss—and the simplicity of the dish allows the quality of the oil and the bite of the pasta to shine, creating a rustic, humble centerpiece for your board.
Ingredients
- 1 lb spaghetti
- 1/2 cup high-quality olive oil
- 10 cloves of garlic, thinly sliced (not minced)
- 1 teaspoon red pepper flakes
- Fresh parsley, finely chopped
- 1/2 cup grated Pecorino Romano
How to make it
- Start your pasta in boiling salted water. Meanwhile, add the olive oil and sliced garlic to a cold skillet. Starting from cold allows the garlic to infuse the oil as it heats up without burning.
- Keep the heat on medium-low. Watch the garlic carefully; it should turn a very pale golden brown. If it turns dark brown, it will be bitter and you must start over.
- Add the red pepper flakes to the oil for the last 30 seconds of infusing to release their heat.
- Transfer the al dente pasta directly to the skillet using tongs. Don’t worry about the water dripping into the pan; it helps create the sauce.
- Turn off the heat and add the cheese and parsley. Toss vigorously. The residual heat will melt the cheese into the garlic oil, creating a thin, flavorful coating on every strand.
How to make crispy chicken

Why we love this
There is nothing quite like the auditory satisfaction of a perfect crunch, and this crispy chicken delivers exactly that. With a crust that shatters upon impact and meat that remains steaming and tender, it provides a textural contrast that is essential for a great food board. The golden-brown breading, seasoned with savory spices, creates a rugged, artisanal look that pairs beautifully with creamy dips or spicy honeys, making it a crowd-favorite that feels both indulgent and nostalgic.
Ingredients
- 1 lb chicken breast, sliced into tenders
- 1 cup Panko breadcrumbs
- 1/2 cup grated Parmesan
- 2 eggs, beaten
- 1/2 cup all-purpose flour
- 1 teaspoon garlic powder and 1 teaspoon onion powder
How to make it
- Set up a dredging station: one bowl for flour (mixed with garlic/onion powder), one for beaten eggs, and one for the Panko and Parmesan mixture.
- Coat each piece of chicken in flour, shaking off the excess. Dip into the egg, then press firmly into the Panko mixture to ensure a thick, even coating.
- For the best results, let the breaded chicken sit on a wire rack for 10 minutes before cooking. This helps the breading adhere so it doesn’t fall off in the pan.
- Heat 1/2 inch of oil in a skillet to 350°F (175°C). If you don’t have a thermometer, drop a breadcrumb in; if it sizzles instantly, it’s ready.
- Fry the chicken in batches for 3-4 minutes per side until deeply golden. Drain on a paper towel and sprinkle with salt immediately while the oil is still wet on the surface.
How to cook hearty stew
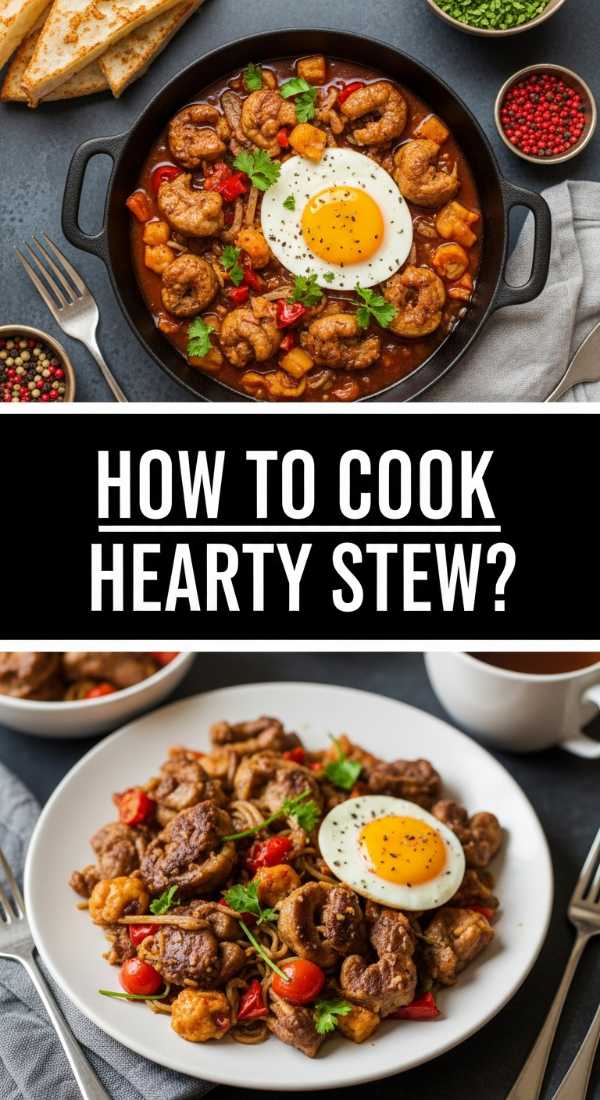
Why we love this
A hearty stew is the soul of the kitchen, a slow-simmered masterpiece where every ingredient has surrendered its flavor to a rich, dark gravy. The meat becomes so tender it melts at the touch of a fork, surrounded by earthy root vegetables that have soaked up the essence of red wine and herbs. It’s a deep, mahogany-colored dish that brings a sense of warmth and abundance to a viral food board, evoking feelings of cozy nights by the fireplace and shared family stories.
Ingredients
- 2 lbs beef chuck, cut into 1-inch cubes
- 4 large carrots, chopped
- 1 lb baby potatoes, halved
- 2 cups beef bone broth
- 1 cup dry red wine
- 2 tablespoons tomato paste
- Fresh thyme and bay leaves
How to make it
- Pat the beef dry and season with salt. In a heavy Dutch oven, sear the meat in batches over high heat until a dark brown crust forms on all sides. Remove the meat and set aside.
- Lower the heat and add the tomato paste, stirring for 2 minutes to cook out the raw metallic taste. Deglaze the pan with the red wine, scraping up all the brown bits (fond) from the bottom.
- Return the beef to the pot. Add the broth, carrots, potatoes, and herbs. The liquid should just barely cover the ingredients.
- Cover and simmer on very low heat for 2.5 to 3 hours. The meat is done when it breaks apart easily with a spoon.
- If the sauce is too thin, remove the lid for the last 30 minutes of cooking to allow it to reduce into a thick, glossy gravy that coats the back of a spoon.
How to make pot roast

Why we love this
Pot roast is the king of low-effort, high-reward cooking. This dish turns a humble, tough cut of meat into a succulent, shredded delicacy that radiates home-cooked charm. The visual of a large, glistening roast sitting in a pool of its own juices, surrounded by perfectly softened vegetables, is a centerpiece that demands attention. It tastes of patience and tradition, with a savory, umami-rich profile that anchors the more delicate flavors on your board with its bold, beefy presence.
Ingredients
- 3-4 lb beef chuck roast
- 1 onion, sliced
- 3 stalks celery, chopped
- 4 cloves garlic, smashed
- 2 cups beef broth
- 1 tablespoon Worcestershire sauce
- Sprigs of fresh rosemary
How to make it
- Season the roast heavily with salt and pepper. Sear it in a hot pot with oil until every side is deeply browned—this takes about 5 minutes per side and is crucial for flavor.
- Remove the roast and briefly sauté the onions and celery until softened. This creates a flavor base for the braising liquid.
- Place the roast back in the pot. Add the beef broth, Worcestershire sauce, garlic, and rosemary. The liquid should come halfway up the side of the meat.
- Cover tightly and place in a 300°F (150°C) oven. Braise for 3 to 4 hours. Low and slow is the only way to break down the tough connective tissues.
- Once the meat is fork-tender, let it rest in the liquid for 20 minutes before serving. This ensures the meat remains juicy and doesn’t dry out when sliced or shredded.
How to sear perfect salmon

Why we love this
Perfectly seared salmon is a masterclass in texture: a thin, glass-like crispy skin on one side and buttery, translucent flakes on the other. It brings a pop of coral color to your board and a lighter, sophisticated protein option that feels incredibly healthy yet indulgent. When done right, the salmon should practically melt in your mouth, leaving behind a subtle sweetness and the clean taste of the sea, finished with a bright spark of lemon and fresh herbs.
Ingredients
- 2 salmon fillets (6 oz each), skin-on
- 1 tablespoon olive oil
- 1 tablespoon butter
- Lemon slices
- Fresh dill or chives
- Sea salt and cracked pepper
How to make it
- Take the salmon out of the fridge 15 minutes before cooking. Pat the skin extremely dry—any moisture will steam the fish instead of crisping it. Season the skin side only with salt.
- Heat a non-stick skillet over medium-high heat. Add the oil. Once it shimmers, place the salmon skin-side down. Press down firmly with a spatula for 10 seconds to prevent the fish from curling.
- Cook skin-side down for 5-6 minutes. Do not move it! You will see the color change creep up the side of the fish. When the cooked color reaches about 75% of the way up, it’s time to flip.
- Flip the fish and add the butter and lemon slices to the pan. Cook for only 1-2 minutes on the second side. The interior should be slightly translucent (medium-rare to medium).
- Remove from the pan immediately. Serve with the crispy skin facing up to preserve that crunch you worked so hard for.
Conclusion: The Art of the Lazy Spread
Creating a viral food board isn’t about spending all day in the kitchen; it’s about choosing high-impact recipes that deliver on flavor and aesthetics. By focusing on these ten staples, you can mix and match to create a spread that looks like a curated work of art. Remember, the ‘Lazy Girl’ way is all about working smarter, using techniques like searing and emulsifying to elevate simple ingredients into something extraordinary. So grab your biggest wooden board, pour a glass of wine, and get ready to be the most effortless host your friends have ever seen.
Frequently Asked Questions
Q: How do I keep all the food warm while assembling the board?
A: The trick is to prepare your ‘slow’ items like the stew or pot roast first, as they hold heat well. Keep them in a warm oven (200°F) while you quickly sear the ‘fast’ items like shrimp or salmon at the very last minute.
Q: Can I make the tomato soup in advance?
A: Absolutely! Tomato soup actually tastes better the next day. Just reheat it gently on the stove and add a fresh splash of cream right before serving to brighten the color.
Q: What is the best board to use for a large spread?
A: Look for a large, food-safe wooden butcher block or a marble slab. If you don’t have one, you can even line your clean kitchen island with parchment paper for a rustic, ‘table-side’ grazing experience.