

Why Everyone Is Obsessed With This Viral Simple Food Board
There is something undeniably magical about the way a shared meal can turn a regular Tuesday evening into a memory that lingers long after the dishes are cleared. Lately, my social media feed has been exploding with the concept of the ‘Simple Food Board’—a sprawling, colorful landscape of fresh flavors that invites everyone to dig in, mix, and match. It’s less about formal plating and more about the communal joy of passing plates and discovering new combinations.
I remember the first time I set one of these boards out for my friends; the room instantly filled with the scent of roasted lemons and fresh herbs, and the stiff atmosphere of a typical dinner party evaporated. We weren’t just eating; we were experiencing the textures and vibrant colors of the season together. It’s that effortless, ‘come as you are’ vibe that has made this trend go viral, and today, I’m showing you exactly how to build your own masterpiece with ten incredible components.
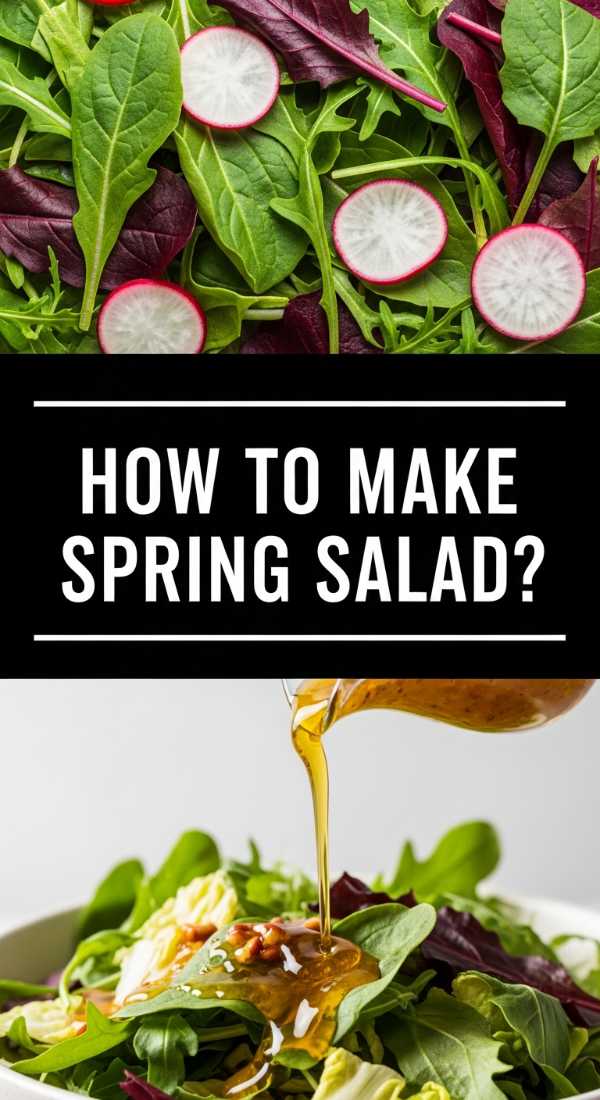
How to make spring salad?
Why we love this
This spring salad is like a breath of fresh air on a plate, capturing the very essence of a garden in bloom. Imagine the satisfying crunch of baby gem lettuce paired with the sweet, literal snap of sugar peas and the peppery bite of fresh radishes. Every forkful is coated in a light, zesty vinaigrette that awakens the senses, while the aroma of freshly torn mint and dill wafts up to greet you, making the whole experience feel incredibly rejuvenating and crisp.
Ingredients
- 2 heads of baby gem lettuce, torn
- 1 cup fresh sugar snap peas, sliced
- 4 radishes, thinly mandolined
- 1/4 cup fresh mint leaves
- 1/4 cup fresh dill
- 3 tbsp extra virgin olive oil
- 1 tbsp fresh lemon juice
- 1 tsp honey
- Salt and cracked black pepper to taste
How to make it
- Begin by thoroughly washing your lettuce and herbs in ice-cold water to ensure maximum crispness; spin them completely dry using a salad spinner, as any residual water will prevent the dressing from adhering.
- In a small glass jar or bowl, whisk together the olive oil, fresh lemon juice, honey, salt, and pepper until the mixture is fully emulsified and slightly thickened; taste and adjust the acidity as needed.
- Place the dried lettuce in a large wooden bowl and gently toss with half of the dressing using your hands to ensure every leaf is lightly coated without being weighed down.
- Top the greens with the sliced snap peas and radishes, then scatter the torn mint and dill over the top for a burst of aromatic freshness.
- Drizzle the remaining dressing over the top just before serving and give it one final, very gentle toss to maintain the structure of the delicate greens.
How to cook lemon chicken?

Why we love this
There is nothing quite like the sizzle of chicken thighs hitting a hot pan and the subsequent fragrance of caramelizing citrus filling the kitchen. This lemon chicken boasts a skin so golden and shatteringly crisp that it contrasts perfectly with the succulent, tender meat underneath. The pan sauce, brightened with fresh lemon rounds and earthy thyme, creates a silky glaze that feels both sophisticated and deeply comforting, offering a tangy punch that cuts through the richness of the poultry beautifully.
Ingredients
- 4 bone-in, skin-on chicken thighs
- 2 lemons (one sliced, one juiced)
- 4 cloves garlic, smashed
- 3 sprigs fresh thyme
- 2 tbsp butter
- 1/2 cup chicken stock
- Salt and smoked paprika for seasoning
How to make it
- Pat the chicken thighs completely dry with paper towels; this is the most critical step for achieving a truly crispy skin, as moisture is the enemy of browning.
- Season the skin side generously with salt and a pinch of smoked paprika, then place them skin-side down in a cold cast-iron skillet and turn the heat to medium-high.
- Render the fat slowly for about 8-10 minutes without moving the chicken until the skin is deep golden brown and releases easily from the pan; flip and sear the other side for 2 minutes.
- Remove the chicken from the pan temporarily and drain all but one tablespoon of the fat; add the garlic and lemon slices, sautéing until the garlic is fragrant and the lemons are slightly charred.
- Deglaze the pan with chicken stock and lemon juice, scraping up the brown bits (fond) from the bottom, then return the chicken to the pan and simmer until the internal temperature reaches 165°F.
- Finish by whisking in the cold butter to create a glossy, emulsified sauce, and garnish with fresh thyme before serving.
How to make rotel dip?

Why we love this
Rotel dip is the ultimate crowd-pleaser, offering a nostalgic, velvety texture that is impossible to resist once you start dipping. It’s a warm, gooey embrace of melted cheese punctuated by the bright, zesty heat of canned tomatoes and green chilies. The way the dip clings to a salty tortilla chip, providing a rich, savory mouthfeel with just enough spice to keep you coming back for more, makes it an essential centerpiece for any casual food board gathering.
Ingredients
- 16 oz processed cheese (like Velveeta), cubed
- 1 can (10 oz) Ro*Tel Original Diced Tomatoes and Green Chilies
- 1/2 lb ground sausage or beef (optional)
- 1/2 tsp cumin
- Fresh cilantro for garnish
How to make it
- If using meat, brown the ground sausage or beef in a skillet over medium heat until fully cooked and crumbly; drain the excess fat thoroughly to prevent the dip from becoming oily.
- Cut the processed cheese into uniform 1-inch cubes to ensure they melt evenly and at the same rate, preventing any burnt spots or lumps.
- In a slow cooker set to low or a heavy-bottomed saucepan over low heat, combine the cheese cubes and the entire can of Ro*Tel (do not drain the liquid, as it provides the necessary acidity and flavor).
- Stir the mixture frequently with a silicone spatula to prevent the cheese from scorching on the bottom of the pot; keep the heat low and slow for the smoothest texture.
- Once the cheese is completely melted and silky, stir in the cooked meat and cumin, then transfer to a serving bowl and top with fresh cilantro while it’s still steaming.
How to cook dirty spaghetti?

Why we love this
Dirty spaghetti is a flavor powerhouse that brings a rustic, umami-forward depth to your food board that standard marinara just can’t match. It’s all about the deeply savory, slightly spicy meat base that coats every individual strand of pasta like a rich, textured blanket. The aroma of sautéed onions, bell peppers, and secret spices creates an intoxicating scent that draws everyone to the table, promising a hearty, soul-satisfying bite that feels like a warm hug in a bowl.
Ingredients
- 1 lb spaghetti
- 1 lb lean ground beef or pork
- 1 onion, finely diced
- 1 green bell pepper, diced
- 3 cloves garlic, minced
- 2 tbsp tomato paste
- 1 tsp cayenne pepper
- 1/2 cup beef broth
- Grated parmesan cheese
How to make it
- Bring a large pot of heavily salted water to a rolling boil; cook the spaghetti for one minute less than the package directions specify for ‘al dente,’ as it will finish cooking in the sauce.
- In a large skillet, brown the ground meat over medium-high heat, breaking it into very small crumbles until no pink remains and the meat begins to develop slightly crispy edges.
- Add the diced onion and bell pepper to the meat and sauté until the vegetables are soft and translucent, then stir in the garlic and tomato paste, cooking for 2 minutes until the paste turns a deep brick red.
- Pour in the beef broth and cayenne pepper, scraping the bottom of the pan to incorporate all the flavor, and let it simmer for 5-7 minutes until the liquid has reduced into a thick, concentrated sauce.
- Reserve a cup of starchy pasta water, then toss the spaghetti directly into the skillet with the sauce, adding splashes of the pasta water as needed to create a glossy, cohesive coating.
- Serve immediately with a generous dusting of parmesan cheese to add a salty, nutty finish to the dish.
How to make pea soup?

Why we love this
This pea soup is a masterclass in vibrant color and silky texture, offering a light yet deeply flavorful addition to your board. It’s incredibly smooth on the palate, with a subtle sweetness from the peas that is balanced by a hint of smoky depth or fresh lemon. The aroma is clean and garden-fresh, and the way a swirl of cream or a drizzle of olive oil sits on the surface makes it look as beautiful as it tastes, providing a cooling, elegant contrast to the heavier board items.
Ingredients
- 4 cups fresh or frozen peas
- 1 yellow onion, chopped
- 2 cloves garlic, minced
- 4 cups vegetable broth
- 1/4 cup heavy cream or coconut milk
- Handful of fresh mint leaves
- Salt and white pepper
How to make it
- Sauté the chopped onion in a large pot with a drizzle of oil over medium heat until soft and translucent, ensuring you don’t brown them as this will dull the soup’s bright green color.
- Add the minced garlic and cook for just 30 seconds until fragrant, then pour in the vegetable broth and bring the mixture to a gentle boil.
- Add the peas to the boiling broth and cook for only 3-5 minutes (if using frozen) or 5-7 minutes (if using fresh) until they are tender but still vibrantly green; overcooking will turn the soup a murky olive color.
- Remove the pot from the heat and stir in the fresh mint leaves, then use an immersion blender to puree the soup until it is completely smooth and velvety.
- Stir in the cream or coconut milk for added richness and season with salt and white pepper, which provides heat without the dark flecks of black pepper.
- For an extra professional touch, pass the soup through a fine-mesh sieve to remove any remaining skins before serving in small cups or bowls.
How to roast seasonal veggies?

Why we love this
Roasted seasonal vegetables are the colorful jewels of any food board, offering a complex array of textures from tender interiors to caramelized, crispy edges. As they roast, the natural sugars in the vegetables concentrate, creating an earthy sweetness that is heightened by the aroma of toasted herbs and garlic. There is something deeply satisfying about the rustic appearance of charred carrots, golden potatoes, and blistered sprouts, all glistening with a touch of high-quality oil and a sprinkle of flaky sea salt.
Ingredients
- Mixed seasonal vegetables (carrots, Brussels sprouts, parsnips, sweet potatoes)
- 3 tbsp olive oil
- 2 tsp dried rosemary or thyme
- 1 tsp garlic powder
- Flaky sea salt and cracked pepper
How to make it
- Preheat your oven to 425°F (220°C); a high temperature is essential for achieving caramelization (the Maillard reaction) before the vegetables become mushy.
- Cut all vegetables into uniform sizes to ensure they cook at the same rate—larger chunks of root vegetables and smaller sprouts work well together.
- Toss the vegetables in a large bowl with the olive oil, rosemary, garlic powder, salt, and pepper until every piece is thoroughly and evenly coated.
- Spread the vegetables in a single layer on a large rimmed baking sheet; do not overcrowd the pan, as this will cause the vegetables to steam rather than roast.
- Roast for 25-35 minutes, tossing the vegetables halfway through the cooking time to ensure they develop an even, golden-brown char on all sides.
- Remove from the oven when the vegetables are fork-tender and have dark, caramelized edges, then sprinkle with an extra pinch of flaky salt for texture.
How to grill fresh salmon?

Why we love this
Grilled salmon brings a sense of luxury and healthy indulgence to the board, with its striking coral hue and distinct smoky aroma. The exterior develops beautiful, charred grill marks that offer a slight crunch, leading into a buttery, flaky interior that melts in your mouth. When finished with a squeeze of charred lemon, the fats of the fish are perfectly balanced, creating a dish that feels incredibly fresh, sophisticated, and deeply nourishing all at once.
Ingredients
- 2 large salmon fillets (center cut)
- 1 tbsp olive oil
- 1 tsp sea salt
- 1/2 tsp black pepper
- 1 lemon, halved
- Fresh dill for garnish
How to make it
- Preheat your grill to medium-high heat and ensure the grates are meticulously cleaned and oiled to prevent the delicate fish from sticking.
- Brush both sides of the salmon fillets with olive oil and season generously with salt and pepper; let the fish sit at room temperature for 10 minutes before grilling to ensure even cooking.
- Place the salmon skin-side down on the grill; cook undisturbed for 4-5 minutes, allowing the skin to become crispy and naturally release from the grates.
- Gently flip the salmon using a wide spatula and grill for another 3-4 minutes on the flesh side until the internal temperature reaches 145°F for a perfect medium-doneness.
- During the last two minutes of grilling, place the lemon halves cut-side down on the grill until they are charred and juicy.
- Remove the salmon and let it rest for 3 minutes to allow the juices to redistribute, then squeeze the charred lemon over the top and garnish with fresh dill.
How to make asparagus soup?

Why we love this
Asparagus soup is the ultimate tribute to early spring, offering a flavor profile that is uniquely grassy, sweet, and sophisticated. Its texture is incredibly light and airy, yet it carries a creamy richness that feels indulgent without being heavy. The bright green color is a visual feast, and the subtle aroma of sautéed leeks and tender asparagus spears creates a refined, delicate scent that makes this soup feel like a gourmet treat, especially when topped with a few reserved, crunchy tips.
Ingredients
- 1 lb fresh asparagus, woody ends trimmed
- 1 large leek, white and light green parts only, sliced
- 2 cloves garlic, minced
- 4 cups chicken or vegetable broth
- 1/2 cup heavy cream
- 1 tbsp lemon juice
- Salt and white pepper
How to make it
- Trim the tough, woody ends off the asparagus and cut the remaining stalks into 1-inch pieces, reserving the tips to use as a garnish later.
- Sauté the sliced leeks in a tablespoon of butter or oil over medium heat until they are soft and fragrant, taking care not to let them brown, which would affect the soup’s delicate flavor.
- Add the garlic and asparagus stalks (not the tips) to the pot, sautéing for 2 minutes, then pour in the broth and bring to a simmer for 10-12 minutes until the asparagus is very tender.
- While the soup simmers, blanch the reserved asparagus tips in boiling water for 2 minutes, then immediately shock them in ice water to keep them bright green and crunchy.
- Puree the soup in a high-speed blender until perfectly smooth, then return to the pot and stir in the heavy cream and lemon juice to brighten the flavors.
- Season with salt and white pepper, and serve with the blanched asparagus tips floating on top for a beautiful presentation.
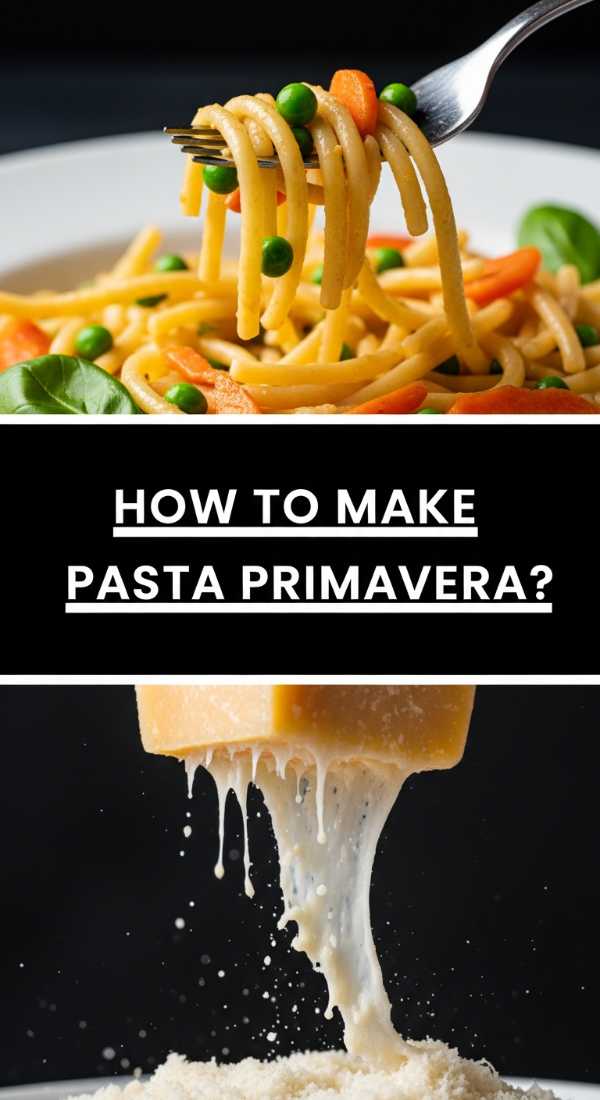
How to make pasta primavera?
Why we love this
Pasta Primavera is a celebration of the harvest, a colorful jumble of al dente pasta and a rainbow of crisp-tender vegetables. The sauce is light and ethereal—usually a simple emulsion of garlic, olive oil, and a splash of pasta water—that allows the natural flavors of the zucchini, peppers, and peas to shine. It smells like a sun-drenched kitchen garden, and each bite offers a different combination of textures and flavors, making it a playful and satisfying addition to your board.
Ingredients
- 12 oz penne or fusilli pasta
- 1 zucchini, sliced into half-moons
- 1 red bell pepper, thinly sliced
- 1/2 cup frozen peas
- 1/2 cup cherry tomatoes, halved
- 3 cloves garlic, thinly sliced
- 1/4 cup grated parmesan
- Fresh parsley and basil
How to make it
- Cook your pasta in a large pot of salted water according to the package instructions, ensuring you stop at ‘al dente’ as the pasta will continue to cook slightly when tossed with the hot vegetables.
- In a large skillet, heat 2 tablespoons of olive oil over medium heat and sauté the garlic slices until they are just beginning to turn golden and fragrant.
- Add the zucchini and bell peppers to the skillet, sautéing for 3-4 minutes until they are bright and slightly softened but still retain a firm ‘snap.’
- Stir in the cherry tomatoes and peas, cooking for just 2 minutes until the tomatoes start to soften and release their juices, creating a natural sauce.
- Add the cooked pasta directly into the skillet, along with a splash of the starchy pasta water and the parmesan cheese; toss vigorously to create a light, creamy emulsion that coats the pasta.
- Finish with a handful of chopped fresh parsley and basil, and a final drizzle of high-quality olive oil before arranging it on your board.
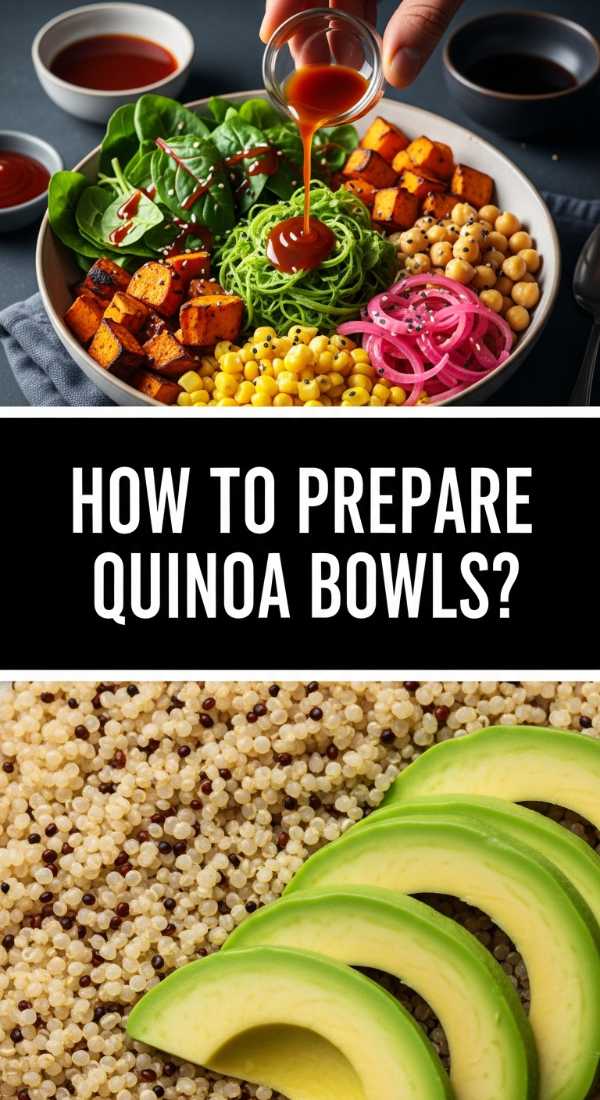
How to prepare quinoa bowls?
Why we love this
Quinoa bowls are the versatile, protein-packed anchors of a food board, offering a satisfyingly nutty flavor and a delightful, fluffy texture. They act as the perfect canvas for a variety of toppings, from crunchy cucumbers to creamy avocado and tangy feta. The visual appeal of a well-constructed bowl—with its organized sections of vibrant colors—is matched only by the wholesome, grounding feeling of eating it, providing a steady energy boost that leaves you feeling light yet completely satisfied.
Ingredients
- 1 cup white or tri-color quinoa
- 2 cups water or vegetable broth
- 1 cucumber, diced
- 1 avocado, sliced
- 1/2 cup chickpeas, rinsed
- 1/4 cup crumbled feta cheese
- Lemon-tahini dressing
How to make it
- Rinse the quinoa thoroughly in a fine-mesh sieve under cold running water for at least 30 seconds; this removes the saponin, a natural coating that can give quinoa a bitter taste.
- Combine the rinsed quinoa and water (or broth for more flavor) in a saucepan, bring to a boil, then reduce the heat to low, cover, and simmer for 15 minutes.
- Once the liquid is absorbed, remove the pan from the heat and let the quinoa sit, covered, for 5 minutes; this allows the steam to finish the cooking process, resulting in fluffier grains.
- Fluff the quinoa gently with a fork and spread it out on a tray to cool slightly if you prefer a room-temperature bowl, or serve it warm for a heartier feel.
- Assemble the bowls by placing a base of quinoa in small individual dishes or sections of the board, then top with organized piles of cucumber, chickpeas, and avocado.
- Garnish with crumbled feta and a drizzle of lemon-tahini dressing, which adds a creamy, nutty finish that ties all the components together perfectly.
Bringing It All Together
Building a viral-worthy food board isn’t just about the recipes; it’s about the intention behind the meal. By combining these ten diverse elements—from the warmth of the dirty spaghetti to the crispness of the spring salad—you create an interactive dining experience that caters to every palate. Whether you’re hosting a big celebration or just a cozy night in with family, this simple food board proves that the best meals are the ones where everyone feels invited to share in the abundance. Happy hosting!