
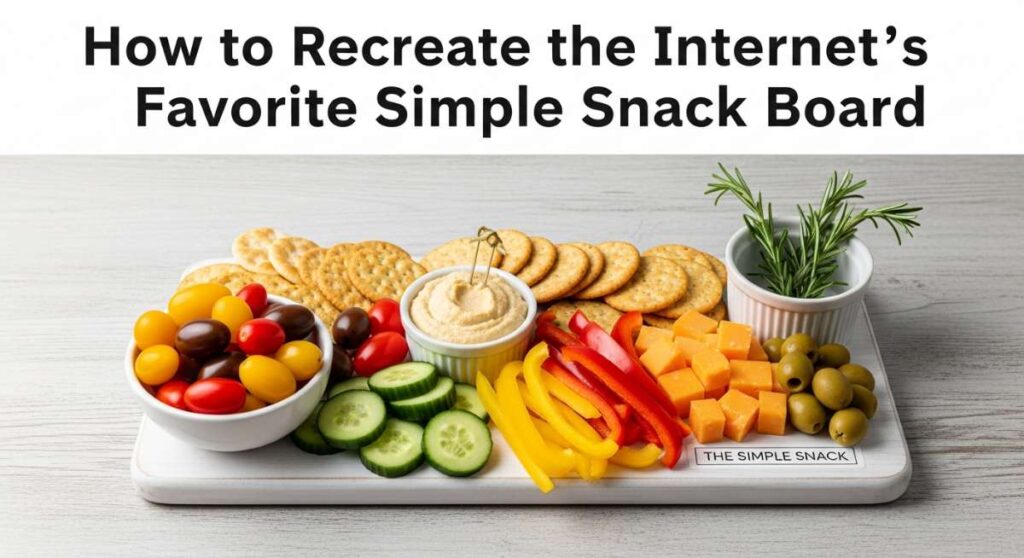
How to Recreate the Internet’s Favorite Simple Snack Board
We’ve all been there—scrolling through our feeds and coming across that one perfectly styled, effortlessly chic food board that looks like it belongs in a magazine. It’s more than just food; it’s a lifestyle. There is something profoundly comforting about a grazing board that invites everyone to lean in, share a bite, and linger over conversation. It’s the ultimate symbol of a slow Sunday or a vibrant Saturday night with friends, turning simple ingredients into a visual and culinary masterpiece.
The secret to the internet’s favorite snack board isn’t just about having one thing; it’s about the harmony of textures, colors, and flavors. It’s about that perfect balance between savory and sweet, crunchy and soft. In this guide, I’m breaking down the essential components that make a board truly viral, from the zing of fresh citrus to the comforting warmth of baked goods. Let’s dive into how you can recreate this aesthetic magic in your own kitchen.
How to make fruit skewers?

Why we love this
Fruit skewers are the ultimate crowd-pleaser because they bring a vibrant burst of natural sweetness and a stunning rainbow aesthetic to any board. There is something incredibly satisfying about the crisp snap of a chilled grape followed by the juicy, sun-ripened explosion of a strawberry. As you assemble them, the sweet, floral aroma of fresh melons and berries fills the air, creating a refreshing sensory experience that feels like a summer breeze. They are light, easy to grab, and provide that essential pop of color that makes your snack board look professionally styled.
Ingredients
- Fresh strawberries
- Green and red grapes
- Pineapple chunks
- Honeydew melon balls
- Blueberries
- Bamboo skewers
- Optional: Fresh mint leaves for garnish
How to make it
- Begin by thoroughly washing all your fruit in cold water and patting them completely dry with a lint-free towel; moisture is the enemy of a clean presentation.
- Prepare the larger fruits by slicing the pineapple into uniform 1-inch cubes and using a melon baller to create perfect spheres of honeydew, ensuring everything is roughly the same size for a balanced look.
- Arrange your fruit in a color-gradient order on your workspace to visualize the pattern, such as red, orange, yellow, green, and purple.
- Carefully thread the fruit onto the bamboo skewers, starting with a sturdy base like a grape or a firm pineapple chunk to prevent sliding.
- Maintain consistent spacing between each piece, pushing them close together but not so tight that they bruise, and finish each skewer with a bright strawberry cap at the top.
- Place the finished skewers on a chilled tray and cover with a damp paper towel until serving to keep them plump and glistening.
How to bake strawberry cake?

Why we love this
A homemade strawberry cake is the heart of a cozy afternoon, offering a nostalgic sweetness that store-bought versions simply can’t match. When it’s baking, the kitchen is transformed by the heavenly scent of caramelized sugar and cooked berries, a warm and inviting aroma that signals something special is happening. The texture is a dream—moist, tender, and dotted with pockets of jammy strawberry goodness that melt on the tongue. It adds a soft, rustic elegance to your snack spread, inviting guests to cut a slice and savor the delicate, fruity crumb.
Ingredients
- 2 cups all-purpose flour
- 1 1/2 cups granulated sugar
- 1/2 cup unsalted butter, softened
- 2 large eggs
- 1 cup fresh strawberry puree
- 1/2 cup buttermilk
- 1 tsp vanilla extract
- 1 1/2 tsp baking powder
- 1/2 tsp salt
How to make it
- Preheat your oven to 350°F (175°C) and generously grease a 9-inch cake pan, lining the bottom with parchment paper to ensure a clean release later.
- In a large bowl, cream together the softened butter and granulated sugar using a stand mixer on medium-high speed for about 3-5 minutes until the mixture is pale, light, and fluffy.
- Add the eggs one at a time, beating well after each addition to ensure the fats and proteins are fully emulsified, then stir in the vanilla extract.
- In a separate bowl, whisk together the flour, baking powder, and salt to aerate the dry ingredients and remove any lumps.
- Alternate adding the dry ingredients and the buttermilk to the butter mixture, starting and ending with the flour; stir only until just combined to avoid overworking the gluten.
- Gently fold in the fresh strawberry puree using a spatula, creating a beautiful pink swirl without completely over-mixing the batter.
- Pour the batter into the prepared pan and bake for 30-35 minutes; look for the edges pulling away from the sides and a toothpick inserted into the center coming out clean with just a few moist crumbs.
- Allow the cake to cool in the pan for 10 minutes before transferring it to a wire rack to cool completely, which prevents the moisture from making the bottom soggy.
How to decorate floral cakes?
Why we love this
Decorating a cake with flowers elevates a simple dessert into a piece of edible art that captures the whimsical beauty of a garden in bloom. The sight of delicate, velvety petals resting against smooth, creamy frosting is breathtakingly romantic and adds an organic, high-end feel to your snack board. There is a quiet, meditative joy in selecting the perfect blooms and placing them just so, creating a composition that feels both wild and refined. It’s a sensory delight that combines the soft fragrance of botanicals with the sweet promise of a perfectly frosted treat.
Ingredients
- A pre-frosted cake (smooth buttercream works best)
- Edible flowers (pansies, violas, or nasturtiums)
- Fresh herbs (rosemary or thyme)
- Organic, pesticide-free roses (for decorative use)
- Piping bag with a small star tip
- Extra buttercream for “glue”
How to make it
- Start with a cake that has been chilled for at least 30 minutes so the frosting is firm enough to handle the weight of the decorations without sagging.
- Wash your edible flowers gently in a bowl of cold water and lay them out on a paper towel to dry completely; any moisture will cause the colors to bleed into your frosting.
- Plan your design on the table first; a crescent moon shape or a “falling” floral path from top to bottom usually creates the most viral, aesthetic appeal.
- Use a small amount of buttercream on the back of each flower or herb sprig as an adhesive, then gently press it onto the cake surface using sterilized tweezers for precision.
- If using larger roses, wrap the stems in floral tape or use small plastic flower spikes before inserting them into the cake to ensure no sap or stem moisture touches the edible portion.
- Add small piped stars or dots of frosting around the base of the flowers to fill in gaps and create a sense of depth and lushness.
- Store the cake in a cool, draft-free area until serving, as extreme heat will cause the flowers to wilt and the frosting to soften.
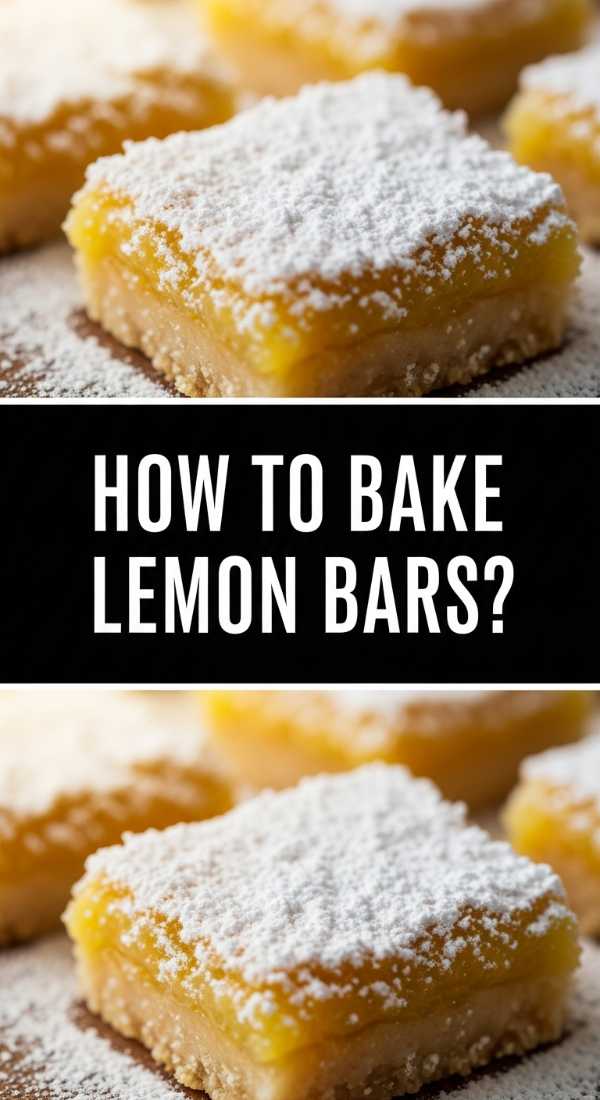
How to bake lemon bars?
Why we love this
Lemon bars are the ultimate palate cleanser on a diverse snack board, offering a sharp, zesty brightness that cuts through richer flavors. The contrast between the buttery, crumbly shortbread crust and the silky, tart lemon curd is a textural masterpiece that feels both indulgent and refreshing. When you bite into one, the immediate citrus tang wakes up the senses, followed by the comforting, melt-in-your-mouth sweetness of the powdered sugar dusting. Their bright yellow hue adds a sunny, cheerful vibe to your table, making them as visually appealing as they are delicious.
Ingredients
- 1 cup unsalted butter, melted
- 1/2 cup granulated sugar (for crust)
- 2 cups all-purpose flour (divided)
- 1/4 tsp salt
- 4 large eggs
- 1 1/2 cups granulated sugar (for filling)
- 2/3 cup fresh lemon juice
- 1 tbsp lemon zest
- Powdered sugar for dusting
How to make it
- Preheat your oven to 350°F (175°C) and line an 8×8 inch baking pan with parchment paper, leaving an overhang on the sides for easy removal later.
- Create the shortbread base by mixing the melted butter, 1/2 cup sugar, 1 3/4 cups flour, and salt until a soft dough forms; press this firmly into the bottom of your pan.
- Bake the crust for 18-20 minutes until the edges are just barely beginning to turn a pale golden brown; this “blind bake” ensures the crust stays crisp under the lemon layer.
- While the crust bakes, whisk the eggs and 1 1/2 cups sugar together in a large bowl until smooth, then stir in the lemon juice, zest, and the remaining 1/4 cup of flour.
- Pour the lemon mixture directly over the hot crust as soon as it comes out of the oven; the heat helps the custard begin to set immediately.
- Return the pan to the oven and bake for another 20-25 minutes, or until the center is set and doesn’t jiggle when the pan is gently shaken.
- Allow the bars to cool completely at room temperature for two hours, then refrigerate for at least another two hours to ensure clean, sharp slices.
- Just before serving, use a fine-mesh sieve to dust a generous layer of powdered sugar over the top, then slice into uniform squares.
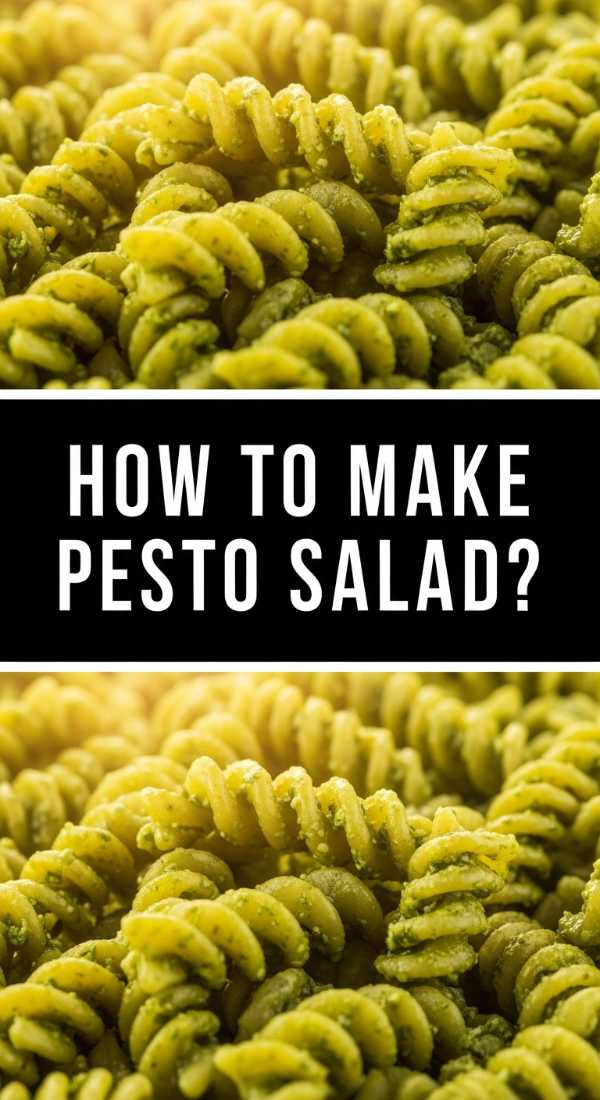
How to make pesto salad?

Why we love this
Pesto salad brings a savory, herbaceous depth to your board that is both rustic and incredibly fresh. The aroma of crushed basil, pungent garlic, and toasted pine nuts is instantly evocative of Italian summers and al fresco dining. Each bite offers a satisfying mix of al dente pasta or crisp greens coated in a rich, emerald-green sauce that feels luxurious on the tongue. It’s a versatile dish that provides a hearty, savory anchor to the snack board, ensuring that guests have something substantial and flavor-packed to enjoy alongside the lighter snacks.
Ingredients
- 16 oz pasta (fusilli or farfalle work best)
- 2 cups fresh basil leaves
- 1/2 cup grated Parmesan cheese
- 1/3 cup pine nuts, toasted
- 2 cloves garlic
- 1/2 cup extra virgin olive oil
- 1 cup cherry tomatoes, halved
- 1/2 cup mini mozzarella pearls
- Salt and pepper to taste
How to make it
- Boil a large pot of heavily salted water and cook your pasta according to the package directions until it reaches a perfect al dente texture; drain and rinse with cold water to stop the cooking process and prevent sticking.
- To make the pesto, combine the basil, toasted pine nuts, garlic, and Parmesan in a food processor, pulsing until finely chopped but still textured.
- With the processor running on low, slowly drizzle in the olive oil in a steady stream to create a thick, vibrant green emulsion; season with salt and pepper to your preference.
- In a large mixing bowl, toss the cold pasta with the fresh pesto until every nook and cranny is thoroughly coated in the sauce.
- Gently fold in the halved cherry tomatoes and mozzarella pearls, being careful not to bruise the cheese or squish the tomatoes.
- For the best flavor, let the salad sit in the refrigerator for 30 minutes to allow the garlic and basil notes to penetrate the pasta.
- Give it one final toss before plating on your board, adding a few whole basil leaves on top for a professional, fresh-from-the-garden look.
How to grill chicken kebabs?
Why we love this
There is nothing quite like the smoky, charred aroma of grilled chicken kebabs to bring a sense of celebration to your food spread. The sight of perfectly seared meat alongside caramelized vegetables creates an irresistible visual appeal that promises a savory, juicy bite every time. You can feel the warmth of the grill and the snap of the slightly charred peppers, providing a fantastic contrast to the colder elements on your board. It adds a wonderful protein-rich component that makes the snack board feel like a complete, satisfying meal rather than just a collection of appetizers.
Ingredients
- 1.5 lbs chicken breast, cut into 1-inch cubes
- 2 bell peppers (any color), cut into chunks
- 1 red onion, cut into wedges
- 1/4 cup olive oil
- 3 tbsp lemon juice
- 2 cloves garlic, minced
- 1 tsp dried oregano
- Salt and black pepper
- Wooden or metal skewers
How to make it
- If using wooden skewers, soak them in water for at least 30 minutes prior to use to prevent them from catching fire on the grill.
- Whisk together the olive oil, lemon juice, minced garlic, oregano, salt, and pepper in a bowl to create a bright, acidic marinade that will tenderize the chicken.
- Toss the chicken cubes in the marinade, covering them completely, and let them sit in the refrigerator for at least 30 minutes (or up to 4 hours) to absorb the flavors.
- Thread the skewers by alternating between a piece of chicken, a pepper chunk, and an onion wedge, ensuring the pieces are touching but not packed too tightly to allow heat to circulate.
- Preheat your grill or grill pan to medium-high heat (about 400°F) and lightly oil the grates to prevent the meat from sticking.
- Place the kebabs on the grill and cook for 10-12 minutes, turning them every 3 minutes to achieve an even char and internal doneness.
- Use a meat thermometer to ensure the chicken has reached an internal temperature of 165°F (74°C), then remove from heat and let them rest for 5 minutes to lock in the juices.
- Arrange them on your board while still warm, perhaps resting on a bed of flatbread or greens for an extra rustic touch.
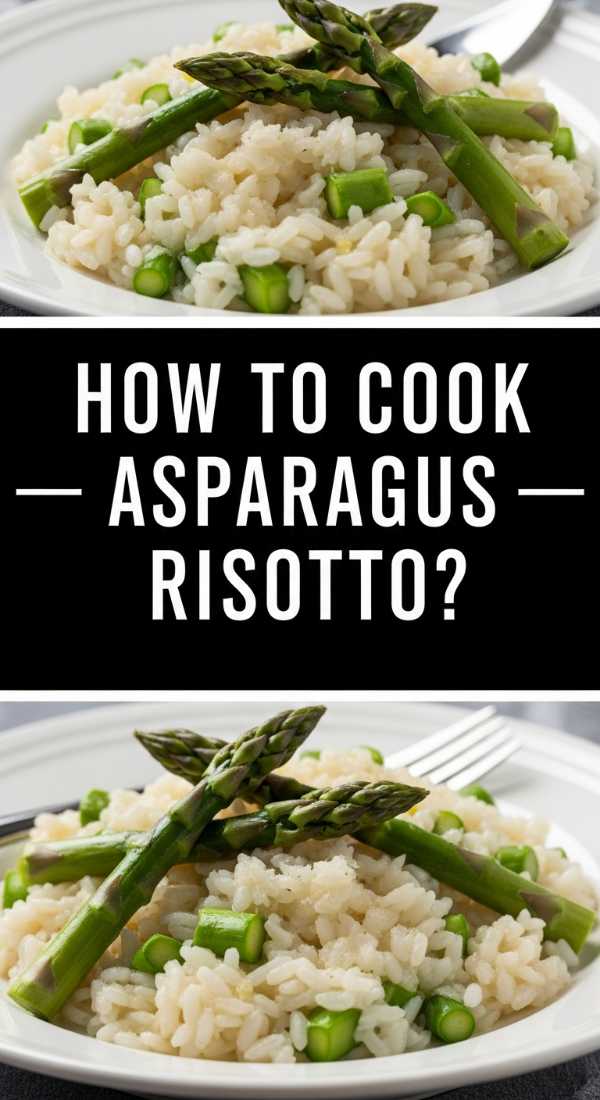
How to cook asparagus risotto?

Why we love this
Asparagus risotto is the epitome of comfort food with a sophisticated twist, offering a creamy, velvety texture that feels like a warm hug. The delicate, earthy scent of tender asparagus spears combined with the rich aroma of shallots and white wine creates a fragrance that is deeply appetizing. As you stir the rice, it releases its starches to form a luscious sauce that coats each grain, providing a luxurious mouthfeel that is both silky and substantial. It brings a touch of gourmet elegance to your snack board, proving that even a “simple” spread can have moments of pure indulgence.
Ingredients
- 1 cup Arborio rice
- 1 bunch asparagus, woody ends removed and cut into 1-inch pieces
- 4 cups vegetable or chicken broth, kept warm
- 1/2 cup dry white wine (like Pinot Grigio)
- 1 shallot, finely minced
- 2 tbsp unsalted butter
- 1/2 cup grated Parmesan cheese
- 1 tbsp olive oil
- Salt and pepper to taste
How to make it
- In a small pan, blanch the asparagus pieces in boiling water for 2 minutes until bright green, then immediately plunge them into ice water to preserve their color and snap.
- Heat the olive oil and 1 tablespoon of butter in a heavy-bottomed pot over medium heat, then sauté the shallot until it is soft and translucent but not browned.
- Add the Arborio rice to the pot and toast it for 2 minutes, stirring constantly until the edges of the grains become translucent and they smell slightly nutty.
- Deglaze the pan by pouring in the white wine, scraping up any bits from the bottom, and stir until the liquid has been completely absorbed by the rice.
- Begin adding the warm broth one ladleful at a time, stirring frequently; wait until the liquid is almost entirely absorbed before adding the next ladle. This technique is crucial for releasing the starches.
- Continue this process for about 18-20 minutes until the rice is tender but still has a slight bite (al dente) and the consistency is creamy, not dry.
- Stir in the remaining butter, Parmesan cheese, and the blanched asparagus, mixing gently until the cheese is melted and the dish is glossy.
- Serve immediately in small bowls or as part of a larger platter, topped with an extra sprinkle of cheese and a crack of fresh black pepper.
How to make cheesy sliders?
Why we love this
Cheesy sliders are the ultimate comfort snack, providing a warm, gooey, and savory element that everyone gravitates toward. There is a primal joy in pulling apart a soft, buttery bun to reveal a layer of perfectly melted, stretchy cheese and savory fillings. The aroma of toasted bread and melted butter infused with garlic is absolutely intoxicating, filling the room with a sense of homey goodness. They are the perfect size for grazing, offering a big punch of flavor in a small, manageable package that makes your snack board feel approachable and fun.
Ingredients
- 1 pack of 12 slider rolls (Hawaiian rolls are a favorite)
- 1/2 lb deli ham or turkey
- 8 slices of Swiss or Provolone cheese
- 1/4 cup unsalted butter, melted
- 1 tbsp Dijon mustard
- 1/2 tsp garlic powder
- 1 tsp poppy seeds
How to make it
- Preheat your oven to 350°F (175°C) and lightly grease a baking dish that fits the entire slab of slider rolls.
- Without separating the individual rolls, use a large serrated knife to slice the entire block of rolls in half horizontally, creating a top half and a bottom half.
- Place the bottom half of the rolls into the baking dish and layer the deli meat evenly across the bread, followed by a generous layer of cheese slices.
- Place the top half of the rolls back on, pressing down slightly to ensure the “sandwich” is stable.
- In a small bowl, whisk together the melted butter, Dijon mustard, garlic powder, and poppy seeds to create a savory glaze.
- Use a pastry brush to coat the tops of the rolls thoroughly with the butter mixture, making sure the glaze seeps into the crevices between the rolls.
- Cover the dish with foil and bake for 10 minutes to melt the cheese, then remove the foil and bake for another 5-10 minutes until the tops are golden brown and slightly crisp.
- Slice into individual sliders using a sharp knife and serve them warm on the board for the best “cheese pull” experience.
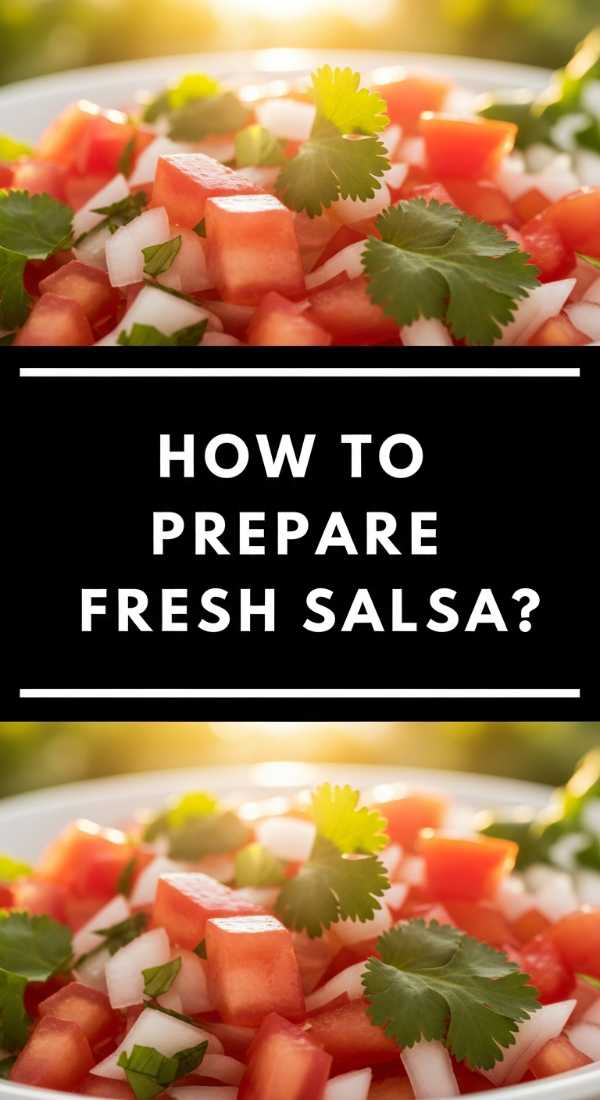
How to prepare fresh salsa?
Why we love this
Fresh salsa is the vibrant, electric heartbeat of a great food board, offering a crunch and a kick that keeps you coming back for more. The fragrance of freshly chopped cilantro and the sharp, clean scent of lime juice are incredibly invigorating and suggest a level of freshness that jarred versions can’t touch. Each scoop provides a mosaic of textures—from the firm dice of the tomatoes to the crisp bite of the red onion and the subtle heat of the jalapeño. It’s a bright, acidic counterpoint that balances out the richer, bready elements of the board, making every bite feel new again.
Ingredients
- 4 large Roma tomatoes, finely diced
- 1/2 red onion, finely minced
- 1/4 cup fresh cilantro, chopped
- 1 jalapeño, seeded and minced
- 2 tbsp fresh lime juice
- 1 clove garlic, grated
- 1/2 tsp salt
- 1/4 tsp cumin
How to make it
- Start by dicing your tomatoes and placing them in a fine-mesh strainer over a bowl for 5 minutes; this removes excess liquid and prevents your salsa from becoming watery.
- Finely mince the red onion and jalapeño; for a milder salsa, ensure every single seed and the white membrane is removed from the jalapeño before dicing.
- In a glass or ceramic bowl (avoid metal to keep the flavors clean), combine the tomatoes, onion, cilantro, and jalapeño.
- Add the grated garlic, lime juice, salt, and cumin, stirring gently to ensure the spices are evenly distributed throughout the vegetables.
- Taste the salsa and adjust the salt or lime juice if necessary; the flavors should be bright and balanced between salt, acid, and heat.
- Cover the bowl and let the salsa sit in the refrigerator for at least 30 minutes; this allows the salt to draw out just enough moisture to create a natural “juice” that binds the flavors together.
- Serve in a beautiful ceramic bowl in the center of your board, surrounded by sturdy tortilla chips or sliced cucumbers for dipping.
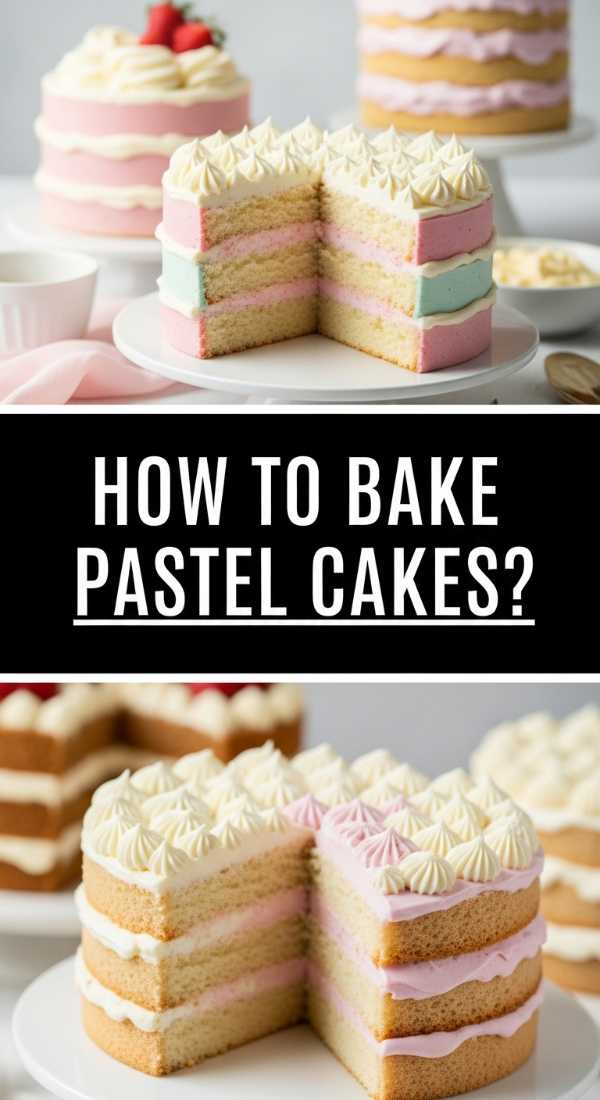
How to bake pastel cakes?
[IMAGE_10]
Why we love this
Pastel cakes are the dreamiest addition to a lifestyle snack board, bringing a soft, ethereal aesthetic that feels like a storybook celebration. The sight of pale pinks, baby blues, and mint greens creates a calming and beautiful visual palette that guests can’t help but photograph. The texture of these cakes is typically light and velvety, with a subtle vanilla aroma that is classic and comforting. They represent the “lifestyle” aspect of the board—where food isn’t just sustenance, but an expression of beauty and care that makes a simple gathering feel like a truly special occasion.
Ingredients
- 1 1/2 cups cake flour (for a finer crumb)
- 1 cup granulated sugar
- 1/2 cup unsalted butter, softened
- 2 large egg whites (keeps the cake color pure)
- 1/2 cup whole milk
- 1 1/2 tsp baking powder
- 1 tsp clear vanilla extract
- Gel food coloring (pink, blue, or lavender)
How to make it
- Preheat your oven to 350°F (175°C) and prepare mini cake tins or a standard pan with parchment paper and a light dusting of flour.
- Cream the softened butter and sugar together until the mixture is exceptionally light and airy, which usually takes about 5 minutes of high-speed mixing.
- Add the egg whites and clear vanilla extract; using whites instead of whole eggs is essential for keeping the base color neutral so the pastel dyes appear bright and true.
- Whisk the cake flour and baking powder together, then add to the wet ingredients alternating with the milk, mixing on the lowest speed until just combined.
- Divide the batter into separate bowls if you want multiple colors, and add a tiny drop of gel food coloring using a toothpick; gel is more concentrated and won’t thin out your batter like liquid drops.
- Gently fold the color in until no streaks remain, aiming for a soft, muted pastel shade rather than a vibrant, saturated one.
- Bake for 18-22 minutes (for mini cakes) or until a toothpick comes out clean; be careful not to over-bake, as browning the edges will ruin the pastel aesthetic.
- Cool completely before frosting with a white or matching pastel buttercream to maintain the monochromatic, viral look.
Conclusion
Creating the internet’s favorite snack board is all about the intention you put into every slice and every stir. By combining these diverse elements—from the savory crunch of chicken kebabs to the delicate beauty of floral cakes—you create a tapestry of flavors that satisfies every craving. Remember, there are no hard rules; the best boards are the ones that reflect your personal style and the tastes of the people you love. So, grab your largest platter, start prepping these viral favorites, and enjoy the beautiful, delicious mess of a perfect grazing afternoon.