
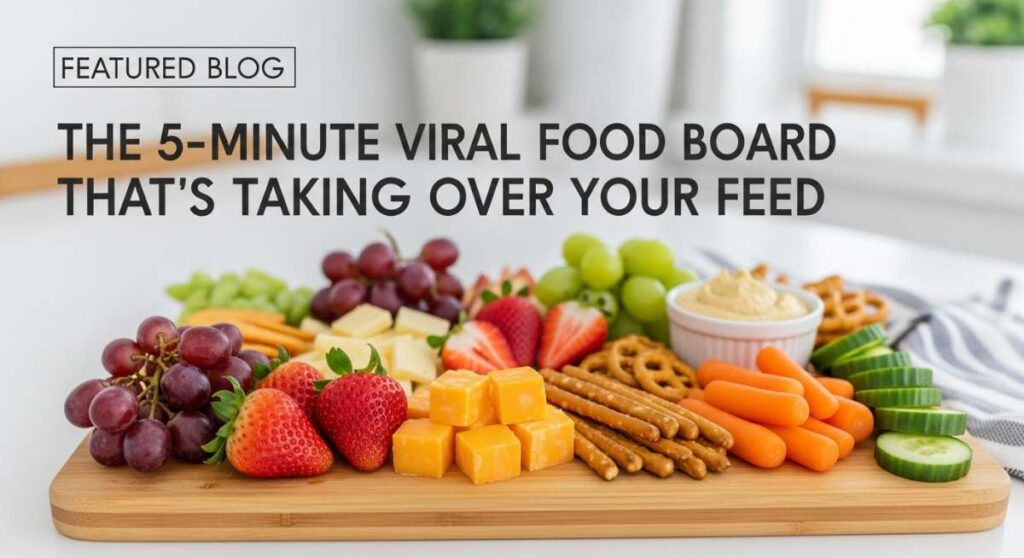
The 5-Minute Viral Food Board That’s Taking Over Your Feed
We’ve all been there—scrolling through our feeds and stopping dead in our tracks at a platter so beautiful, so vibrant, and so effortless that it feels like a work of art. There is something truly magical about the way a well-curated food board brings people together. It’s not just about the food; it’s about the shared laughter, the reaching hands, and the relaxed atmosphere that only a communal feast can provide. Lately, my kitchen has become a laboratory for these ‘viral’ boards, and I’ve discovered that the secret isn’t just in the arrangement, but in the variety of textures and seasonal flavors we bring to the table.
As the seasons shift and the light lingers a little longer in the evening, I find myself craving dishes that feel like a celebration of the sun. Whether you are hosting a backyard gathering or just trying to make a Tuesday night feel a bit more special, these concepts are designed to be approachable yet impressive. This blog post is my love letter to simple, beautiful cooking. We are diving deep into ten viral elements that will transform your next food board into the centerpiece of your home, blending the freshness of spring with the heat of summer grill-outs.
How to bake spring cakes?

Why we love this
There is nothing quite like the aroma of a light, citrus-infused sponge cake wafting through a sunlit kitchen. These spring cakes are the epitome of elegance, featuring a delicate crumb that feels like a cloud on your tongue, perfectly complemented by the zest of lemon or the floral notes of lavender. Each bite offers a refreshing brightness that clears the palate, making it the ideal centerpiece for a mid-afternoon tea or a post-brunch treat. The visual appeal of a pale, golden crust dusted with powdered sugar is simply irresistible and sets a joyful tone for the season.
Ingredients
- 2 cups cake flour
- 1 1/2 cups granulated sugar
- 3 large eggs (room temperature)
- 1/2 cup unsalted butter (softened)
- 1 cup whole milk
- 2 tsp baking powder
- 1 tbsp lemon zest
- 1 tsp vanilla extract
- 1/2 tsp salt
How to make it
- Preheat your oven to 350°F (175°C) and grease a 9-inch round cake pan thoroughly, lining the bottom with parchment paper to ensure an easy release.
- In a medium bowl, sift together the cake flour, baking powder, and salt. Sifting is crucial here as it aerates the flour, contributing to that signature light, airy spring texture.
- In a large mixing bowl, cream the softened butter and sugar together using a stand mixer or hand mixer on medium-high speed for about 3-5 minutes until the mixture is pale, light, and fluffy.
- Add the eggs one at a time, beating well after each addition to ensure they are fully emulsified into the fats. Stir in the vanilla extract and lemon zest.
- Reduce the mixer speed to low. Alternately add the dry ingredients and the milk in three batches, starting and ending with the flour. Mix only until the streaks of flour disappear to avoid overdeveloping the gluten.
- Pour the batter into the prepared pan and smooth the top with a spatula. Bake for 30-35 minutes, or until a wooden skewer inserted into the center comes out clean with just a few moist crumbs.
- Let the cake cool in the pan for 10 minutes before transferring it to a wire rack to cool completely.
How to cook spring dinners?

Why we love this
Spring dinners are all about honoring the first harvests of the year, bringing together the snap of fresh asparagus with the buttery richness of pan-seared proteins. There is a specific kind of comfort in a meal that feels healthy yet indulgent, where the vibrant greens pop against the plate and the flavors remain clean and crisp. The transition from heavy winter stews to these lighter, herb-forward dishes mirrors the awakening of the garden outside, filling your dining room with the scent of fresh dill, parsley, and bright lemon. It is the kind of meal that leaves you feeling energized and satisfied.
Ingredients
- 1 lb salmon fillets or chicken breasts
- 1 bunch thin asparagus, trimmed
- 2 cups baby potatoes, halved
- 3 tbsp olive oil
- 2 cloves garlic, minced
- 1 lemon, sliced into rounds
- Fresh dill and parsley
- Salt and cracked black pepper
How to make it
- Preheat your oven to 400°F (200°C). Large sheet pan cooking is the secret to a stress-free spring dinner that maintains the integrity of the vegetables.
- Toss the halved baby potatoes with 1 tablespoon of olive oil, salt, and pepper on the sheet pan. Spread them out in a single layer and roast for 15 minutes, as they need a head start to achieve a crispy exterior and fluffy interior.
- Push the potatoes to one side of the pan. Place the salmon or chicken in the center and the asparagus on the other side.
- Whisk together the remaining olive oil, minced garlic, and chopped herbs. Drizzle this mixture generously over the protein and the asparagus.
- Place lemon slices over the protein to infuse it with steam and citrus oils while it cooks.
- Return the pan to the oven and bake for another 12-15 minutes. The salmon should flake easily with a fork (internal temp of 145°F), and the asparagus should be tender-crisp with slightly charred tips.
- Garnish with extra fresh herbs before serving directly from the pan for a rustic feel.
How to make rotel dip?

Why we love this
This is the ultimate crowd-pleaser that dominates every social media food board for a reason: it is pure, unadulterated comfort. The velvety, molten cheese swirls together with the spicy, acidic kick of diced tomatoes and green chilies to create a dip that is impossible to stop eating. The aroma of browning meat mixed with melted cheese is a nostalgic scent that instantly signals a party is starting. It’s thick, rich, and has that perfect spicy-salty balance that makes it the MVP of any snacking spread, especially when paired with extra-crunchy tortilla chips.
Ingredients
- 1 lb ground beef or sausage
- 16 oz Velveeta or processed cheese, cubed
- 1 can (10 oz) RoTel diced tomatoes with green chilies
- 1/2 cup heavy cream (optional for extra creaminess)
- 1 tsp taco seasoning
- Fresh cilantro for garnish
How to make it
- In a large skillet over medium-high heat, brown the ground beef or sausage. Use a wooden spoon to break the meat into very small crumbles to ensure even distribution in the dip.
- Cook until the meat is fully browned and no pink remains, then drain the excess grease thoroughly to prevent the dip from becoming oily.
- Lower the heat to medium-low. Add the cubed cheese to the skillet. It is important to cut the cheese into small, uniform cubes so it melts evenly without scorching.
- Pour in the can of RoTel (do not drain the liquid; that flavorful juice is essential for the consistency).
- Stir continuously as the cheese begins to melt. If the mixture feels too thick, splash in a little heavy cream or milk until you reach a silky, pourable consistency.
- Once the cheese is completely smooth and bubbly, stir in the taco seasoning for an extra layer of depth.
- Transfer to a small slow cooker on the ‘warm’ setting to keep it dip-ready for hours, or serve immediately in a heated ceramic bowl.
How to mix summer salads?

Why we love this
Summer salads are a masterclass in contrast, combining the juicy sweetness of seasonal fruits like peaches or strawberries with the salty tang of feta and the earthy crunch of toasted nuts. When you mix a summer salad, you aren’t just making a side dish; you’re creating a refreshing explosion of flavor that combats the heat of the day. The way the balsamic glaze clings to the tender greens while the mint adds a surprising cooling sensation makes every forkful a discovery of textures. It is the perfect, colorful addition to a viral food board that keeps the palate excited.
Ingredients
- 5 oz mixed baby greens or arugula
- 1 cup fresh strawberries, sliced
- 1/2 cup blueberries
- 1/4 cup crumbled goat cheese or feta
- 1/4 cup toasted pecans or walnuts
- 1/4 red onion, thinly shaved
- Honey balsamic vinaigrette
How to make it
- Start with a very large, chilled mixing bowl. A cold bowl helps keep the greens crisp while you toss them.
- Place the greens in the bowl and drizzle with only half of your dressing. Use tongs or clean hands to gently lift and turn the greens until every leaf is lightly glistening. This ensures the salad isn’t weighed down by too much liquid at the bottom.
- Add the shaved red onions and the toasted nuts. Toss once more to distribute these savory elements.
- Carefully fold in the sliced strawberries and blueberries. Berries are delicate, so you want to avoid over-mixing them to prevent bruising or staining the greens.
- Sprinkle the crumbled cheese over the top just before serving. This prevents the cheese from melting into the dressing and turning the salad cloudy.
- Finish with a final crack of black pepper and a light drizzle of balsamic glaze for a professional, high-contrast look.
How to decorate spring cookies?

Why we love this
There is a meditative joy in decorating spring cookies, turning simple sugar rounds into miniature canvases of pastel beauty. The smooth, satin finish of royal icing paired with the buttery, melt-in-your-mouth texture of a shortbread cookie is a sensory delight. We love the way these cookies look on a board—lilacs, soft yellows, and mint greens that mimic a budding garden. The scent of vanilla bean and almond extract fills the air, and the satisfying ‘snap’ of the dried icing followed by the soft bite of the cookie is the ultimate treat for both the eyes and the stomach.
Ingredients
- Batch of chilled sugar cookie dough
- 4 cups powdered sugar
- 3 tbsp meringue powder
- 1 tsp almond extract
- 5-7 tbsp warm water
- Gel food coloring (pastel tones)
How to make it
- Roll out your chilled dough to a consistent 1/4-inch thickness. Use flower, butterfly, or egg-shaped cutters. Bake according to your recipe and let them cool completely on a wire rack; icing will melt on even a slightly warm cookie.
- Prepare the royal icing by whisking the powdered sugar, meringue powder, extract, and water. You want a ’15-second consistency’ for flooding—meaning if you run a knife through the icing, the line disappears in exactly 15 seconds.
- Divide the icing into small bowls and tint them with gel food coloring. Gel is preferred over liquid as it doesn’t thin out the icing’s structure.
- Transfer the icing to piping bags fitted with small round tips. Pipe an outline around the edge of the cookie first to create a ‘dam.’
- Immediately ‘flood’ the center by filling it with more icing, using a toothpick or scribe tool to pop any tiny air bubbles and push the icing into the corners.
- While the icing is still wet, you can use the ‘wet-on-wet’ technique by adding dots or stripes of a different color to create marble effects or floral patterns.
- Let the cookies dry undisturbed for at least 8-12 hours until the icing is completely hard and stackable.
How to simmer spring soup?

Why we love this
Spring soup is the gentle bridge between the cold of winter and the heat of summer—it’s light, vibrant, and incredibly nourishing. Imagine a silken puree of sweet peas or a clear broth filled with floating ribbons of leeks and tender herbs. The aroma is fresh and grassy, reminiscent of a rain-washed garden, and the taste is clean and revitalizing. It’s the kind of dish that feels like a hug for your digestive system, providing a hit of vitamins while remaining sophisticated enough to serve as an elegant starter for a viral board spread.
Ingredients
- 1 lb fresh or frozen peas
- 2 large leeks, white parts only, sliced
- 1 quart vegetable or chicken stock
- 2 tbsp butter
- 1/2 cup heavy cream or coconut milk
- Fresh mint and chives
- Lemon juice
How to make it
- In a heavy-bottomed pot or Dutch oven, melt the butter over medium heat. Add the sliced leeks and a pinch of salt. Sauté them slowly for about 8-10 minutes until they are soft and translucent, but not browned. The goal is sweetness, not caramelization.
- Pour in the stock and bring the mixture to a gentle simmer. Do not let it reach a rolling boil, as this can dull the bright green color of the vegetables.
- Add the peas to the simmering broth. If using fresh peas, cook for 3-5 minutes; if frozen, they only need about 2 minutes to tenderize.
- Immediately remove the pot from the heat. Stir in a handful of fresh mint leaves. The residual heat will steep the mint flavor without making it bitter.
- Using an immersion blender, puree the soup until it is completely smooth and velvety. For an extra-fine texture, you can pass the soup through a fine-mesh sieve.
- Stir in the cream and a squeeze of fresh lemon juice to brighten the flavors. Season with salt and white pepper to taste.
- Serve warm or chilled, garnished with a swirl of cream and fresh chives.
How to make dirty spaghetti?
Why we love this
Don’t let the name fool you—dirty spaghetti is the ultimate ‘umami bomb’ that has taken the internet by storm. This dish is all about a deep, savory, slightly spicy meat sauce that clings to every strand of pasta, creating a rustic and incredibly satisfying meal. The ‘dirty’ refers to the way the finely minced meat and spices coat the noodles, giving them a dark, rich appearance. It’s a sensory experience of garlic, browned meat, and herbs that fills the kitchen with a heady, irresistible scent, making everyone hover around the stove before it’s even done.
Ingredients
- 1 lb spaghetti noodles
- 1 lb ground beef or pork (or a mix)
- 1 small onion, finely minced
- 4 cloves garlic, minced
- 2 tbsp tomato paste
- 1 tsp red pepper flakes
- 1/2 cup beef broth
- 1/2 cup grated Parmesan cheese
- Fresh parsley
How to make it
- Bring a large pot of heavily salted water to a boil. Cook the spaghetti until it is just ‘al dente’—about 1-2 minutes less than the package directions. It will finish cooking in the sauce.
- While the pasta cooks, brown the ground meat in a large skillet over medium-high heat. Use a spatula to break it into very fine, sand-like crumbles.
- Add the minced onions and cook until softened. Stir in the garlic, tomato paste, and red pepper flakes. Sauté for 2 minutes until the tomato paste turns a deep brick red and smells toasted.
- Deglaze the pan with the beef broth, scraping up all the brown bits (the fond) from the bottom of the pan—this is where the ‘dirty’ flavor lives.
- Reserve 1 cup of starchy pasta water before draining the noodles.
- Toss the pasta into the skillet with the meat mixture. Add half of the pasta water and the Parmesan cheese. Toss vigorously over medium heat. The starch and cheese will emulsify into a glossy sauce that coats the noodles perfectly.
- Adjust the consistency with more pasta water if needed. Finish with a generous handful of chopped parsley and extra cheese.
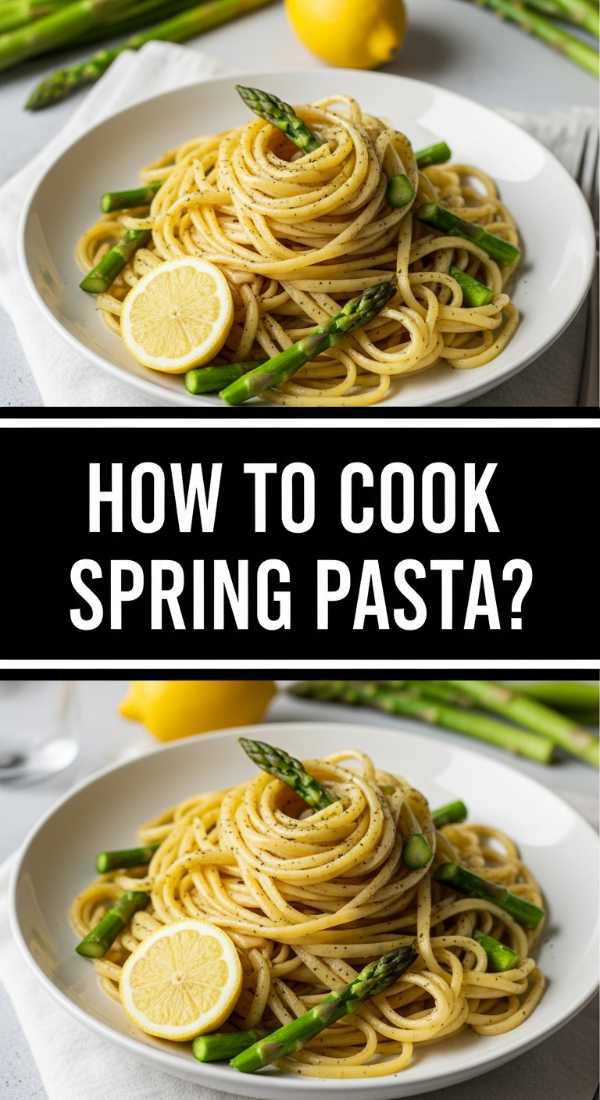
How to cook spring pasta?

Why we love this
Spring pasta is like a garden on a plate, swapping heavy creams for olive oil, garlic, and the bright acidity of lemon. We love the way the vibrant green of snap peas and asparagus looks against the pale gold of the noodles. It’s a light, refreshing meal that celebrates the ‘al dente’ snap of seasonal vegetables. The aroma of garlic sautéing in high-quality olive oil combined with fresh basil is enough to make anyone’s mouth water. It’s the perfect addition to a food board because it’s equally delicious at room temperature as it is hot.
Ingredients
- 12 oz linguine or fettuccine
- 1/2 lb asparagus, cut into 1-inch pieces
- 1 cup snap peas
- 3 tbsp extra virgin olive oil
- 3 cloves garlic, thinly sliced
- Zest and juice of 1 lemon
- 1/4 cup pine nuts, toasted
- Fresh basil leaves
How to make it
- Boil your pasta in salted water. During the last 2 minutes of the pasta’s cooking time, drop the asparagus and snap peas directly into the boiling pasta water. This blanches the vegetables to a perfect tender-crisp texture while saving a step.
- Drain the pasta and vegetables together, reserving a small amount of the cooking water.
- In the same pot (now empty), heat the olive oil over low-medium heat. Add the sliced garlic and cook slowly. You want the garlic to become golden and fragrant without turning brown or bitter.
- Return the pasta and vegetables to the pot. Add the lemon zest, lemon juice, and a splash of the reserved pasta water.
- Toss everything together with tongs for about a minute to allow the lemon and garlic oil to coat every strand.
- Stir in the toasted pine nuts for a buttery crunch and tear the fresh basil leaves over the top.
- Serve with a final drizzle of premium olive oil and a sprinkle of sea salt.
How to whip summer desserts?

Why we love this
When the temperature rises, no one wants to turn on the oven, which is why whipped summer desserts are the ultimate viral hack. These treats are light, airy, and ice-cold, offering a refreshing finish to a summer evening. Whether it’s a berry-infused whipped cream or a fluffy no-bake cheesecake mousse, the texture is like eating a sweet, flavored cloud. The scent of macerated strawberries and vanilla bean is quintessential summer bliss. Arranged on a board with fresh fruit and graham crackers for dipping, it becomes an interactive and fun dessert experience.
Ingredients
- 2 cups heavy whipping cream (very cold)
- 8 oz cream cheese, softened
- 1/2 cup powdered sugar
- 1 tsp vanilla bean paste
- 2 cups fresh berries (raspberries or blackberries)
- Graham crackers or vanilla wafers for serving
How to make it
- Place your mixing bowl and whisk attachment in the freezer for 10 minutes before starting. Cold tools are essential for achieving maximum volume in your whipped cream.
- In a separate bowl, beat the softened cream cheese with the powdered sugar and vanilla bean paste until completely smooth and free of lumps.
- In the chilled bowl, whip the heavy cream on medium-high speed until stiff peaks form. Be careful not to over-whip, or it will turn into butter.
- Gently fold one-third of the whipped cream into the cream cheese mixture to lighten it up. This is a sacrificial fold to adjust the density.
- Carefully fold in the remaining whipped cream using a silicone spatula. Use a ‘figure-eight’ motion to keep as much air in the mixture as possible.
- In a small bowl, lightly mash half of the berries with a fork to release their juices. Fold these mashed berries into the cream to create beautiful pink streaks.
- Transfer the mixture to a serving bowl, top with the remaining whole berries, and chill for at least 2 hours before serving as a dip or a mousse.
How to grill healthy meals?
[IMAGE_10]
Why we love this
Grilling is the soul of summer cooking, offering a smoky depth of flavor that you just can’t replicate indoors. We love healthy grilled meals because they focus on the natural sweetness of charred vegetables and the succulent tenderness of lean proteins. The visual of those perfect grill marks and the sizzle of the grates creates an atmosphere of outdoor celebration. The aroma of wood smoke and caramelized peppers is intoxicating, and the result is a plate full of vibrant, nutrient-dense food that feels like a treat rather than a diet. It’s the ultimate ‘low-effort, high-reward’ cooking style.
Ingredients
- 2 lbs lean protein (chicken skewers, shrimp, or tofu)
- 2 bell peppers, cut into chunks
- 1 red onion, cut into wedges
- 1 zucchini, sliced into thick rounds
- Marinade: olive oil, balsamic vinegar, dried oregano, garlic powder
- Wooden or metal skewers
How to make it
- Whisk together your marinade ingredients and toss your protein and vegetables in it. Let them marinate for at least 30 minutes in the refrigerator to allow the flavors to penetrate.
- If using wooden skewers, soak them in water for at least 30 minutes to prevent them from burning on the grill.
- Preheat your grill to medium-high heat (about 400°F). Clean the grates thoroughly and oil them lightly using a paper towel dipped in oil held by tongs.
- Thread the protein and vegetables onto the skewers, alternating colors for a beautiful presentation. Leave a tiny bit of space between items so the heat can circulate and cook everything evenly.
- Place the skewers on the grill. For chicken, grill for 5-7 minutes per side; for shrimp or tofu, 2-3 minutes per side is usually sufficient.
- Look for the visual cue of ‘easy release’—if the food sticks to the grate, it’s not ready to be flipped. Once a crust has formed, it will lift away easily.
- Remove from the grill and let the meat rest for 5 minutes to allow the juices to redistribute before serving on your viral food board.
Conclusion
Creating a viral food board isn’t just about following a trend; it’s about reclaiming the joy of the kitchen and sharing it with the people you love. Whether you’re simmering a bright spring soup or whipping up a fluffy summer dessert, these recipes are designed to be the building blocks of a memorable gathering. Remember, the best boards are those that reflect your own taste and the season’s best offerings. So, grab a platter, get creative, and let these flavors take over your feed—and your heart!