

We’ve all been there—scrolling through our feeds and stopping dead in our tracks because of a food board so beautiful it looks like it belongs in a museum. There is a specific kind of magic in a shared meal that is spread out across a wooden surface, inviting everyone to dig in, laugh, and connect. But let’s be honest, most of us don’t have three hours to spend meticulously placing individual blueberries with tweezers or carving radishes into roses.
That is exactly why I created this ‘Viral Simple Food Board.’ It’s about capturing that high-end, aesthetic vibe without the high-stress preparation. This board is a celebration of textures, temperatures, and bold flavors that come together in just minutes. It’s the kind of hosting hack that makes you look like a culinary genius while actually giving you the time to sit down and enjoy a glass of wine with your guests.
Whether you are hosting a backyard summer bash or a cozy Sunday brunch, these components are designed to be the stars of the show. We are talking about smoky proteins, creamy dips, and vibrant salads that pop against the wood. Let’s dive into the ten essential recipes that will make your board the talk of the town and the star of everyone’s Instagram story!
How to grill tender chicken

Why we love this
There is something inherently primal and satisfying about the scent of marinated chicken hitting a scorching hot grill, sending up plumes of aromatic smoke that signal a feast is coming. We love this because of the contrast between the slightly charred, crispy exterior and the incredibly tender, moisture-locked meat that practically melts away with every bite. It’s the ultimate protein for a viral board, offering a golden-brown aesthetic that looks as good as it tastes while providing a savory anchor for your other sides. Imagine that first slice—steam rising, juices running clear—paired with a cold drink on a sun-drenched patio.
Ingredients
- 2 lbs boneless, skinless chicken breasts
- 1/4 cup extra virgin olive oil
- 3 cloves garlic, minced
- 1 lemon, juiced
- 1 tsp dried oregano
- Salt and cracked black pepper to taste
How to make it
- Start by patting your chicken breasts completely dry with paper towels; removing surface moisture is the secret to achieving those professional-looking grill marks and preventing the meat from steaming.
- In a large bowl, whisk together the olive oil, minced garlic, lemon juice, oregano, salt, and pepper to create a bright, acidic marinade that will break down the fibers and infuse flavor.
- Submerge the chicken in the marinade, ensuring every inch is coated, and let it sit in the refrigerator for at least 30 minutes, though two hours is ideal for maximum tenderness.
- Preheat your grill to a medium-high heat (about 400°F) and use a pair of tongs to rub the grates with an oil-soaked paper towel to create a non-stick surface.
- Place the chicken on the grill and let it sear undisturbed for 6 minutes to develop a crust; if the meat resists when you try to lift it, give it another minute until it releases naturally.
- Flip the chicken and cook for another 5-7 minutes, or until an instant-read thermometer inserted into the thickest part reads exactly 165°F.
- Remove the chicken from the heat and transfer it to a clean plate, tenting it loosely with foil for 5 minutes to let the juices redistribute before slicing into thin, board-ready strips.
How to make rotel dip

Why we love this
Rotel dip is the undisputed king of comfort appetizers, offering a velvety, molten texture that coats a tortilla chip in pure, cheesy bliss. We love it because it hits every sensory note: the heat from the green chilies, the richness of the melted cheese, and the savory heartiness of the browned meat. It’s a nostalgic crowd-pleaser that brings a bright orange pop of color to your board, drawing everyone in with its warm, spicy aroma. There’s a certain communal joy in dipping into a bowl of this liquid gold, watching the steam rise as the cheese stretches and flows.
Ingredients
- 1 lb Velveeta cheese, cubed
- 1 can (10 oz) Ro-Tel Diced Tomatoes and Green Chilies
- 1 lb ground beef or spicy sausage
- 1/2 cup whole milk (optional for consistency)
- Fresh cilantro for garnish
How to make it
- Place a large skillet over medium-high heat and add your ground beef or sausage, breaking it up with a wooden spoon into small, uniform crumbles.
- Cook the meat until it is deeply browned and no pink remains, then carefully drain off the excess fat to ensure your dip isn’t oily or heavy.
- Turn your heat down to low and add the cubed Velveeta cheese to the skillet; it’s important to keep the heat low so the cheese melts slowly and smoothly without scorching or becoming grainy.
- Pour in the entire can of Ro-Tel (do not drain the liquid, as the juices provide essential flavor and acidity) and stir constantly as the cheese begins to liquefy.
- If the dip feels too thick, splash in a little milk one tablespoon at a time until you reach a silky, dippable consistency that holds its heat.
- Once the mixture is bubbly and uniform, transfer it immediately to a warm serving bowl and top with fresh cilantro for a burst of color.
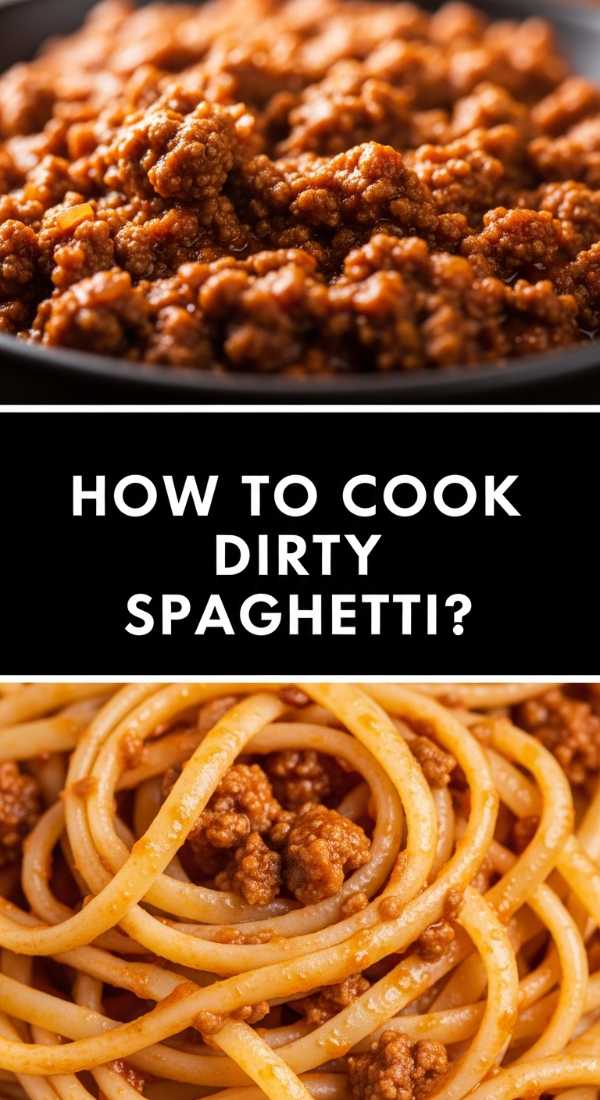
How to cook dirty spaghetti
Why we love this
Dirty spaghetti is the soul-warming cousin of the classic Italian dish, boasting a deep, umami-rich sauce that looks rustic and incredibly inviting on a wooden board. We love the way the long strands of pasta become stained with the savory essence of browned meats and aromatic vegetables, creating a complex flavor profile that feels far more expensive than it actually is. The texture is key here—the pasta is slippery and coated in a thick, concentrated sauce that clings to every strand rather than pooling at the bottom. It smells like a slow-cooked Sunday dinner, with hints of garlic, onion, and herbs wafting through the air.
Ingredients
- 1 lb spaghetti noodles
- 1 lb ground pork or beef
- 1 onion, finely diced
- 1 green bell pepper, diced
- 2 tbsp tomato paste
- 1 cup beef broth
- 2 tsp Cajun seasoning
How to make it
- Bring a large pot of heavily salted water to a rolling boil and cook the spaghetti noodles until they are just shy of al dente; they will finish cooking in the sauce later.
- While the pasta boils, brown your ground meat in a large pan over medium-high heat until it is crispy and dark, which builds the ‘dirty’ color and deep flavor of the dish.
- Add the diced onion and bell pepper to the meat and sauté for 5 minutes until the vegetables are translucent and the edges are starting to caramelize.
- Stir in the tomato paste and Cajun seasoning, cooking for 2 minutes to ‘toast’ the paste and remove the raw metallic taste, turning it a deep brick red.
- Deglaze the pan with beef broth, scraping up all the brown bits (the fond) from the bottom of the pan to incorporate all that concentrated flavor into the liquid.
- Drain the pasta, reserving half a cup of starchy pasta water, and toss the noodles directly into the meat sauce.
- Simmer for 3 minutes, adding the reserved pasta water as needed to create a glossy, thick sauce that perfectly coats the spaghetti before piling it onto your board.
How to make summer salad

Why we love this
A true summer salad is a masterclass in freshness, acting as the vibrant, cooling counterbalance to the heavier grilled items on your board. We love the explosive crunch of garden-fresh cucumbers paired with the juicy burst of vine-ripened tomatoes and the sharp, salty kick of feta cheese. The colors are a visual feast—bright greens, deep reds, and snowy whites—drizzled in a zesty vinaigrette that makes the whole dish shimmer under the sun. It feels light and rejuvenating, with the scent of fresh basil and lemon zest cutting through the air like a cool breeze on a humid afternoon.
Ingredients
- 4 cups mixed baby greens
- 1 cup cherry tomatoes, halved
- 1 English cucumber, sliced into half-moons
- 1/2 red onion, thinly shaved
- 1/4 cup crumbled feta cheese
- Dressing: 3 tbsp olive oil, 1 tbsp red wine vinegar, 1 tsp honey, salt/pepper
How to make it
- Begin by preparing your vegetables; slicing the red onion as thinly as possible (using a mandoline if you have one) ensures you get the flavor without the overpowering bite.
- In a small jar or bowl, whisk together the olive oil, red wine vinegar, honey, salt, and pepper until the dressing is fully emulsified and slightly thickened.
- Place the mixed greens in a large chilled bowl and lightly toss them with half of the dressing to ensure every leaf is seasoned without being weighed down or wilted.
- Layer the halved cherry tomatoes and cucumber slices over the greens; keeping them on top prevents them from sinking to the bottom and keeps the presentation beautiful.
- Scatter the shaved red onions and crumbled feta over the top, then drizzle the remaining dressing in a zig-zag pattern across the entire salad.
- Add a final crack of fresh black pepper and serve immediately to maintain the maximum ‘snap’ and crispness of the fresh produce.
How to make hummingbird food

Why we love this
While not for the human guests, hummingbird food is the secret ingredient to a viral backyard lifestyle post, bringing nature’s most dazzling aerialists right to your patio. We love the simplicity of this clear, sweet nectar that mimics the natural sucrose found in flowers, providing essential energy for these tiny creatures. The sight of a shimmering hummingbird hovering near your board adds a whimsical, magical element to your outdoor gathering that no store-bought decoration could ever match. It’s about creating an ecosystem of beauty and life that surrounds your meal, making the whole experience feel like an enchanted garden party.
Ingredients
- 1 cup white granulated sugar
- 4 cups filtered water
- Note: Never use honey, brown sugar, or red dye as they can be harmful to birds
How to make it
- Mix the sugar and water in a medium saucepan, using the precise 1:4 ratio which is the safest and most effective concentration for hummingbird health.
- Place the pan over medium heat and stir constantly until the sugar is completely dissolved; you don’t need a rolling boil, just enough heat to ensure the solution is perfectly clear.
- Once dissolved, bring the mixture to a brief boil for about 2 minutes to kill any bacteria or fungi that might be present in the water or sugar.
- Remove the pan from the heat and allow the nectar to cool completely to room temperature; never put hot liquid into a feeder as it can warp the plastic and harm the birds.
- Fill your cleaned hummingbird feeder with the solution and store any leftovers in the refrigerator for up to one week.
- Hang the feeder near your outdoor dining area in a shaded spot to prevent the sugar from fermenting too quickly in the sun.
How to use sourdough discard

Why we love this
Sourdough discard is the hidden gem of the baker’s kitchen, offering a complex, tangy depth of flavor that you simply can’t get from commercial yeast. We love it because it transforms what would be waste into a crispy, golden-brown flatbread or cracker that is the perfect vessel for dips on your board. The texture is uniquely addictive—airy and bubbly in some spots, yet shatteringly crisp in others—with a fermented aroma that smells like a professional boulangerie. It adds an artisanal, ‘from-scratch’ feel to your spread that will have guests asking for your starter recipe within minutes.
Ingredients
- 1 cup sourdough discard (unfed)
- 2 tbsp melted butter or olive oil
- 1/2 tsp sea salt
- 1 tbsp fresh rosemary or thyme, chopped
- Everything bagel seasoning (optional)
How to make it
- Preheat your oven to 325°F and line a large baking sheet with parchment paper to ensure your delicate crackers don’t stick to the pan.
- In a medium bowl, gently stir together the sourdough discard and the melted butter or oil until the mixture is smooth and has a consistency similar to pancake batter.
- Pour the mixture onto the parchment paper and use an offset spatula to spread it into a very thin, even layer; the thinner you spread it, the crispier the final product will be.
- Sprinkle the sea salt, chopped herbs, or seasoning evenly over the surface, pressing them lightly into the batter so they adhere during the bake.
- Bake for 10 minutes, then remove from the oven and use a pizza cutter to score the batter into squares or diamonds while it is still soft.
- Return to the oven for another 20-30 minutes, or until the crackers are a deep golden brown and feel firm to the touch with no soft spots in the middle.
- Let them cool completely on the pan to reach maximum crunchiness before snapping them along the score lines and piling them onto your board.
How to bake strawberry pie

Why we love this
A homemade strawberry pie is the ultimate visual showstopper for any food board, featuring a mountain of ruby-red berries encased in a buttery, flaky crust. We love the way the heat of the oven transforms fresh strawberries into a thick, jammy filling that oozes slightly when sliced, releasing an intoxicating aroma of sweet summer fruit and baked pastry. It’s the perfect balance of tart and sweet, providing a dessert element to your board that feels rustic and sophisticated all at once. There’s something deeply nostalgic about a fruit pie, reminding everyone of summer picnics and simpler times spent outdoors.
Ingredients
- 2 pre-made or homemade pie crusts
- 5 cups fresh strawberries, hulled and sliced
- 3/4 cup granulated sugar
- 1/4 cup cornstarch
- 1 tbsp lemon juice
- 1 egg (for egg wash)
How to make it
- Preheat your oven to 400°F and place a baking sheet on the bottom rack to catch any juices that might bubble over during the process.
- In a large bowl, toss the sliced strawberries with the sugar, cornstarch, and lemon juice; let them macerate for 15 minutes to draw out the juices and allow the starch to begin thickening.
- Roll out your bottom crust and fit it into a 9-inch pie plate, trimming the edges so there is a 1-inch overhang.
- Pour the strawberry mixture into the crust, ensuring you include all the liquid from the bottom of the bowl as that will become your delicious sauce.
- Top with the second crust—either whole with steam vents or cut into strips for a lattice design—and crimp the edges tightly to seal the berries inside.
- Brush the top of the crust with a beaten egg wash and sprinkle with a little extra sugar for a professional, sparkling golden finish.
- Bake for 45-50 minutes until the crust is a deep golden brown and you can see the strawberry filling bubbling thick and slow through the vents.
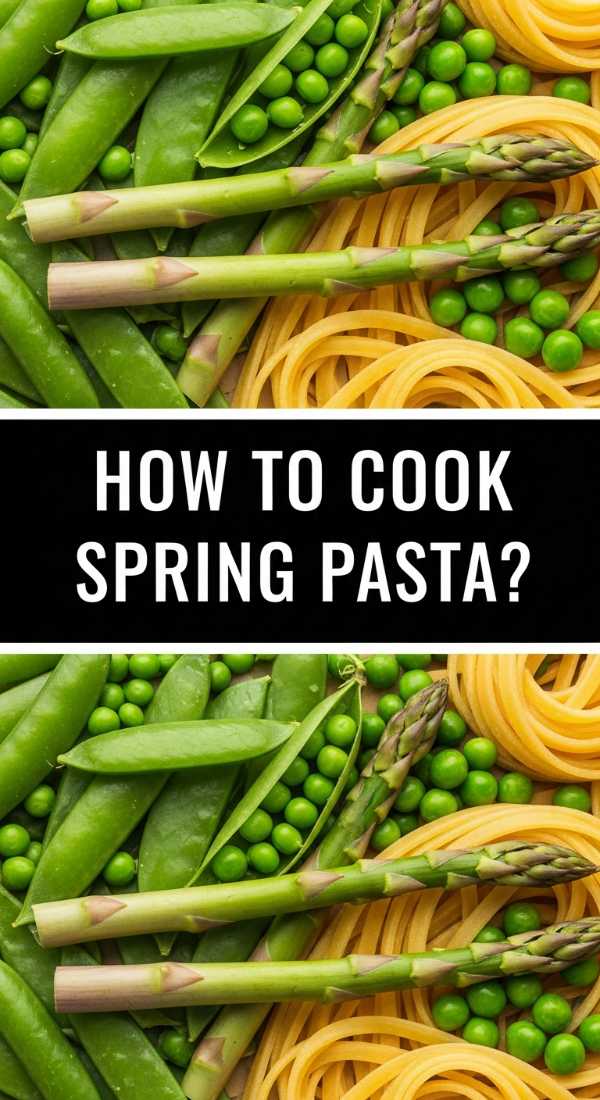
How to cook spring pasta
Why we love this
Spring pasta is like a garden on a plate, featuring light, herbaceous flavors that celebrate the arrival of warmer weather. We love this dish for its elegance and simplicity—it relies on a silk-smooth butter and lemon sauce rather than a heavy cream, allowing the snap of fresh peas and the tenderness of asparagus to shine. The pasta should be perfectly al dente, offering a satisfying bite that contrasts with the softness of the vegetables. With every forkful, you get a bright hit of citrus and the cooling finish of fresh mint or parsley, making it an incredibly refreshing addition to a viral board.
Ingredients
- 1 lb linguine or fettuccine
- 1 cup frozen or fresh peas
- 1 bunch asparagus, cut into 1-inch pieces
- 4 tbsp unsalted butter
- 1 lemon, zested and juiced
- 1/2 cup grated Parmesan cheese
- Fresh mint leaves for garnish
How to make it
- Boil your pasta in a large pot of salted water according to the package directions, but add the cut asparagus and peas to the boiling water during the last 3 minutes of cook time.
- Before draining, reserve 1 full cup of the cloudy pasta water; this starch-heavy liquid is the secret to creating a restaurant-quality sauce that sticks to the noodles.
- In a large wide skillet over medium heat, melt the butter until it begins to foam and turn a very light nut-brown color.
- Add the lemon zest and juice to the butter, then immediately toss in the drained pasta and vegetables.
- Add the Parmesan cheese and half of the reserved pasta water, tossing vigorously with tongs to create a creamy, emulsified sauce that coats every strand.
- If the pasta looks dry, add more pasta water a little at a time until the sauce is glossy and the vegetables are evenly distributed.
- Finish with torn mint leaves and a final dusting of cheese before arranging it in elegant swirls on your board.
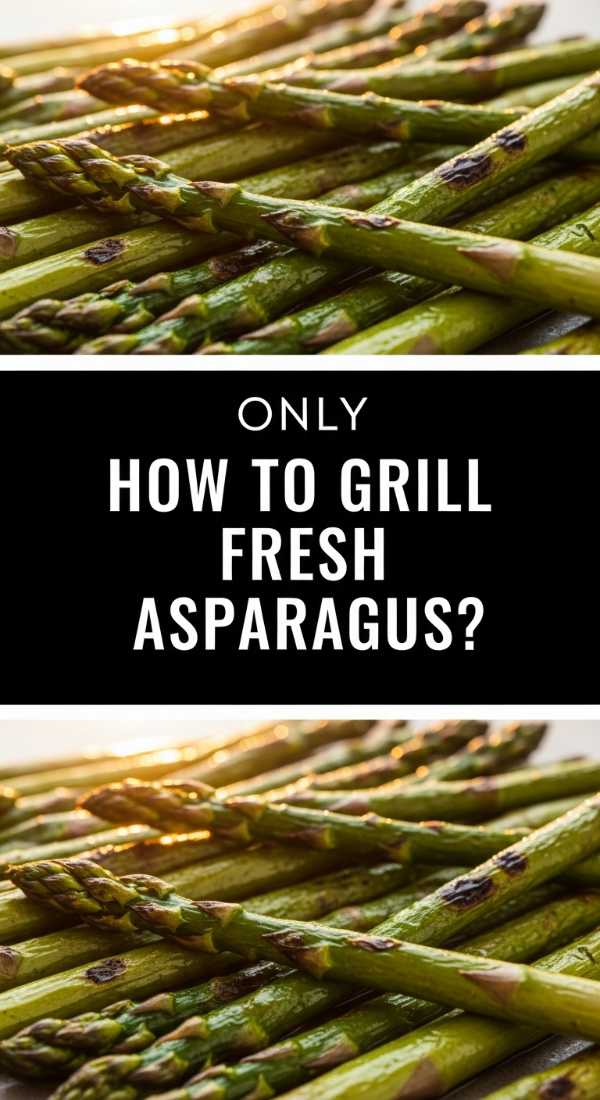
How to grill fresh asparagus
Why we love this
Grilling asparagus transforms it from a simple vegetable into a smoky, charred delicacy that is as addictive as french fries. We love the way the intense heat of the grill caramelizes the tips until they are crispy and almost nutty, while keeping the stalks tender yet firm. It adds a sophisticated, architectural element to your board—long, vibrant green spears lined up like soldiers, glistening with oil and coarse salt. The aroma of charred greens is the quintessential scent of a cookout, and the flavor is elevated with just a simple squeeze of lemon and a grating of zest.
Ingredients
- 1 lb fresh asparagus, woody ends trimmed
- 2 tbsp olive oil
- 1 tsp garlic powder
- Kosher salt and black pepper
- 1 lemon, cut into wedges
How to make it
- Prepare your asparagus by snapping off the woody bottom inch of each stalk; they will naturally break at the point where the stem becomes tender.
- Place the spears on a large baking sheet and drizzle with olive oil, tossing them by hand to ensure every inch is thinly coated to prevent sticking to the grill.
- Sprinkle with salt, pepper, and garlic powder, rolling the spears around again to distribute the seasoning evenly.
- Preheat your grill to high heat (around 450°F) and lay the asparagus spears across the grates perpendicular to the bars so they don’t fall through the gaps.
- Grill for 3-5 minutes, using tongs to roll them occasionally, until you see clear char marks and the spears have turned a bright, vibrant green.
- Remove them from the heat immediately—they will continue to cook for a minute while they rest, and you want to avoid them becoming mushy.
- Squeeze fresh lemon juice over the top while they are still steaming hot to let the flavor soak into the charred tips.
How to make pina coladas

Why we love this
The Pina Colada is the ultimate vacation in a glass, a frothy, tropical indulgence that instantly sets a relaxed, celebratory mood for your board. We love the creamy, velvet-smooth texture of coconut milk blended with the bright, acidic sweetness of pineapple and a kick of rum. It’s a sensory escape—the smell of coconut transports you to a white-sand beach, while the icy coldness provides the perfect relief on a warm afternoon. Served in tall glasses with a garnish of fresh fruit, these drinks act as the ‘crown jewels’ of your presentation, adding height and a sense of luxury to the entire spread.
Ingredients
- 2 cups frozen pineapple chunks
- 1/2 cup coconut cream (the thick stuff from the top of the can)
- 1/2 cup pineapple juice
- 4 oz white rum
- 2 cups ice
- Fresh pineapple wedges and maraschino cherries for garnish
How to make it
- Add the frozen pineapple chunks to a high-speed blender; using frozen fruit instead of just ice ensures a thicker, more intense fruit flavor that won’t get watered down.
- Pour in the coconut cream, pineapple juice, and white rum; if you want a non-alcoholic version, simply replace the rum with a splash of coconut water.
- Add the ice cubes to the blender last, which helps push the other ingredients down into the blades for a more even mix.
- Start the blender on a low speed to break up the large frozen chunks, then gradually increase to high and blend for a full 45-60 seconds.
- The goal is a ‘soft-serve’ consistency—if the mixture is too thick to pour, add a tablespoon of pineapple juice and pulse until it moves freely.
- Pour into chilled hurricane glasses and garnish immediately with a pineapple wedge and a cherry to capture that classic viral tropical aesthetic.
The Art of the Board
Creating a viral-worthy food board isn’t about perfection; it’s about the abundance of choices and the joy of a shared experience. By combining these savory, sweet, and refreshing elements, you’ve built more than just a meal—you’ve built a memory. Now, grab your camera, snap that overhead shot, and then put the phone away to enjoy the feast you’ve created!