

There is something inherently magical about a table filled with small, colorful bites that invite everyone to lean in, share stories, and graze at their own pace. We’ve moved past the era of stiff, formal dinner parties and entered the age of the ‘simple food board’—a lifestyle trend that prioritizes connection over perfection. It’s about the organized chaos of vibrant colors, the clinking of glasses, and the shared joy of discovering a new flavor combination in a relaxed, sun-drenched setting.
If you have scrolled through your feed lately, you’ve likely seen these masterpieces: sprawling displays of pastas, dips, and seasonal fruits that look more like art than a meal. But the secret is that these boards aren’t just for the ‘aesthetic.’ They are a way to celebrate the season’s bounty while keeping the host out of the kitchen and in the conversation. It’s time to trade in your individual plates for a giant wooden board and let the food tell the story of your gathering.
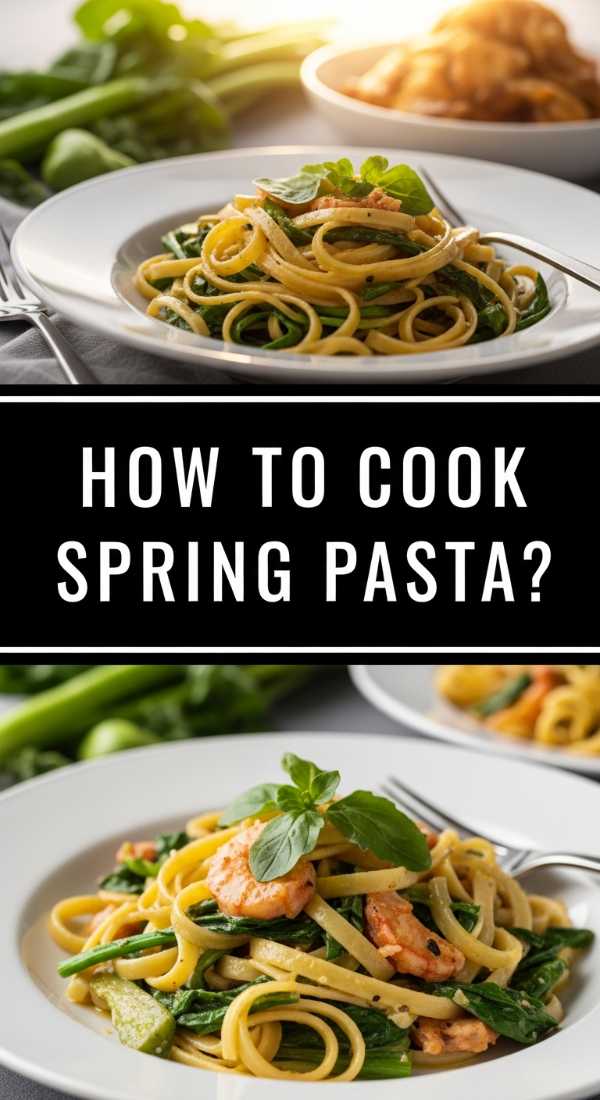
How to make spring pasta?
Why we love this
This dish is like a garden on a plate, capturing the literal essence of renewal with every forkful. The bright, zesty aroma of freshly grated lemon zest mingles with the earthy, sweet scent of tender snap peas and baby asparagus. When you take a bite, the silky emulsion of olive oil and starchy pasta water coats your tongue, punctuated by the salty pop of Pecorino Romano. It feels light enough for a breezy afternoon but satisfying enough to be the centerpiece of a weekend lunch with friends.
Ingredients
- 1 lb Bucatini or Linguine
- 1 cup frozen or fresh sweet peas
- 1 bunch thin asparagus, cut into 1-inch pieces
- 3 cloves garlic, thinly sliced
- Zest and juice of 2 organic lemons
- 1/2 cup extra virgin olive oil
- 1/2 cup grated Pecorino Romano
- Fresh mint and parsley, torn
- Salt and cracked black pepper
How to make it
- Bring a large pot of heavily salted water to a rolling boil. The water should taste like the sea to properly season the pasta from the inside out.
- Add the pasta and cook for 2 minutes less than the package directions for true al dente texture. In the final 2 minutes of cooking, drop the asparagus and peas directly into the pasta water to blanch them.
- Before draining, carefully scoop out 2 cups of the cloudy pasta water; this liquid gold is the secret to a glossy sauce.
- In a large skillet over medium-low heat, add the olive oil and sliced garlic. Sauté gently until the garlic is fragrant and translucent, but not browned, which takes about 3 minutes.
- Add the drained pasta and vegetables to the skillet. Pour in 1 cup of pasta water and the lemon juice. Toss vigorously with tongs while adding the Pecorino Romano in small handfuls to prevent clumping.
- Continue tossing for 2-3 minutes until the liquid reduces and forms a creamy, emulsified sauce that clings to every strand. If it looks dry, add more pasta water.
- Finish with lemon zest, fresh herbs, and a final drizzle of oil before serving warm on your board.
How to make rotel dip?

Why we love this
There is a profound, nostalgic comfort in a bowl of warm, gooey Rotel dip that instantly makes any gathering feel like home. The sight of that smooth, molten golden cheese studded with vibrant bits of green chilies and tomatoes is enough to draw a crowd in seconds. As the steam rises, you catch the smoky, savory scent of seasoned beef and the slight tang of the tomatoes. It’s creamy, slightly spicy, and has that perfect ‘pull’ when you dip a crunchy tortilla chip into its heart.
Ingredients
- 1 lb Velveeta or high-quality melting cheese, cubed
- 1 can (10 oz) Ro-Tel Diced Tomatoes and Green Chilies
- 1 lb lean ground beef or bulk sausage
- 1 tbsp taco seasoning
- 1/4 cup whole milk (optional, for creaminess)
- Fresh cilantro for garnish
How to make it
- In a large skillet over medium-high heat, brown the ground beef or sausage, breaking it into very small crumbles with a wooden spoon. Drain the excess fat thoroughly to ensure your dip isn’t greasy.
- Stir in the taco seasoning and a splash of water, cooking for another 2 minutes until the meat is fully coated and fragrant.
- In a slow cooker or a heavy-bottomed pot over low heat, combine the cubed cheese and the undrained can of Ro-Tel. The juices from the can provide the necessary acidity and flavor.
- Stir frequently as the cheese melts to prevent scorching on the bottom. Keep the heat low and slow; high heat can cause the cheese to break and become grainy.
- Once the cheese is completely smooth, fold in the cooked meat. If the dip is too thick, whisk in a tablespoon of milk at a time until you reach your desired velvety consistency.
- Transfer to a serving bowl placed in the center of your board and garnish with fresh cilantro. Keep it warm for serving.
How to bake strawberry pie?

Why we love this
A fresh strawberry pie is the ultimate herald of warmer days, bursting with the concentrated sweetness of sun-ripened fruit. The contrast between the flaky, buttery, salt-kissed crust and the jammy, ruby-red interior creates a sensory experience that is both sophisticated and deeply rustic. When sliced, the berries glisten under a light glaze, releasing an aroma that is purely floral and sweet. It’s a dessert that feels celebratory, especially when served with a dollop of cold, unsweetened whipped cream to balance the intensity.
Ingredients
- 2 disks of chilled pie dough (homemade or high-quality store-bought)
- 6 cups fresh strawberries, hulled and halved
- 3/4 cup granulated sugar
- 1/4 cup cornstarch
- 1 tbsp lemon juice
- 1/2 tsp vanilla extract
- 1 egg (for egg wash)
- Coarse sugar for sprinkling
How to make it
- Preheat your oven to 400°F (200°C). Roll out one disk of dough on a floured surface and fit it into a 9-inch pie plate. Chill in the fridge while you prepare the filling.
- In a large bowl, gently toss the strawberries with the sugar, cornstarch, lemon juice, and vanilla. Let them sit for about 10 minutes; the sugar will draw out the juices, and the cornstarch will begin to thicken them.
- Pour the fruit mixture into the chilled bottom crust, piling them high in the center as they will shrink during baking.
- Roll out the second disk of dough. You can either place it whole over the top (cutting vents for steam) or cut it into strips to create a beautiful lattice weave.
- Crimp the edges of the top and bottom crusts together tightly to seal in the juices. Brush the top dough with a beaten egg wash and sprinkle generously with coarse sugar for crunch.
- Bake at 400°F for 20 minutes, then reduce the heat to 375°F and bake for another 35-45 minutes. You are looking for the crust to be deep golden brown and the fruit juices to be bubbling thickly through the vents.
- Crucially, let the pie cool completely for at least 4 hours before slicing. This allows the cornstarch to set the juices so the pie doesn’t run.
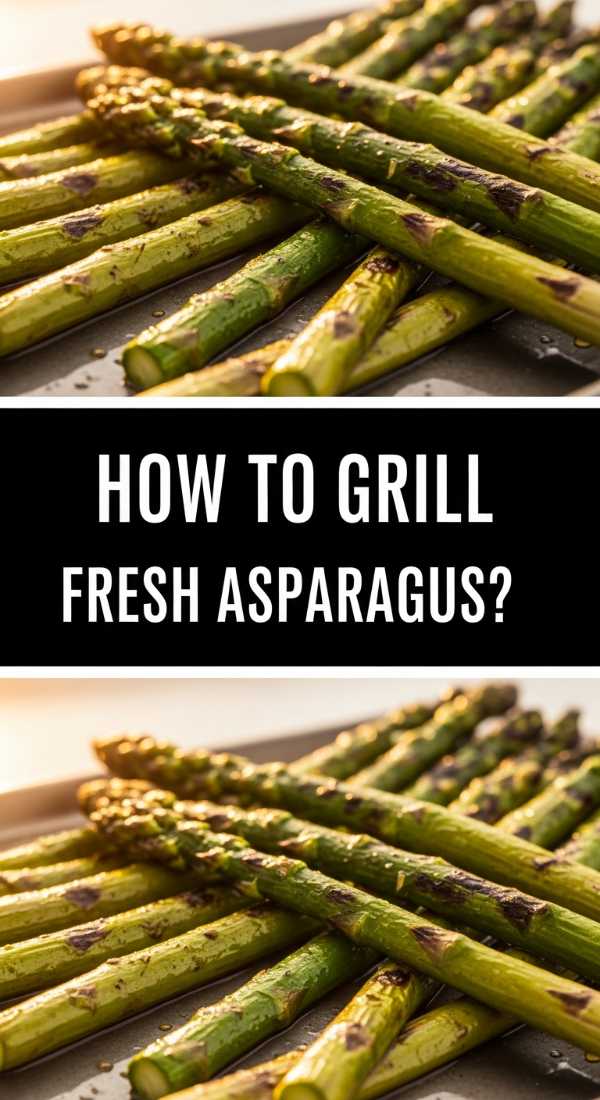
How to grill fresh asparagus?
Why we love this
Grilling transforms the humble asparagus from a simple side dish into a smoky, charred delicacy with a satisfying snap. The high heat of the grates caramelizes the natural sugars in the stalks, creating a complex sweetness that pairs perfectly with a hint of char. The tips become wonderfully crispy, almost like savory blossoms, while the centers remain tender and juicy. Finished with a squeeze of lemon and a shower of flaky sea salt, it’s a vibrant, textural addition that brings an outdoor, fire-kissed energy to your food board.
Ingredients
- 1 lb fresh asparagus, woody ends trimmed
- 2 tbsp extra virgin olive oil
- 1/2 tsp garlic powder
- 1/2 tsp kosher salt
- 1/4 tsp black pepper
- Lemon wedges for serving
How to make it
- Preheat your grill to medium-high heat (about 400°F). Ensure the grates are clean and lightly oiled to prevent sticking.
- Place the trimmed asparagus on a large baking sheet. Drizzle with olive oil and sprinkle with garlic powder, salt, and pepper. Toss with your hands to ensure every inch of every stalk is thinly coated in oil.
- Lay the asparagus spears across the grill grates perpendicularly so they don’t fall through the gaps.
- Grill undisturbed for 3-4 minutes. You are looking for distinct char marks to form on the underside.
- Use tongs to roll the spears over and grill for another 2-3 minutes. The asparagus should be bright green and just tender when pierced with a fork, but still have a firm ‘bite.’
- Remove from the grill immediately to prevent overcooking, as they will continue to soften slightly from residual heat.
- Arrange them in a neat row on your board and squeeze fresh lemon juice over them just before the guests arrive.
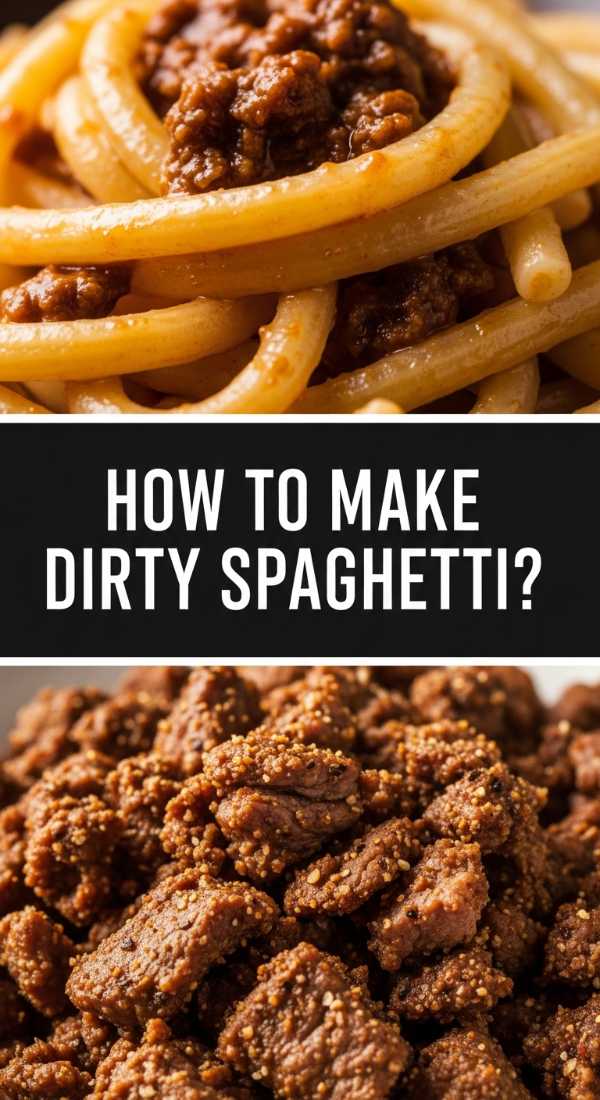
How to make dirty spaghetti?
Why we love this
Dirty spaghetti is the ultimate ‘umami bomb,’ offering a deep, savory richness that feels sophisticated yet incredibly grounded. The sauce is thick and clingy, coating each strand of pasta in a dark, flavorful embrace of browned meats, aromatic holy trinity (onions, peppers, celery), and a hint of liver or bouillon for that signature ‘dirty’ depth. The aroma is intoxicating—heady with black pepper and slow-cooked spices. It’s the kind of dish that feels like a warm hug, providing a hearty, soulful anchor to a diverse food board.
Ingredients
- 1 lb spaghetti
- 1/2 lb ground pork and 1/2 lb ground beef
- 1/4 lb chicken livers, finely minced (optional, for authenticity)
- 1 onion, 1 bell pepper, and 2 stalks celery, finely diced (The Holy Trinity)
- 3 cloves garlic, minced
- 2 tbsp Worcestershire sauce
- 1 tsp dried thyme and 1 tsp smoked paprika
- 1 cup beef broth
- Sliced green onions for garnish
How to make it
- Boil the spaghetti in salted water until just al dente. Drain, reserving 1 cup of pasta water, and set aside.
- In a large pot, brown the ground pork, beef, and minced livers over medium-high heat. Cook until deeply browned and slightly crispy to develop maximum flavor.
- Add the diced onion, bell pepper, and celery to the meat. Sauté for 8-10 minutes until the vegetables are soft and starting to caramelize.
- Stir in the garlic, thyme, paprika, and Worcestershire sauce, cooking for 1 minute until fragrant.
- Pour in the beef broth, scraping the bottom of the pot to release all the brown bits (fond). Lower the heat and simmer for 15 minutes until the liquid has reduced and thickened into a chunky sauce.
- Add the cooked spaghetti to the pot. Toss vigorously, adding a splash of reserved pasta water if needed to help the sauce coat the noodles.
- Taste and adjust seasoning with plenty of black pepper. Serve on the board garnished with fresh green onions for a pop of color.
How to make summer salad?

Why we love this
A true summer salad is a masterclass in balance, playing with temperatures, textures, and the line between sweet and savory. Imagine crisp, cold cucumber moons and juicy, vine-ripened tomatoes mingling with creamy chunks of feta and the surprising sweetness of fresh peaches or berries. The fragrance is dominated by fresh basil and mint, providing a cooling sensation even on the hottest days. Every bite is a refreshing explosion of hydration and brightness, acting as the perfect palate cleanser between heavier bites on your board.
Ingredients
- 4 cups mixed baby greens or arugula
- 2 large heirloom tomatoes, sliced into wedges
- 1 cucumber, thinly sliced
- 1 peach, sliced into thin wedges
- 1/2 cup crumbled goat cheese or feta
- 1/4 cup toasted sunflower seeds
- Dressing: 3 tbsp olive oil, 1 tbsp balsamic glaze, 1 tsp honey, salt, and pepper
How to make it
- Start with a base of chilled greens. If using arugula, ensure it is thoroughly dried so the dressing doesn’t slide off.
- Layer the tomatoes and cucumbers over the greens. Do not toss yet; layering keeps the ingredients from getting bruised and looks more ‘blog-worthy.’
- Gently nestle the peach slices among the vegetables. The natural juices of the peaches will eventually mingle with the dressing for extra flavor.
- In a small jar, combine the olive oil, balsamic glaze, honey, salt, and pepper. Shake vigorously until the dressing is fully emulsified and thickened.
- Just before serving, drizzle the dressing over the salad. Do not over-dress; you want the flavors of the fresh produce to shine through.
- Sprinkle the crumbled cheese and toasted seeds over the top for a final hit of creaminess and crunch.
- Serve immediately to maintain the crispness of the leaves.
How to marinate grilled chicken?

Why we love this
Perfectly marinated grilled chicken is the backbone of any great food board, offering a lean, protein-packed option that is dripping with succulence. The marinade works its magic by breaking down fibers and infusing the meat with layers of citrus, herbs, and garlic. As it hits the grill, the sugars in the marinade caramelize into a beautiful, sticky lacquer that seals in the juices. The result is chicken that is tender enough to cut with a fork, with a golden-brown exterior that smells like a summer cookout in the best possible way.
Ingredients
- 2 lbs chicken thighs (boneless, skinless)
- 1/3 cup extra virgin olive oil
- 1/4 cup soy sauce (for umami and salt)
- Juice of 1 lime and 1 orange
- 2 tbsp honey or maple syrup
- 4 cloves garlic, smashed
- 1 tbsp fresh rosemary, chopped
- 1 tsp red pepper flakes
How to make it
- In a medium bowl, whisk together the olive oil, soy sauce, citrus juices, honey, garlic, rosemary, and pepper flakes until the honey is completely dissolved.
- Place the chicken thighs in a large zip-top bag and pour the marinade over them. Squeeze out as much air as possible before sealing to ensure the meat is fully submerged.
- Refrigerate for at least 4 hours, though overnight is best. The acidity in the citrus tenderizes the meat, while the salt in the soy sauce seasons it deeply.
- Remove the chicken from the fridge 20 minutes before grilling to take the chill off; this ensures more even cooking.
- Preheat the grill to medium heat. Oil the grates and place the chicken on the grill. Discard the remaining marinade.
- Grill for 6-7 minutes per side. Use a meat thermometer to check for an internal temperature of 165°F (74°C). Thighs are forgiving and stay juicy even if they go slightly over.
- Let the chicken rest for 5-10 minutes under foil before slicing. This allows the juices to redistribute so they don’t run out when you cut into the meat.
How to brew sun tea?

Why we love this
Sun tea is the embodiment of slow living, a beverage brewed by the gentle, persistent warmth of the sun rather than the harshness of boiling water. This method results in a smoother, less bitter tea that tastes remarkably clean and crisp. Looking at a glass jar sitting on a porch, with the tea leaves slowly unfurling and tinting the water a deep amber, is a visual delight. When served over ice with a sprig of bruised mint, it is the ultimate thirst-quencher—mellow, refreshing, and filled with the essence of a lazy afternoon.
Ingredients
- 8-10 high-quality black or green tea bags
- 1 gallon of purified water
- 1 lemon, thinly sliced
- A handful of fresh mint leaves
- Honey or simple syrup (optional, to taste)
How to make it
- Find a very clean 1-gallon glass jar. Avoid plastic, as the sun’s heat can cause off-flavors to leach into your tea.
- Fill the jar with room-temperature purified water. Place the tea bags inside, draped so the strings hang over the edge for easy removal later.
- Seal the jar tightly and place it in a spot that receives direct, uninterrupted sunlight for at least 3 to 5 hours.
- Watch as the water gradually darkens. Do not leave the tea out for more than 5 hours, as this can encourage bacterial growth; the goal is gentle infusion, not cooking.
- Once the tea has reached a rich amber color, bring the jar inside and remove the tea bags immediately.
- Stir in your sweetener while the tea is still slightly warm from the sun so it dissolves easily. Add the fresh mint and lemon slices.
- Refrigerate immediately and serve over plenty of ice. For a food board presentation, serve in a glass dispenser with extra floating fruit.
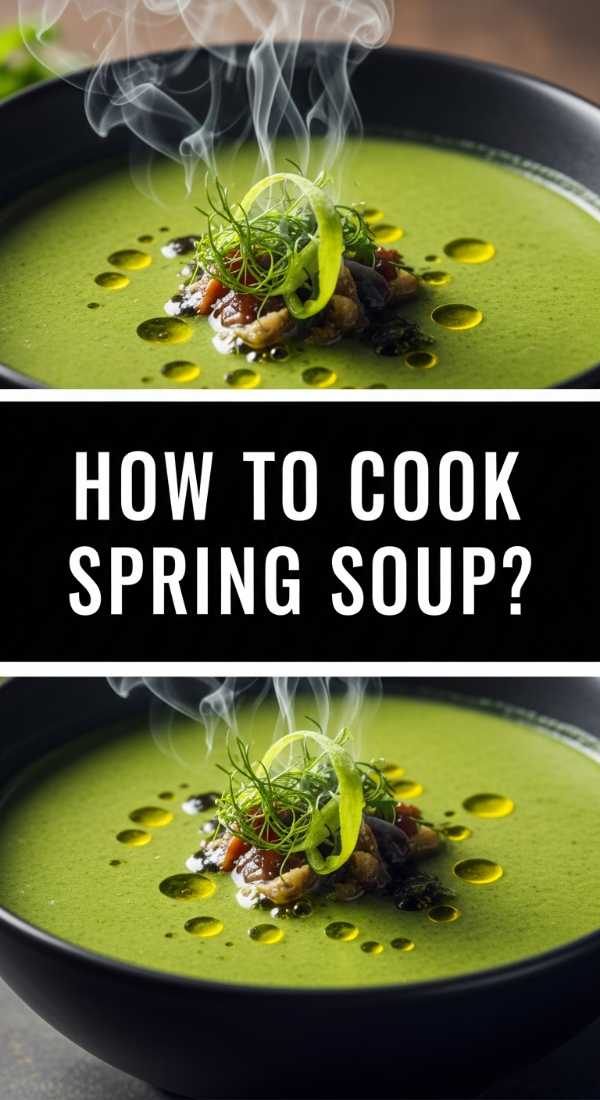
How to cook spring soup?
Why we love this
Spring soup is a celebration of ‘green’ in a bowl—vibrant, rejuvenating, and unexpectedly sophisticated. Unlike the heavy, long-simmered stews of winter, this soup is quick and light, featuring tender leeks, vibrant spinach, and delicate herbs. The texture is often silky and smooth, with a bright, clean finish from a swirl of crème fraîche or lemon. It smells like a fresh-cut meadow and feels like a detox for the soul, providing a delicate, warm component to a board otherwise filled with room-temperature grazing items.
Ingredients
- 2 large leeks, white and light green parts only, sliced
- 1 large potato, peeled and diced small (for creaminess)
- 4 cups vegetable broth
- 5 cups fresh baby spinach
- 1 cup frozen peas
- 1/4 cup fresh dill and chives
- 2 tbsp butter
- Crème fraîche for garnish
How to make it
- In a large heavy pot, melt the butter over medium-low heat. Add the sliced leeks and a pinch of salt. Sauté slowly for 10 minutes until they are soft and buttery, but not browned.
- Add the diced potato and the vegetable broth. Bring to a gentle boil, then reduce the heat and simmer for 15 minutes, or until the potatoes are completely tender when pressed against the side of the pot.
- Stir in the peas and the spinach. Cook for only 2-3 minutes until the spinach has wilted and the peas are bright green. Overcooking will turn the soup a dull olive color.
- Remove the pot from the heat and stir in the fresh dill and chives.
- Using an immersion blender, puree the soup until it is completely smooth and vibrant green. If it’s too thick, add a splash more broth.
- Season generously with salt and white pepper. The white pepper provides heat without the black specks, keeping the color pure.
- Ladle into small ramekins or glasses for your board, finishing each with a tiny dollop of crème fraîche and a sprig of dill.
How to mix spring mocktails?

Why we love this
Spring mocktails bring all the glamour and complexity of a craft cocktail without the buzz, focusing on botanical extracts and fresh fruit infusions. These drinks are a feast for the eyes—soft pinks, pale greens, and vibrant purples topped with edible flowers or herb sprigs. The flavor profile is usually a dance between tart citrus, floral syrups (like lavender or elderflower), and a sparkling, effervescent finish. They provide a sophisticated, inclusive drinking experience that makes everyone at the table feel celebrated and refreshed.
Ingredients
- 1 cup fresh raspberries
- 2 tbsp elderflower syrup (non-alcoholic)
- Juice of 1 lime
- Sparkling water or club soda
- Fresh thyme sprigs and edible flowers for garnish
- Ice cubes (extra points for freezing berries inside the ice!)
How to make it
- In a sturdy glass or cocktail shaker, combine the fresh raspberries and the lime juice. Use a muddler to crush the berries thoroughly, releasing all their juice and oils.
- Strain the mixture through a fine-mesh sieve into a pitcher or individual glasses to remove the seeds, resulting in a clear, vibrant pink liquid base.
- Stir in the elderflower syrup. This provides a delicate floral note that mimics the complexity of high-end spirits.
- Fill your serving glasses with plenty of ice. If you have time, freeze small pansies or sprigs of mint into your ice cubes the night before for a stunning visual effect.
- Pour the raspberry-elderflower base over the ice, filling the glass about halfway.
- Top with chilled sparkling water. Use a long spoon to gently stir from the bottom, integrating the flavors without losing the carbonation.
- Garnish with a fresh sprig of thyme and a few whole raspberries on top. Arrange the glasses in a cluster on your food board for an instant ‘wow’ factor.
The Art of the Board
Creating a simple food board is more than just a culinary task; it’s an act of hospitality that prioritizes ease and enjoyment. By combining these vibrant, seasonal recipes on a single shared surface, you create an environment where guests feel comfortable helping themselves and lingering over a meal. Whether it’s the smoky snap of grilled asparagus or the sweet comfort of a strawberry pie, these dishes are designed to be enjoyed together. So, clear off your largest wooden board, gather your favorite people, and start building your own viral-worthy feast today.