

There is something undeniably magical about a shared meal that looks as good as it tastes. We’ve all seen those viral food boards—the kind that look like a work of art, dripping with textures and colors that make your mouth water before you even take a bite. In my own kitchen, I’ve found that the secret to a happy home isn’t just in the nutrition, but in the aesthetic and the effortless grace of a well-arranged platter. It’s about creating an atmosphere where guests feel pampered and every bite feels like a little celebration of life.
The beauty of the viral food board is that it takes the pressure off formal plating while elevating simple, comforting ingredients to a gourmet level. Whether you’re hosting a weekend brunch or a cozy movie night, these dishes are designed to be the stars of your spread. I’ve curated my favorite ‘aesthetic’ staples that transition perfectly from the pan to the board, ensuring your next gathering is as visually stunning as it is delicious. Let’s dive into the recipes that will turn your dining table into a viral sensation.
How to make crispy chicken
Why we love this
There is nothing quite as satisfying as the audible crunch of perfectly fried chicken, followed immediately by the rush of savory juices. We love this dish because it bridges the gap between humble comfort food and high-end culinary craft, offering a golden, craggy exterior that catches every drop of sauce or honey drizzle. The aroma of toasted flour and sizzling spices fills the kitchen with a sense of warmth that is purely nostalgic, while the tender, steam-released interior provides a luxurious mouthfeel that keeps everyone reaching for seconds. It is the ultimate tactile experience, providing a textural contrast that is the backbone of any great food board.
Ingredients
- 2 lbs chicken thighs or breasts, cut into strips
- 2 cups all-purpose flour
- 1/2 cup cornstarch
- 1 tsp baking powder
- 2 cups buttermilk
- 1 tbsp smoked paprika, 1 tsp garlic powder, 1 tsp onion powder
- Salt and cracked black pepper to taste
- Neutral oil for frying (canola or peanut)
How to make it
- Begin by marinating your chicken pieces in seasoned buttermilk for at least 30 minutes, or up to 4 hours in the refrigerator. This step is crucial as the lactic acid in the buttermilk tenderizes the protein fibers, ensuring a juicy result.
- In a wide, shallow bowl, whisk together the flour, cornstarch, baking powder, and all the dry spices. The cornstarch is the secret weapon here; it prevents gluten development and creates a lighter, glass-like crunch that stays crispy longer.
- Dredge the chicken: Take a piece from the buttermilk, let the excess drip off, and press it firmly into the flour mixture. Shake it gently to create those craggy bits that turn into extra-crunchy shards when fried. Repeat for a double-dredge if you want a thicker crust.
- Heat about 2 inches of oil in a heavy-bottomed skillet or Dutch oven to exactly 350°F (175°C). Use a meat thermometer to track this; if the oil is too cool, the chicken becomes greasy, and if it’s too hot, the outside burns before the inside cooks.
- Fry the chicken in small batches to avoid crowding the pan, which would drop the oil temperature. Cook for about 5-7 minutes per side until the exterior is a deep, honey-gold brown and the internal temperature reaches 165°F.
- Remove the chicken and place it immediately on a wire cooling rack set over a baking sheet. Do not use paper towels, as they trap steam and soften the bottom of your crispy crust. Sprinkle with a final pinch of sea salt while the oil is still wet on the surface.
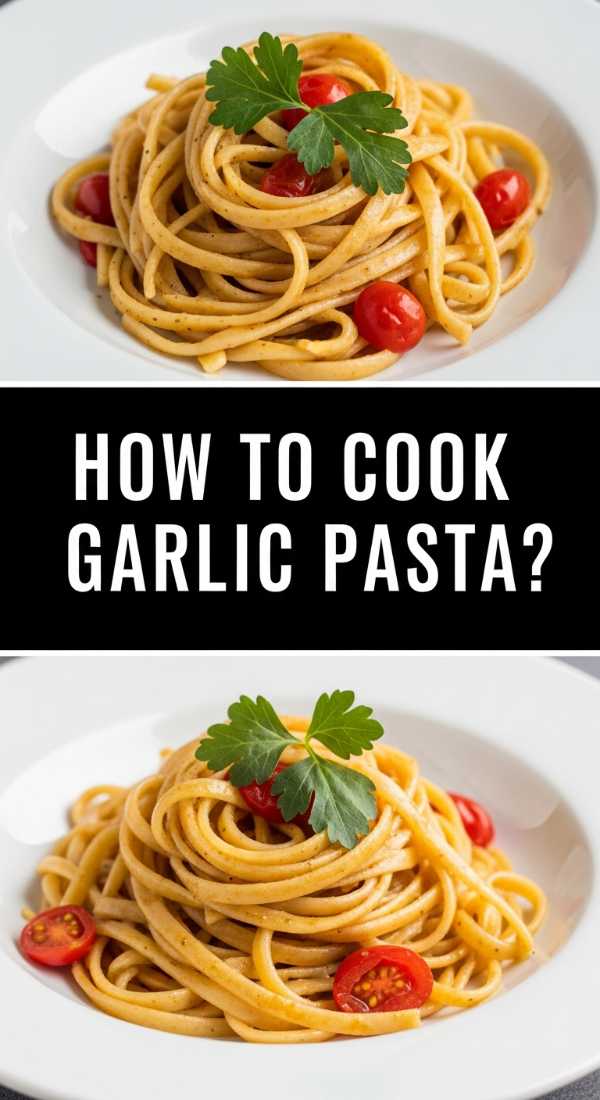
How to cook garlic pasta

Why we love this
Garlic pasta is the epitome of ‘quiet luxury’ in the culinary world, relying on just a few high-quality ingredients to create a dish that feels incredibly sophisticated. We love the way the sharp, pungent aroma of fresh garlic mellows into a sweet, nutty fragrance as it gently confits in shimmering golden olive oil. The way the silky strands of pasta become coated in a glossy, emulsified sauce creates a mouthfeel that is pure velvet, punctuated by the bright, herbal pop of fresh parsley. It is a sensory delight that proves you don’t need a long list of ingredients to create a viral-worthy, soul-warming meal.
Ingredients
- 1 lb spaghetti or linguine
- 8 cloves fresh garlic, thinly sliced
- 1/2 cup extra virgin olive oil
- 1/2 tsp red pepper flakes
- 1 cup freshly grated Parmesan cheese
- 1/2 cup fresh Italian parsley, finely chopped
- Salt to taste
How to make it
- Bring a large pot of heavily salted water to a rolling boil. The water should taste like the sea; this is your only chance to season the pasta itself from the inside out. Cook the pasta until it is just shy of al dente, usually 1-2 minutes less than the package instructions.
- While the pasta cooks, place the olive oil and sliced garlic in a large cold skillet. Turning the heat to medium-low now allows the garlic to infuse the oil gradually without burning. Sauté slowly until the garlic turns a pale golden brown and smells fragrant—watch it like a hawk, as burnt garlic turns bitter instantly.
- Add the red pepper flakes to the oil for the last 30 seconds of sautéing to release their oils and create a gentle, underlying heat.
- Before draining the pasta, reserve at least 2 cups of the starchy pasta water. This liquid is liquid gold; the starch is the key to creating a creamy sauce without using any actual cream.
- Transfer the pasta directly into the skillet with the garlic oil. Add 1/2 cup of the reserved pasta water and toss vigorously over medium heat. The agitation helps the oil and water emulsify into a light, shimmering sauce.
- Remove from heat and stir in the Parmesan cheese and parsley. If the pasta looks dry, add more pasta water a tablespoon at a time until every strand is coated in a glossy, luxurious sheen. Serve immediately while the cheese is perfectly melted.
How to bake fluffy pancakes

Why we love this
There is a specific kind of joy found in a stack of pancakes so tall and airy they practically wobble when the plate is moved. We love this recipe because it transforms a standard breakfast item into a cloud-like confection that melts on the tongue with a gentle, buttery sweetness. The scent of vanilla bean and toasted butter wafting through the house is the ultimate ‘slow morning’ vibe, signaling a time to relax and indulge. These pancakes aren’t just food; they are a canvas for gleaming maple syrup, dusting of powdered sugar, and vibrant berries, making them the visual centerpiece of any viral brunch board.
Ingredients
- 2 cups all-purpose flour
- 2 tbsp sugar
- 1 tbsp baking powder
- 1/2 tsp salt
- 1 1/2 cups buttermilk
- 2 large eggs
- 4 tbsp unsalted butter, melted and cooled
- 1 tsp vanilla extract
How to make it
- In a large bowl, whisk together the flour, sugar, baking powder, and salt. Sifting these ingredients together ensures there are no large clumps, which leads to a more uniform rise and a delicate crumb.
- In a separate jug, whisk the buttermilk, eggs, melted butter, and vanilla extract. Ensure your buttermilk and eggs are at room temperature so the melted butter doesn’t seize up into little clumps when mixed.
- Create a well in the center of the dry ingredients and pour in the wet mixture. Use a spatula to gently fold the ingredients together until just combined. Crucially: leave the lumps! Overmixing develops gluten, which makes pancakes tough instead of fluffy. Stop as soon as you see no more dry flour streaks.
- Let the batter rest for 10-15 minutes. This allows the baking powder to activate and the flour to fully hydrate, resulting in a much thicker batter and a higher rise.
- Heat a non-stick griddle or large skillet over medium-low heat. Lightly grease with a small amount of butter. Use a 1/4 cup measure to pour the batter onto the griddle, ensuring even-sized circles.
- Cook until bubbles form on the surface and the edges look set and matte, about 2-3 minutes. Flip carefully with a thin spatula and cook for another 1-2 minutes until golden brown on the bottom. Keep the heat low to ensure the center cooks through without burning the exterior.
How to sear juicy steak

Why we love this
The sear on a steak is a culinary masterpiece of chemistry and flavor, known as the Maillard reaction, which creates that deep, savory, umami crust we all crave. We love this preparation because it turns a simple cut of meat into a decadent, restaurant-quality experience right in your own kitchen. The sound of the steak hitting a screaming hot pan is an instant appetite-inducer, and the subsequent basting with foaming butter, garlic, and woody rosemary creates a complex aroma that is utterly intoxicating. It’s the ultimate protein for a board, offering a rich, iron-rich depth that pairs beautifully with lighter sides.
Ingredients
- 2 thick-cut steaks (Ribeye or New York Strip, about 1.5 inches thick)
- 2 tbsp high-smoke point oil (grapeseed or avocado oil)
- 3 tbsp unsalted butter
- 4 cloves garlic, smashed
- 3 sprigs fresh rosemary or thyme
- Flaky sea salt and coarse black pepper
How to make it
- Remove the steaks from the refrigerator at least 45 minutes before cooking. Bringing the meat to room temperature ensures it cooks evenly from edge to center. Pat the steaks extremely dry with paper towels; moisture is the enemy of a good sear.
- Season aggressively with salt and pepper on all sides, including the edges. Press the seasoning into the meat so it adheres during the high-heat process.
- Heat a heavy cast-iron skillet over high heat until it is wisps of smoke are just starting to rise. Add the oil and swirl to coat the pan.
- Carefully lay the steaks into the pan, laying them away from you to avoid oil splatters. Press down slightly with tongs to ensure full contact. Sear undisturbed for 3-4 minutes until a dark, mahogany crust forms.
- Flip the steaks. Immediately add the butter, smashed garlic, and herbs to the pan. As the butter melts and foams, tilt the pan slightly and use a large spoon to continuously pour the hot, flavored butter over the steaks. This ‘aromatic basting’ cooks the top while infusing the meat with incredible flavor.
- Cook until the internal temperature reaches 130°F for medium-rare. Remove the steaks from the pan and place them on a cutting board. Rest for at least 10 minutes before slicing. This allows the juices to redistribute so they don’t run out when you cut into it, ensuring every bite is succulent.
How to make cheesy tacos
Why we love this
Cheesy tacos are a riot of textures and bold, punchy flavors that bring an instant festive energy to any meal. We love the contrast between the crispy, lacey cheese ‘skirt’ that forms on the griddle and the soft, warm tortilla cradling succulent, spiced meat. The vibrant colors of fresh lime, bright cilantro, and zesty salsa make these a visual knockout, while the gooey, melted interior provides that satisfying ‘cheese pull’ that is a hallmark of viral food content. It’s a handheld explosion of heat, fat, and acid that satisfies every single taste bud in one go.
Ingredients
- 1 lb ground beef or chorizo
- 12 small corn or flour tortillas
- 2 cups shredded Mexican blend cheese (Oaxaca, Monterey Jack, Cheddar)
- 1 tbsp chili powder, 1 tsp cumin, 1/2 tsp oregano
- Toppings: Fresh cilantro, diced onions, lime wedges, sliced radishes
- 1 tbsp oil or butter
How to make it
- In a large skillet over medium-high heat, brown the meat, breaking it into small crumbles. Stir in the chili powder, cumin, and oregano. Add a splash of water or broth to keep the meat moist and saucy. Once cooked through, set aside in a warm bowl.
- Clean the skillet and return it to medium heat. Add a tiny amount of oil. Place a tortilla in the pan and immediately sprinkle a generous layer of cheese over the entire surface, extending slightly over the edges.
- As the cheese begins to melt and bubble, add a spoonful of the cooked meat to one half of the tortilla.
- Once the cheese at the edges starts to turn golden and crispy (creating that famous ‘cheese skirt’), fold the tortilla in half over the meat.
- Press down with a spatula to seal the taco and crisp up the outside of the tortilla for about 30-45 seconds per side. The tortilla should be golden and the cheese should be oozing out.
- Remove from the pan and immediately garnish with fresh onions, cilantro, and a heavy squeeze of lime. Serve while the cheese is at its peak meltiness.
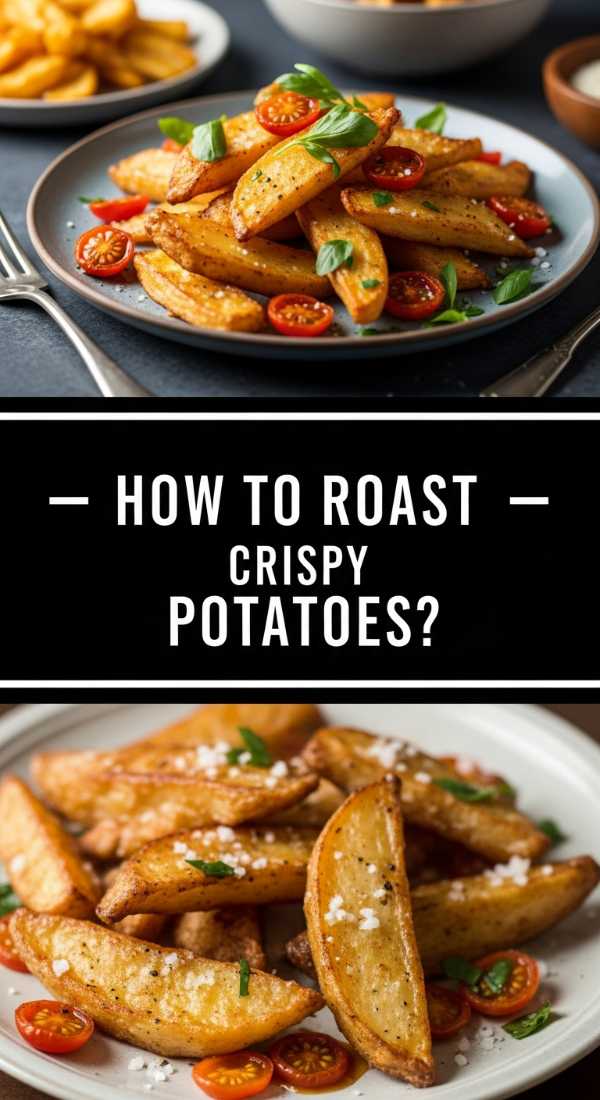
How to roast crispy potatoes
Why we love this
The perfect roasted potato is a masterclass in textural duality: a shell so crisp it shatters like glass, giving way to a center as soft and fluffy as mashed potatoes. We love this dish because it’s the ultimate crowd-pleaser that feels rustic yet refined. The earthy scent of roasting tubers mingled with the woody fragrance of rosemary and garlic is one of the most comforting smells in the world. When piled high on a board, their golden-brown edges catch the light, making them look like little nuggets of culinary gold that no one can resist picking at throughout the evening.
Ingredients
- 3 lbs Yukon Gold or Russet potatoes, peeled and cut into 1-inch chunks
- 1/2 cup extra virgin olive oil or duck fat
- 1 tsp baking soda
- 1 tbsp kosher salt
- 2 tsp garlic powder
- 2 sprigs fresh rosemary, finely chopped
How to make it
- Preheat your oven to 425°F (220°C). Place a large rimmed baking sheet inside the oven while it preheats; a hot pan helps sear the potatoes immediately upon contact.
- Place the potato chunks in a large pot of cold water seasoned with the kosher salt and the baking soda. The baking soda breaks down the potato’s pectin and draws starch to the surface. Bring to a boil and simmer for about 8-10 minutes until the outsides are softened but the centers are still firm.
- Drain the potatoes and let them steam dry in the colander for 2 minutes. Return them to the pot, add the oil, garlic powder, and rosemary, and shake the pot vigorously. This ‘roughening’ process creates a starchy paste on the outside of the potatoes that will dehydrate and crisp up into an incredibly thick crust in the oven.
- Carefully spread the potatoes onto the preheated baking sheet in a single layer. You should hear a sizzle.
- Roast for 45-50 minutes, turning them with a metal spatula every 20 minutes. Ensure they have enough space; if they are crowded, they will steam rather than crisp.
- Remove when they are deep brown and unmistakably crunchy. Season with a final dusting of flaky salt and serve immediately.
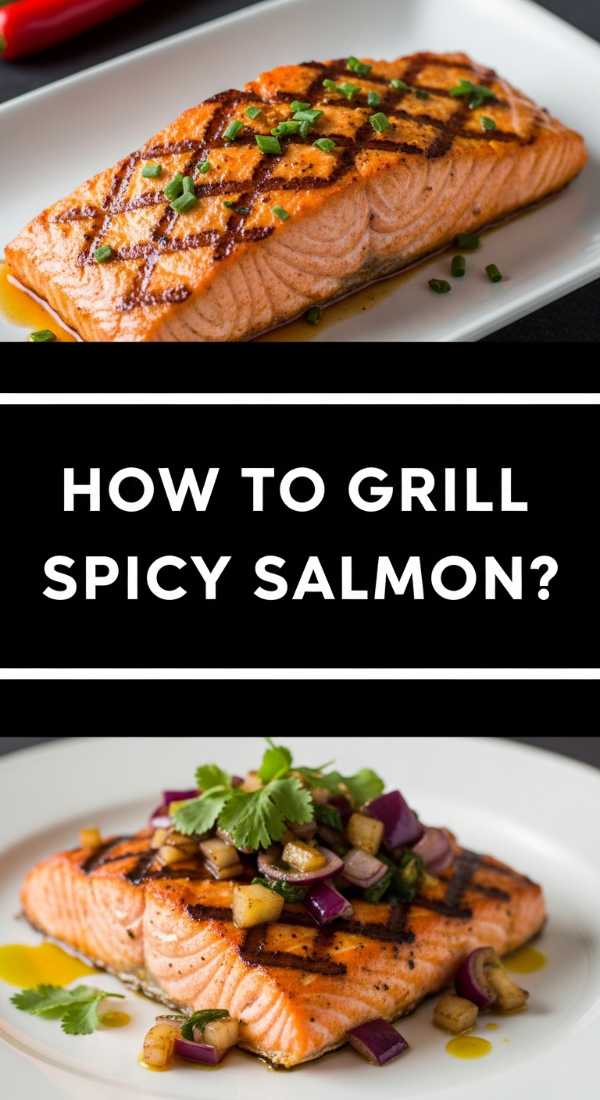
How to grill spicy salmon

Why we love this
Salmon is a showstopper of a protein, and when kissed by the flames of a grill, it takes on a smoky complexity that is simply divine. We love the way a spicy, honey-based glaze caramelizes under the heat, creating a sticky, charred exterior that perfectly complements the buttery, flake-apart tenderness of the fish. The vibrant coral hue of the salmon against the dark grill marks is an aesthetic dream, and the balance of sweet heat and citrus zing makes it a refreshing yet deeply satisfying addition to any food board. It feels light and healthy, yet incredibly indulgent.
Ingredients
- 4 salmon fillets (6 oz each, skin-on)
- 2 tbsp sriracha or chili garlic sauce
- 2 tbsp honey
- 1 tbsp soy sauce
- 1 tbsp grated fresh ginger
- 1 lime, juiced
- 2 tbsp olive oil
How to make it
- In a small bowl, whisk together the sriracha, honey, soy sauce, ginger, and lime juice to create the glaze. Reserve half of the glaze for serving and use the other half for the grilling process.
- Pat the salmon fillets completely dry. Brush both sides with olive oil and season lightly with salt. The oil prevents the delicate skin from sticking to the grill grates.
- Preheat your grill to medium-high heat (about 400°F). Ensure the grates are clean and well-oiled.
- Place the salmon fillets skin-side down first. This protects the flesh and allows the skin to become crispy and edible. Grill undisturbed for about 4-5 minutes. You will see the color of the fish start to change from the bottom up.
- Carefully flip the fillets using a thin fish spatula. Brush the generous amount of the spicy glaze over the crispy skin side.
- Grill for another 2-3 minutes. The glaze will bubble and thicken into a beautiful lacquer. Remove the salmon when it reaches an internal temperature of 135°F for medium (it will continue to rise to 140-145°F as it rests). Serve with the remaining fresh glaze drizzled over the top.
How to make glazed donuts

Why we love this
There is a whimsical, childlike wonder that comes with a tray of fresh, homemade glazed donuts. We love the way the translucent sugar glaze settles into every nook and cranny of the warm, yeasty dough, creating a delicate crackle when you bite into it. The texture is impossibly light and airy, almost like eating a sweetened cloud, with a faint aroma of nutmeg and vanilla that is deeply nostalgic. They bring a sense of celebration to any spread, acting as the perfect sweet punctuation to a board filled with savory delights.
Ingredients
- 3 1/4 cups all-purpose flour
- 1/4 cup sugar
- 1 packet (2 1/4 tsp) active dry yeast
- 3/4 cup warm milk (110°F)
- 1/4 cup unsalted butter, melted
- 1 egg, room temperature
- Glaze: 2 cups powdered sugar, 1/4 cup milk, 1 tsp vanilla
- Oil for frying
How to make it
- In the bowl of a stand mixer, combine the warm milk and yeast with a pinch of sugar. Let it sit for 5-10 minutes until it becomes foamy, indicating the yeast is active.
- Add the remaining sugar, melted butter, egg, and half of the flour. Use the dough hook to mix. Gradually add the rest of the flour until a soft, slightly sticky dough forms. Knead on medium speed for 5 minutes until the dough is smooth and elastic.
- Place the dough in a greased bowl, cover, and let rise in a warm spot for 1-1.5 hours, or until doubled in size.
- On a floured surface, roll the dough out to 1/2-inch thickness. Use a donut cutter to punch out shapes. Place the donuts on a parchment-lined sheet, cover, and let rise again for 30-45 minutes until they look puffy.
- Heat oil in a heavy pot to 360°F. Carefully drop 2-3 donuts at a time into the oil. Fry for about 60-90 seconds per side until a very pale golden brown. Over-frying will make them dry, so aim for a light color.
- While the donuts are frying, whisk the glaze ingredients until smooth. Drain the donuts on a wire rack for 1 minute, then dip them while still warm into the glaze, coating both sides. Let the excess drip off and return to the rack to set.
How to cook creamy soup
Why we love this
A bowl of truly creamy soup is like a warm hug for the soul, offering a velvety, luxurious texture that coats the palate in pure comfort. We love this dish because it’s a masterclass in building layers of flavor—from the slow-sautéed aromatics to the rich, herb-infused broth. The way a swirl of heavy cream or a dollop of crème fraîche creates beautiful, artistic patterns on the surface makes it an essential ‘aesthetic’ dish. It serves as a soothing, savory base that anchors a food board, especially when paired with crusty bread for dipping into that thick, concentrated goodness.
Ingredients
- 1 lb vegetables (Roasted tomatoes, mushrooms, or butternut squash)
- 1 large shallot, minced
- 3 cloves garlic, minced
- 4 cups vegetable or chicken broth
- 1/2 cup heavy cream
- 2 tbsp butter
- 1 tsp fresh thyme or basil
- Salt and white pepper to taste
How to make it
- In a large pot, melt the butter over medium heat. Add the shallots and cook until translucent and soft, about 5 minutes. Add the garlic and herbs, sautéing for another minute until fragrant but not browned.
- Add your primary vegetable (if using tomatoes or squash, roasting them beforehand adds a deep, caramelized sweetness). Stir to coat in the aromatics.
- Pour in the broth and bring the mixture to a gentle boil. Reduce heat and simmer for 20 minutes to allow the flavors to marry and the vegetables to become completely tender.
- Use an immersion blender to puree the soup directly in the pot until it is completely smooth and silky. For an extra-fine restaurant-quality texture, you can pass the soup through a fine-mesh sieve.
- Stir in the heavy cream and return to a low simmer. Do not let it boil vigorously once the cream is added, as it can break the emulsion.
- Season with salt and white pepper. White pepper is preferred here as it provides a clean heat without the black specks, maintaining the soup’s uniform, elegant appearance. Serve in small bowls or ramekins as part of your board spread.
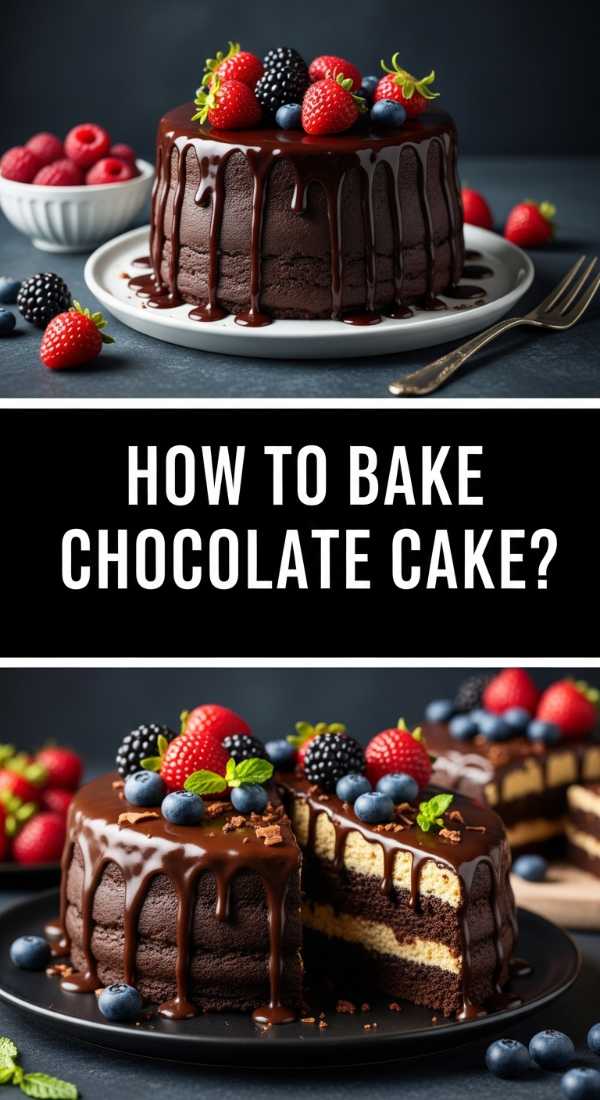
How to bake chocolate cake
[IMAGE_10]
Why we love this
Chocolate cake is the ultimate indulgence, a rich and decadent finale that demands attention with its deep, dark hue and intoxicating cocoa aroma. We love this specific recipe because it yields a crumb so moist and tender it practically dissolves on the tongue, while the addition of hot coffee intensifies the chocolate flavor to a professional level. The sight of a thick, glossy chocolate ganache dripping down the sides of a tall cake is the definition of food porn, making it an irresistible viral centerpiece. It’s a celebration of all things cocoa—bitter, sweet, and profoundly satisfying.
Ingredients
- 1 3/4 cups all-purpose flour
- 2 cups sugar
- 3/4 cup unsweetened cocoa powder (high quality)
- 2 tsp baking soda, 1 tsp baking powder
- 1 tsp salt
- 1 cup buttermilk
- 1/2 cup vegetable oil
- 2 large eggs
- 1 cup hot freshly brewed coffee
- 1 tsp vanilla extract
How to make it
- Preheat your oven to 350°F (175°C). Grease and flour two 8-inch cake pans, lining the bottoms with parchment paper. This is non-negotiable for a clean release.
- Sift together the flour, sugar, cocoa powder, baking soda, baking powder, and salt into a large bowl. Sifting cocoa powder is vital as it is notorious for having stubborn lumps that won’t disappear during mixing.
- In a separate bowl, whisk the buttermilk, oil, eggs, and vanilla. Slowly pour the wet ingredients into the dry, whisking until just combined.
- Now, the ‘magic’ step: Pour in the hot coffee. The batter will be very thin and liquid—don’t panic! The hot coffee ‘blooms’ the cocoa powder, releasing its full flavor profile and ensuring a moist crumb. Whisk gently by hand until smooth.
- Divide the batter evenly between the two pans. Bake for 30-35 minutes. Test with a toothpick; it should come out with a few moist crumbs attached, but not wet batter.
- Allow the cakes to cool in the pans for 10 minutes, then invert them onto a wire rack to cool completely. Cooling is essential before frosting; a warm cake will melt your ganache or buttercream. Frost with your favorite dark chocolate frosting and top with flaky salt for an aesthetic, viral finish.
Conclusion: Crafting Your Aesthetic Feast
Building a viral food board is about more than just the individual recipes; it’s about the harmony of flavors and the joy of sharing. By mastering these ten staples—from the crunch of the perfect chicken to the velvety finish of a chocolate cake—you’re not just making dinner; you’re creating an experience. Remember to play with heights, colors, and textures as you arrange these dishes on your board. The most important ingredient, however, is the warmth you bring to the table. Happy hosting!