
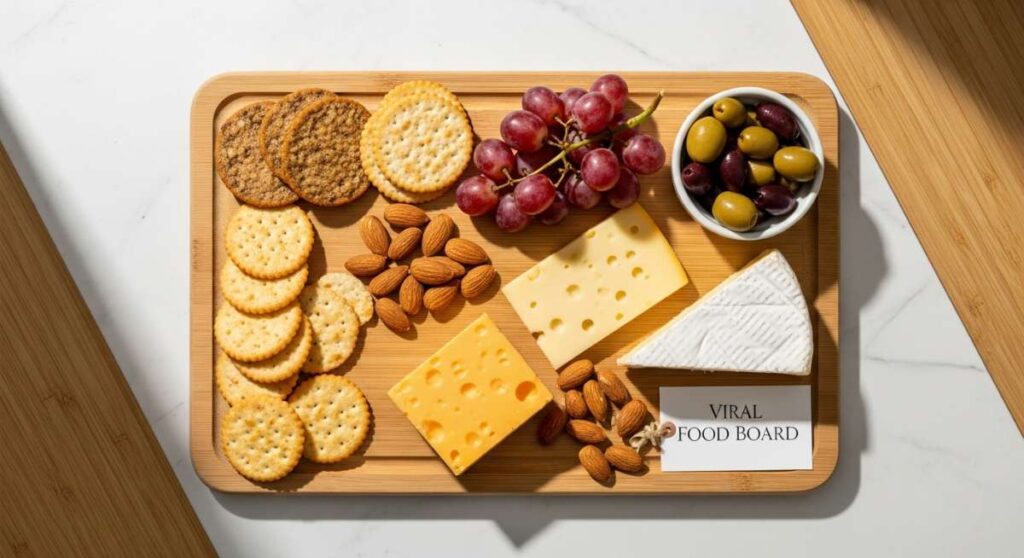
The Lazy Host’s Guide to the Viral Food Board Craze
We’ve all been there: the guest list is growing, the clock is ticking, and the internal panic of ‘what am I going to serve’ is starting to set in. In the age of perfectly curated social media feeds, the pressure to perform as a domestic deity feels higher than ever. But here is a little secret I’ve learned after years of hosting: people don’t actually want a five-course meal that leaves the host stuck in the kitchen. They want to graze, they want to chat, and they want something that looks like a work of art without requiring a culinary degree.
That’s where the viral food board comes in. It’s the ultimate lazy host’s hack—a way to combine simple, seasonal ingredients and celebratory treats into a stunning spread that invites everyone to dig in. Whether you are celebrating a graduation or just the arrival of spring’s first rhubarb crop, these boards are about abundance and ease. Today, I’m sharing my favorite components to mix and match so you can create a ‘viral’ moment of your own without the stress.
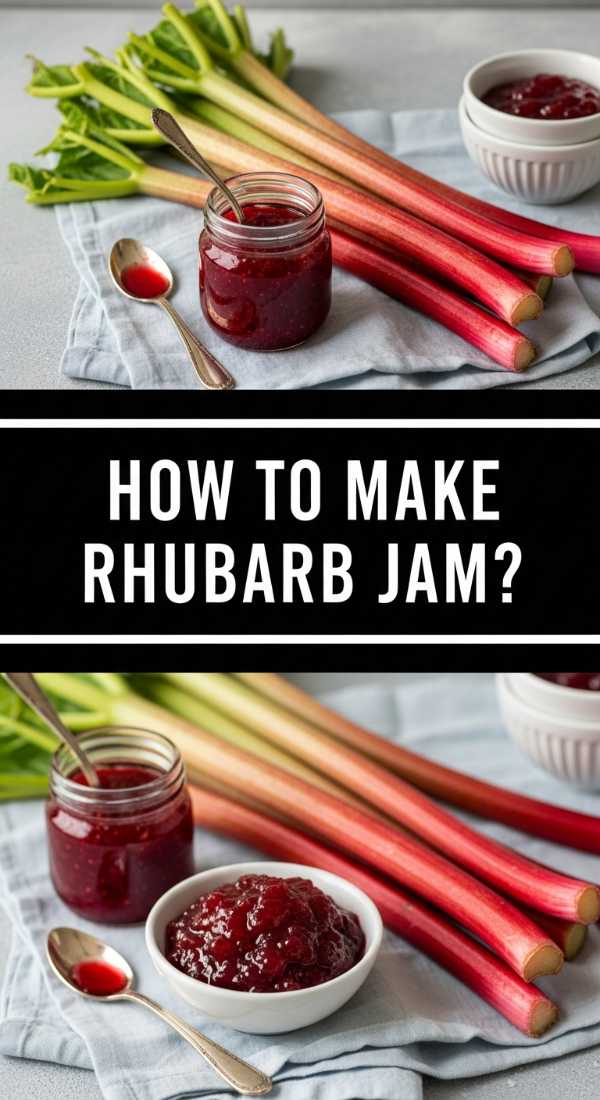
How to make rhubarb jam?
Why we love this
There is something incredibly nostalgic about the scent of simmering rhubarb and sugar filling a sun-drenched kitchen. This jam is a vibrant, ruby-red masterpiece that balances a sharp, electric tang with a deep, honeyed sweetness that lingers on the palate. When spread over a warm piece of sourdough, the texture is luscious and slightly chunky, offering a sensory explosion that feels like capturing the very essence of springtime in a glass jar. It is the perfect bright addition to any cheese board, cutting through the richness of a creamy brie or sharp cheddar.
Ingredients
- 4 cups fresh rhubarb, chopped into 1-inch pieces
- 2 cups granulated sugar
- 1 tablespoon fresh lemon juice
- 1 teaspoon vanilla bean paste
- A pinch of sea salt
How to make it
- Begin by tossing your chopped rhubarb and sugar together in a large, heavy-bottomed pot. Let this mixture sit for about 30 minutes at room temperature; this process, known as macerating, allows the sugar to draw out the natural juices of the rhubarb, creating its own syrup.
- Place the pot over medium heat and stir constantly until the sugar has completely dissolved. Add the lemon juice and sea salt, which act as natural preservatives and flavor enhancers.
- Increase the heat to medium-high and bring the mixture to a rolling boil. You will see the rhubarb break down into soft, jammy ribbons. Use a wooden spoon to skim off any foam that rises to the top to ensure a clear, bright finish.
- Continue to boil for about 12-15 minutes. To check for doneness, place a small spoonful on a chilled plate; if it wrinkles when you push it with your finger, it is set. Stir in the vanilla bean paste at the very end to preserve its delicate aroma.
- Carefully ladle the hot jam into sterilized jars, leaving a quarter-inch of headspace. Let them cool completely before sealing and storing in the refrigerator.
How to style graduation cakes?

Why we love this
A graduation cake is more than just a dessert; it’s a centerpiece that anchors the entire celebration and honors years of hard work. The visual appeal of a well-styled cake—with its smooth, pristine frosting and elegant accents—evokes a sense of pride and accomplishment. Imagine the contrast of shimmering gold leaf against deep school colors, or the playful touch of a miniature mortarboard perched atop a towering layer cake. The goal is to create a look that is both sophisticated and celebratory, making the graduate feel like the true star of the show.
Ingredients
- Pre-baked and chilled layer cake
- 4 cups Swiss meringue buttercream
- Edible gold leaf or metallic sprinkles
- Fresh flowers or custom acrylic cake toppers
- A revolving cake stand and offset spatula
How to make it
- Start by applying a thin ‘crumb coat’ of frosting over the entire cake. This initial layer seals in the crumbs and creates a smooth foundation. Chill the cake for 20 minutes until the frosting is firm to the touch.
- Place the cake on a revolving stand. Apply a generous second layer of buttercream. Hold your bench scraper at a 45-degree angle against the side of the cake and spin the stand slowly to create a perfectly smooth, professional finish.
- For a modern look, create a ‘watercolor’ effect by dotting small amounts of a secondary color around the cake and smoothing them into the white base with your spatula.
- Apply edible gold leaf using a dry, clean paintbrush. Lightly press the flakes onto the sides of the cake in an organic, cascading pattern for a touch of luxury.
- Finish the styling by adding a statement topper or a cluster of fresh, non-toxic flowers. Always wrap the stems of fresh flowers in floral tape before inserting them into the cake for food safety.
How to bake rhubarb pie?

Why we love this
There is nothing quite like the architectural beauty of a lattice-top rhubarb pie, its golden-brown crust glistening with coarse sugar. As it bakes, the rhubarb softens into a tart, silken filling that bubbles up through the gaps in the pastry, releasing a fragrance that is both earthy and sweet. The first bite offers a satisfying crunch from the buttery, flaky layers followed by the refreshing zing of the fruit. Served warm with a scoop of melting vanilla bean ice cream, it is the ultimate comfort food that bridges the gap between sophisticated tartness and home-style sweetness.
Ingredients
- Double crust pie dough (chilled)
- 5 cups sliced rhubarb (1/2 inch thick)
- 1 1/4 cups sugar
- 1/3 cup cornstarch
- 1 tablespoon orange zest
- 1 egg (for wash) and turbinado sugar
How to make it
- Roll out the bottom half of your chilled dough on a floured surface until it is about 12 inches in diameter. Drape it over a 9-inch pie plate, gently pressing it into the corners, and trim the excess to leave a 1-inch overhang.
- In a large bowl, toss the rhubarb with sugar, cornstarch, and orange zest. The cornstarch is vital; it thickens the juices so the pie doesn’t become soggy. Pour the filling into the prepared crust.
- Roll out the second piece of dough and cut into 1-inch wide strips. Weave the strips over the rhubarb in a lattice pattern, alternating over and under to create a sturdy, beautiful top. Fold the bottom crust over the edges and crimp to seal.
- Whisk one egg with a splash of water and brush the entire top of the crust. This ensures a deep, golden color. Sprinkle generously with turbinado sugar for a crystalline crunch.
- Bake at 400°F (200°C) for 20 minutes, then reduce the heat to 375°F (190°C) and bake for another 35-45 minutes. The pie is done when the crust is mahogany brown and the filling is thick and bubbling. Let it cool for at least 3 hours before slicing to allow the filling to set.
How to frost graduation cupcakes?

Why we love this
Cupcakes are the ultimate party food because they are perfectly portioned and easy to grab, but when frosted with care, they become miniature works of art. A perfectly piped swirl of velvety buttercream creates a decadent mouthfeel that melts instantly, providing a sweet contrast to the moist cake beneath. Using school colors in the frosting or adding tiny, edible graduation caps makes each guest feel included in the celebration. The sight of a dozen uniform, expertly frosted cupcakes lined up on a board is incredibly satisfying and high-impact.
Ingredients
- 12 baked and cooled cupcakes
- 3 cups stiff vanilla buttercream
- Gel food coloring (school colors)
- Large open-star piping tip (like Wilton 1M)
- Piping bags
How to make it
- Ensure your cupcakes are completely cool. If they are even slightly warm, the butter in the frosting will melt and slide right off.
- Fit your piping bag with the large star tip. If you want a multi-color swirl, use a toothpick to paint stripes of gel food coloring down the inside of the bag before filling it with white buttercream.
- Hold the bag vertically, about half an inch above the center of the cupcake. Squeeze with constant pressure, starting in the middle, moving to the outer edge in a circle, and then spiraling back toward the center and upward.
- As you reach the peak, release the pressure and pull the bag away quickly to create a sharp, professional point.
- Immediately add any sprinkles or toppers so they stick to the fresh frosting before it develops a ‘crust.’ For a graduation theme, place a small chocolate square and a sour belt ‘tassel’ on top to mimic a cap.
How to brew fancy coffee?

Why we love this
Elevating your morning ritual into a ‘fancy’ coffee experience is all about the sensory details: the sound of beans grinding, the rich, toasted aroma that fills the air, and the sight of creamy micro-foam marbling through dark espresso. A well-crafted coffee feels like a warm hug in a mug, offering a complex profile of chocolatey, nutty, or fruity notes depending on the roast. It transforms a simple caffeine fix into a moment of mindful indulgence, especially when served in a beautiful ceramic mug alongside a brunch-style food board.
Ingredients
- Whole bean specialty coffee (medium roast)
- Filtered water (heated to 200°F)
- Whole milk or oat milk for frothing
- Optional: Lavender syrup or vanilla bean sugar
- Burr grinder and a French Press or Pour-over dripper
How to make it
- Start with high-quality, freshly roasted beans. Grind them just before brewing—use a coarse grind for a French Press or a medium-fine grind for a pour-over. This preserves the delicate oils that provide the best flavor.
- Wet your filter with hot water first; this removes any paper taste and warms your vessel. Discard the rinse water before adding your grounds.
- Bloom the coffee by pouring just enough hot water over the grounds to dampen them. Wait 30 seconds. You’ll see bubbles forming; this is ‘off-gassing,’ and it ensures a smoother, less acidic cup.
- Pour the remaining water in slow, steady concentric circles. For a French Press, let it steep for exactly 4 minutes before plunging slowly.
- Froth your milk by heating it to about 150°F and using a handheld frother or a French Press plunger to create tiny, velvety bubbles. Pour the milk slowly into your coffee, using a spoon to hold back the foam until the end for a perfect latte-style finish.
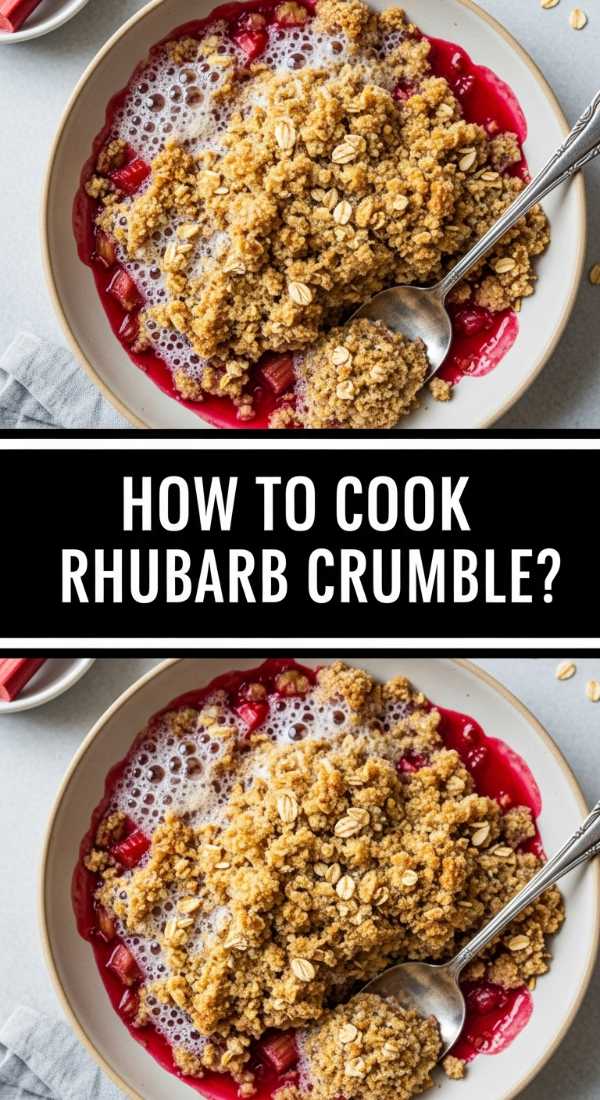
How to cook rhubarb crumble?
Why we love this
Rhubarb crumble is the rustic, effortless cousin of the pie, and in many ways, it’s even more satisfying. The beauty lies in the texture: the soft, jammy collapse of the tart rhubarb underneath a heavy, buttery blanket of toasted oats and brown sugar. As it bakes, the juices from the fruit mingle with the melting butter from the topping, creating a caramel-like sauce that coats every bite. It is a dish meant for sharing, served family-style in a large dish where everyone can scoop out their own perfect ratio of fruit to crunch.
Ingredients
- 6 cups chopped rhubarb
- 3/4 cup granulated sugar
- 1 cup all-purpose flour
- 1 cup rolled oats
- 1 cup brown sugar, packed
- 1/2 cup cold unsalted butter, cubed
- 1 teaspoon cinnamon
How to make it
- Preheat your oven to 375°F (190°C). In a 9×13 inch baking dish, toss the rhubarb with the granulated sugar until evenly coated. Spread the fruit out into an even layer.
- In a separate bowl, combine the flour, oats, brown sugar, and cinnamon. Use your fingers or a pastry cutter to work the cold, cubed butter into the dry ingredients.
- Continue mixing until the mixture resembles coarse crumbs with some pea-sized chunks of butter remaining. This unevenness is what creates those coveted crunchy bits.
- Sprinkle the crumble topping generously and evenly over the rhubarb. Do not press it down; you want it to stay light and airy so the heat can circulate.
- Bake for 35-45 minutes. You are looking for the topping to turn a deep, golden brown and the rhubarb juices to be thick and bubbling around the edges. Serve warm, ideally with a dollop of cold whipped cream.
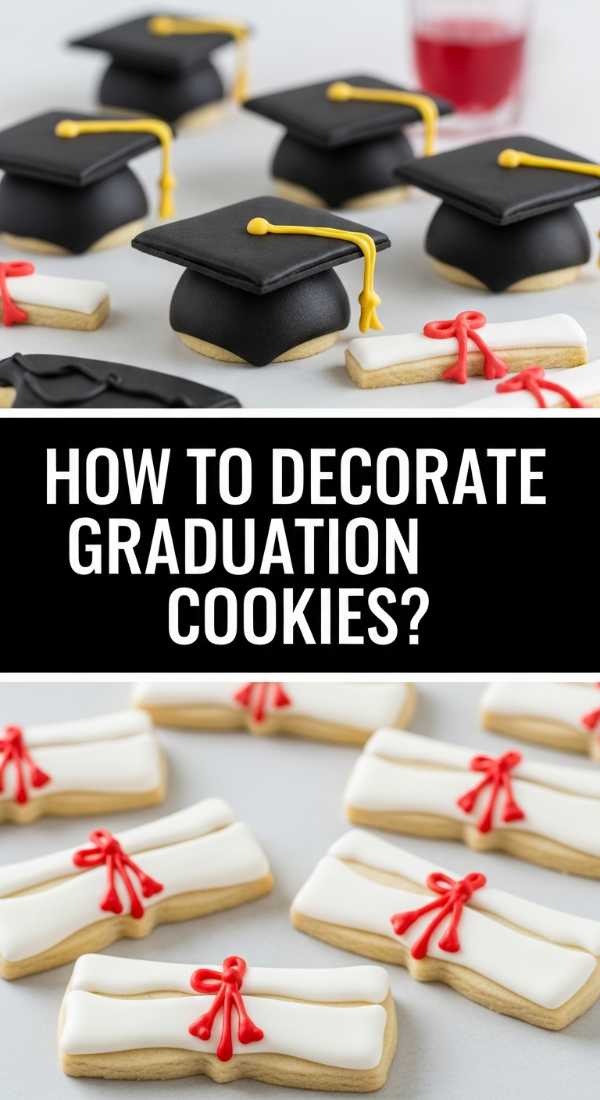
How to decorate graduation cookies?
Why we love this
Decorated sugar cookies are like edible greeting cards. There is a quiet, meditative joy in the process of flooding a cookie with smooth icing and watching it transform into a symbol of success. The ‘snap’ of the dried royal icing followed by the soft, buttery yield of the cookie is a textural delight. Whether you are piping out the year of graduation or intricate diplomas tied with ribbons, these cookies add a personalized, sentimental touch to your food board that guests will be talking about long after the party ends.
Ingredients
- Batch of chilled sugar cookies (cut into graduation shapes)
- Royal icing (stiff and flooding consistencies)
- Gel food colors
- Piping bags and small round tips (#1 or #2)
- Scribe tool or toothpick
How to make it
- Start with completely cooled, flat cookies. Using ‘stiff’ consistency icing, pipe an outline around the edge of the cookie. This acts as a dam to hold the thinner icing in place.
- Let the outline dry for 5-10 minutes. Then, use the ‘flooding’ consistency icing (which should be the thickness of shampoo) to fill in the center. Use a scribe tool or toothpick to pop any tiny air bubbles and push the icing into the corners.
- Allow the base flood to dry for at least 4-6 hours, or ideally overnight. This is the ‘secret’ to professional cookies—if you pipe on wet icing, the colors will bleed.
- Once dry, use stiff icing to add details like the graduate’s name, the ‘tassel’ on a cap, or the ribbon on a diploma. This adds 3D dimension to the design.
- For a final flourish, use a damp brush to apply a little edible luster dust or fine sanding sugar to the wet details for a bit of celebratory shimmer.
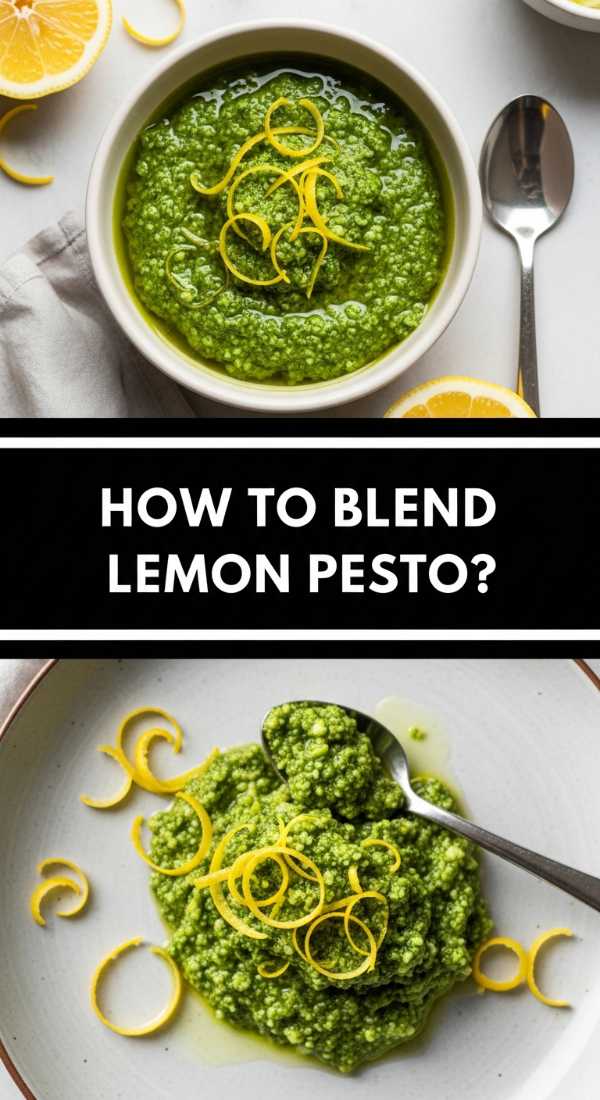
How to blend lemon pesto?
Why we love this
Traditional pesto is wonderful, but adding a heavy dose of lemon transforms it into something bright, sunshine-filled, and incredibly versatile. The aroma of fresh basil smashed with garlic and citrus is intoxicating, waking up the senses instantly. The texture is a beautiful balance of oily, nutty, and slightly herbaceous, with the lemon juice cutting through the fat of the pine nuts and cheese. It’s a ‘secret weapon’ sauce that can be dolloped on crackers, drizzled over fresh mozzarella, or used as a dip for crunchy spring vegetables on your board.
Ingredients
- 2 cups fresh basil leaves, packed
- 1/2 cup grated Parmesan cheese
- 1/3 cup toasted pine nuts or walnuts
- 2 cloves garlic
- Zest and juice of 1 large lemon
- 1/2 cup high-quality extra virgin olive oil
- Salt and pepper to taste
How to make it
- Pulse the basil, garlic, and toasted nuts in a food processor until they are coarsely chopped. Do not over-process at this stage; you want to maintain some texture.
- Add the Parmesan cheese, lemon zest, and lemon juice. The acid in the lemon juice will help keep the basil a bright, vibrant green, preventing it from oxidizing and turning brown.
- With the processor running on a low setting, slowly drizzle in the olive oil in a steady stream. This creates an emulsion, resulting in a creamy, cohesive sauce rather than just oil and herbs.
- Season with a pinch of sea salt and fresh cracked pepper. Taste and adjust—if it’s too thick, add a teaspoon of water or more oil.
- Transfer to a small bowl. If you aren’t using it immediately, pour a thin layer of olive oil over the top to seal out the air and store in the fridge for up to 3 days.
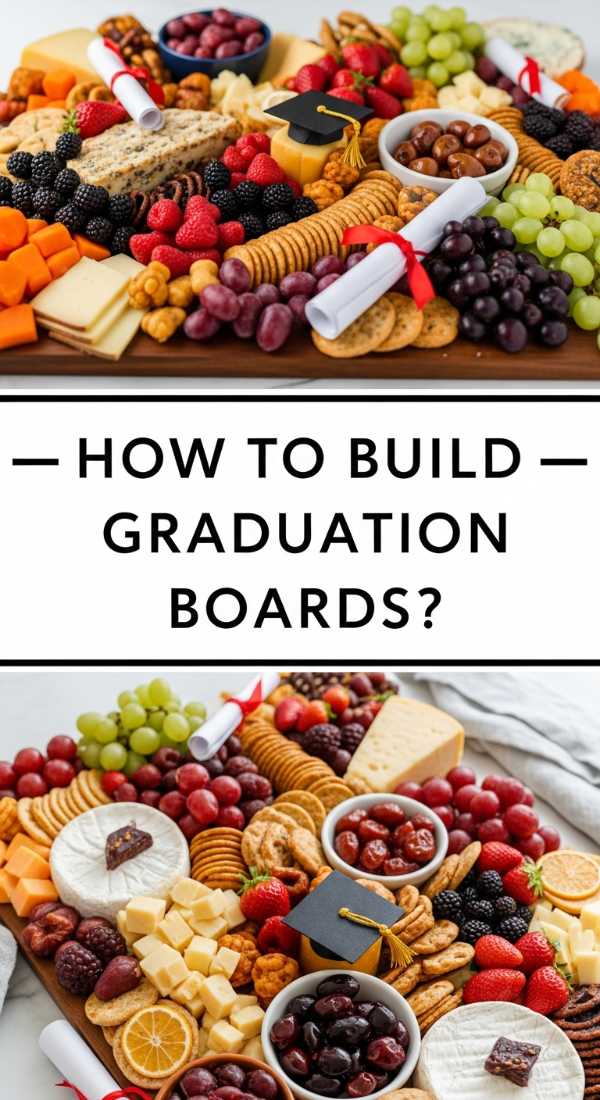
How to build graduation boards?
Why we love this
Building a graduation board is an exercise in abundance and celebration. It’s a visual feast that represents a ‘full circle’ moment, combining the graduate’s favorite snacks with elegant, festive touches. The beauty of a board is that it breaks down the formality of a party—it’s an invitation for guests to linger, graze, and discover different flavor combinations. The mix of colors, from the dark berries to the golden cookies and colorful dips, creates a high-energy aesthetic that looks incredible in photos and feels even better to eat.
Ingredients
- A large wooden board or marble slab
- Assorted cheeses (brie, aged cheddar, goat cheese)
- Cured meats (prosciutto, salami)
- Seasonal fruits (grapes, berries, sliced apples)
- Themed treats (graduation cookies, cupcakes, chocolate caps)
- Dips (lemon pesto, rhubarb jam)
- Crackers, nuts, and fresh herbs for garnish
How to make it
- Start by placing your ‘anchors’—these are your small bowls of jam, pesto, and nuts. Spread them out across the board to create balance.
- Add your cheeses and meats. Fold the meats into ‘ribbons’ or fans to create height and texture. Place the cheeses near the bowls of jam or pesto that pair well with them.
- Fill the largest remaining gaps with your star items: the graduation cookies and cupcakes. This ensures they are the focal point of the board.
- Incorporate ‘flow’ by adding lines of crackers or sliced fruit that curve around the bowls and cheeses, leading the eye across the entire spread.
- The final, most important step is to ‘fill the holes.’ Use small clusters of grapes, handfuls of nuts, or sprigs of fresh rosemary and mint to fill every single empty space. A ‘viral’ board should look overflowing with no board showing through.
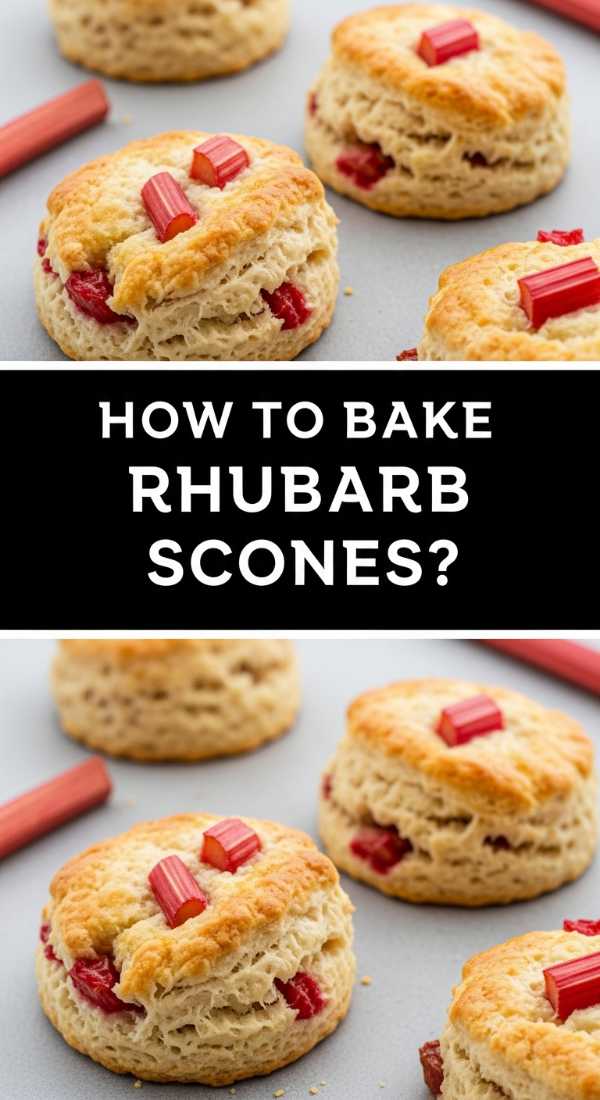
How to bake rhubarb scones?
Why we love this
Rhubarb scones are the height of sophisticated brunch fare. They have a tender, buttery crumb that pulls apart easily, revealing pockets of tart, softened rhubarb that provide little bursts of flavor. The top is usually crusted with sparkling sugar, providing a delightful crunch that contrasts with the soft interior. When served warm with a dollop of clotted cream or that homemade rhubarb jam we made earlier, they offer a refined, sensory experience that feels deeply luxurious yet wonderfully simple. They are the perfect addition to a morning graduation board.
Ingredients
- 2 cups all-purpose flour
- 1/3 cup granulated sugar
- 1 tablespoon baking powder
- 1/2 cup cold unsalted butter, grated
- 1 cup fresh rhubarb, finely diced
- 2/3 cup heavy cream (plus more for brushing)
- 1 teaspoon vanilla extract
How to make it
- In a large bowl, whisk together the flour, sugar, and baking powder. The secret to light scones is keeping everything cold, so grate your butter while frozen and toss it into the flour immediately.
- Use your fingertips to quickly rub the butter into the flour until the mixture looks like coarse meal. Stir in the finely diced rhubarb; smaller pieces ensure they distribute evenly without making the dough too wet.
- Make a well in the center and pour in the heavy cream and vanilla. Use a fork to gently mix until a shaggy dough forms. Do not overwork it! Over-mixing develops gluten, which makes the scones tough instead of flaky.
- Turn the dough out onto a lightly floured surface and pat it into a 1-inch thick circle. Cut into 8 wedges. Place the wedges on a parchment-lined baking sheet and chill in the freezer for 15 minutes before baking. This helps the butter stay solid so the scones rise high.
- Brush the tops with a little extra cream and a sprinkle of sugar. Bake at 400°F (200°C) for 18-22 minutes until the edges are golden brown and the centers are set. Let them cool slightly on a wire rack before serving.
Conclusion: Hosting Without the Headache
Hosting doesn’t have to be a chore that leaves you exhausted. By embracing the ‘food board’ philosophy, you’re choosing a style of entertaining that values connection and visual joy over rigid formality. Whether you’re layering up a graduation board with custom cookies or serving warm rhubarb crumble straight from the oven, these recipes are designed to be flexible, impressive, and above all, delicious. So, grab a board, pick your favorite components, and let the grazing begin!