

The Easiest Food Board Hack You’ll Actually Want to Try
There is something undeniably magical about the way a beautiful food board brings people together. I remember the first time I set one out during a rainy Sunday afternoon; the room was filled with the scent of brewing coffee and the quiet hum of laughter as friends picked through a landscape of treats. It wasn’t just about the food; it was about that effortless feeling of abundance and the simple joy of sharing a moment without the stress of a formal dinner party. It’s a lifestyle hack that transforms your table into a conversation piece, making even the most mundane gathering feel like a curated celebration.
Today, I’m showing you the ultimate viral secret: the Chocolate Dessert Board. Forget the expensive cheeses and hard-to-find charcuterie; we are diving deep into the world of cocoa. By mastering a few foundational chocolate recipes, you can mix and match textures and temperatures to create a board that looks like it cost a fortune but was actually made with love right in your own kitchen. Let’s get into the heart of these decadent treats that will make your next food board the talk of the town.
How to bake moist chocolate cake?
Why we love this
There is nothing quite like the sensory experience of a perfectly moist chocolate cake. As you slice into it, the crumb should be tight yet incredibly tender, releasing a deep, heady aroma of toasted cocoa and warm vanilla. Each bite feels like a luxurious velvet hug on the tongue, offering a balance of sweetness and that sophisticated bitterness that only high-quality dark chocolate can provide. It is the ultimate comfort food, serving as the sturdy yet soft centerpiece for any dessert board, inviting everyone to dive in for just one more sliver of decadence.
Ingredients
- 2 cups all-purpose flour
- 2 cups granulated sugar
- 3/4 cup unsweetened cocoa powder
- 2 tsp baking soda
- 1 tsp baking powder
- 1 tsp salt
- 1 cup buttermilk, room temperature
- 1/2 cup vegetable oil
- 2 large eggs
- 2 tsp vanilla extract
- 1 cup boiling water
How to make it
- Begin by preheating your oven to 350°F (175°C) and thoroughly greasing two 9-inch round cake pans with butter or cooking spray, lining the bottoms with parchment paper for an easy release.
- In a large mixing bowl, sift together the flour, sugar, cocoa powder, baking soda, baking powder, and salt to ensure there are no lumps and the leavening agents are evenly distributed for a consistent rise.
- Add the buttermilk, vegetable oil, eggs, and vanilla extract to the dry ingredients, and use an electric mixer on medium speed for about 2 minutes until the batter is smooth and well-incorporated.
- The secret step: Lower the mixer speed and slowly pour in the boiling water. The batter will be very thin, but this ‘blooms’ the cocoa and creates the ultra-moist texture we crave.
- Divide the batter evenly between the prepared pans and bake for 30-35 minutes. Check for doneness by inserting a toothpick in the center; it should come out clean or with just a few moist crumbs attached. Let them cool in the pans for 10 minutes before transferring to a wire rack to cool completely.
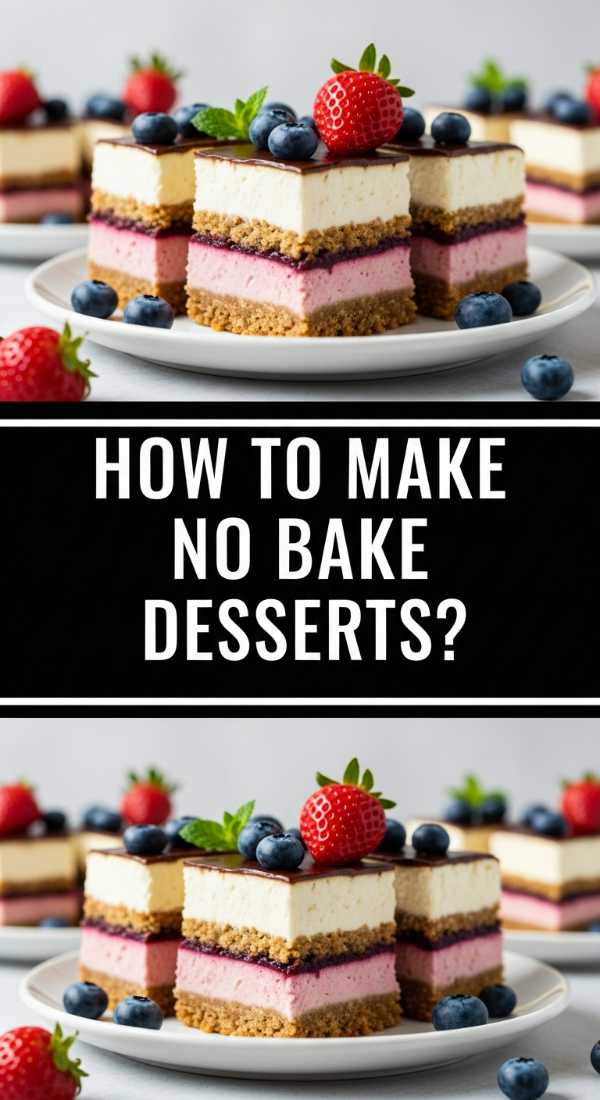
How to make no bake desserts?
Why we love this
No-bake chocolate bars offer a delightful contrast of textures that play across the palate with surprising complexity. You get the crunch of a chilled biscuit base followed by a silky, dense chocolate ganache top that melts slowly and luxuriously in your mouth. Because they are served cold, they carry a refreshing quality that cuts through the richness, making them an addictive addition to your board. They are the epitome of stress-free elegance, allowing you to create something sophisticated without ever turning on the oven, filling the kitchen with the clean, sweet scent of chilled cream and dark cocoa.
Ingredients
- 1 1/2 cups crushed graham crackers
- 1/2 cup melted unsalted butter
- 1/4 cup granulated sugar
- 2 cups semi-sweet chocolate chips
- 1 cup heavy cream
- 1/2 tsp sea salt for topping
How to make it
- Line an 8×8 inch square baking pan with parchment paper, leaving an overhang on the sides to easily lift the bars out once they are set.
- Combine the crushed graham crackers, melted butter, and sugar in a bowl, mixing until it looks like wet sand. Press this mixture firmly and evenly into the bottom of the pan using the back of a spoon.
- Place the chocolate chips in a heat-proof glass bowl. In a small saucepan, heat the heavy cream over medium-low heat until it just begins to simmer—do not let it reach a full rolling boil.
- Pour the hot cream over the chocolate chips and let it sit undisturbed for 5 minutes to allow the chocolate to melt evenly. Gently whisk from the center outward until the mixture is glossy and smooth.
- Pour the chocolate mixture over the crust, sprinkle with sea salt, and refrigerate for at least 4 hours (or overnight) until the ganache is firm to the touch before slicing into neat squares.
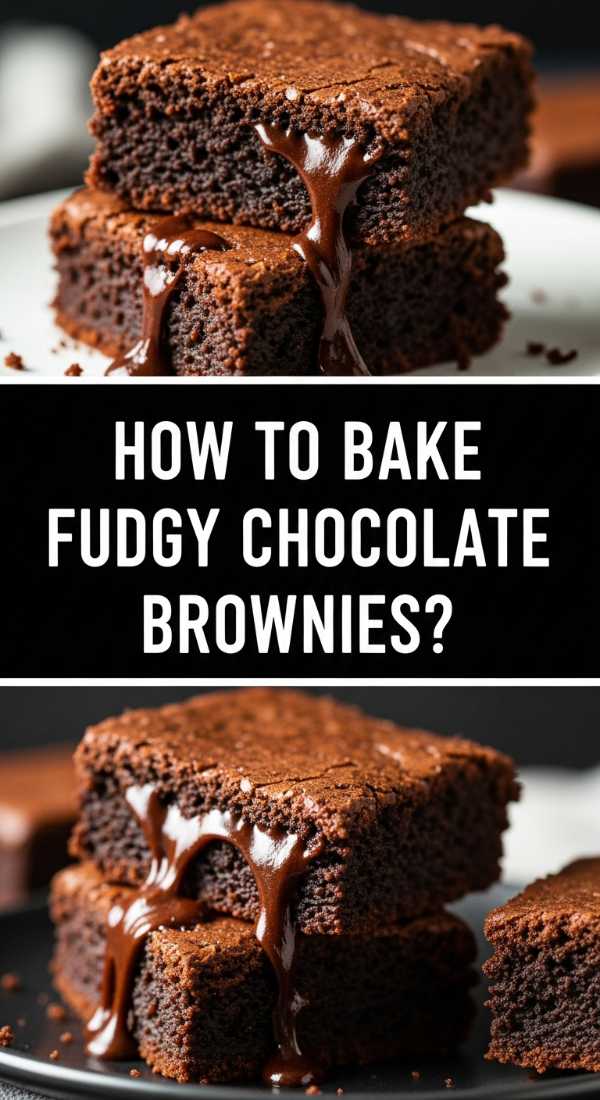
How to bake fudgy chocolate brownies?
Why we love this
A truly fudgy brownie is a masterpiece of baking science, boasting a paper-thin, crinkly top that shatters under the weight of a fork to reveal a dense, almost truffle-like interior. The aroma is intensely chocolatey, with hints of caramelized sugar and rich butter that linger in the air long after they come out of the oven. When you take a bite, the edges provide a slight chewiness while the center remains gooey and rich, offering a multi-dimensional experience that is both nostalgic and deeply satisfying. They provide the perfect weight to your dessert board, grounding the lighter elements with their sheer intensity.
Ingredients
- 1 cup unsalted butter, melted and slightly cooled
- 2 cups granulated sugar
- 4 large eggs, room temperature
- 1 tbsp vanilla extract
- 3/4 cup cocoa powder
- 1 cup all-purpose flour
- 1/2 tsp salt
- 1 cup dark chocolate chunks
How to make it
- Preheat your oven to 325°F (165°C). Use a lower temperature for fudgier results, as this prevents the edges from overcooking before the middle is perfectly set. Grease an 8-inch square pan.
- In a large bowl, whisk the melted butter and sugar vigorously for about 2 minutes. This aeration is what creates that iconic shiny, crackly top crust.
- Add the eggs one at a time, beating well after each addition, then stir in the vanilla extract until the mixture is pale and thick.
- Gently fold in the cocoa powder, flour, and salt using a spatula. Do not overmix here; stop as soon as no white streaks remain to keep the texture dense and fudgy rather than cakey.
- Fold in the chocolate chunks and spread the thick batter into the pan. Bake for 40-45 minutes. The center should still have a slight jiggle, and a toothpick should come out with wet crumbs—not clean—for that ultimate fudgy finish.
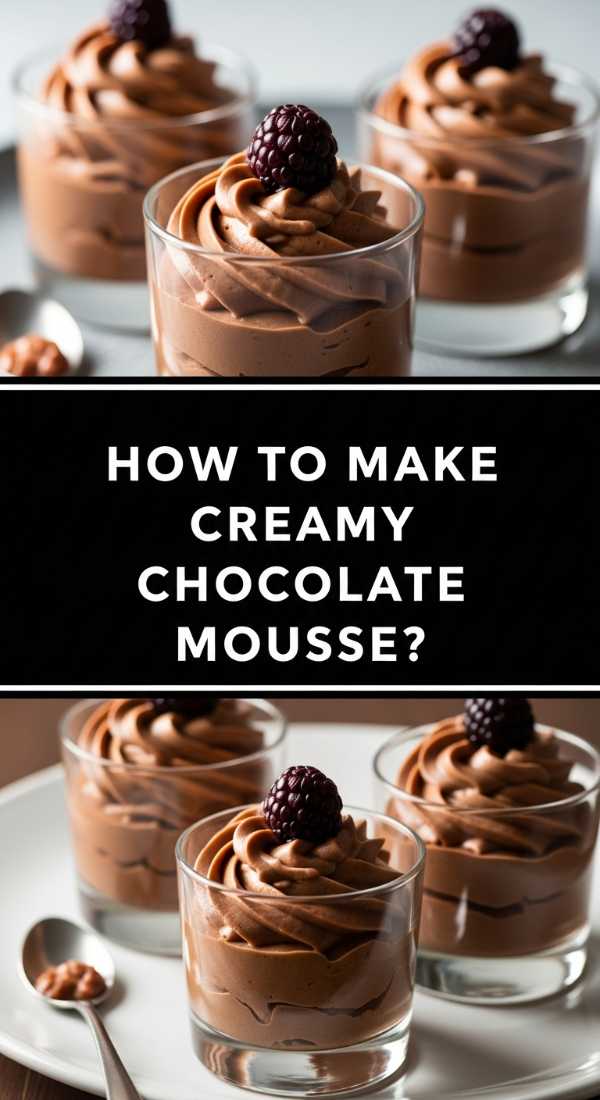
How to make creamy chocolate mousse?
Why we love this
Chocolate mousse is like eating a decadent, chocolate-flavored cloud that dissolves instantly on the tongue, leaving behind a trail of pure, airy bliss. The texture is a marvel of lightness, achieved through thousands of tiny air bubbles trapped within a rich, dark chocolate base. It feels cooling and sophisticated, offering a break from the denser baked goods on your board. Served in small ramekins or shot glasses, it adds a vertical element to your presentation, while the scent of chilled whipped cream and premium cocoa provides a fresh, inviting aroma.
Ingredients
- 4 large egg yolks
- 1/4 cup sugar
- 2 cups heavy whipping cream, divided
- 6 oz bittersweet chocolate, chopped
- 1 tsp vanilla extract
How to make it
- In a small saucepan, whisk together egg yolks, sugar, and 3/4 cup of the heavy cream. Cook over low heat, stirring constantly, until the mixture is thick enough to coat the back of a spoon (about 160°F). Do not let it boil or the eggs will scramble.
- Remove from heat and stir in the chopped chocolate and vanilla until the chocolate is completely melted and the mixture is glossy. Set aside to cool to room temperature.
- In a separate cold bowl, beat the remaining 1 1/4 cups of heavy cream until stiff peaks form. The cream should hold its shape firmly when the whisk is lifted.
- Gently fold one-third of the whipped cream into the cooled chocolate mixture to lighten it up. Then, very carefully fold in the remaining cream using a slow figure-eight motion to preserve the air bubbles.
- Spoon the mousse into serving dishes and chill for at least 2 hours. This resting time allows the mousse to set into its signature airy yet stable structure.
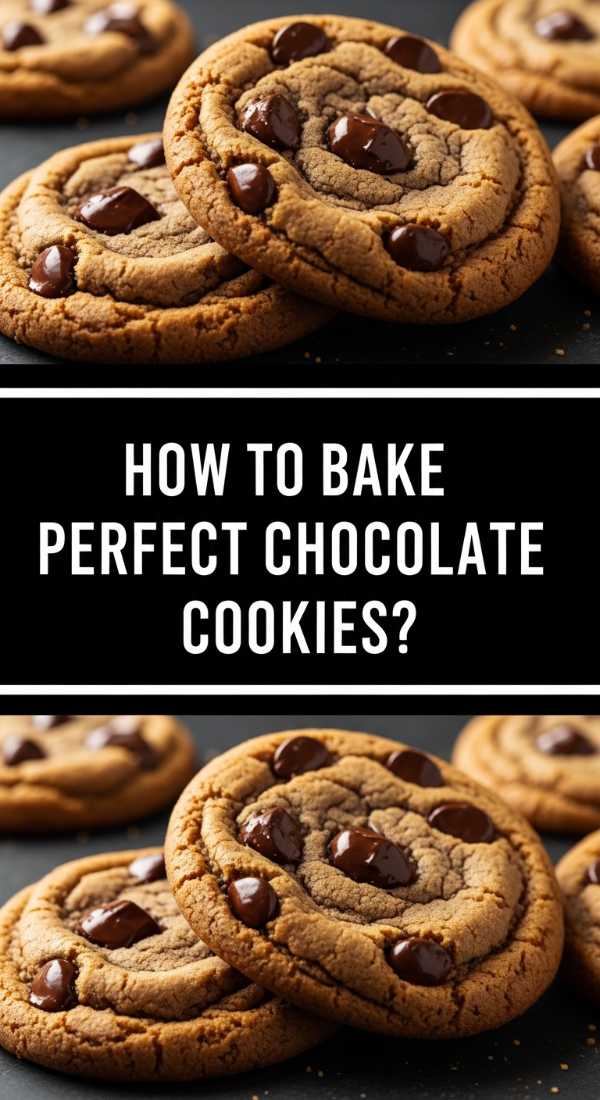
How to bake perfect chocolate cookies?

Why we love this
The perfect chocolate cookie is a study in contrasts: golden-brown, crispy edges that snap when bitten, leading into a soft, chewy, and slightly underbaked center that is studded with molten pools of chocolate. As they bake, the smell of browning butter and vanilla fills the home, creating an atmosphere of pure warmth and hospitality. These cookies are the versatile workhorses of the food board, providing a familiar, handheld comfort that appeals to everyone. Their rustic appearance and the sparkle of sea salt on top make them as beautiful as they are delicious.
Ingredients
- 1 cup unsalted butter, softened
- 3/4 cup brown sugar, packed
- 3/4 cup granulated sugar
- 2 large eggs
- 1 tsp baking soda
- 2 1/4 cups all-purpose flour
- 2 cups semi-sweet chocolate chips
- 1/2 tsp flaky sea salt
How to make it
- Cream the softened butter with both the brown and white sugars in a stand mixer for at least 3-5 minutes until the mixture is light, fluffy, and significantly paler in color.
- Add eggs one at a time, beating well after each. Mix in the vanilla. In a separate bowl, whisk the flour and baking soda, then add it to the wet ingredients on low speed just until combined.
- Fold in the chocolate chips by hand. For the best flavor and texture, chill the dough in the refrigerator for at least 2 hours (or up to 24 hours). This hydrates the flour and prevents excessive spreading.
- Scoop rounded tablespoons of dough onto a parchment-lined baking sheet, spacing them 2 inches apart. Preheat your oven to 375°F (190°C).
- Bake for 9-11 minutes until the edges are just barely golden but the centers still look slightly soft. Sprinkle with flaky sea salt immediately upon removal and let them cool on the pan for 5 minutes to set.
How to make rich chocolate truffles?
Why we love this
Chocolate truffles are the crown jewels of any dessert board, offering an explosion of intense flavor in a single, bite-sized sphere. Rolling them in cocoa powder or crushed nuts provides a tactile, rustic charm that contrasts beautifully with the ultra-smooth, ganache center that melts the moment it touches your tongue. They carry an air of professional confectionery art, yet they are surprisingly simple to create. The deep, dark scent of the ganache and the satisfying weight of each truffle make them feel like a true indulgence, perfect for slow savoring with a glass of red wine.
Ingredients
- 8 oz high-quality dark chocolate (60% cocoa or higher), finely chopped
- 1/2 cup heavy cream
- 1 tbsp unsalted butter, softened
- 1/2 tsp vanilla extract
- Coatings: Cocoa powder, crushed pistachios, or melted chocolate
How to make it
- Place the finely chopped chocolate in a medium heat-proof bowl. The smaller the pieces, the more evenly the chocolate will melt without seizing.
- Heat the heavy cream in a small saucepan over medium heat until it just reaches a simmer. Immediately pour the hot cream over the chocolate and let it sit for 5 minutes.
- Add the butter and vanilla, then whisk gently starting from the center until the mixture is completely smooth and shiny. Cover the surface directly with plastic wrap to prevent a skin from forming.
- Refrigerate the ganache for at least 2-3 hours until it is firm enough to handle. Use a melon baller or a teaspoon to scoop out small portions.
- Quickly roll the portions between your palms to form balls (your body heat will melt them, so work fast!). Immediately roll them in your chosen coatings and store in the fridge until ready to serve.
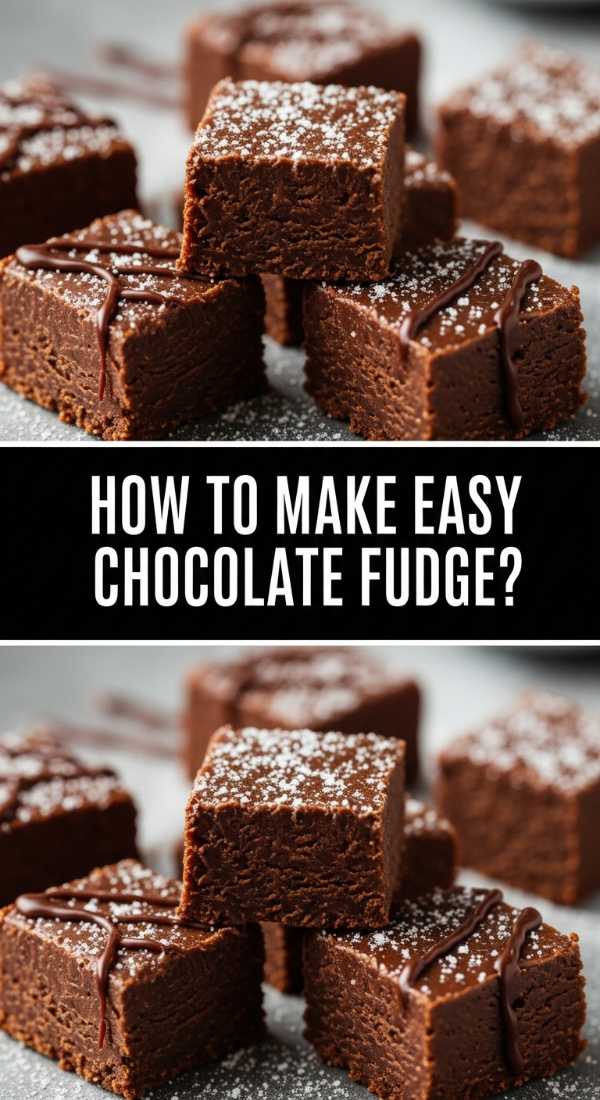
How to make easy chocolate fudge?
Why we love this
Chocolate fudge is pure nostalgia, evoking memories of seaside candy shops and holiday gatherings. Its texture is unique—remarkably dense, creamy, and smooth, with a slight resistance that yields into a melt-in-your-mouth finish. The aroma is a concentrated blast of sweet cocoa and condensed milk, creating an inviting scent that draws guests to the board from across the room. Because it is so rich, it can be cut into tiny, elegant cubes, acting as the perfect concentrated ‘flavor bomb’ to balance out the larger cakes and cookies on your display.
Ingredients
- 3 cups semi-sweet chocolate chips
- 1 can (14 oz) sweetened condensed milk
- 1/4 cup unsalted butter
- 1 tsp vanilla extract
- Pinch of salt
How to make it
- Line an 8-inch square pan with parchment paper or aluminum foil, lightly greasing it to ensure the fudge doesn’t stick to the bottom.
- In a heavy-bottomed saucepan over low heat, combine the chocolate chips, sweetened condensed milk, and butter. Low heat is critical here to prevent the chocolate from scorching or becoming grainy.
- Stir the mixture constantly with a rubber spatula until the chocolate is completely melted and the mixture is thick and glossy. This usually takes about 5-7 minutes.
- Remove from heat and quickly stir in the vanilla extract and a pinch of salt. The salt is essential to balance the high sugar content of the condensed milk.
- Spread the mixture into the prepared pan, smoothing the top with an offset spatula. Let it sit at room temperature for an hour, then refrigerate for 2-3 hours until completely set before cutting into squares.
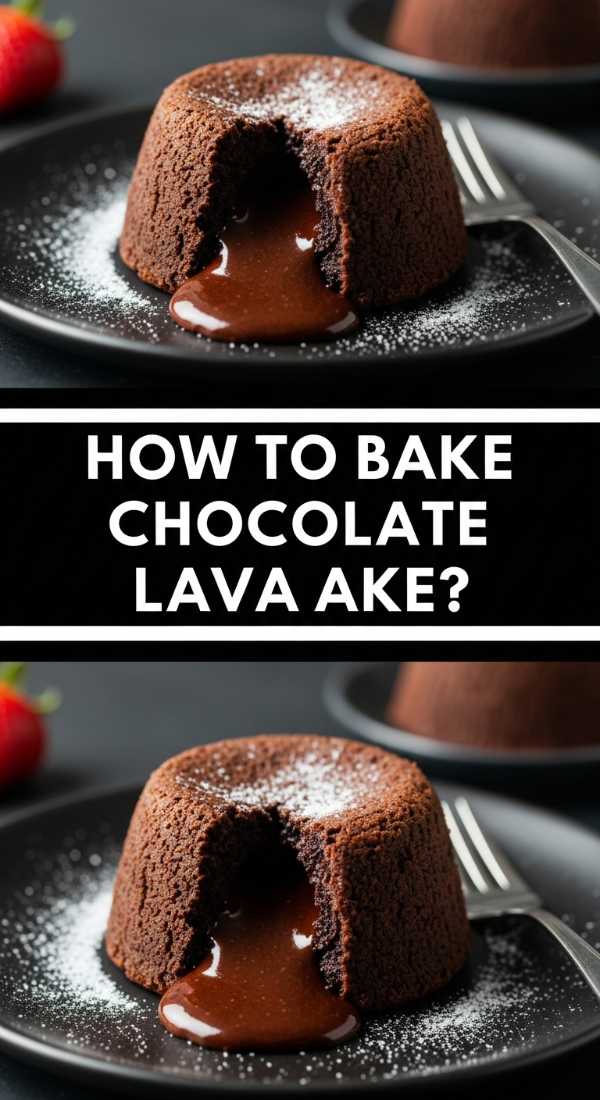
How to bake chocolate lava cake?
Why we love this
The chocolate lava cake is the ultimate ‘wow’ factor, providing a theatrical moment when the first spoon breaks through the outer sponge to release a warm, flowing river of molten chocolate. The contrast between the cooked, cakey exterior and the liquid heart is a sensory delight that plays with temperature and texture simultaneously. The steam rising from a fresh lava cake carries an intoxicating aroma of warm chocolate that is impossible to resist. It turns a simple food board into a gourmet experience, making every guest feel like they are at a five-star bistro.
Ingredients
- 6 oz high-quality semi-sweet chocolate, chopped
- 1/2 cup unsalted butter
- 2 large eggs plus 2 egg yolks
- 1/4 cup granulated sugar
- 2 tbsp all-purpose flour
- 1 tsp vanilla extract
How to make it
- Preheat your oven to 425°F (218°C). This high temperature is necessary to bake the outside quickly while leaving the center liquid. Grease and flour two 6-oz ramekins thoroughly.
- Melt the chocolate and butter together using a double boiler or in the microwave in 30-second increments, stirring until smooth. Let it cool slightly.
- In a separate bowl, beat the eggs, yolks, sugar, and vanilla at high speed for about 5 minutes until the mixture is thick, pale, and leaves a trail when the beaters are lifted.
- Gently fold the melted chocolate mixture into the egg mixture using a spatula. Sift the flour over the top and fold in just until combined.
- Pour the batter into the ramekins and bake for 12-14 minutes. The sides should be firm, but the center should still be soft and slightly jiggly. Let them sit for 1 minute before carefully inverting onto a plate.
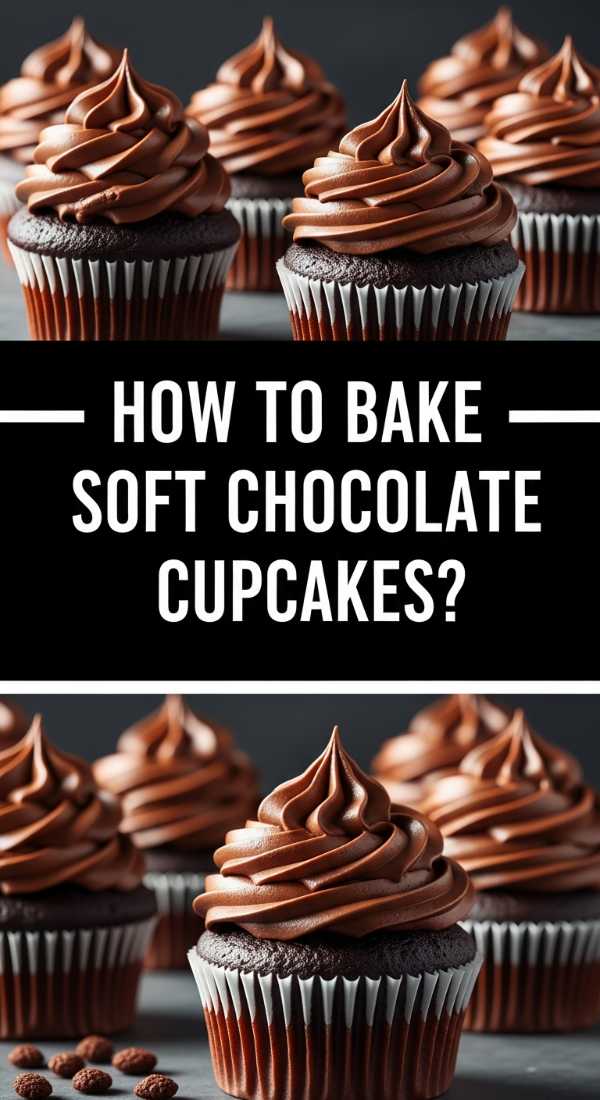
How to bake soft chocolate cupcakes?
Why we love this
Soft chocolate cupcakes are the playful, individual-sized cousins of the chocolate cake, offering a whimsical and customizable addition to your board. Their texture should be incredibly light and springy, almost like a sponge, topped with a swirl of frosting that adds a creamy, decadent finish. They are visually stunning, acting as little pedestals of flavor that can be decorated with sprinkles, fruit, or gold leaf to match any theme. The scent of vanilla-infused chocolate batter baking in the oven is a domestic dream, promising a treat that is as fun to eat as it is beautiful to look at.
Ingredients
- 1 1/2 cups all-purpose flour
- 1 cup sugar
- 1/3 cup cocoa powder
- 1 tsp baking soda
- 1/2 tsp salt
- 1 cup warm water
- 1/3 cup vegetable oil
- 1 tsp vanilla extract
- 1 tsp white vinegar
How to make it
- Preheat your oven to 350°F (175°C) and line a standard cupcake tin with paper liners. This recipe is unique because it doesn’t require eggs, resulting in an exceptionally soft crumb.
- In a large bowl, whisk together the flour, sugar, cocoa, baking soda, and salt. Make three wells in the dry ingredients (two small and one large).
- Pour the vinegar into one small well, vanilla into the other small well, and the vegetable oil into the large well. Pour the warm water over everything.
- Whisk the ingredients together until smooth. The reaction between the vinegar and baking soda will create tiny bubbles that give the cupcakes their lift and fluffiness.
- Fill the cupcake liners about two-thirds full. Bake for 18-22 minutes until a toothpick comes out clean. Allow them to cool completely on a wire rack before frosting to prevent the icing from melting.
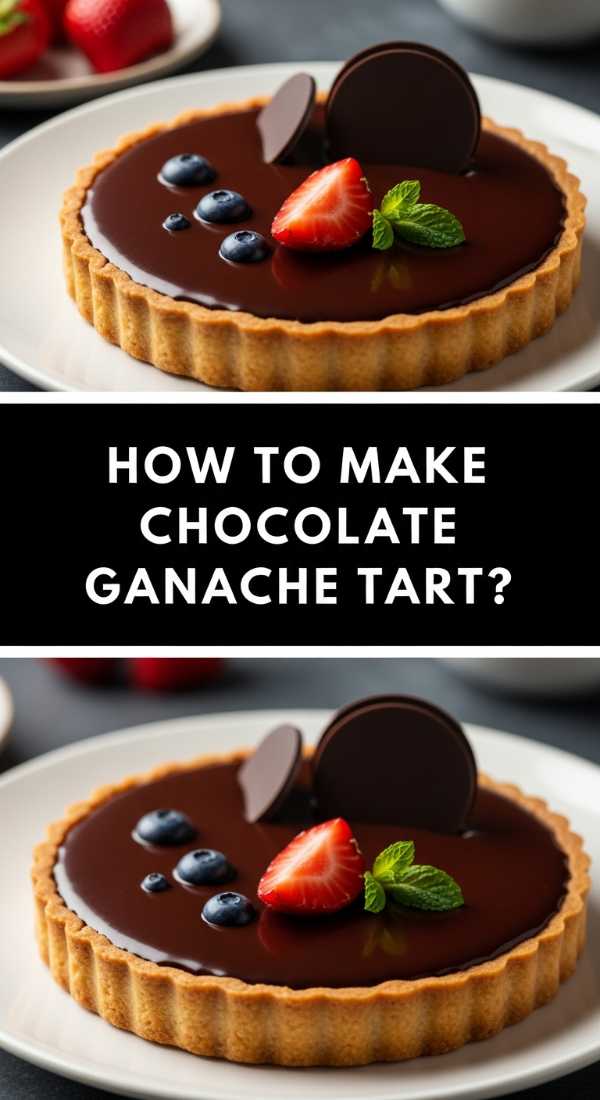
How to make chocolate ganache tart?
[IMAGE_10]
Why we love this
A chocolate ganache tart is the pinnacle of elegant dessert design, featuring a crisp, buttery shortcrust shell that houses a pool of glossy, mirror-like chocolate ganache. The snap of the pastry followed by the unctuous, thick creaminess of the filling creates a sophisticated eating experience that isn’t overly sweet. It looks like a piece of modern art on your board, reflecting the light and inviting guests to admire its perfectly smooth surface. The aroma of baked pastry dough mixed with high-end dark chocolate is the scent of a professional French patisserie brought right into your kitchen.
Ingredients
- 1 1/2 cups chocolate cookie crumbs (for the crust)
- 5 tbsp melted butter
- 9 oz bittersweet chocolate, finely chopped
- 1 cup heavy cream
- 2 tbsp unsalted butter, room temperature
How to make it
- Mix the cookie crumbs and 5 tablespoons of melted butter until well combined. Press the mixture into the bottom and up the sides of a 9-inch tart pan with a removable bottom.
- Bake the crust at 350°F (175°C) for 8-10 minutes to set it. Allow it to cool completely before adding the filling.
- Place the chopped chocolate in a bowl. Bring the heavy cream to a simmer in a small saucepan, then pour it over the chocolate. Let it sit for 5 minutes.
- Whisk the mixture gently until smooth, then stir in the 2 tablespoons of room temperature butter. This extra butter gives the ganache a professional, high-gloss shine and a silkier mouthfeel.
- Pour the ganache into the cooled crust. Smooth the top if necessary and refrigerate for at least 4 hours until the filling is firm. Remove from the tart pan carefully before serving.
Conclusion
Creating a viral-worthy food board isn’t about being a professional chef; it’s about the heart you put into the details. By combining these different chocolate textures—from the molten flow of a lava cake to the snap of a tart crust—you create a landscape of flavor that invites exploration and connection. So, grab your favorite wooden board, whip up a few of these decadent treats, and watch as your guests gather around, lingering over every delicious bite. Life is short; make it sweet, one chocolate board at a time.