

Why Everyone Is Obsessed With This Simple Food Board
We’ve all been there—standing in front of an open fridge at 6:00 PM, feeling that familiar wave of ‘dinner dread’ wash over us. Between the endless scrolling for recipes and the mountain of dishes that inevitably follows, sometimes the joy of eating gets lost in the logistics. But lately, my social feed has been taken over by something that feels less like a chore and more like a celebration: the Simple Food Board. It’s not just a meal; it’s an aesthetic, low-stress way to bring back the magic of gathering around the table with vibrant, wholesome ingredients that look as good as they taste.
This trend is all about reclaiming your time without sacrificing that ‘wow’ factor. Imagine a massive wooden board or a series of beautiful platters overflowing with perfectly seared proteins, crisp-tender veggies, and grains that catch the light. It’s the ultimate hack for busy families and social butterflies alike. By prepping these ‘building blocks’ in advance, you’re not just making one meal; you’re creating a delicious choose-your-own-adventure story for the entire week. Let’s dive into the components that make this board a viral sensation.
How to prep garlic chicken?

Why we love this
There is nothing quite like the sound of garlic chicken hitting a hot pan, creating a rhythmic sizzle that fills the kitchen with an aroma so savory it practically calls the family to the table. We love this because the garlic mellows as it cooks, infusing the tender, juicy chicken thighs with a buttery, earthy sweetness that pairs perfectly with almost anything. The texture is the real star here—crispy, golden-brown edges that give way to a moist, succulent center, making every bite a rich, sensory experience that feels like a warm hug on a plate.
Ingredients
- 2 lbs boneless, skinless chicken thighs
- 6 cloves of garlic, minced
- 2 tablespoons olive oil
- 1 teaspoon smoked paprika
- Salt and cracked black pepper to taste
- Fresh parsley for garnish
- 1 tablespoon unsalted butter
How to make it
- Begin by patting your chicken thighs completely dry with paper towels; this is the secret to achieving that coveted golden-brown sear rather than steaming the meat.
- In a large bowl, whisk together the olive oil, minced garlic, smoked paprika, salt, and pepper until it forms a fragrant paste.
- Toss the chicken in the marinade, ensuring every nook and cranny is coated, and let it sit for at least 20 minutes at room temperature to take the chill off.
- Heat a large cast-iron skillet over medium-high heat until a drop of water flicked onto the surface dances and evaporates instantly.
- Add the chicken in a single layer, making sure not to crowd the pan (cook in batches if necessary). Let it sear undisturbed for 5-6 minutes until a deep golden crust forms and the meat releases easily from the pan.
- Flip the chicken and add the tablespoon of butter to the center of the pan; once melted, baste the chicken with the garlic butter for another 4-5 minutes until the internal temperature reaches 165°F.
- Let the chicken rest for 5 minutes before slicing to allow the juices to redistribute through the fibers.
How to make steak bowls?
Why we love this
Steak bowls are the epitome of casual luxury, offering the high-end feel of a steakhouse dinner in a format that’s easy to eat while lounging on the sofa. We adore the contrast between the hot, salty strips of beef and the cool, crisp toppings like radish or cucumber. The aroma of seared fat and rosemary creates a sophisticated atmosphere, while the juicy, melt-in-your-mouth texture of a medium-rare steak provides a satisfying weightiness that keeps you full and happy for hours.
Ingredients
- 1.5 lbs flank steak or sirloin
- 3 cups cooked white or brown rice
- 2 cups sliced bell peppers and onions
- 2 tablespoons soy sauce
- 1 tablespoon honey
- 1 teaspoon garlic powder
- Avocado slices and sesame seeds for topping
How to make it
- Remove your steak from the refrigerator 30 minutes prior to cooking to ensure it cooks evenly from edge to center.
- Whisk together soy sauce, honey, and garlic powder, then brush it liberally over the steak.
- Set a heavy skillet or grill pan to high heat; you want it smoking slightly to achieve a professional-grade crust.
- Lay the steak down and sear for 3-4 minutes per side for medium-rare; look for a dark, caramelized exterior that smells slightly nutty.
- While the steak rests on a cutting board, toss your peppers and onions into the same pan to soak up the residual beef drippings, sautéing until they are tender-crisp.
- Slice the steak against the grain into thin strips to ensure maximum tenderness.
- Assemble the bowls by layering the rice, sautéed veggies, and steak, then finishing with fresh avocado and a sprinkle of sesame seeds for a pop of texture.
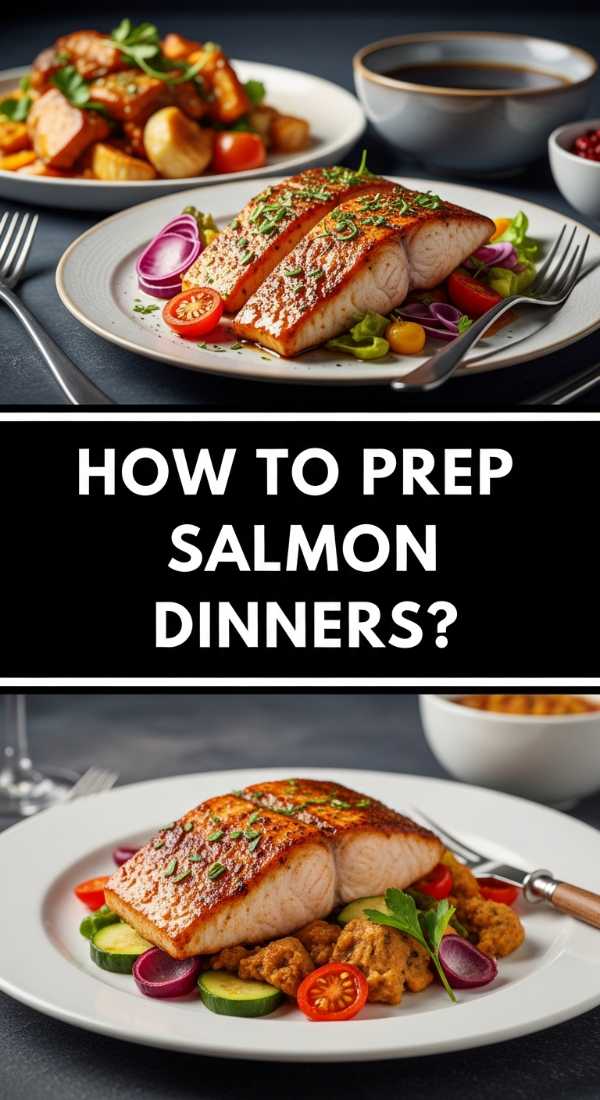
How to prep salmon dinners?

Why we love this
Salmon is the crown jewel of the food board, bringing a vibrant pop of pink and a boost of healthy fats that make the meal feel truly nourishing. The way the fish flakes apart under a fork into buttery, silken layers is incredibly satisfying, especially when paired with a zesty citrus glaze that cuts through the richness. The aroma is clean and bright, reminiscent of a seaside lunch, and the crispy skin provides a crackling texture that is the hallmark of a perfectly prepared piece of fish.
Ingredients
- 4 salmon fillets (6 oz each)
- 2 tablespoons honey
- 1 tablespoon Dijon mustard
- 1 lemon, sliced into rounds
- 2 tablespoons olive oil
- Salt, pepper, and dried dill
How to make it
- Preheat your oven to 400°F and line a baking sheet with parchment paper for easy cleanup.
- Whisk the honey, mustard, and dill together in a small ramekin to create a thick, glossy glaze.
- Pat the salmon dry and place it on the sheet, skin-side down; drizzle with olive oil and season generously with salt and pepper.
- Brush the honey-mustard glaze over the top of each fillet, ensuring a thick layer that will caramelize under the heat.
- Top each fillet with a lemon slice; the heat will release the lemon oils, scenting the fish beautifully.
- Bake for 12-15 minutes; you’ll know it’s done when the meat is opaque and flakes easily with a fork at the thickest part.
- For an extra crunch, pop the pan under the broiler for the last 60 seconds until the edges of the glaze start to bubble and brown.
How to make freezer burritos?
Why we love this
Freezer burritos are the ultimate gift to your future self, promising a warm, cheesy, and incredibly convenient meal during those hectic midweek slumps. There’s something so comforting about the weight of a tightly wrapped tortilla, filled with the smoky aroma of cumin and chili. When reheated, the cheese becomes gooey and elastic, binding the beans and rice into a hearty, flavorful core that feels substantial and deeply satisfying with every bite.
Ingredients
- 10 large flour tortillas
- 1 can black beans, drained and rinsed
- 2 cups cooked Spanish rice
- 1 lb ground beef or turkey, browned
- 2 cups shredded cheddar cheese
- 1 cup salsa
- Foil for wrapping
How to make it
- The absolute key to a non-soggy freezer burrito is allowing every single ingredient—the rice, meat, and beans—to cool completely to room temperature before assembly.
- Lay out a tortilla and spread a thin layer of rice in the center, followed by the seasoned meat, beans, a spoonful of salsa, and a generous sprinkle of cheese.
- Fold the sides of the tortilla inward, then roll from the bottom up, keeping the tension tight so the filling doesn’t spill out.
- Wrap each burrito individually in aluminum foil, ensuring it is airtight to prevent freezer burn.
- Place the foil-wrapped burritos in a large zip-top bag, squeeze out the air, and freeze for up to 3 months.
- To reheat, remove from foil and wrap in a damp paper towel; microwave for 2-3 minutes, turning halfway through, or bake in the oven at 375°F for 20 minutes for a crispier exterior.
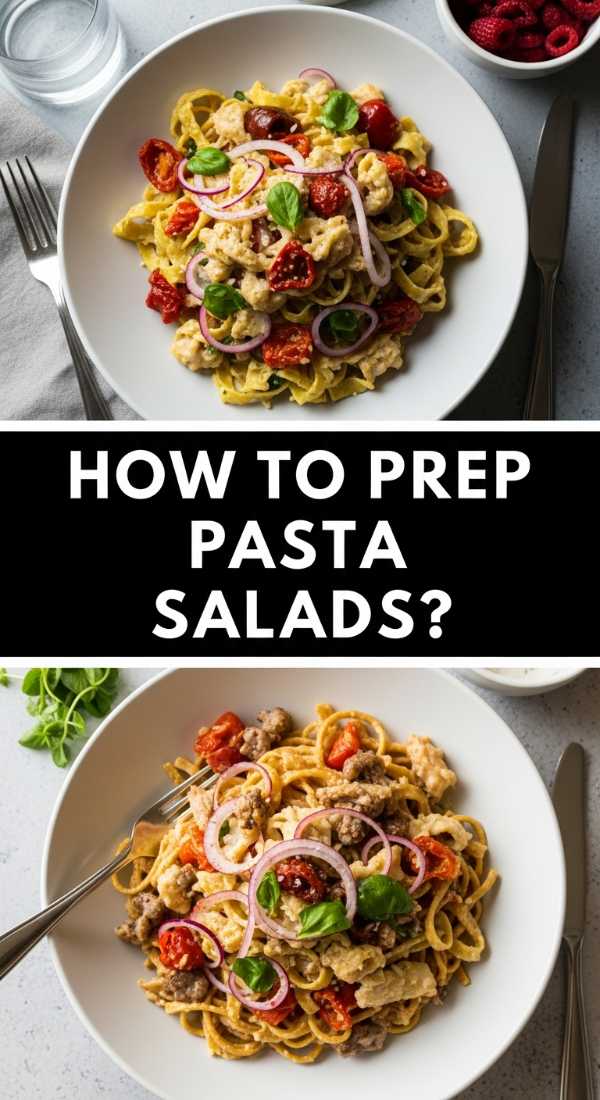
How to prep pasta salads?
Why we love this
Pasta salad is the unsung hero of the food board, offering a cold, refreshing element that balances out grilled meats and roasted vegetables. We love the playful textures—the chew of the pasta, the crunch of fresh bell peppers, and the creamy tang of feta cheese. As it sits, the pasta absorbs the herb-infused dressing, creating a vibrant explosion of flavor that only gets better with time, making it the perfect make-ahead dish for busy schedules.
Ingredients
- 1 lb rotini or farfalle pasta
- 1 cup cherry tomatoes, halved
- 1 cucumber, diced
- 1/2 cup Kalamata olives
- 1/2 cup crumbled feta cheese
- 1/2 cup Italian dressing
- Fresh basil leaves
How to make it
- Boil your pasta in heavily salted water; aim for ‘al dente’—which means it should still have a slight bite—as it will soften slightly once it starts absorbing the dressing.
- Drain the pasta and immediately rinse it under cold running water to stop the cooking process and wash away excess starch, which prevents clumping.
- In a massive mixing bowl, combine the cooled pasta with the tomatoes, cucumbers, olives, and feta.
- Pour the Italian dressing over the mixture and toss thoroughly with large spoons until every piece of pasta is glistening.
- Let the salad chill in the refrigerator for at least 30 minutes before serving; this ‘marinating’ time is crucial for the flavors to meld.
- Just before serving, tear fresh basil leaves over the top to add a hit of aromatic freshness.
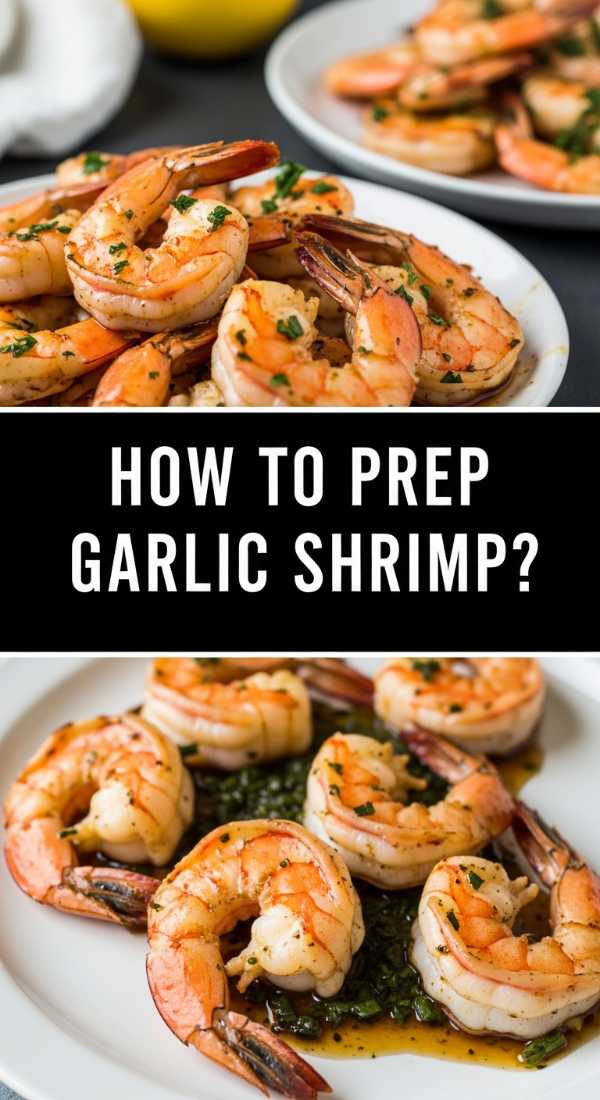
How to prep garlic shrimp?

Why we love this
Garlic shrimp feels like an instant vacation; the bright, pink curls of seafood paired with the scent of lemon and sizzling butter evoke images of dinner by the coast. We love how quickly they cook, transforming from translucent and soft to firm and opaque in just minutes. The sauce that forms in the pan is liquid gold—garlicky, slightly spicy, and deeply savory—perfect for drizzling over the rest of your food board components.
Ingredients
- 1 lb large shrimp, peeled and deveined
- 4 cloves garlic, minced
- 1/2 teaspoon red pepper flakes
- 2 tablespoons butter
- 1 tablespoon olive oil
- Juice of half a lemon
- Fresh chives for garnish
How to make it
- Ensure your shrimp are completely thawed and patted dry with a paper towel; moisture is the enemy of a good sear.
- Heat the olive oil and butter in a wide skillet over medium heat until the butter starts to foam and turn slightly golden.
- Add the minced garlic and red pepper flakes, sautéing for only 30-60 seconds until fragrant—do not let the garlic turn brown or it will become bitter.
- Increase the heat to medium-high and add the shrimp in a single, even layer.
- Cook for 2 minutes on the first side without moving them, then flip and cook for another 1-2 minutes until they form a ‘C’ shape and are opaque throughout.
- Squeeze the fresh lemon juice over the pan and toss the shrimp one last time to deglaze the skillet and pick up all those flavorful brown bits.
- Garnish with snipped chives and serve immediately while the butter is still bubbling.
How to batch roast veggies?

Why we love this
There is a specific kind of alchemy that happens in a hot oven, turning humble vegetables into caramelized, candy-like treats. We love batch roasting because it transforms the texture of broccoli, carrots, and sweet potatoes into something crispy on the outside and tender on the inside. The deep, earthy aroma of roasting roots is incredibly grounding, and the charred edges provide a smoky complexity that elevates the entire food board from simple to gourmet.
Ingredients
- 2 lbs mixed vegetables (broccoli, carrots, zucchini, red onion)
- 3 tablespoons olive oil
- 1 teaspoon dried thyme
- 1 teaspoon garlic powder
- Salt and pepper
- Balsamic glaze for drizzling
How to make it
- Preheat your oven to a high 425°F; high heat is essential for roasting rather than just baking.
- Chop all vegetables into uniform sizes—about 1-inch pieces—to ensure they all finish cooking at the same time.
- In a large bowl, toss the vegetables with olive oil, thyme, garlic powder, salt, and pepper until they are evenly coated and glossy.
- Spread the vegetables onto two large baking sheets; the most important rule is to avoid crowding. Each piece needs ‘breathing room’ so the hot air can circulate and create those crispy edges.
- Roast for 20-30 minutes, tossing them halfway through with a spatula. Look for browned, caramelized spots and fork-tender centers.
- Remove from the oven and, while still hot, drizzle with a bit of balsamic glaze for a sweet and tangy finish.
How to prep quinoa bowls?

Why we love this
Quinoa bowls are the ultimate canvas for creativity, offering a nutty, protein-packed base that makes everything else on the board shine. We love the tiny, pearl-like texture of the grains and how they pop slightly with every bite. The aroma is subtle and earthy, providing a neutral backdrop for bold dressings and crunchy toppings. It feels incredibly light yet stays with you, providing a steady stream of energy that makes this a favorite for healthy weeknight rotations.
Ingredients
- 1 cup dry quinoa
- 2 cups chicken or vegetable broth
- 1 cup shredded red cabbage
- 1/2 cup edamame
- 1/4 cup toasted pumpkin seeds
- Lemon-tahini dressing
How to make it
- Rinse the dry quinoa in a fine-mesh strainer under cold water for at least 30 seconds to remove the saponin, a natural coating that can make quinoa taste bitter.
- In a medium saucepan, combine the rinsed quinoa and the broth; using broth instead of water adds a much deeper layer of flavor to the grain.
- Bring to a boil, then reduce the heat to the lowest setting, cover with a tight-fitting lid, and simmer for 15 minutes.
- Turn off the heat and let the pan sit, covered, for an additional 5 minutes; this allows the steam to finish the job and makes the quinoa extra fluffy.
- Fluff with a fork and let it cool slightly before folding in the shredded cabbage and edamame for a beautiful color contrast.
- Portion the quinoa into bowls and top with pumpkin seeds and a generous drizzle of lemon-tahini dressing just before serving.
How to batch cook meatballs?

Why we love this
Meatballs are pure nostalgia, reminding us of Sunday afternoon kitchens and big family dinners. We love them because they are perfectly portioned ‘flavor bombs’ that stay incredibly juicy when cooked correctly. The aroma of toasted breadcrumbs, parmesan, and herbs browning in the oven is intoxicating. Their firm yet tender texture makes them perfect for dipping into sauces or piling onto a food board for guests to grab with toothpicks.
Ingredients
- 1 lb ground beef and 1 lb ground pork
- 1/2 cup Italian breadcrumbs
- 1/4 cup whole milk
- 1 egg, beaten
- 1/2 cup grated Parmesan cheese
- 2 tablespoons fresh parsley, chopped
- Salt, pepper, and onion powder
How to make it
- In a small bowl, soak the breadcrumbs in the milk for 5 minutes; this creates a ‘panade’ which keeps the meatballs incredibly moist even after reheating.
- In a large mixing bowl, combine the beef, pork, soaked breadcrumbs, egg, parmesan, parsley, and seasonings.
- Mix gently with your hands just until combined—over-mixing will lead to tough, rubbery meatballs.
- Use a small cookie scoop to portion out the meat, then roll gently between your palms into 1.5-inch balls.
- Place the meatballs on a parchment-lined baking sheet and bake at 400°F for 18-20 minutes.
- To get a restaurant-style finish, turn the broiler on for the last 2 minutes to create a dark, savory crust on the tops.
- Let them rest for 5 minutes before moving them to the food board to ensure they hold their shape.
How to prep crispy tofu?
[IMAGE_10]
Why we love this
Crispy tofu is a revelation for anyone who thinks plant-based proteins are boring. We love the dramatic transformation from a soft, bland block to golden, crunch-tastic nuggets that shatter slightly when you bite into them. The interior remains creamy and custard-like, creating a wonderful textural play. It’s a clean, savory snack that absorbs whatever sauce it touches, making it an essential, high-protein addition to any modern food board.
Ingredients
- 1 block extra-firm tofu
- 2 tablespoons cornstarch
- 1 tablespoon soy sauce
- 1 tablespoon toasted sesame oil
- 1/2 teaspoon garlic powder
- Avocado oil for frying
How to make it
- The most critical step: press your tofu. Wrap the block in a clean kitchen towel and place a heavy skillet on top for at least 20 minutes to squeeze out excess moisture.
- Cut the pressed tofu into even 1-inch cubes.
- In a bowl, toss the cubes with soy sauce, sesame oil, and garlic powder until they are dark and seasoned.
- Sprinkle the cornstarch over the tofu and toss again until each cube is coated in a thin, powdery white film; this is what creates the ‘crunch.’
- Heat a thin layer of avocado oil in a non-stick skillet over medium-high heat.
- Place the tofu in the pan, ensuring no two pieces are touching. Fry for 3-4 minutes per side, being patient until a thick, golden crust forms.
- Drain the finished cubes on a paper towel-lined plate to keep them from getting soggy before adding them to your board.
The Art of the Simple Food Board
Building a food board isn’t just about the cooking; it’s about the presentation and the freedom it gives you. By mastering these ten components, you’ve essentially unlocked a million different meal combinations. Whether you’re hosting a casual get-together or just trying to survive a Tuesday, these recipes ensure that you’re eating well and feeling inspired. So, grab your biggest platter, arrange your colorful creations, and get ready to see why the whole world is obsessed with this simple, beautiful way to eat.